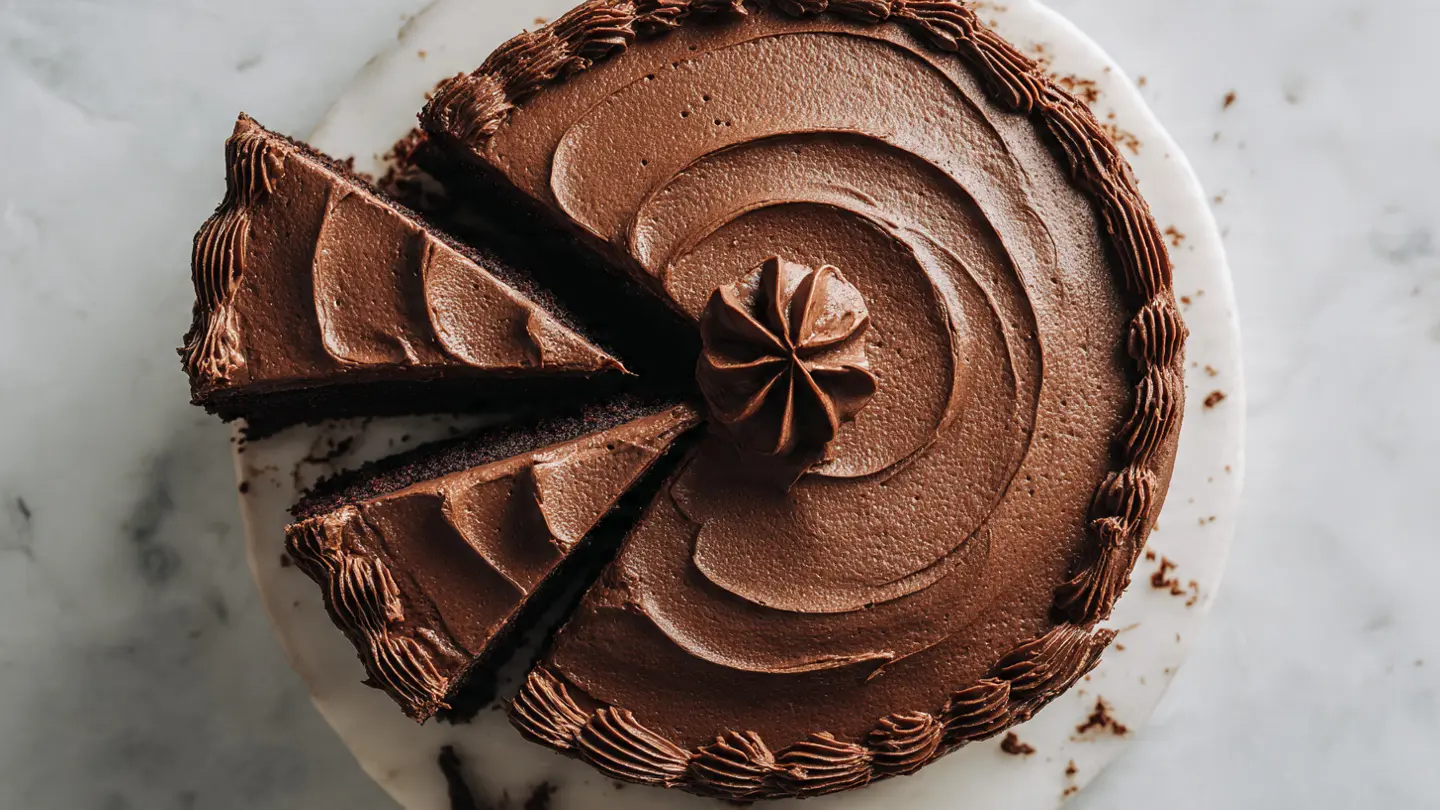
This moist chocolate cake recipe delivers rich, deep chocolate flavor with an incredibly tender crumb that stays soft for days. The secret lies in using cocoa powder bloomed with hot coffee, which intensifies the chocolate taste without any coffee flavor coming through.
The batter comes together in one bowl with no mixer needed. Just a whisk and a few simple ingredients create a cake that’s so moist it practically melts in your mouth. Unlike butter-based cakes that can dry out quickly, this oil-based version maintains its perfect texture even after several days.
What makes this cake truly special is its ultra-soft, almost spongey texture. The batter will look surprisingly thin, almost like chocolate milk, but don’t worry. That liquid consistency is exactly what produces those incredibly moist, tender layers that chocolate lovers dream about.
This recipe works beautifully as a layer cake, sheet cake, or even cupcakes. The chocolate flavor is pronounced but not overwhelming, making it the perfect canvas for your favorite frosting. I love pairing it with rich chocolate buttercream, but it’s equally delicious with vanilla frosting or even a simple dusting of powdered sugar.
You might also enjoy: Best Carrot Cake Recipe
Why You’ll Love This Moist Chocolate Cake Recipe
This recipe takes the guesswork out of making an exceptional chocolate cake from scratch. The ingredients are pantry staples, the method is foolproof, and the results rival any bakery cake.
The oil-based batter means you don’t need to worry about creaming butter and sugar to the perfect consistency. Everything gets whisked together in minutes. The hot coffee blooms the cocoa powder, which is a fancy way of saying it wakes up those chocolate flavors and makes them more intense and complex.
Here’s what sets this cake apart:
- Incredibly moist texture that stays fresh for up to 5 days at room temperature
- One bowl mixing means minimal cleanup and no special equipment needed
- Deep chocolate flavor enhanced by the addition of hot coffee (which doesn’t taste like coffee at all)
- Versatile recipe that works for layer cakes, sheet cakes, and cupcakes
- Forgiving nature makes it nearly impossible to overbake or mess up
- Uses oil instead of butter for superior moisture that lasts
- Bakes relatively flat so less trimming is needed for layer cakes
Read Also: Carrot Cake with Cream Cheese Frosting Recipe
Ingredients
This simple ingredient list is what makes this cake so accessible. You probably have most of these items in your pantry right now. The quality of your cocoa powder will make the biggest difference in the final flavor, so choose a good quality brand if you can.
For the Cake:
- 2 cups (250g) all-purpose flour – provides structure without making the cake dense
- 2 cups (400g) granulated sugar – creates moisture and tenderness
- ¾ cup (65g) unsweetened cocoa powder – use natural or Dutch process for deep chocolate flavor
- 2 teaspoons baking powder – helps the cake rise
- 1½ teaspoons baking soda – reacts with acidic ingredients for lift
- 1 teaspoon salt – balances sweetness and enhances chocolate flavor
- 2 large eggs – at room temperature for better incorporation
- 1 cup (240ml) whole milk – adds richness and moisture
- ½ cup (120ml) vegetable oil – keeps the cake moist for days
- 2 teaspoons vanilla extract – enhances overall flavor
- 1 cup (240ml) hot brewed coffee – or hot water if you prefer, blooms the cocoa
For the Chocolate Buttercream Frosting:
- 1 cup (230g) unsalted butter – softened to room temperature
- 3½ cups (440g) powdered sugar – sifted to avoid lumps
- ½ cup (45g) unsweetened cocoa powder – sifted
- ½ cup (120ml) heavy cream – or whole milk
- 2 teaspoons vanilla extract – for depth of flavor
- Pinch of salt – balances the sweetness
This pairs wonderfully with homemade granola for a complete dessert spread.
Kitchen Equipment Needed
Having the right tools makes baking easier and more enjoyable. Here’s what you’ll need to make this chocolate cake. The good news is that none of these items are specialized or expensive.
- Two 9-inch round cake pans – or one 9×13-inch pan for a sheet cake
- Large mixing bowl – for combining ingredients
- Medium mixing bowl – for wet ingredients
- Whisk – no electric mixer needed
- Measuring cups and spoons – for accurate measurements
- Rubber spatula – for scraping down the bowl
- Parchment paper – for lining cake pans
- Cooling racks – allows air to circulate around cooling cakes
- Stand mixer or hand mixer – for making the frosting
- Offset spatula – for frosting the cake smoothly
- Toothpick or cake tester – for checking doneness
Read Also: Old Fashioned Chocolate Chip Cookie Recipe
Recommended Products for This Recipe
These carefully selected products will help you achieve bakery-quality results at home. I’ve tested this recipe with various tools and ingredients, and these are my top recommendations for the best outcome.
1. Ghirardelli Unsweetened Cocoa Powder
The quality of your cocoa powder directly impacts the chocolate intensity in this cake. Ghirardelli produces a rich, full-flavored cocoa that creates that deep chocolate taste you’re looking for. The powder dissolves smoothly and doesn’t leave any bitter aftertaste.
2. USA Pan Bakeware Round Cake Pan Set
These professional-grade pans distribute heat evenly, which means your cake layers bake uniformly without hot spots or burnt edges. The nonstick coating releases cakes perfectly every time, and the corrugated surface allows air to circulate for even browning. They’re durable enough to last for years of baking.
3. Nielsen-Massey Pure Vanilla Extract
Pure vanilla extract makes a noticeable difference in chocolate cakes. Nielsen-Massey’s Madagascar Bourbon vanilla has a rich, creamy flavor that enhances the chocolate without overpowering it. A little goes a long way in bringing all the flavors together.
4. Ateco Offset Spatula
An offset spatula is essential for frosting layer cakes smoothly and professionally. The angled blade gives you better control and leverage, making it easy to spread frosting evenly across the top and sides. This tool makes the difference between a homemade-looking cake and a bakery-quality finish.
If you enjoy baking, you’ll also love this easy tiramisu for another crowd-pleasing dessert.
Step-by-Step Instructions
Follow these detailed steps for chocolate cake perfection. The process is straightforward, but paying attention to a few key details will ensure the best results. Don’t skip the hot coffee – it’s what makes this cake extraordinary.
1. Prepare Your Pans and Preheat the Oven
- Preheat your oven to 350°F (175°C).
- Grease two 9-inch round cake pans with butter or non-stick spray.
- Line the bottom of each pan with a circle of parchment paper for easy release.
- Grease the parchment paper as well to ensure nothing sticks.
- Set the prepared pans aside while you make the batter.
2. Mix the Dry Ingredients
- In a large mixing bowl, sift together the flour, sugar, cocoa powder, baking powder, baking soda, and salt.
- Whisk the dry ingredients together until everything is evenly distributed and there are no lumps.
- Sifting the cocoa powder is especially important to prevent clumps in your finished cake.
- Make a well in the center of the dry ingredients for easier mixing in the next step.
3. Combine the Wet Ingredients
- In a medium bowl, whisk together the eggs, milk, vegetable oil, and vanilla extract.
- Beat the mixture until the eggs are fully incorporated and the liquid is smooth.
- Room temperature eggs mix more easily and create a smoother batter.
- Make sure the oil is fully emulsified into the mixture rather than floating on top.
4. Mix the Wet and Dry Ingredients
- Pour the wet ingredients into the well you created in the dry ingredients.
- Using a whisk or rubber spatula, gently mix the ingredients together.
- Start in the center and gradually incorporate the dry ingredients from the sides.
- Mix until just combined with no visible flour streaks, but don’t overmix.
- The batter will be thick at this stage, but that’s about to change.
5. Add the Hot Coffee
- Brew your coffee and make sure it’s quite hot (or use boiling water).
- Slowly pour the hot coffee into the batter while whisking constantly.
- The batter will become very thin and liquidy, which is exactly what you want.
- Don’t be alarmed by how runny the batter looks – this is what creates the moist texture.
- Whisk until the coffee is fully incorporated and the batter is smooth.
6. Pour and Bake
- Divide the batter evenly between your two prepared pans.
- A kitchen scale works great for this, or eyeball it as close as you can.
- Tap the pans gently on the counter a few times to release any air bubbles.
- Place the pans in the preheated oven on the center rack.
- Bake for 30-35 minutes, or until a toothpick inserted into the center comes out with just a few moist crumbs.
- The tops should spring back when lightly touched.
7. Cool the Cakes
- Remove the cakes from the oven when they’re done.
- Let them cool in the pans for 10 minutes on a wire rack.
- Run a knife around the edges to loosen the cakes from the sides.
- Carefully invert the cakes onto the wire racks.
- Peel off the parchment paper while the cakes are still slightly warm.
- Allow the cakes to cool completely before frosting, about 1-2 hours.
8. Make the Chocolate Buttercream
- In a large bowl or stand mixer, beat the softened butter on medium speed for 2-3 minutes until light and fluffy.
- Sift the powdered sugar and cocoa powder together to remove any lumps.
- Add the sifted powdered sugar and cocoa to the butter in three additions, mixing on low speed after each addition.
- Pour in the heavy cream, vanilla extract, and salt.
- Beat on low speed until combined, then increase to medium-high speed.
- Whip the frosting for 3-4 minutes until it’s light, fluffy, and spreadable.
- If the frosting is too thick, add more cream 1 tablespoon at a time.
- If it’s too thin, add more powdered sugar ¼ cup at a time.
9. Assemble and Frost the Cake
- Place one cake layer on your serving plate or cake stand.
- Spread about 1 cup of frosting evenly over the top of the first layer.
- Place the second cake layer on top, making sure it’s centered.
- Apply a thin layer of frosting all over the cake to seal in crumbs (this is called a crumb coat).
- Refrigerate the cake for 15-20 minutes to set the crumb coat.
- Apply the remaining frosting generously over the top and sides.
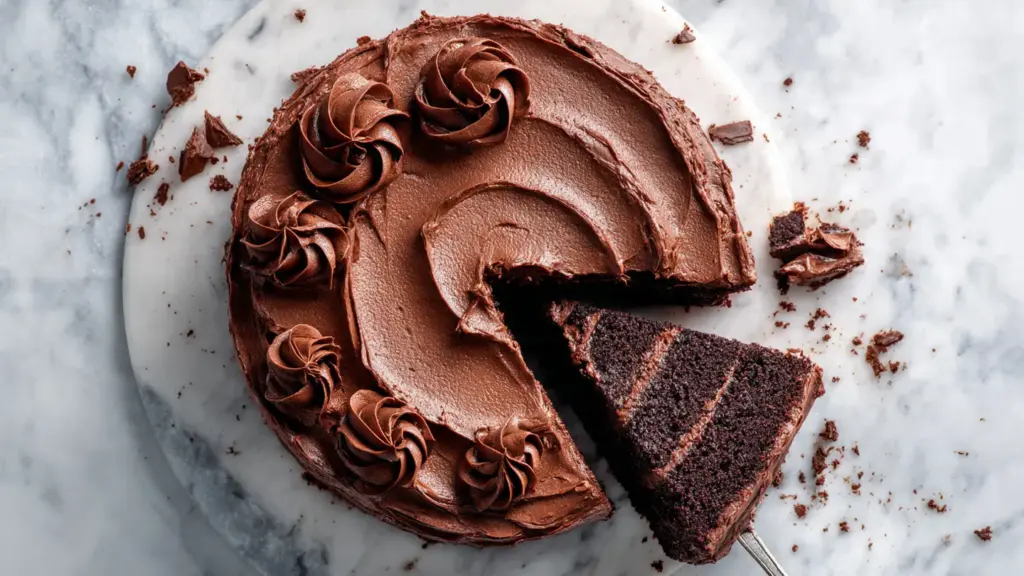
- Use an offset spatula to smooth the frosting and create swirls or patterns as desired.
- Refrigerate until ready to serve, but bring to room temperature 30 minutes before serving for the best texture and flavor.
For another classic dessert, try this classic tiramisu.
Tips for Success
These tips will help you avoid common pitfalls and ensure your chocolate cake turns out perfectly every time. I’ve learned these tricks through years of baking and testing this recipe.
A few small adjustments can make a big difference in your final result:
- Measure flour correctly – Spoon flour into measuring cups and level with a knife rather than scooping directly from the bag, which packs it down and can lead to dry cake
- Use room temperature ingredients – Eggs and milk should sit out for 30 minutes before mixing for better incorporation and a smoother batter
- Don’t skip the hot coffee – It blooms the cocoa powder and enhances the chocolate flavor dramatically; the cake won’t taste like coffee
- The batter should be thin – It will look runnier than most cake batters, almost pourable like a thick beverage, and that’s exactly right
- Don’t overbake – Take the cake out when a toothpick has a few moist crumbs clinging to it; it will continue cooking slightly as it cools
- Cool completely before frosting – Warm cake will melt the frosting and create a mess; patience is key here
- Sift the cocoa powder – This prevents lumps in both your cake and frosting and ensures even chocolate distribution
- Invest in quality cocoa – Since cocoa is the main flavor, using a good quality brand makes a noticeable difference
- Level your layers if needed – If the tops dome slightly, trim them flat with a serrated knife for easier stacking and frosting
This cake is also wonderful alongside easy hummus for a complete party spread.
Serving Suggestions
This versatile chocolate cake shines in many different serving scenarios. The rich flavor and moist texture make it suitable for both casual family dinners and special celebrations.
Here are some delicious ways to serve this cake:
- Serve slices with a scoop of vanilla ice cream and a drizzle of hot fudge sauce
- Add fresh berries like raspberries or strawberries for a pop of color and tartness that balances the richness
- Dust with powdered sugar for an elegant, minimalist presentation
- Top with whipped cream and chocolate shavings for a lighter finish
- Pair with a tall glass of cold milk for a classic combination
- Serve with classic deviled eggs at parties for a sweet and savory spread
- Cut into squares for easier serving at potlucks and picnics
- Layer with chocolate mousse or pudding for an extra decadent dessert
- Garnish with candied nuts or toffee pieces for added texture and crunch
- Accompany with coffee or hot chocolate for an afternoon treat
You might also enjoy: Best Chocolate Chip Cookies Recipe
Variations to Try
Once you’ve mastered the basic recipe, these variations will keep things interesting. Each modification creates a different flavor profile while maintaining that signature moist texture.
- German Chocolate Cake – Top with coconut pecan frosting instead of chocolate buttercream for a classic variation
- Mint Chocolate Cake – Add 1 teaspoon of peppermint extract to the batter and frost with mint buttercream
- Mocha Cake – Increase the coffee to 1¼ cups and add 2 tablespoons of espresso powder to the batter for intense coffee flavor
- Mexican Chocolate Cake – Add 1 tablespoon of cinnamon and ½ teaspoon of cayenne pepper to the dry ingredients
- Chocolate Orange Cake – Replace vanilla with orange extract and add 2 tablespoons of orange zest to the batter
- Peanut Butter Chocolate Cake – Frost with peanut butter buttercream instead of chocolate for a classic flavor combination
- Red Velvet Style – Add 2 tablespoons of red food coloring to the batter and frost with cream cheese frosting
- Cookies and Cream Cake – Fold 1 cup of crushed Oreos into the batter before baking
Try pairing this with loaded nachos for a fun party menu.
Storage and Reheating
Proper storage keeps this cake fresh and delicious for days. The oil-based recipe means it stays moist much longer than butter-based cakes.
- Room temperature – Store unfrosted cake layers wrapped tightly in plastic wrap at room temperature for up to 2 days
- Refrigerated – Keep frosted cake covered in the refrigerator for up to 5 days; bring to room temperature 30 minutes before serving for best flavor
- Frozen cake layers – Wrap unfrosted, cooled layers in plastic wrap, then aluminum foil, and freeze for up to 3 months; thaw overnight in the refrigerator
- Frozen frosted cake – Freeze the frosted cake uncovered until the frosting is firm, then wrap tightly in plastic wrap and foil for up to 2 months
- Individual slices – Wrap slices individually in plastic wrap for easy grab-and-go servings from the freezer
- Reheating – Microwave individual slices for 10-15 seconds for a warm, just-baked texture, or let come to room temperature naturally
- Avoiding dryness – Always keep the cake well-covered to prevent it from drying out, even though this recipe stays moist better than most
Read Also: Chewy Chocolate Chip Cookies Recipe
Nutritional Facts
Here’s the approximate nutritional information per serving (1 slice, based on 12 servings):
- Calories: 520
- Total Fat: 24g
- Saturated Fat: 11g
- Cholesterol: 75mg
- Sodium: 380mg
- Total Carbohydrates: 74g
- Dietary Fiber: 3g
- Sugars: 56g
- Protein: 5g
Please note that these values are estimates and will vary based on specific ingredients used and portion sizes. The frosting accounts for roughly half of the calories per serving.
For a lighter option, consider serving smaller slices or using less frosting. You can also make this as cupcakes for built-in portion control, with each cupcake containing approximately 320 calories.
This dessert is best enjoyed as an occasional treat alongside easy granola for breakfast balance.
Health Benefits of Key Ingredients
While this is definitely an indulgent dessert, some of the ingredients do offer nutritional benefits. Enjoying treats in moderation as part of a balanced diet is perfectly healthy.
Cocoa powder is the star ingredient here, and it brings more than just flavor:
- Rich in antioxidants – Dark cocoa powder contains flavonoids that may support heart health and reduce inflammation
- Mood-boosting properties – Cocoa contains compounds that can stimulate the production of endorphins and serotonin, improving mood
- Mineral content – Provides iron, magnesium, and zinc, though in modest amounts
- Brain health – The flavonoids in cocoa may improve blood flow to the brain and support cognitive function
- Lower sugar than many desserts – The intense chocolate flavor means you’re satisfied with a smaller portion
- Energy from natural sources – The combination of complex carbohydrates and natural sugars provides sustained energy
- Eggs provide protein – Each serving contains protein that helps with satiety and provides essential amino acids
For more wholesome options, check out classic hummus.
Frequently Asked Questions
1. Can I use Dutch process cocoa powder instead of natural cocoa powder?
Yes, you can use either Dutch process or natural cocoa powder in this recipe. Dutch process cocoa will give you a darker color and slightly milder chocolate flavor, while natural cocoa powder provides a more intense, slightly acidic chocolate taste. Both work beautifully in this cake.
2. Can I make this cake without coffee?
Absolutely! You can substitute the hot coffee with an equal amount of hot water. The coffee enhances the chocolate flavor without making the cake taste like coffee, but hot water will still bloom the cocoa powder and create a moist cake. If you want to try the coffee version but are sensitive to caffeine, use decaf coffee.
3. Why is my chocolate cake dry?
The most common reason for dry chocolate cake is using too much flour. Make sure you’re measuring correctly by spooning flour into the measuring cup and leveling it off rather than scooping directly from the bag. Overbaking is another culprit – the cake should come out with a few moist crumbs on a toothpick, not completely clean.
4. Can I make this as cupcakes instead of a layer cake?
Yes! This batter makes excellent cupcakes. Fill cupcake liners about two-thirds full and bake at 350°F for 18-22 minutes, or until a toothpick inserted in the center comes out with a few moist crumbs. This recipe yields approximately 24 cupcakes.
5. How do I prevent my cake layers from sticking to the pans?
Proper pan preparation is key. Grease your pans with butter or non-stick spray, then line the bottoms with parchment paper circles. Grease the parchment paper too. After baking, let the cakes cool in the pans for exactly 10 minutes before turning them out – any longer and they may stick, any shorter and they may fall apart.
You might also enjoy: Easy Sugar Cookie Recipe
Final Thoughts
This moist chocolate cake recipe has become my go-to for every celebration and chocolate craving. The combination of deep chocolate flavor and incredibly tender texture makes it a crowd-pleaser every single time.
What I love most is how foolproof it is. You don’t need fancy equipment or advanced baking skills to create a bakery-quality cake. Just follow the steps, trust the process with that thin batter, and you’ll have a chocolate cake that stays moist for days and tastes absolutely incredible.
I’d love to hear how your cake turns out! Leave a comment below with your results, any variations you tried, or questions you might have. Happy baking!
Recommended:
- Classic Tiramisu Recipe
- Easy Tiramisu Recipe
- Cut Out Sugar Cookie Recipe
- Single Serving Sugar Cookie Recipe
- Classic Apple Pie Recipe
- Dutch Apple Pie Recipe
- Classic Pumpkin Pie Recipe
- From Scratch Pumpkin Pie Recipe
- Belgian Waffle Recipe
- Easy Waffle Recipe


