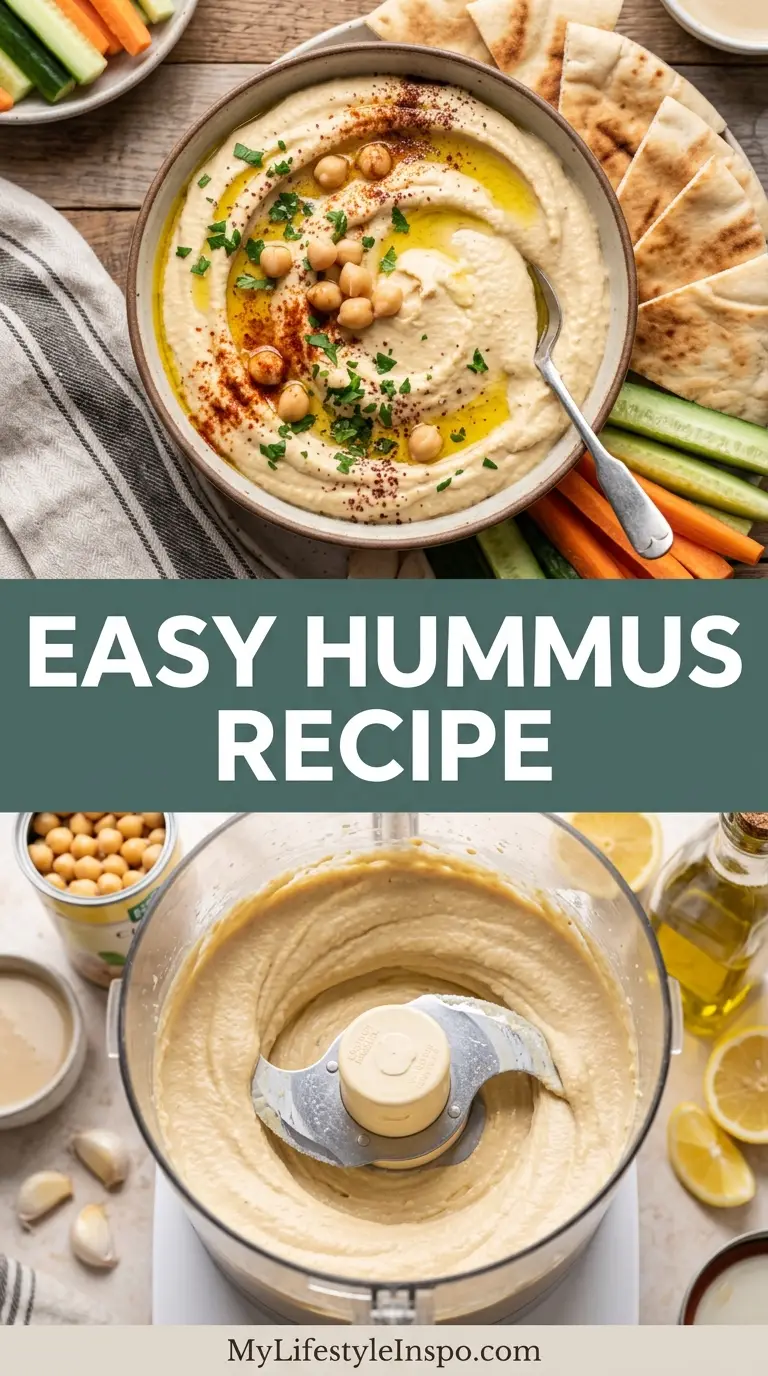
Making your own easy hummus recipe at home is one of those simple kitchen wins that completely changes how you snack. This creamy, nutty dip comes together in about 10 minutes using just a handful of pantry staples, and the flavor is miles ahead of anything you’d grab off the grocery store shelf.
Once you taste homemade hummus for the first time, store-bought versions will feel like a distant memory. The secret lies in a few small techniques, the right ratio of tahini to chickpeas, and blending it long enough to get that silky-smooth texture that makes people ask for the recipe.
This is the kind of recipe that works beautifully at parties, as an after-school snack, or simply as something to munch on while you cook dinner. It’s vegan, gluten-free, and packed with plant-based protein, making it one of the most versatile dips in your kitchen repertoire.
If you love making homemade dips and spreads, you might also enjoy our Easy Pesto Recipe as another quick and flavorful option.
Why You’ll Love This Easy Hummus Recipe
This recipe is a crowd-pleaser for so many reasons, and once you try it, you’ll wonder why you ever bought the store-bought stuff. The texture is unbelievably creamy and smooth, thanks to a combination of quality tahini and a little patience with the blending.
It takes almost no effort to pull together, and you probably already have most of the ingredients on hand right now. Canned chickpeas, tahini, lemon juice, garlic, and olive oil are the five core components that give this hummus its classic Middle Eastern flavor profile.
The best part? You can make a big batch on Sunday and enjoy it all week long as a dip, a spread, or even a base for grain bowls. It stores beautifully in the fridge and holds up well for days.
- It comes together in about 10 minutes of hands-on time
- The ingredient list is short and mostly made up of pantry staples
- It is naturally vegan, gluten-free, and dairy-free
- It works as a dip, a spread, or a topping for almost any meal
- Homemade hummus tastes significantly better than store-bought versions
- It can be customized with add-ins and toppings to suit any flavor preference
- It is high in protein and fiber, making it a genuinely nutritious snack
You might also enjoy: Classic Guacamole Recipe
Ingredients
The ingredient list for this easy hummus recipe is refreshingly short. The most important thing to note is the quality of your tahini, as it is the backbone of the flavor and texture. Look for a brand that uses only hulled sesame seeds and has a smooth, pourable consistency before you even stir it.
- 1 can (15 oz / 425g) chickpeas, drained (reserve the liquid from the can)
- 3 tablespoons (45g) tahini, well-stirred
- 3 tablespoons (45ml) fresh lemon juice (about 1 large lemon)
- 2 tablespoons (30ml) extra virgin olive oil, plus more for serving
- 1 small clove garlic, peeled
- 1/4 teaspoon (1.25g) ground cumin
- 1/2 teaspoon (3g) salt, or to taste
- 2 tablespoons (30ml) reserved chickpea liquid or cold water, as needed
- Pinch of paprika for garnish
- Fresh flat-leaf parsley, finely chopped, for garnish
Read Also: Basil Pesto Recipe
Kitchen Equipment Needed
You do not need any fancy gadgets to make this hummus. A food processor is the star of the show here, and it does the heavy lifting in terms of getting that ultra-smooth texture. A high-powered blender works as a backup, but a food processor gives you the most control over consistency.
- Food processor (a standard 7 to 11-cup size works perfectly)
- Colander or fine-mesh strainer
- Measuring cups and spoons
- Medium bowl
- Rubber spatula or silicone scraper
- Serving bowl
- Small jar or container to store reserved chickpea liquid
You might also enjoy: Easy Guacamole Recipe
Recommended Products for This Recipe
These are products I genuinely recommend based on the quality and performance they bring to this recipe. Getting the right tahini and a reliable food processor will make the biggest difference in your final result.
1. Soom Tahini
Soom is widely considered one of the best tahini brands available, and for good reason. It has a smooth, slightly nutty flavor without any bitterness, which means your hummus will taste clean and balanced right out of the blender. A little goes a long way, and the consistency is perfect for blending.
2. Cuisinart 11-Cup Food Processor
A reliable food processor is the single most important tool for making creamy hummus. The Cuisinart 11-cup model is powerful enough to break down chickpeas in minutes and has a wide enough bowl to handle a full batch without overflow. It is also easy to clean afterward.
3. California Olive Ranch Extra Virgin Olive Oil
The olive oil in this recipe does double duty: it gets blended right into the hummus and also serves as a finishing drizzle on top. California Olive Ranch produces a bright, peppery oil that adds a nice depth of flavor without overpowering the other ingredients.
4. Eden Organic Canned Chickpeas (BPA-Free)
If you want to skip the cooking-from-scratch route, quality canned chickpeas make a huge difference. Eden Organic chickpeas are BPA-free, have no added sodium, and tend to be softer and creamier than many other brands, which translates directly to a smoother final product.
5. Citrus Juicer
Fresh lemon juice is non-negotiable in this recipe, and a good citrus juicer makes squeezing quick and mess-free. A simple handheld or tabletop model will do the trick and keep the pulp out of your hummus.
This pairs wonderfully alongside a platter of Classic Bruschetta at any gathering.
Step-by-Step Instructions
Making hummus is genuinely one of the easiest things you can do in the kitchen, but a few key details will take yours from good to great. Follow each step carefully, and pay special attention to the blending time, which is the number one factor in getting a creamy, smooth result.
1. Drain and Prep the Chickpeas
- Open your can of chickpeas and pour them into a colander set over a medium bowl. You want to catch all of that starchy liquid from the can, because you will use it later to thin out the hummus if needed. Do not rinse the chickpeas, as the residual liquid on them adds flavor and helps with blending.
- Set the bowl of reserved chickpea liquid aside. You will need about 2 tablespoons of it, but keep the rest handy in case you want a looser consistency at the end.
- Give the chickpeas a gentle shake in the colander to remove any excess liquid, then transfer them to your food processor bowl.
2. Blend the Tahini and Lemon Juice First
- Before adding the chickpeas to the food processor, start by blending the tahini and lemon juice together on their own for about 30 to 45 seconds. This step is a little-known trick that creates a lighter, fluffier base and helps the garlic flavor mellow out.
- Scrape down the sides of the food processor bowl with your rubber spatula, then blend again for another 15 seconds until the mixture looks smooth and slightly lightened in color.
- This pre-blending stage makes a noticeable difference in the final texture, so do not skip it even if it feels like an extra step.
3. Add the Chickpeas and Garlic
- Add the drained chickpeas and the peeled garlic clove to the food processor with the tahini-lemon mixture. Using just one small clove of garlic keeps the flavor grounded without being overpowering, since the garlic is raw and its intensity builds quickly.
- Pulse the food processor about 10 times in short bursts, scraping down the sides after every few pulses. This initial pulsing breaks the chickpeas down into a rough, chunky paste before you move to full blending.
4. Add the Olive Oil, Cumin, and Salt
- With the food processor running on low, slowly drizzle in the 2 tablespoons of extra virgin olive oil in a thin, steady stream. Adding it gradually allows the hummus to emulsify properly and develop a richer, more cohesive texture.
- Add the ground cumin and salt directly into the bowl. Cumin is a classic addition to traditional hummus and gives it that warm, earthy undertone that makes it taste authentic.
- Scrape down the sides of the bowl one more time to make sure everything is incorporated evenly.
5. Blend Until Ultra-Smooth
- Turn the food processor on and let it run continuously for a full 3 to 4 minutes without stopping. This is the most important step in the entire recipe. Most people stop blending too early, which leaves the hummus grainy or thick. The longer you blend, the more the chickpeas break down and the creamier your hummus becomes.
- If the hummus looks too thick or is not coming together smoothly after about 2 minutes of blending, add the 2 tablespoons of reserved chickpea liquid one tablespoon at a time. The chickpea liquid is starchy and flavorful, so it thins the hummus without diluting the taste the way plain water would.
- Stop the processor, scrape down the sides, and blend for another minute. The finished hummus should be completely smooth, light, and hold its shape when you drag a spoon through it.
6. Taste and Adjust the Seasoning
- Taste the hummus and decide if it needs any adjustments. If it feels flat, add a little more salt, a squeeze of fresh lemon juice, or a pinch more cumin. These small tweaks at the end make a big difference in how balanced the final flavor is.
- If the hummus is thicker than you like, add a splash more chickpea liquid or cold water and blend for another 10 to 15 seconds until you reach your preferred consistency.
7. Serve and Garnish
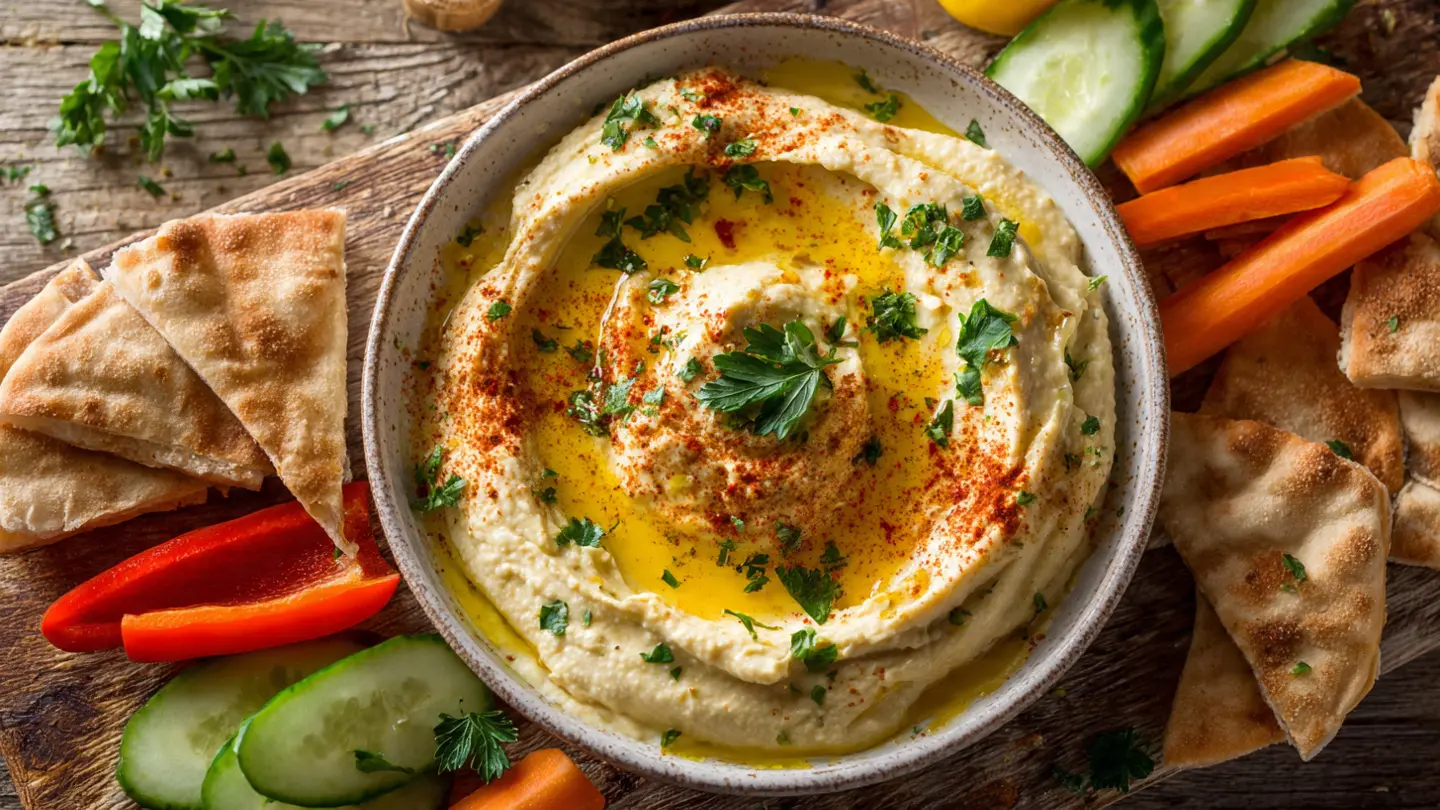
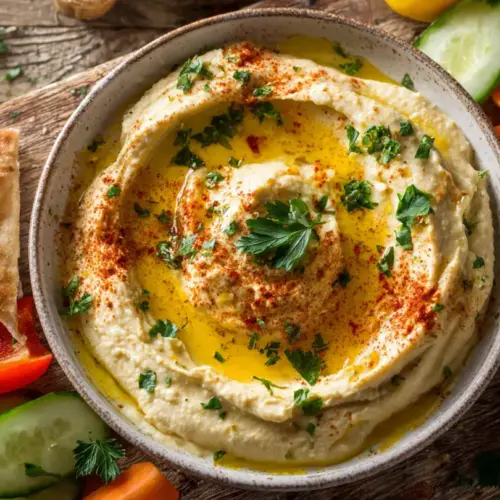
- Scoop the hummus into a shallow serving bowl. Use the back of a spoon to create gentle swirls and swoops across the surface. These little divots are not just decorative; they catch the olive oil drizzle and make each bite more flavorful.
- Drizzle a generous amount of extra virgin olive oil over the top of the hummus. Sprinkle with a light dusting of paprika and a small handful of finely chopped fresh parsley for a pop of color and a subtle herby freshness.
- Serve immediately with pita bread, crackers, or your favorite raw vegetables for dipping.
Read Also: Tzatziki Sauce Recipe
Tips for Success
A few small adjustments can take your hummus from good to absolutely exceptional. These tips are based on common mistakes and the techniques that consistently produce the creamiest, most flavorful results.
- Blend longer than you think you need to. Three to four minutes of continuous blending is the sweet spot for a truly smooth texture.
- Pre-blend the tahini and lemon juice before adding the chickpeas. This lightens the texture and mellows the raw garlic bite.
- Save the chickpea liquid from the can. It is starchy and flavorful, making it the best liquid to use for thinning out the hummus.
- Use good-quality tahini. Look for brands that list only one ingredient, which is hulled sesame seeds, and that have a smooth, pourable consistency.
- Do not skip the cumin. Even a small amount adds a warm, earthy depth that makes the hummus taste more complex and authentic.
- Taste and season at the very end. Flavors concentrate as the hummus comes together, so wait until the final step to adjust salt and lemon.
- Let the hummus sit for 10 to 15 minutes before serving if you have time. This allows the flavors to meld and the texture to settle into its final form.
This technique also works beautifully when making Easy Salsa at home.
Serving Suggestions
Hummus is one of the most versatile foods in your kitchen, and the ways you can enjoy it go far beyond just dipping chips into a bowl. Think of it as a creamy, flavorful base that can elevate almost any meal or snack spread.
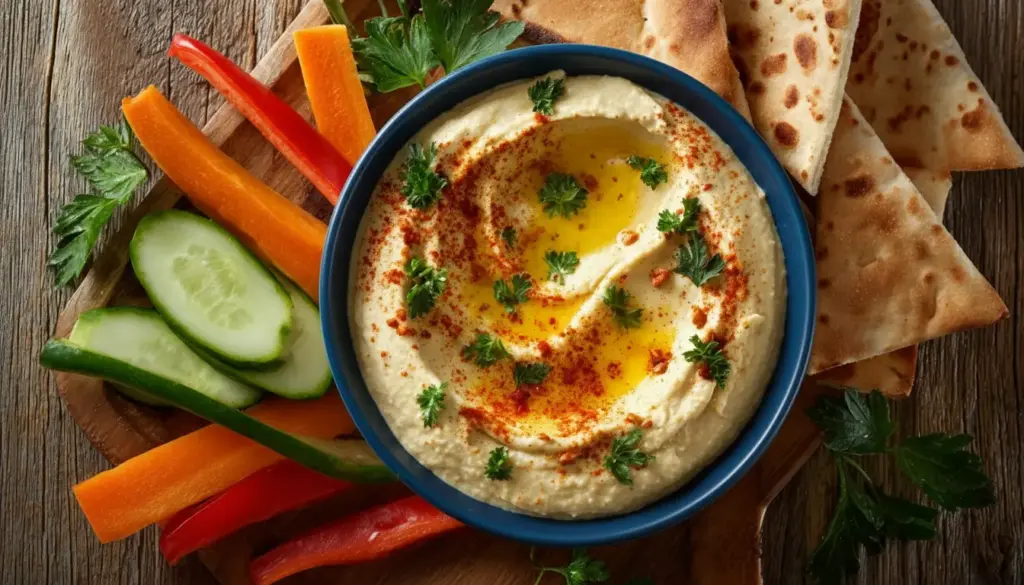
- Serve it alongside warm pita bread torn into pieces, along with a platter of fresh vegetables like cucumber slices, cherry tomatoes, bell peppers, and carrot sticks
- Spread a thick layer on toast or a bagel and top with sliced avocado, a drizzle of olive oil, and a sprinkle of red pepper flakes for a quick and satisfying breakfast
- Use it as the base layer in a grain bowl topped with roasted chickpeas, cucumber, cherry tomatoes, and a squeeze of lemon
- Add it to a mezze-style spread alongside Pico de Gallo and warm flatbread for entertaining
- Stir a spoonful into cooked pasta with a splash of pasta water for a surprisingly creamy and flavorful sauce
- Spread it inside a wrap or pita pocket with lettuce, tomato, cucumber, and grilled chicken or chickpeas for a quick lunch
Variations to Try
Once you have the classic version down, experimenting with different flavors becomes a lot of fun. The base recipe is incredibly forgiving, and small additions can completely transform the taste and character of the hummus.
- Roasted Red Pepper Hummus: Blend in 1/2 cup (about 75g) of roasted red peppers from a jar along with the chickpeas. Add a pinch of smoked paprika for extra depth.
- Roasted Garlic Hummus: Roast an entire head of garlic until soft and golden, then squeeze the cloves into the food processor instead of using raw garlic. The flavor becomes sweet and mellow.
- Lemon Dill Hummus: Add 2 tablespoons of fresh chopped dill and an extra tablespoon of lemon juice for a bright, herbaceous twist.
- Beetroot Hummus: Blend in 1/2 cup (about 100g) of roasted or canned beet for a stunning pink color and a subtle earthy sweetness.
- Spicy Hummus: Stir in 1 to 2 teaspoons of harissa paste or a pinch of cayenne pepper after blending for a kick of heat.
- White Bean Hummus: Swap the chickpeas for an equal amount of cannellini beans for a slightly creamier, milder flavor that works beautifully as a dip.
For another crowd-pleasing homemade dip, check out our Buffalo Chicken Dip Recipe.
Storage and Reheating
Homemade hummus stores well and is one of those recipes that actually tastes even better the next day as the flavors continue to develop. Proper storage keeps it fresh and safe to eat for several days without any loss of quality.
- Transfer any leftover hummus into an airtight container and smooth the surface flat before sealing.
- Store it in the refrigerator for up to 4 days. The texture may firm up slightly as it chills, so give it a good stir before serving.
- To freeze hummus, pour it into a freezer-safe container, drizzle a thin layer of olive oil over the top to help preserve moisture, and freeze for up to 3 months.
- When you are ready to use frozen hummus, thaw it overnight in the refrigerator. Stir it well once it has fully thawed to restore the creamy texture.
- Do not leave hummus out at room temperature for more than 2 hours, as it contains ingredients that can spoil if left out too long.
- A small drizzle of olive oil on the surface before refrigerating helps prevent a dry film from forming on top.
If you enjoy meal-prepping dips and sauces, you will love this Fresh Salsa Recipe as another fridge-friendly staple.
Nutritional Facts
The nutritional values below are approximate and based on one serving of this easy hummus recipe, which is roughly 1/4 cup (about 60g). Actual values may vary slightly depending on the specific brands and quantities of ingredients you use.
| Nutrient | Amount per Serving |
|---|---|
| Calories | 145 |
| Total Fat | 7g |
| Saturated Fat | 1g |
| Cholesterol | 0mg |
| Sodium | 200mg |
| Total Carbohydrates | 16g |
| Dietary Fiber | 4g |
| Total Sugars | 2g |
| Protein | 5g |
| Iron | 1.5mg |
| Calcium | 40mg |
This recipe serves about 6 people as a dip or spread. If you are serving it as part of a larger appetizer platter, each portion can be smaller, stretching the recipe to about 8 servings.
For a similarly nutritious and easy homemade option, try our Easy Deviled Eggs Recipe.
Health Benefits of Key Ingredients
Hummus is more than just a tasty dip. The core ingredients in this recipe each bring meaningful nutritional benefits to the table, making it one of the healthiest snacks you can keep in your fridge.
- Chickpeas are an excellent source of plant-based protein and dietary fiber, both of which support digestion, help you feel full longer, and contribute to sustained energy throughout the day. They also contain iron and folate, which are important for overall health.
- Tahini is made from ground sesame seeds and is rich in healthy unsaturated fats, calcium, and magnesium. These nutrients support bone health and help your body absorb other vitamins more efficiently.
- Lemon juice adds a burst of vitamin C, which plays a key role in immune function and helps your body absorb iron from plant-based sources like chickpeas more effectively.
- Garlic has long been recognized for its anti-inflammatory properties and its ability to support heart health. Even a single clove adds a meaningful amount of these benefits to the recipe.
- Extra virgin olive oil is a cornerstone of the Mediterranean diet for good reason. It is loaded with antioxidants and heart-healthy monounsaturated fats that can reduce inflammation and support cardiovascular health over time.
- Cumin is a warming spice that has been used in traditional medicine for centuries. It supports digestive health and adds a subtle complexity to the flavor without adding any calories or sodium.
Our Avocado Toast Recipe is another healthy snack idea that pairs beautifully with hummus.
Frequently Asked Questions
1. Can I make hummus without tahini?
You can, though the flavor and texture will be noticeably different without it. Tahini is what gives hummus its signature nutty richness and silky consistency. If you truly cannot find it or have an allergy, try substituting an extra tablespoon of olive oil or a tablespoon of sunflower seed butter as a partial replacement.
The result will be a bit lighter in flavor and slightly less creamy, but it will still taste good as a dip or spread.
2. How long does homemade hummus last in the fridge?
Homemade hummus will stay fresh in the refrigerator for up to 4 days when stored in a sealed, airtight container. Make sure to keep the surface smooth and add a thin layer of olive oil on top before closing the lid to help prevent it from drying out.
If you notice any separation or liquid pooling on the surface after a day or two, simply stir it back in before serving.
3. Do I need to peel the chickpeas for smooth hummus?
Peeling the chickpeas is an optional step that some recipes swear by, but it is not strictly necessary for a creamy result. The bigger factor in achieving smoothness is blending time. Running your food processor for a full 3 to 4 minutes will break down the skins and produce a very smooth texture without any extra effort.
If you do want to peel them, simply soak the drained chickpeas in warm water for a few minutes, then gently rub them between your fingers. The skins will float to the surface and can be skimmed off easily.
4. Can I use dried chickpeas instead of canned?
Absolutely. Dried chickpeas will give you a slightly deeper, more robust flavor. Soak about 3/4 cup (150g) of dried chickpeas overnight in plenty of cold water, then drain and cook them in fresh water until they are very tender and starting to fall apart, which usually takes about 1.5 to 2 hours.
Reserve about 1/2 cup of the cooking liquid before draining, and use it in place of the canned chickpea liquid in the recipe. The rest of the steps remain exactly the same.
5. Why does my hummus taste bitter?
Bitterness in hummus usually comes from one of two sources: the tahini or the garlic. Some tahini brands can have a harsh, bitter undertone, so switching to a higher-quality brand like Soom or Cedar’s can make a significant difference. Raw garlic also intensifies quickly, so using just one small clove and pre-blending it with the lemon juice helps mellow out any sharpness.
A little extra lemon juice or a pinch more salt can also help balance out any lingering bitterness and bring the flavors into a more harmonious place.
For another simple and flavorful homemade recipe, check out our Cheese Ball Recipe.
Easy Hummus Recipe
Equipment
- Food processor - Standard 7 to 11-cup size works perfectly
- Colander
- Fine-mesh strainer - Alternative to colander
- Measuring cups
- Measuring spoons
- Medium bowl - For catching chickpea liquid
- Rubber spatula - Or silicone scraper
- Serving bowl - Shallow bowl works best for serving
- Citrus juicer - For fresh lemon juice
Ingredients
- 15 oz chickpeas - 425g, 1 can, drained, reserve the liquid from the can
- 3 tablespoons tahini - 45g, well-stirred
- 3 tablespoons fresh lemon juice - 45ml, about 1 large lemon
- 2 tablespoons extra virgin olive oil - 30ml, plus more for serving
- 1 clove garlic - small, peeled
- 0.25 teaspoon ground cumin - 1.25g
- 0.5 teaspoon salt - 3g, or to taste
- 2 tablespoons reserved chickpea liquid - 30ml, or cold water, as needed
- paprika - for garnish
- fresh flat-leaf parsley - finely chopped, for garnish
For Serving (Optional)
- pita bread - warm, torn into pieces
- cucumber slices - for dipping
- cherry tomatoes - for dipping
- bell peppers - sliced, for dipping
- carrot sticks - for dipping
Instructions
- Drain the can of chickpeas into a colander set over a medium bowl to catch the liquid. Do not rinse the chickpeas.
- In the food processor, blend the tahini and lemon juice together for 30-45 seconds until smooth and lightened in color.
- Add the drained chickpeas and peeled garlic clove to the food processor. Pulse about 10 times in short bursts to break them down into a chunky paste.
- With the processor running on low, slowly drizzle in the olive oil. Add the ground cumin and salt.
- Blend continuously for 3-4 minutes until ultra-smooth. If too thick, add the reserved chickpea liquid 1 tablespoon at a time while blending.
- Taste and adjust seasoning with more salt, lemon juice, or cumin if needed. Thin with additional chickpea liquid if desired.
- Transfer to a shallow serving bowl and create swirls on the surface with a spoon. Drizzle with olive oil and garnish with paprika and fresh parsley.
Notes
- Blend longer than you think: 3-4 minutes of continuous blending is the sweet spot for a truly smooth texture. Most people stop too early, which leaves the hummus grainy.
- Pre-blend tahini and lemon: This step lightens the texture and mellows the raw garlic bite. Don’t skip it even if it feels like an extra step.
- Save the chickpea liquid: The starchy liquid from the can (aquafaba) is the best liquid to use for thinning hummus as it adds flavor and helps with creaminess.
- Use good-quality tahini: Look for brands that list only hulled sesame seeds and have a smooth, pourable consistency. Lower quality tahini can make hummus bitter.
- Room temperature ingredients: For the creamiest texture, let your ingredients sit at room temperature for about 15 minutes before blending.
- Storage: Store in an airtight container in the refrigerator for up to 4 days. Add a thin layer of olive oil on top to prevent drying out.
- Freezing instructions: Freeze in a freezer-safe container for up to 3 months. Drizzle a thin layer of olive oil over the top before freezing to help preserve moisture. Thaw overnight in the refrigerator.
- Make it smoother: For an ultra-smooth, restaurant-quality texture, remove the chickpea skins by soaking drained chickpeas in warm water and rubbing them between your fingers. Most of the skins will float to the surface and can be skimmed off.
- Flavor variations: Try adding roasted red peppers, roasted garlic, fresh dill, beetroot, harissa paste, or swapping chickpeas for cannellini beans.
- Let it rest: Allow the hummus to sit for 10-15 minutes before serving if you have time. This allows the flavors to meld and the texture to settle.
Final Thoughts
Once you make this easy hummus recipe at home, you will genuinely never want to go back to the store-bought version. It is fresher, creamier, and so much more flavorful, and it takes only a fraction of the effort you might expect.
This is the kind of recipe that rewards you every single time you make it, no matter your skill level in the kitchen. Give it a try this week and let us know how it turns out in the comments below. We would love to hear about any flavor twists or toppings you tried!
Recommended:
- Classic Hummus Recipe
- Strawberry Bruschetta Recipe
- Chicken Bruschetta Recipe
- Cottage Cheese Chips Recipe
- Classic Deviled Eggs Recipe
- Loaded Nachos Recipe
- Easy Nachos Recipe
- Fruit Salad Recipe
- Broccoli Salad Recipe
- Potato Salad Recipe


