I’ll never forget the first time I made this lemon cheesecake recipe for a family gathering. My aunt, who’s notoriously picky about desserts, took one bite and immediately asked for the recipe.
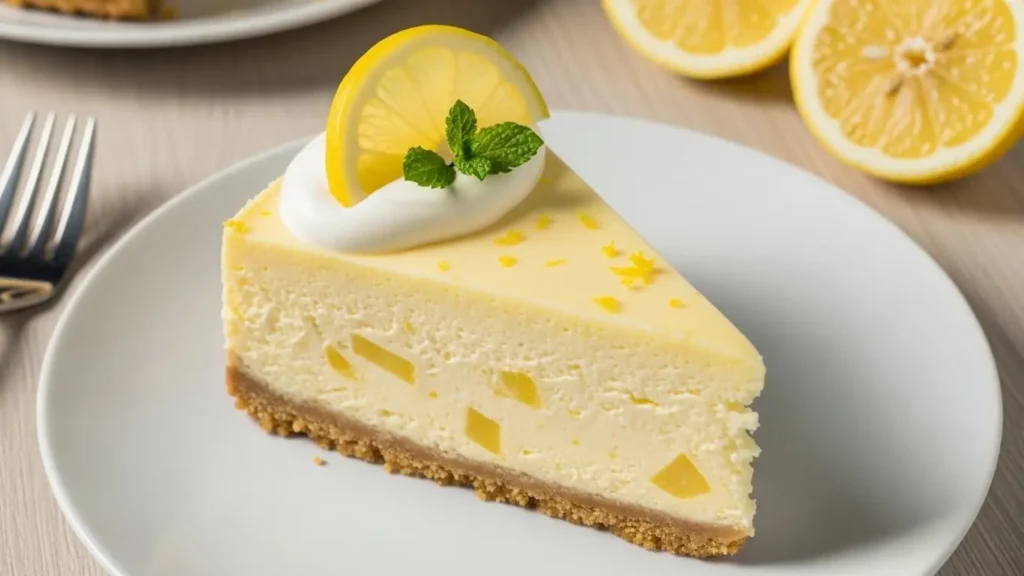
The combination of tangy lemon and creamy cheesecake is pure magic. Every forkful delivers that perfect balance of sweet and tart that keeps you coming back for more.
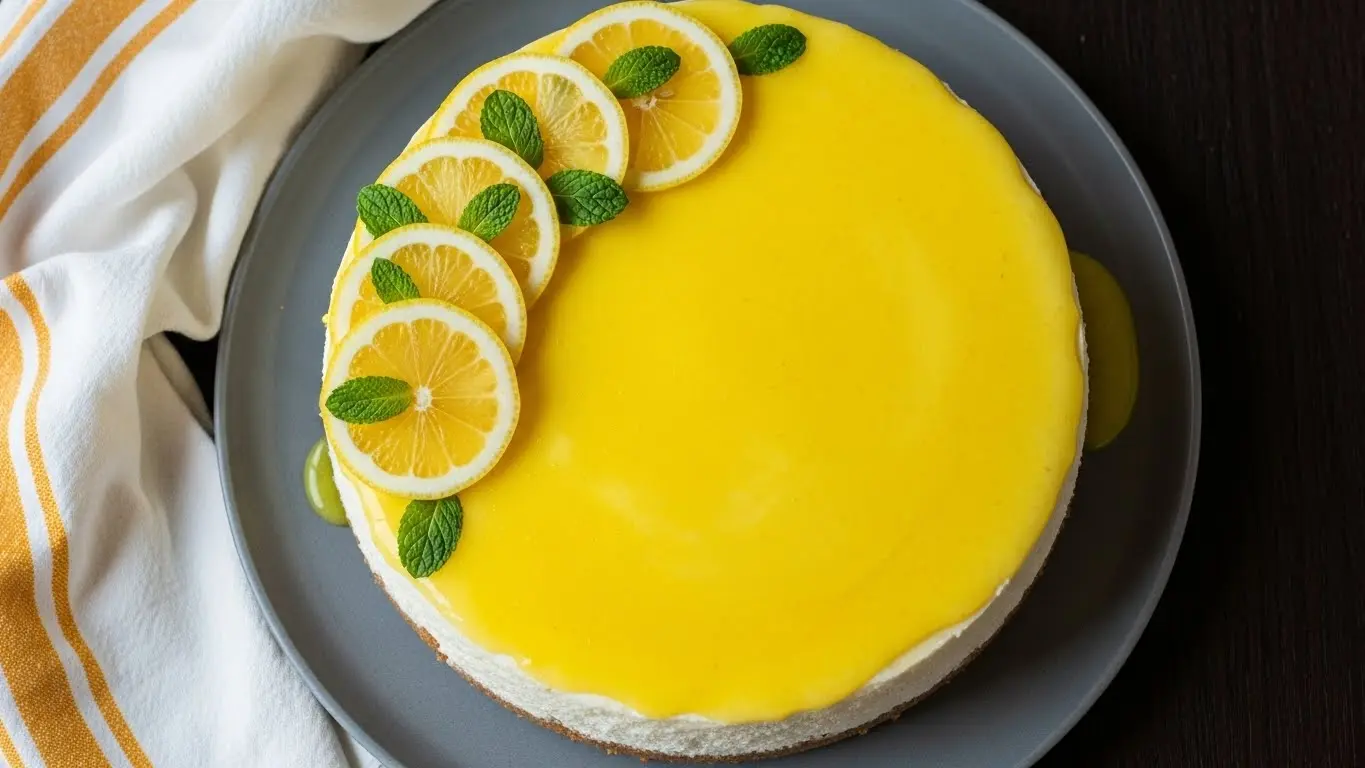
This dessert looks impressive but is surprisingly straightforward to make. The buttery graham cracker crust provides the perfect foundation for the velvety smooth filling.
What I love most is how versatile this recipe is. You can dress it up with fresh berries for a dinner party or keep it simple for a weeknight treat.
The fresh lemon juice and zest bring such vibrant flavor that you’ll taste sunshine in every bite. It’s become my go-to dessert when I want something that feels special without spending hours in the kitchen.
Why You’ll Love This Lemon Cheesecake Recipe
This lemon cheesecake recipe strikes the perfect balance between rich creaminess and bright citrus flavor. The texture is incredibly smooth, and the taste is restaurant-quality without the complicated techniques.
I appreciate how forgiving this recipe is for beginners. Even if you’ve never made cheesecake before, the step-by-step instructions will guide you through every detail.
Here’s what makes this recipe stand out:
- Perfectly creamy texture – The combination of cream cheese and sour cream creates an ultra-smooth filling that melts in your mouth
- Bright lemon flavor – Fresh lemon juice and zest provide authentic citrus taste that’s never artificial
- No-crack method – The water bath technique ensures your cheesecake comes out flawless every time
- Make-ahead friendly – This dessert actually tastes better after chilling overnight, making it perfect for entertaining
- Crowd-pleaser – Even people who claim they don’t like cheesecake fall in love with the refreshing lemon twist
This pairs beautifully with my strawberry cheesecake recipe for a complete dessert spread.
Ingredients
The ingredient list is simple and straightforward. You’ll find most items in your pantry, with fresh lemons being the star ingredient.
For the Crust:
- 2 cups graham cracker crumbs
- 1/3 cup granulated sugar
- 1/2 cup unsalted butter, melted
For the Filling:
- 32 oz (four 8-oz packages) cream cheese, softened to room temperature
- 1 1/4 cups granulated sugar
- 1/4 cup all-purpose flour
- 4 large eggs, room temperature
- 2/3 cup sour cream, room temperature
- 1/4 cup fresh lemon juice (about 2 lemons)
- 2 tablespoons lemon zest (about 2-3 lemons)
- 1 teaspoon pure vanilla extract
For the Lemon Topping (Optional):
- 1 cup sour cream
- 2 tablespoons granulated sugar
- 1 tablespoon fresh lemon juice
- 1 teaspoon lemon zest
Kitchen Equipment Needed
Having the right tools makes this recipe so much easier. Quality equipment helps you achieve professional results at home.
- 9-inch springform pan
- Heavy-duty aluminum foil (for water bath)
- Large roasting pan (for water bath)
- Electric mixer (stand or hand mixer)
- Mixing bowls
- Measuring cups and spoons
- Microplane zester or fine grater
- Rubber spatula
- Cooling rack
Recommended Products for This Recipe
After making countless cheesecakes over the years, I’ve discovered a few products that truly make a difference in the final result. These aren’t just nice-to-haves—they solve real problems that home bakers face.
1. Nordic Ware Leakproof Springform Pan
The biggest challenge with cheesecake is preventing water from seeping into your pan during the water bath, which can ruin the crust. This leakproof springform pan has a silicone seal that completely eliminates that worry, and the quality construction ensures even baking every time.
2. KitchenAid Artisan Stand Mixer
While you can make this recipe with a hand mixer, a stand mixer makes the process effortless and ensures you get that perfectly smooth, lump-free filling. The powerful motor creams the cream cheese beautifully, and you can walk away while it works.
3. Microplane Premium Zester
Fresh lemon zest is crucial for authentic citrus flavor, and a quality zester makes all the difference. This Microplane glides over citrus fruits effortlessly and creates fluffy, aromatic zest without any bitter white pith.
4. Philadelphia Cream Cheese
Not all cream cheese is created equal. Philadelphia brand has the perfect consistency and tang for cheesecakes, and I’ve found it produces the smoothest texture with the most reliable results.
Another favorite: churro cheesecake recipe
Step-by-Step Instructions
Follow these detailed instructions carefully for a perfect lemon cheesecake. Take your time with each step, especially when mixing the filling.
1. Prepare Your Pan and Oven
- Preheat your oven to 325°F (163°C)
- Wrap the outside of your 9-inch springform pan with two layers of heavy-duty aluminum foil, covering the bottom and sides completely to prevent water from leaking in during the water bath
- Grease the inside of the pan lightly with butter or non-stick spray
- Set a large roasting pan on the counter—you’ll use this for the water bath later
2. Make the Graham Cracker Crust
- In a medium bowl, combine 2 cups graham cracker crumbs and 1/3 cup sugar, stirring until evenly mixed
- Pour the melted butter over the crumb mixture and stir with a fork until all the crumbs are moistened and the mixture resembles wet sand
- Transfer the mixture to your prepared springform pan
- Press the crumbs firmly and evenly into the bottom of the pan using the bottom of a measuring cup or your fingers—make sure it’s packed tightly so it holds together
- Press the crumbs slightly up the sides of the pan (about 1 inch) to create a small edge
- Bake the crust for 10 minutes, then remove and let cool while you prepare the filling
3. Prepare the Cream Cheese Filling
- In a large mixing bowl or the bowl of your stand mixer, beat the softened cream cheese on medium speed for 2-3 minutes until completely smooth and fluffy with no lumps—this step is crucial for a smooth cheesecake
- Scrape down the sides and bottom of the bowl with a rubber spatula to ensure everything is incorporated
- Add 1 1/4 cups sugar and 1/4 cup flour to the cream cheese, beating on low speed until just combined
- Add the eggs one at a time, beating on low speed after each addition just until incorporated—avoid overmixing at this stage as it can incorporate too much air and cause cracks
- Scrape down the bowl after adding the eggs
4. Add the Lemon Flavor
- Add the sour cream, fresh lemon juice, lemon zest, and vanilla extract to the batter
- Beat on low speed for about 30 seconds, just until everything is combined and the mixture is smooth
- Use your rubber spatula to scrape the bottom and sides of the bowl one final time, ensuring no pockets of unmixed cream cheese remain
- The batter should be silky smooth with visible flecks of lemon zest throughout
5. Assemble and Create the Water Bath
- Pour the filling over the cooled crust in the springform pan
- Gently tap the pan on the counter a few times to release any air bubbles
- Use a toothpick or skewer to pop any visible bubbles on the surface
- Place the foil-wrapped springform pan inside the large roasting pan
- Carefully transfer the roasting pan to the oven rack
- Pour hot water into the roasting pan until it reaches about halfway up the sides of the springform pan—the water bath ensures gentle, even cooking and prevents cracks
6. Bake the Cheesecake
- Bake at 325°F for 65-75 minutes—the cheesecake is done when the edges are set but the center still jiggles slightly when you gently shake the pan (it should jiggle like Jell-O, not liquid)
- The center should look slightly underdone—it will continue cooking as it cools
- Turn off the oven and crack the oven door open about 1 inch
- Let the cheesecake sit in the oven for 1 hour—this gradual cooling prevents dramatic temperature changes that cause cracks
7. Cool and Chill
- After 1 hour in the oven, remove the cheesecake from the water bath and place on a cooling rack
- Carefully remove the aluminum foil from around the pan
- Run a thin knife around the edge of the cheesecake to loosen it from the pan—this prevents cracks as it cools and contracts
- Let the cheesecake cool at room temperature for 1 hour
- Cover the pan loosely with plastic wrap and refrigerate for at least 6 hours, preferably overnight—this chilling time is essential for the cheesecake to set properly and develop full flavor
8. Add Optional Lemon Topping (If Using)
- About 1 hour before serving, mix together 1 cup sour cream, 2 tablespoons sugar, 1 tablespoon lemon juice, and 1 teaspoon lemon zest in a small bowl
- Spread the topping evenly over the chilled cheesecake
- Return to the refrigerator for at least 30 minutes before serving
9. Serve
- Remove the cheesecake from the refrigerator 10-15 minutes before serving to take the chill off
- Run a knife under hot water, wipe it dry, and use it to make clean cuts—wipe the knife between each slice for the prettiest presentation
- Carefully release and remove the springform pan sides
- Garnish with fresh lemon slices, whipped cream, or fresh berries if desired
You might also enjoy: mini cheesecake recipe
Tips for Success
These tips come from years of making cheesecakes and learning from mistakes. Follow them for the best results every time.
- Room temperature ingredients are crucial – Take your cream cheese, eggs, and sour cream out of the fridge at least 1 hour before starting; cold ingredients don’t blend smoothly and can create lumps
- Don’t overmix the batter – Once you add the eggs, mix just until combined; overmixing incorporates air bubbles that expand during baking and cause cracks
- Use fresh lemon juice – Bottled lemon juice has a harsh, artificial flavor; fresh-squeezed juice makes all the difference in this recipe
- Double-wrap your pan with foil – Water leaking into your springform pan will ruin the crust; use heavy-duty foil and wrap it securely
- Don’t skip the water bath – The steam creates a humid environment that prevents the top from drying out and cracking
- Check doneness carefully – A slightly jiggly center is perfect; overbaking creates a dry, dense texture
- Cool gradually – Sudden temperature changes cause cracks; the slow oven cooling and gradual room temperature cooling are essential steps
Read Also: Japanese Cheesecake Recipe
Serving Suggestions
This lemon cheesecake is stunning on its own, but a few simple additions can make it even more special. The tangy lemon flavor pairs wonderfully with fresh fruit and cream.
Fresh Berry Compote – Simmer fresh or frozen mixed berries with a bit of sugar until thickened, then spoon over each slice for a burst of color and complementary tartness.
Whipped Cream Rosettes – Pipe homemade whipped cream around the edge using a star tip for an elegant presentation.
Lemon Curd Drizzle – A spoonful of tangy lemon curd intensifies the citrus flavor and adds visual appeal.
Candied Lemon Slices – Thinly sliced lemons simmered in simple syrup create a beautiful garnish that’s both decorative and delicious.
Blueberry Topping – Fresh blueberries complement lemon perfectly, and their deep purple color creates a striking contrast against the pale yellow cheesecake.
This dessert shines alongside hot fudge cake for a complete dessert table.
Variations to Try
Once you’ve mastered the basic recipe, these variations add exciting new flavors. Each one transforms the cheesecake into something unique while maintaining that creamy, dreamy texture.
- Lemon Blueberry Cheesecake – Fold 1 cup fresh blueberries gently into the batter before baking, or swirl in 1/2 cup blueberry preserves for beautiful marbled color
- Lemon Lavender Cheesecake – Add 1 tablespoon culinary lavender buds to the crust mixture and 1/2 teaspoon to the filling for a sophisticated floral note
- Meyer Lemon Cheesecake – Substitute Meyer lemon juice and zest for regular lemons; the sweeter, more floral flavor is absolutely divine
- Lemon Raspberry Swirl – Drop spoonfuls of raspberry preserves over the batter and swirl with a knife for a stunning marbled effect
- Limoncello Cheesecake – Replace 2 tablespoons of the lemon juice with Limoncello liqueur for an adult version with extra lemon punch
- No-Bake Lemon Cheesecake – Skip the baking and use unflavored gelatin to set the filling instead; perfect for hot summer days when you don’t want to turn on the oven
Storage and Reheating
Proper storage keeps your cheesecake fresh and delicious for days. The good news is that cheesecake actually improves with time as the flavors meld together.
Refrigerator Storage:
- Cover the cheesecake tightly with plastic wrap or store in an airtight container
- Refrigerate for up to 5 days—the flavor actually deepens over time
- Keep away from strong-smelling foods as cheesecake absorbs odors easily
- Always store in the refrigerator, never at room temperature
Freezer Storage:
- Wrap individual slices tightly in plastic wrap, then in aluminum foil
- Place wrapped slices in a freezer-safe container or zip-top bag
- Freeze for up to 3 months for best quality
- Label with the date so you know how long it’s been frozen
- Thaw overnight in the refrigerator before serving—never thaw at room temperature as this causes condensation and makes the cheesecake soggy
You might also enjoy: oreo cheesecake recipe
Nutritional Facts
Per slice (based on 12 slices):
- Calories: 445
- Total Fat: 32g
- Saturated Fat: 18g
- Cholesterol: 145mg
- Sodium: 320mg
- Total Carbohydrates: 35g
- Dietary Fiber: 0g
- Sugars: 28g
- Protein: 7g
- Vitamin C: 6% of Daily Value
- Calcium: 8% of Daily Value
Note: Nutritional values are approximate and may vary based on specific ingredients used and portion sizes.
Health Benefits of Key Ingredients
While cheesecake is definitely an indulgent treat, several key ingredients offer surprising nutritional benefits. Enjoying dessert mindfully means appreciating both flavor and the good stuff inside.
Cream Cheese provides protein and calcium for bone health, plus vitamin A for immune function and healthy vision. The fat content helps your body absorb fat-soluble vitamins.
Lemons are packed with vitamin C, a powerful antioxidant that supports immune health and collagen production. The citric acid may aid digestion and help your body absorb minerals more efficiently.
Eggs deliver high-quality protein and choline, which supports brain health and metabolism. They also contain lutein and zeaxanthin, antioxidants that promote eye health.
Sour Cream offers probiotics that support gut health and digestion. It also provides calcium, vitamin B12, and riboflavin for energy metabolism.
Remember, moderation is key with rich desserts like this. A small slice lets you enjoy the flavors while keeping portions reasonable.
This complements new york cheesecake recipe perfectly for variety.
Frequently Asked Questions
1. Why did my cheesecake crack?
Cracks typically happen from overmixing the batter (which adds too much air), baking at too high a temperature, or cooling too quickly. The water bath method and gradual cooling steps in this recipe help prevent cracks.
If your cheesecake does crack, don’t worry—cover it with the sour cream topping, fresh fruit, or whipped cream and no one will ever know.
2. Can I make this cheesecake without a water bath?
You can skip the water bath, but your cheesecake will be more prone to cracks and may have a drier texture. If you choose to skip it, place a pan of water on the rack below the cheesecake to add moisture to the oven.
Lower the oven temperature to 300°F and bake for the same amount of time, checking for that slight jiggle in the center.
3. How do I know when my cheesecake is done?
The edges should be set and slightly puffed, while the center should still jiggle like Jell-O when you gently shake the pan. Insert an instant-read thermometer into the center—it should read 150-155°F.
The cheesecake will continue cooking as it cools, reaching the perfect texture once fully chilled.
4. Can I substitute the graham cracker crust?
Absolutely! Try crushed vanilla wafers, digestive biscuits, or even shortbread cookies for the crust.
Lemon Oreos make a fun twist that amplifies the citrus flavor. Just use the same quantity of crumbs as the recipe calls for.
5. Why does my cheesecake have a grainy texture?
Graininess usually results from not softening the cream cheese enough before mixing, or from overbaking. Always let your cream cheese sit at room temperature for at least an hour, and beat it thoroughly before adding other ingredients.
Baking to the correct internal temperature (150-155°F) and not beyond ensures a silky smooth texture.
Final Thoughts
This lemon cheesecake recipe has become my signature dessert for good reason. The bright, sunny flavor never fails to bring smiles to the table.
I hope you’ll give this recipe a try and experience that perfect balance of creamy richness and zesty lemon. Don’t be intimidated by the steps—just follow them carefully and you’ll create something truly special.
I’d love to hear how your lemon cheesecake turns out! Drop a comment below with your results, or let me know if you tried any of the variations.
Recommended:
- No Bake Cheesecake Recipe
- Best Cheesecake Recipe
- Pumpkin Cheesecake Recipe
- Chinese Chicken Salad Recipe
- Mexican Chicken Salad Recipe
- Hot Chicken Salad Recipe
- Asian Chicken Salad Recipe
- Buffalo Chicken Salad Recipe
- Southern Chicken Salad Recipe
- Curry Chicken Salad Recipe


