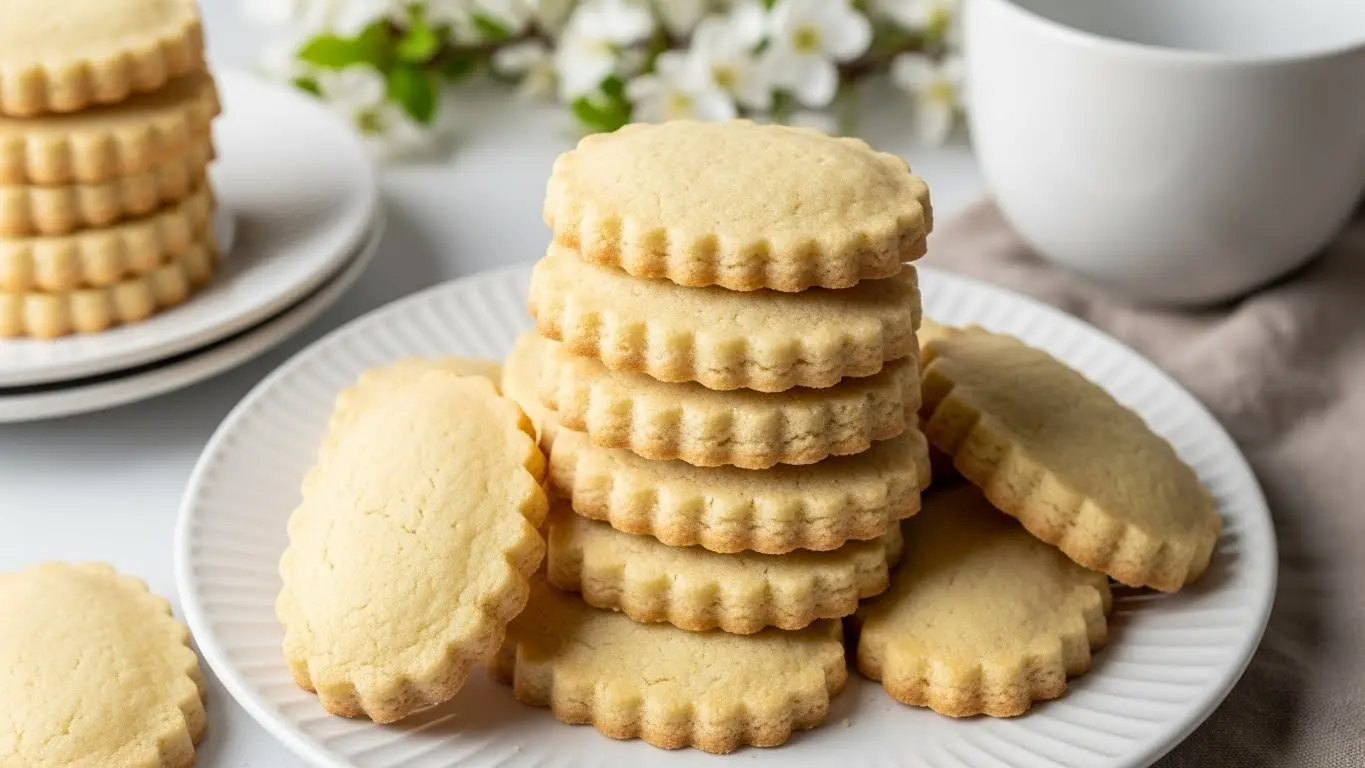
I’ve been making these buttery, melt-in-your-mouth cookies for years, and they never fail to disappear within minutes of coming out of the oven.
This shortbread cookie recipe is my go-to whenever I want something simple yet impressive. The beauty of these cookies lies in their simplicity—just a handful of ingredients that come together to create something truly magical. My grandmother used to make these every Christmas, and now they’re a staple in my kitchen year-round.
These cookies have that perfect crumbly texture that practically dissolves on your tongue. They’re rich without being overwhelming, and their subtle sweetness makes them incredibly versatile. You can enjoy them plain with your afternoon tea, dress them up with chocolate drizzle for special occasions, or sandwich them with jam for an elegant teatime treat.
The best part? You don’t need any fancy equipment or hard-to-find ingredients. Just butter, flour, sugar, and a little patience. The dough comes together in minutes, and the hardest part is waiting for them to chill before baking.
Why You’ll Love This Shortbread Cookie Recipe
These cookies are pure comfort in every bite. The texture is unbelievably tender, with that signature snap that only proper shortbread can achieve.
They’re incredibly forgiving for beginners yet sophisticated enough to serve at your fanciest gatherings. I’ve made these countless times, and they’ve never let me down.
- Minimal ingredients: Just four basic pantry staples create these incredible cookies
- Make-ahead friendly: The dough can be prepared days in advance and stored in the fridge
- Endlessly customizable: Add citrus zest, chocolate chips, or spices to make them your own
- Perfect for gifting: They stay fresh for weeks and look beautiful packaged in tins
- No mixer required: Everything comes together easily by hand or with a simple whisk
- Crowd-pleaser: From kids to grandparents, everyone loves a good shortbread
For a fun twist on classic cookies, you might enjoy my peanut butter blossom cookies too.
Ingredients
These cookies require just a few high-quality ingredients. Use the best butter you can find—it truly makes a difference in flavor.
- 1 cup (2 sticks/226g) unsalted butter, softened to room temperature
- ½ cup (60g) powdered sugar, sifted
- 2 cups (240g) all-purpose flour
- ¼ teaspoon salt
- 1 teaspoon vanilla extract (optional, but recommended)
Kitchen Equipment Needed
You probably already have everything you need in your kitchen. These cookies are wonderfully low-tech.
- Mixing bowls (at least 2)
- Whisk or wooden spoon
- Rolling pin
- Cookie cutters (or a knife for cutting shapes)
- Baking sheets
- Parchment paper or silicone baking mats
- Wire cooling rack
Recommended Products for This Recipe
After making shortbread countless times, I’ve found a few products that genuinely improve the final result. These recommendations are based on my personal experience in the kitchen.
1. European-Style Butter
The quality of your butter will make or break these cookies since it’s the star ingredient. European-style butter has a higher fat content (around 82% compared to the standard 80%), which gives shortbread that extra-rich, creamy flavor and more tender texture. I always notice a difference when I use it.
2. Nordic Ware Natural Aluminum Baking Sheets
These commercial-grade baking sheets distribute heat so evenly that my cookies brown perfectly without any burnt edges. They’re also warp-resistant, which is crucial when you’re baking at higher temperatures. I’ve had mine for over five years and they still look brand new.
3. OXO Good Grips Rolling Pin
This rolling pin has comfortable non-slip handles and rolls smoothly, making it easy to get your dough to an even thickness. The tapered design gives you better control, especially when working with the softer shortbread dough. It’s become my go-to for all my cookie and pastry projects.
4. Ateco Plain Edge Round Cookie Cutters
This set includes multiple sizes, which is perfect for making various shortbread shapes. The stainless steel cuts cleanly through the dough without dragging, and they’re easy to clean. I particularly love using the smaller sizes for making bite-sized shortbread for parties.
Step-by-Step Instructions
Take your time with these steps. The process is simple, but attention to detail makes all the difference in achieving that perfect shortbread texture.
1. Prepare Your Butter
- Remove the butter from the refrigerator about 30-45 minutes before you start baking
- It should be soft enough to leave an indent when pressed with your finger, but not melted or greasy
- Cut the butter into chunks to help it soften more evenly
- If you’re in a hurry, you can cut the butter into small pieces and let it sit at room temperature for 15-20 minutes
2. Cream the Butter and Sugar
- Place the softened butter in a large mixing bowl
- Sift the powdered sugar directly into the bowl to eliminate any lumps
- Use a wooden spoon or whisk to beat the butter and sugar together for 2-3 minutes
- The mixture should become light, fluffy, and pale in color
- Scrape down the sides of the bowl with a spatula to ensure everything is evenly mixed
- Add the vanilla extract if using and mix until fully incorporated
3. Add the Dry Ingredients
- In a separate bowl, whisk together the flour and salt
- Add half of the flour mixture to the butter mixture and stir gently with a wooden spoon
- Once the first half is mostly incorporated, add the remaining flour
- Mix just until the dough comes together and no dry flour remains visible
- Be careful not to overmix, as this can make the cookies tough instead of tender
- The dough will be soft and slightly crumbly at this stage, which is exactly what you want
4. Chill the Dough
- Turn the dough out onto a clean work surface or a large piece of plastic wrap
- Gently press it together with your hands to form a cohesive disk about 1 inch thick
- Wrap the disk tightly in plastic wrap, making sure there are no air pockets
- Refrigerate for at least 1 hour, or up to 3 days
- Chilling is crucial because it allows the butter to firm up, making the dough easier to roll and preventing the cookies from spreading too much during baking
- If you’re in a real hurry, you can freeze the dough for 30 minutes instead
5. Prepare for Baking
- About 15 minutes before you’re ready to roll out the dough, preheat your oven to 325°F (165°C)
- Line your baking sheets with parchment paper or silicone baking mats
- Remove the dough from the refrigerator and let it sit at room temperature for 5-10 minutes to soften slightly
- If the dough is too hard, it will crack when you try to roll it out
- If it’s too soft, it will stick to your rolling pin and be difficult to work with
6. Roll Out the Dough
- Lightly flour your work surface and rolling pin to prevent sticking
- Unwrap the dough and place it on the floured surface
- Roll the dough out to about ¼ to ⅓ inch thickness, working from the center outward
- Try to maintain an even thickness throughout so the cookies bake evenly
- If the dough becomes too soft or sticky while rolling, place it in the refrigerator for 10-15 minutes
- Rotate the dough occasionally and add more flour as needed to prevent sticking
7. Cut Out Your Cookies
- Use cookie cutters to cut shapes from the dough, pressing straight down without twisting
- Twisting the cutter can seal the edges and prevent the cookies from rising properly
- Place the cut cookies on the prepared baking sheets, leaving about 1 inch of space between them
- Shortbread doesn’t spread much, so you can place them fairly close together
- Gather the scraps, press them together gently, and re-roll to cut more cookies
- Try not to re-roll the dough more than twice, as it can become tough
8. Add Optional Finishing Touches
- For a professional look, use a fork to prick each cookie with a few holes
- This traditional decoration also helps prevent the cookies from puffing up too much
- You can also sprinkle the tops with a little coarse sugar for extra sweetness and crunch
- If you want to add a decorative edge, use the tines of a fork to create a pattern around the perimeter
9. Bake the Cookies
- Place the baking sheets in the preheated oven on the center rack
- Bake for 12-15 minutes, until the edges just barely start to turn golden
- The centers should still look pale and slightly underdone
- Keep a close eye on them during the last few minutes, as they can go from perfect to overbaked quickly
- Rotate the baking sheets halfway through baking if your oven has hot spots
- The cookies will firm up as they cool, so don’t worry if they seem soft when you take them out
10. Cool and Store
- Let the cookies cool on the baking sheet for 5 minutes before transferring them
- They’ll be very fragile when hot, so be patient during this step
- Use a thin spatula to carefully transfer the cookies to a wire cooling rack
- Allow them to cool completely, about 20-30 minutes
- Once fully cooled, the cookies will have that signature crisp-yet-tender shortbread texture
- Store them in an airtight container at room temperature
Another favorite: sugar cookies are equally fun to decorate and share.
Tips for Success
Keep these tips in mind to ensure your shortbread turns out perfect every time. I’ve learned these lessons through plenty of trial and error over the years.
- Use room temperature butter: Cold butter won’t cream properly, and melted butter will make the dough too greasy
- Don’t skip the chilling step: Warm dough will spread too much and lose that classic shortbread shape
- Measure flour correctly: Spoon it into your measuring cup and level it off with a knife rather than scooping directly from the bag
- Watch the baking time closely: Shortbread can go from perfectly baked to overdone in just a minute or two
- Let them cool completely: The cookies continue to firm up as they cool, achieving that perfect texture
Serving Suggestions
These versatile cookies pair beautifully with so many things. I love serving them with a hot cup of tea in the afternoon.
They’re elegant enough for fancy occasions but comforting enough for everyday snacking. The subtle sweetness means they won’t overwhelm other flavors.
- Serve alongside hot chocolate for a cozy winter treat
- Pair with fresh berries and whipped cream for a simple dessert
- Crumble them over ice cream for a buttery, crunchy topping
- Sandwich two cookies together with strawberry sauce or lemon curd
- Arrange on a platter with fruit salad for afternoon tea
- Serve with coffee or espresso for an elegant finish to dinner
- Package them in decorative tins as homemade holiday gifts
Variations to Try
Once you’ve mastered the basic recipe, have fun experimenting with different flavors. The simple base welcomes so many delicious additions.
- Chocolate dipped: Melt dark chocolate and dip half of each cooled cookie for an elegant finish
- Citrus shortbread: Add 1 tablespoon of lemon, orange, or lime zest to the dough for a bright, refreshing twist
- Lavender: Mix in 1 teaspoon of dried culinary lavender for a sophisticated floral note
- Chocolate chip: Fold in ½ cup of mini chocolate chips for a kid-friendly version
- Almond: Replace the vanilla with almond extract and add ½ cup of finely chopped almonds
- Spiced: Add ½ teaspoon of cinnamon, ¼ teaspoon of nutmeg, and a pinch of ground ginger
- Brown butter: Brown the butter before using it for a rich, nutty flavor (let it cool and resolidify before proceeding)
You might also enjoy: gingerbread cookies for another holiday favorite.
Storage and Reheating
Proper storage keeps these cookies fresh and delicious for weeks. They actually improve in flavor after a day or two as the butter flavor deepens.
- Room temperature: Store in an airtight container for up to 2 weeks
- Refrigerator: Keep in a sealed container for up to 3 weeks
- Freezer: Freeze baked cookies in a freezer-safe container for up to 3 months
- Unbaked dough: Wrap tightly and refrigerate for up to 5 days or freeze for up to 3 months
- Thawing: Let frozen cookies sit at room temperature for 30 minutes before serving
- Reheating: Not typically necessary, but you can warm them in a 300°F oven for 3-5 minutes if desired
Nutritional Facts
Per Cookie (based on 24 cookies):
- Calories: 110
- Total Fat: 8g
- Saturated Fat: 5g
- Cholesterol: 20mg
- Sodium: 25mg
- Total Carbohydrates: 10g
- Dietary Fiber: 0g
- Sugars: 3g
- Protein: 1g
Note: Nutritional information is approximate and will vary based on specific ingredients used and cookie size.
Health Benefits of Key Ingredients
While these cookies are definitely a treat, the simple ingredients do offer some nutritional value. Moderation is key when enjoying any dessert.
Butter provides fat-soluble vitamins A, D, E, and K that support various bodily functions. Using real butter instead of margarine means you’re avoiding trans fats and getting a more natural product with conjugated linoleic acid (CLA), which has been studied for potential health benefits.
- Butter: Contains vitamin A for eye health and immune function, plus butyrate which may support digestive health
- Flour: Provides energy through complex carbohydrates and small amounts of protein and B vitamins
- Minimal ingredients: The short ingredient list means no artificial flavors, colors, or unnecessary additives
Read Also: Snickerdoodle Cookie Recipe
Frequently Asked Questions
1. Why did my shortbread spread too much during baking?
Your butter was likely too warm when you started, or you didn’t chill the dough long enough. Shortbread needs properly chilled dough to maintain its shape. Make sure your butter is just softened (not melted or greasy), and always refrigerate the dough for at least an hour before rolling and cutting.
2. Can I use salted butter instead of unsalted?
You can, but I recommend reducing or omitting the added salt in the recipe. Salted butter contains varying amounts of salt depending on the brand, which can make your cookies too salty. Unsalted butter gives you better control over the final flavor.
3. How do I prevent my shortbread from becoming too hard?
Don’t overbake them—they should just barely start to turn golden at the edges while the centers remain pale. Also, be careful not to overmix the dough when adding the flour, as this develops gluten and creates a tougher texture. The cookies should be tender and crumbly, not hard.
4. Can I make the dough ahead of time?
Absolutely! The dough actually benefits from resting in the refrigerator. You can make it up to 3 days ahead and keep it wrapped tightly in plastic wrap. You can also freeze the wrapped dough for up to 3 months—just thaw it overnight in the refrigerator before rolling and baking.
5. Why are my cookies crumbly and falling apart?
If they’re falling apart before baking, your dough may be too cold or you didn’t press it together well enough after mixing. Let it warm up slightly before rolling. If they’re crumbling after baking, you may have used too much flour or overbaked them slightly—but some crumbliness is actually desirable in shortbread!
Final Thoughts
This shortbread cookie recipe has earned its place as a kitchen staple in my home, and I hope it becomes one of yours too. The buttery richness and delicate texture make these cookies special without being fussy.
They’re perfect for any occasion, from casual afternoon snacks to elegant holiday gatherings. Once you master this basic recipe, you’ll find yourself making them again and again, probably experimenting with the endless flavor variations.
I’d love to hear how your shortbread turns out! Drop a comment below with your favorite variation or any questions you have. And if these cookies disappear as quickly in your house as they do in mine, you might want to consider doubling the batch next time.
Happy baking!
Recommended:
- Oatmeal Cookie Recipe
- Oatmeal Raisin Cookie Recipe
- No Bake Cookie Recipe
- Peanut Butter Cookie Recipe
- Pizzelle Recipe
- Rugelach Recipe
- Fudge Stripe Cookies Recipe
- Eggnog Cookies Recipe
- Bourbon Balls Recipe
- Buckeyes Recipe


