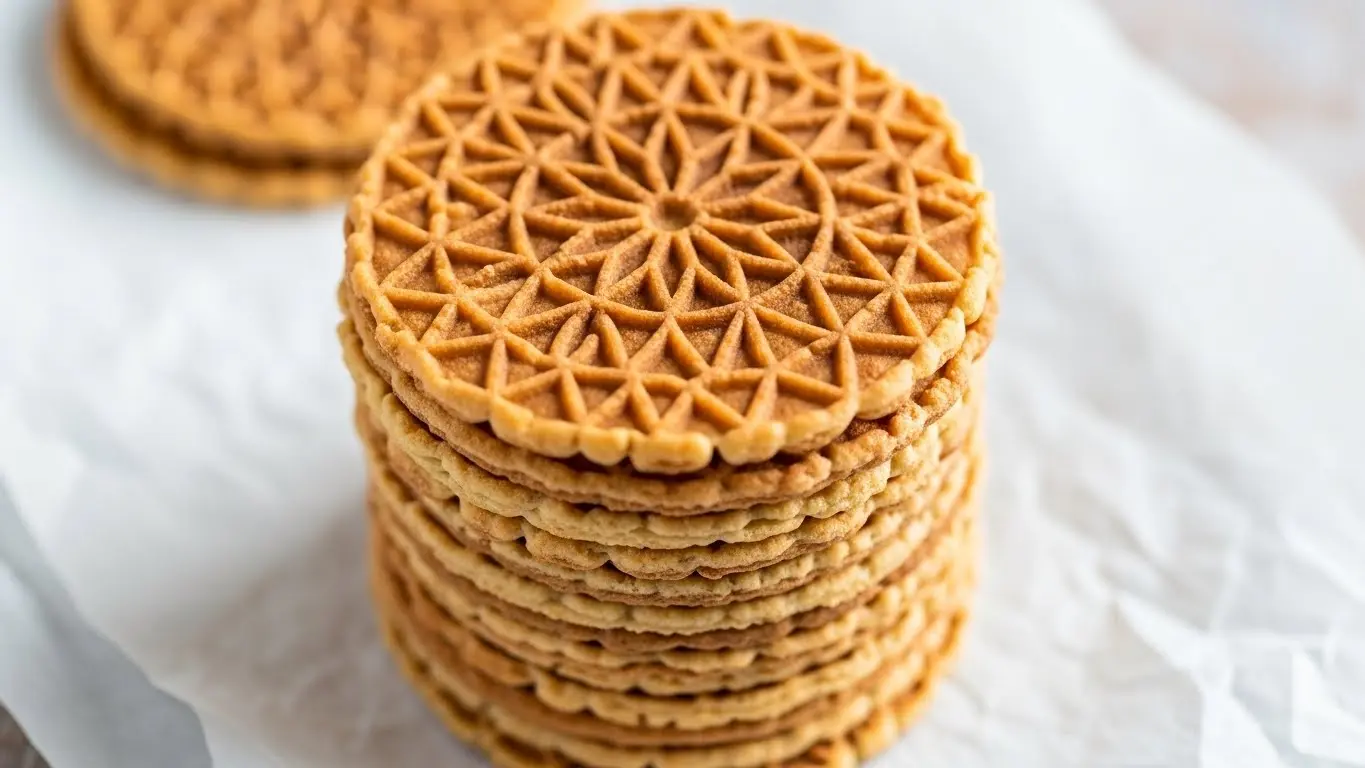
I grew up watching my Italian grandmother make pizzelles every holiday season, and the sweet scent of anise filling her kitchen is one of my most treasured memories. These crispy, delicate waffle cookies are a traditional Italian treat that’s surprisingly simple to make at home, and this pizzelle recipe will help you create the same magic in your own kitchen.
The first time I attempted them on my own, I was nervous about getting that perfect thin, crispy texture. But once I learned a few key techniques, I was hooked.
Now I make them year-round, not just for holidays. They’re wonderful with morning coffee, perfect for gifting, and always impress guests who’ve never tried authentic homemade pizzelles before.
Why You’ll Love This Pizzelle Recipe
This traditional Italian cookie is absolutely worth making from scratch. The flavor is incomparably better than store-bought versions, and the process is actually quite meditative once you get into a rhythm.
You’ll love how versatile these cookies are—enjoy them plain, dust them with powdered sugar, or roll them into cannoli shells while they’re still warm. The classic anise flavor is traditional, but you can easily customize the taste to suit your preferences.
Here’s what makes this recipe special:
- Authentic Italian flavor that tastes just like the cookies from Italian bakeries
- Crispy, delicate texture that melts in your mouth
- Simple ingredients you probably already have in your pantry
- Makes a large batch perfect for sharing or gifting
- Customizable flavoring to suit any taste preference
- Freezer-friendly so you can enjoy them for months
Another favorite: Oatmeal Cookie Recipe
Ingredients
These thin, crispy cookies require just a handful of simple ingredients. The key is using quality extracts for the best flavor—cheap imitation extracts just won’t give you that authentic taste.
- 6 large eggs, room temperature
- 1½ cups granulated sugar
- 1 cup (2 sticks) unsalted butter, melted and slightly cooled
- 2 tablespoons anise extract (or vanilla extract for a different flavor)
- 3½ cups all-purpose flour
- 4 teaspoons baking powder
- ¼ teaspoon salt
- Powdered sugar for dusting (optional)
Kitchen Equipment Needed
Having the right tools makes all the difference when making pizzelles. The most important piece of equipment is obviously the pizzelle iron itself, but a few other tools will make the process smoother.
- Pizzelle iron or pizzelle maker (electric is easiest)
- Large mixing bowl
- Electric mixer (hand or stand mixer)
- Measuring cups and spoons
- Whisk
- Rubber spatula
- Small cookie scoop or tablespoon
- Wire cooling racks
- Thin metal spatula for removing cookies
- Kitchen timer
Recommended Products for This Recipe
After making hundreds of batches over the years, I’ve found a few products that really elevate the pizzelle-making experience. These aren’t absolutely necessary, but they make the process easier and the results more consistent.
1. CucinaPro Pizzelle Baker
This is the pizzelle maker I’ve been using for over a decade, and it’s still going strong. It heats evenly, has a nonstick surface that makes removal a breeze, and the indicator light tells you exactly when it’s ready. The adjustable temperature control lets you get your cookies exactly as crispy as you like them.
2. Pure Anise Extract by McCormick
The flavor of your pizzelles is only as good as your extract. I’ve tried cheaper brands, and they just don’t compare to this one. It’s concentrated, aromatic, and gives that authentic Italian bakery taste that makes these cookies so special.
3. Nordic Ware Natural Aluminum Cooling Racks
You need plenty of cooling space when making pizzelles since they come off the iron quickly. These racks are sturdy, stackable, and large enough to hold several batches. The tight grid pattern prevents even thin cookies from falling through.
4. OXO Good Grips Cookie Scoop
Consistency is crucial for pizzelles—if your batter portions vary, some cookies will be too thick and others too thin. This scoop holds exactly the right amount of batter and releases it cleanly every time, giving you perfectly uniform cookies.
You might also enjoy: Sugar Cookies Recipe
Step-by-Step Instructions
Making pizzelles is straightforward once you understand the technique. The key is working quickly while the cookies are still warm and pliable, and developing a good rhythm as you go.
1. Prepare Your Workspace
- Clear a large counter space near your pizzelle iron
- Set up two or three cooling racks side by side
- Have a thin metal spatula ready for removing cookies
- Preheat your pizzelle iron according to manufacturer’s instructions (usually 3-5 minutes)
- If your iron doesn’t have a nonstick surface, lightly spray it with cooking spray before the first cookie only
2. Mix the Wet Ingredients
- In a large mixing bowl, beat the eggs on medium speed for about 2 minutes until they’re light and frothy
- Gradually add the sugar while continuing to beat, mixing for another 2-3 minutes until the mixture is thick and pale yellow
- Pour in the melted butter slowly while mixing on low speed, making sure it’s fully incorporated
- Add your anise extract (or vanilla) and mix until evenly distributed throughout the batter
- The mixture should be smooth and slightly thick, similar to pancake batter
3. Combine the Dry Ingredients
- In a separate medium bowl, whisk together the flour, baking powder, and salt until well combined
- This whisking step is important to ensure the baking powder is evenly distributed
- Make sure there are no lumps in your flour before adding it to the wet ingredients
4. Create the Batter
- Add the dry ingredients to the wet mixture in three parts, mixing on low speed after each addition
- Scrape down the sides of the bowl with a rubber spatula between additions to ensure everything is incorporated
- Mix just until no flour streaks remain—overmixing can make your pizzelles tough instead of crispy
- The final batter should be thick but pourable, similar to a thick pancake batter
- Let the batter rest for 5 minutes while your iron finishes heating
5. Test Your First Pizzelle
- Using a small cookie scoop or tablespoon, place about 1 tablespoon of batter in the center of each pizzelle pattern on the iron
- Close the lid gently—don’t press down too hard or the batter will spread too thin
- Cook for 30-40 seconds, depending on your iron and how crispy you like them (mine take exactly 35 seconds)
- The pizzelle should be golden brown, not pale (pale means undercooked and they’ll be chewy)
- If your first one is too thick, use slightly less batter; if it’s too thin or has holes, use slightly more
- Adjust cooking time based on this test cookie to get your preferred level of crispiness
6. Develop Your Rhythm
- Once you’ve perfected your timing, start working in a rhythm—while one batch cooks, prepare the batter portion for the next
- Use your thin spatula to quickly remove the finished pizzelle from the iron
- Work fast because the cookies become crispy and less pliable as they cool
- Place each hot pizzelle flat on your cooling rack (they’ll crisp up more as they cool)
- Immediately add the next portion of batter to the hot iron
- You’ll get faster as you go—by your third or fourth batch, you’ll find your groove
7. Shape While Warm (Optional)
- If you want to make pizzelle cannoli shells or tubes, you must work within 10-15 seconds of removing them from the iron
- Gently wrap the hot pizzelle around a wooden dowel, cannoli form, or even a clean wooden spoon handle
- Hold it in place for 15-20 seconds until it sets in that shape
- Carefully slide it off and let it finish cooling on a rack
- This takes practice, so don’t get discouraged if your first few crack—it happens to everyone
8. Cool and Store
- Let the pizzelles cool completely on wire racks—this takes about 15-20 minutes
- They’ll continue to crisp up as they cool, so don’t worry if they seem slightly soft when first removed
- Once completely cool, store them in an airtight container with parchment paper between layers
- Don’t stack them while warm or they’ll stick together and lose their crispiness
This pairs beautifully with my Hot Chocolate Recipe for a cozy afternoon treat.
Tips for Success
These tips come from years of trial and error, so take them seriously. They’ll save you from the most common pizzelle-making mistakes.
Here are my best tips:
- Room temperature eggs create a smoother batter and better texture
- Don’t overfill the iron—less batter is better than too much (you can always add more next time)
- Work quickly when removing hot pizzelles—they become brittle as they cool
- Consistent batter portions ensure evenly cooked cookies every time
- Let the iron reheat between batches if needed to maintain consistent temperature
- Clean the iron immediately after you’re done while it’s still warm (just wipe with a damp cloth)
- Store with parchment between layers to prevent sticking
- Avoid humidity when making pizzelles—they’ll absorb moisture and lose their crispiness
Read Also: No Bake Cookie Recipe
Serving Suggestions
Pizzelles are incredibly versatile cookies that can be served in many delightful ways. I love that they’re appropriate for everything from casual coffee breaks to elegant dinner parties.
Try serving them:
- Dusted with powdered sugar alongside espresso or cappuccino
- Sandwiched with Chocolate Pie filling for an indulgent dessert
- Crumbled over ice cream as a crunchy topping
- Rolled into tubes and filled with sweetened ricotta or cannoli cream
- Stacked on a platter with fresh berries and whipped cream
- Served alongside Eggnog during the holidays
- Paired with afternoon tea or Hot Fudge Sundae for dessert
- Arranged in decorative tins as homemade gifts
Variations to Try
Once you’ve mastered the basic recipe, experimenting with flavors is half the fun. I rotate through different variations depending on the season and occasion.
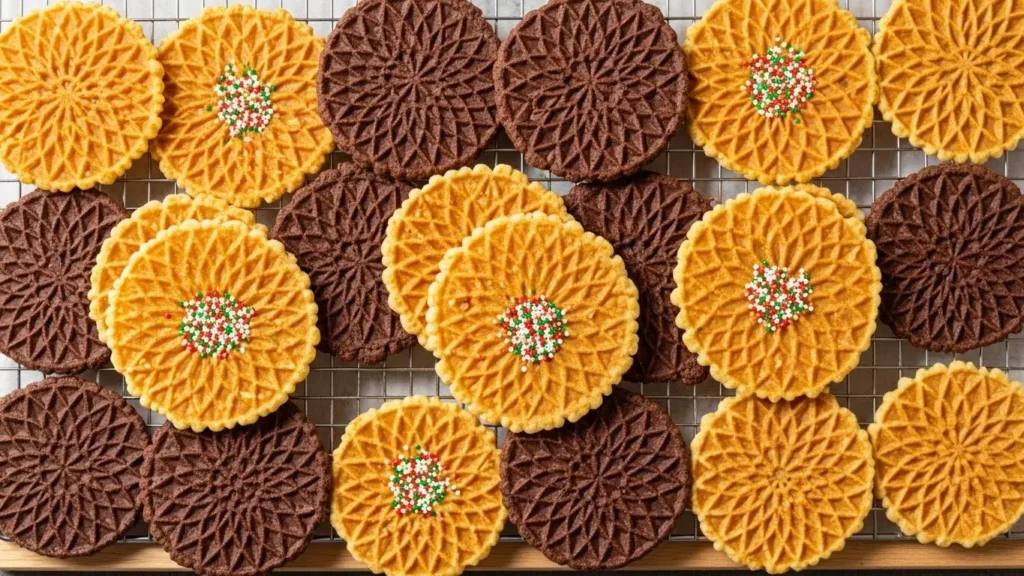
Popular flavor variations:
- Vanilla pizzelles: Replace anise extract with 2 tablespoons pure vanilla extract
- Lemon pizzelles: Use 1 tablespoon lemon extract plus 1 tablespoon lemon zest
- Chocolate pizzelles: Add ⅓ cup cocoa powder to the dry ingredients and reduce flour by ⅓ cup
- Almond pizzelles: Replace anise with 2 tablespoons almond extract
- Orange pizzelles: Use 1 tablespoon orange extract plus 2 tablespoons orange zest
- Peppermint pizzelles: Perfect for holidays—use 1½ tablespoons peppermint extract
- Cinnamon spice: Add 2 teaspoons cinnamon, 1 teaspoon nutmeg, and use vanilla extract
You might also enjoy: Snickerdoodle Cookie Recipe
Storage and Reheating
Proper storage is crucial for maintaining that signature crispy texture. Humidity is the enemy of pizzelles, so take these storage guidelines seriously.
Storage instructions:
- Room temperature: Store in an airtight container with parchment paper between layers for up to 2 weeks
- Freezer: Place cooled pizzelles in freezer bags with parchment between layers for up to 3 months
- Avoid refrigeration: The fridge creates humidity that will make them soggy
- Recrisping: If they lose crispiness, place them in a 300°F oven for 3-5 minutes
- Shaped pizzelles: Store tubes or cannoli shells upright in a container to prevent breaking
- Humidity control: Add a food-safe silica packet to storage containers in humid climates
Read Also: Gingerbread Cookie Recipe
Nutritional Facts
Here’s the approximate nutritional information per pizzelle (recipe makes about 48 cookies):
- Calories: 75
- Total Fat: 3g
- Saturated Fat: 2g
- Cholesterol: 30mg
- Sodium: 35mg
- Total Carbohydrates: 11g
- Sugars: 6g
- Protein: 1g
These values are estimates and may vary based on specific ingredients used and cookie size.
Health Benefits of Key Ingredients
While pizzelles are definitely a treat, they do contain some ingredients with nutritional benefits. Understanding what goes into your food is always valuable.
Key nutritional highlights:
- Eggs provide high-quality protein and essential vitamins like B12 and D
- Anise extract has been used traditionally for digestive support and contains antioxidants
- Butter offers fat-soluble vitamins A, E, and K when used in moderation
- Flour provides carbohydrates for energy and small amounts of protein
- Smaller portions mean you can enjoy these treats without overdoing it—one or two pizzelles satisfy a sweet craving beautifully
Frequently Asked Questions
1. Can I make pizzelles without a pizzelle iron?
Unfortunately, no. A pizzelle iron is essential for creating the traditional thin, crispy texture and characteristic pattern. Waffle irons won’t work because they’re too thick, and baking them in the oven produces an entirely different cookie texture that’s not authentic to pizzelles.
2. Why are my pizzelles sticking to the iron?
Sticking usually happens for one of three reasons: the iron isn’t hot enough, you’re using too much batter, or your iron needs cleaning. Make sure the iron is fully preheated before starting, use a light hand with the batter, and clean any residue from the iron surface between uses.
3. Can I make the batter ahead of time?
Yes, you can refrigerate the batter for up to 24 hours in an airtight container. Just let it come to room temperature before using, and give it a good stir since some separation may occur. The cookies might not be quite as crispy as those made from fresh batter, but they’ll still be delicious.
4. How do I know when the pizzelles are done?
Look for a golden brown color—pale pizzelles will be chewy instead of crispy. Most irons take 30-40 seconds, but yours might vary. The best indicator is color: they should be a nice golden tan, almost like the color of a graham cracker.
5. Why did my pizzelles turn out chewy instead of crispy?
Chewy pizzelles are usually undercooked or have absorbed moisture. Make sure you’re cooking them long enough to achieve that golden color, and store them properly in an airtight container once completely cooled. If your kitchen is very humid, they may soften over time—recrisp them in a low oven.
Read Also: Peanut Butter Cookie Recipe
Final Thoughts
Making pizzelles at home is one of those wonderful baking projects that looks impressive but is actually quite manageable once you get the hang of it. The rhythm of scooping, pressing, and removing becomes almost meditative, and the reward is a batch of crispy, delicate cookies that taste infinitely better than anything store-bought.
I hope this pizzelle recipe becomes a beloved tradition in your kitchen like it has in mine. There’s something special about serving cookies you’ve made yourself, especially ones with such a rich Italian heritage.
Give this recipe a try and let me know how your pizzelles turn out in the comments below. I’d love to hear which flavor variation becomes your favorite!
Recommended:
- Oatmeal Raisin Cookie Recipe
- Fudge Stripe Cookies Recipe
- Eggnog Cookies Recipe
- Buckeyes Recipe
- Pumpkin Roll Recipe
- Cake Pop Recipe
- Muddy Buddy Recipe
- Toffee Recipe
- Baklava Recipe
- Croissant Recipe


