If you’ve ever wanted to make authentic Italian cookies at home, this pizzelle recipe is the perfect place to start.
Pizzelle are thin, crisp waffle cookies from the Abruzzo region of Italy, and they’ve been a beloved part of Italian Christmas, Easter, and holiday traditions for centuries.
The combination of butter, eggs, sugar, and anise gives them a delicate yet distinctive flavor that is unlike anything else on a cookie tray.
What makes pizzelle so special is how they manage to be both simple and impressive at the same time.
With just a handful of pantry staples and a pizzelle iron, you can produce dozens of beautifully embossed, snowflake-patterned cookies that look bakery-worthy right out of your own kitchen.
Whether you grew up eating these at your grandmother’s table or you’re discovering them for the very first time, this recipe walks you through every detail so you can get them right on your very first batch.
Why You’ll Love This Pizzelle Recipe
This pizzelle recipe is genuinely one of the easiest cookie recipes you’ll ever make.
There’s no chilling, no rolling, and no cutting dough into shapes.
The batter comes together in about 10 minutes, and each cookie only takes 30 to 60 seconds on the iron.
Once you have the iron, the whole process is surprisingly quick, even when making large batches.
Pizzelle also have an incredible shelf life. Store them correctly and they stay crisp and delicious for weeks, making them one of the best make-ahead cookies for holiday trays or gifting.
The flavor is light and not overly sweet. The anise gives just enough of that classic licorice-like fragrance without being overpowering.
They’re also endlessly versatile. You can serve them flat as cookies, roll them into cones, or shape them into bowls for ice cream.
Here’s a quick summary of why this recipe is a keeper:
- Simple 6-ingredient batter with no complicated techniques
- No chill time required so you can go from mixing to pressing immediately
- Makes a large batch (about 36 cookies) great for parties, gifts, or cookie trays
- Stays crisp for weeks making it perfect for making ahead of the holidays
- Versatile flavor base that works with anise, vanilla, lemon, or chocolate variations
- Beautiful presentation thanks to the intricate embossed design of the pizzelle iron
- Beginner-friendly with clear steps even if you’ve never used a pizzelle press before
You might also enjoy: Almond Macaroon Cookie Recipe
Ingredients
The ingredient list for pizzelle is refreshingly short. Each one plays a specific role in achieving that signature thin, crispy texture with a buttery, fragrant flavor.
A note on anise: this is the traditional and most widely recognized pizzelle flavor. Anise extract is the most accessible option for home bakers, and it gives you a consistent, balanced result without the risk of overdoing it the way pure anise oil can.
- 3 large eggs, at room temperature
- ¾ cup (150g) granulated white sugar
- ½ cup (113g / 1 stick) unsalted butter, melted and cooled
- 2 teaspoons anise extract
- 1 teaspoon pure vanilla extract
- 1¾ cups (220g) all-purpose flour
- 2 teaspoons baking powder
- ¼ teaspoon salt
- Powdered sugar for dusting (optional)
Read Also: Sicilian Fig Cookies Recipe
Kitchen Equipment Needed
The most important piece of equipment here is the pizzelle iron. You cannot make authentic pizzelle without one since a standard waffle iron has grooves that are far too deep to produce the signature thin, crispy result.
Everything else is standard kitchen equipment that you likely already own.
- Pizzelle iron / pizzelle maker (electric, non-stick preferred)
- Large mixing bowl
- Hand mixer or stand mixer
- Whisk
- Rubber spatula or silicone spatula
- Measuring cups and spoons
- Wire cooling rack
- Small cookie scoop or tablespoon
- Non-stick cooking spray (for greasing the iron, if needed)
- Sifter or fine mesh sieve (for dusting with powdered sugar)
This pairs well with Peanut Butter Blossom Cookies when building a holiday cookie platter.
Recommended Products for This Recipe
These are products that I genuinely recommend based on quality and performance, and they make a real difference when making pizzelle.
1. CucinaPro Pizzelle Maker
A reliable, non-stick electric pizzelle iron is the single most important tool for this recipe. The CucinaPro makes two full-size cookies at a time, heats evenly, and the non-stick plates release cookies cleanly every single time. Investing in a quality iron means fewer stuck cookies, better color, and far less frustration.
2. Pure Anise Extract
The flavor of your pizzelle is almost entirely determined by the quality of your anise extract. A high-quality pure anise extract has a clean, true licorice fragrance that elevates the whole cookie. Artificial versions can taste flat or chemical, so reaching for a pure extract is well worth it.
3. OXO Good Grips Cookie Scoop
Portioning your batter consistently is key to getting pizzelle that cook evenly and fit properly in the iron. A small cookie scoop (about 1 tablespoon capacity) takes all the guesswork out of it and keeps every cookie the same size and thickness.
4. Powdered Sugar Shaker
Dusting your finished pizzelle with powdered sugar is one of the easiest ways to make them look truly stunning. A fine mesh powdered sugar shaker gives you a delicate, even coating without clumping or over-dusting.
5. Wire Cooling Rack Set
Pizzelle need to cool in a single layer with good airflow to crisp up properly. A set of wire cooling racks lets you cool large batches at once without any cookies going soft from steam buildup underneath them.
For a delicious Italian-inspired dessert to round out your spread, try this Classic Tiramisu.
Step-by-Step Instructions
Step 1: Prepare Your Workspace
- Clear a large section of counter space near your pizzelle iron where you can set up your cooling racks.
- Place two or three wire cooling racks in a single layer so they are ready to receive the hot cookies as they come off the press.
- Have your cookie scoop, spatula, and powdered sugar nearby so the process flows smoothly once you start pressing.
Step 2: Melt and Cool the Butter
- Measure out ½ cup (113g) of unsalted butter and cut it into smaller pieces to help it melt evenly.
- Melt the butter in the microwave in 30-second intervals, stirring between each, or melt it gently in a small saucepan over low heat on the stovetop.
- Set the melted butter aside to cool to room temperature for at least 10 minutes before adding it to your batter. Adding hot butter can cook the eggs, which is why this step matters.
Step 3: Beat the Eggs and Sugar
- Crack 3 large eggs into a large mixing bowl. Room temperature eggs blend more smoothly, so if your eggs are cold, let them sit out for 15 minutes before using.
- Add ¾ cup (150g) granulated white sugar to the bowl with the eggs.
- Using a hand mixer or stand mixer fitted with the paddle attachment, beat the eggs and sugar together on medium speed for about 2 minutes, until the mixture is pale, slightly thickened, and light yellow in color. This step helps build structure in the batter.
Step 4: Add the Butter and Extracts
- Reduce the mixer speed to low.
- Pour the cooled melted butter into the egg and sugar mixture in a slow, steady stream while the mixer is running.
- Add 2 teaspoons of anise extract and 1 teaspoon of pure vanilla extract.
- Mix on low speed for about 1 minute until everything is fully combined and the batter looks smooth and uniform.
Step 5: Mix the Dry Ingredients
- In a separate medium bowl, whisk together 1¾ cups (220g) all-purpose flour, 2 teaspoons baking powder, and ¼ teaspoon salt.
- Whisking the dry ingredients together first ensures the baking powder and salt are evenly distributed throughout the flour before it goes into the wet batter.
Step 6: Combine Wet and Dry Ingredients
- Add the flour mixture to the bowl with the wet ingredients.
- Mix on low speed (or fold by hand with a rubber spatula) until just combined. Do not overmix.
- The finished batter should be fairly thick, more dense than pancake batter but looser than a standard cookie dough. It will be sticky. This is completely normal and correct.
Step 7: Preheat the Pizzelle Iron
- Plug in your pizzelle iron and allow it to preheat fully according to the manufacturer’s instructions. This usually takes 3 to 5 minutes.
- If your iron’s instructions call for it, lightly spray both the top and bottom cooking plates with non-stick cooking spray before the first batch. Only do this once at the start, not between every cookie.
- If your iron has a non-stick coating, check the manual first — some manufacturers advise against spray to protect the coating.
Step 8: Portion and Press the First Cookies
- Use a small cookie scoop or a heaping tablespoon to portion out about 1 tablespoon (15ml) of batter per cookie.
- Place the batter directly in the center of each cooking plate on the iron. The batter will spread as the lid closes, so resist the urge to place it off-center.
- Close the lid firmly and press gently but firmly to ensure the batter spreads evenly across the entire plate.
Step 9: Cook Until Golden
- Cook for approximately 30 to 60 seconds, depending on your specific iron’s heat level and how golden you like your pizzelle.
- Start checking around 30 seconds. You are looking for a pale to medium golden color. The cookies will darken slightly as they cool.
- Most pizzelle irons have an indicator light or audible signal that tells you when they’re done, but use your eyes and nose as well.
Step 10: Remove and Cool
- Open the iron carefully and use a silicone spatula or chopstick to gently lift the hot pizzelle from the plates.
- Transfer them immediately to the wire cooling rack in a single layer. Do not stack them on top of each other while they are still hot, as the steam will make them soft and they will lose their crispness.
- The cookies will come out of the iron feeling soft and slightly flexible. This is normal. They crisp up completely as they cool, usually within 2 to 3 minutes.
Step 11: Continue with Remaining Batter
- Repeat the scooping, pressing, and cooling process with the remaining batter.
- You do not need to re-grease the iron between each batch if you sprayed it at the start.
- If any cookies stick, a very light spray of non-stick cooking spray on the plates should solve the problem.
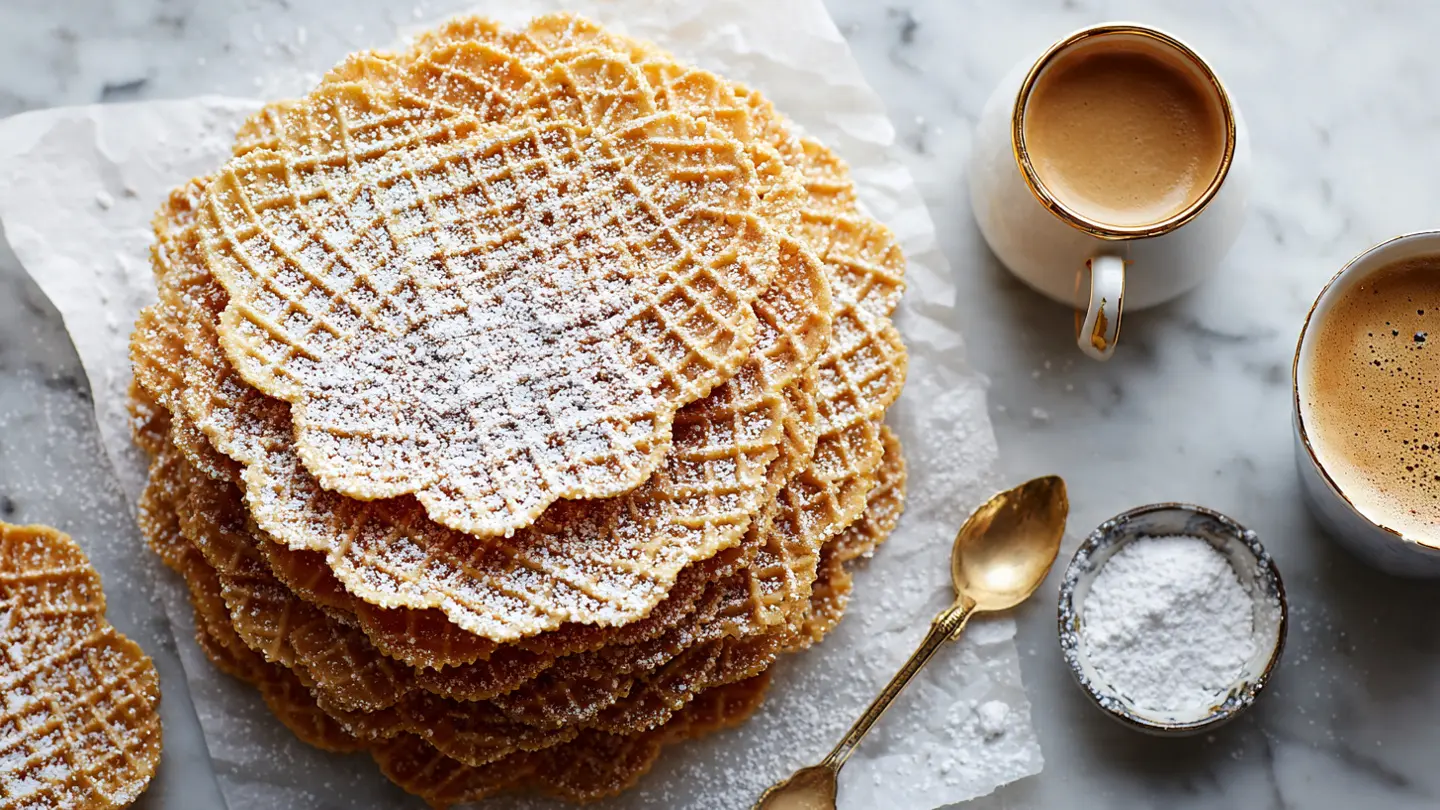
Step 12: Dust with Powdered Sugar (Optional)
- Once all cookies are fully cooled and crisped up, lay them in a single layer on your cooling rack or a sheet of parchment paper.
- Using a fine mesh sieve or powdered sugar shaker, lightly dust the tops with powdered sugar for a classic, elegant finish.
- Serve immediately or transfer to an airtight container for storage.
Read Also: Snickerdoodle Cookie Recipe
Tips for Success
Getting your pizzelle right comes down to a few key details that can make or break the texture and flavor of the final cookie.
Keep these tips in mind, especially for your first batch:
- Cool the butter fully before adding it. Hot butter can scramble the eggs in the batter, leading to a grainy, unpleasant texture. Give it at least 10 minutes to cool after melting.
- Don’t overmix the batter. Once you add the flour, mix just until combined. Overmixing develops gluten, which can make your pizzelle tough instead of delicate and crisp.
- Let the iron preheat completely. A properly preheated iron gives you even color and the right texture from the very first cookie. If the iron isn’t hot enough, the cookies will stick and cook unevenly.
- Use a consistent amount of batter. A cookie scoop is the best tool for this. Too much batter overflows and creates messy edges. Too little batter won’t cover the whole plate.
- Cool in a single layer. Stacking warm pizzelle causes steam to build up between them, resulting in soft, limp cookies. Always cool them flat on a wire rack.
- The first one or two cookies may not be perfect. Many bakers discard the first couple as the iron comes up to its ideal operating temperature. Don’t get discouraged.
- Air dry for extra crispness. Once all the cookies are pressed and cooled, allow them to air dry uncovered on the wire rack for a few more hours before storing. This extra step ensures maximum crispness.
For more inspiration on Italian-style holiday treats, take a look at this Rugelach Recipe.
Serving Suggestions

Pizzelle are wonderfully versatile and can be enjoyed in many different ways beyond simply eating them flat off a plate.
They’re a natural fit for coffee and tea service, dessert trays, and elegant gifts. Here are some of the most popular and delicious ways to serve them:
- Serve alongside a cup of Hot Chocolate for a cozy winter treat
- Dust with powdered sugar and arrange on a platter for a stunning cookie tray presentation
- Roll warm pizzelle around a wooden dowel to create cones, then fill with sweetened whipped cream or ricotta for a cannoli-style dessert
- Press warm cookies into a muffin tin while still pliable to create edible bowls perfect for ice cream or fruit
- Layer pizzelle with mascarpone cream for a no-fuss Italian dessert that looks far more impressive than the effort required
- Pair them with an espresso or cappuccino in the Italian tradition, dunking the cookie for a few seconds before eating
- Break into pieces and use as a garnish on top of panna cotta or mousse for a crispy textural contrast
- Add to a holiday gift box alongside other cookies for a heartfelt homemade present
Variations to Try
The classic anise pizzelle is the most beloved version, but the basic batter is a fantastic base for experimenting with different flavors.
Once you master the technique with the original recipe, these variations are just as easy to make:
- Vanilla Pizzelle: Simply replace the anise extract with an equal amount of pure vanilla extract and omit the anise seeds if using. This produces a milder, subtly sweet cookie that’s more universally appealing to those who aren’t fans of anise.
- Lemon Pizzelle: Replace the anise extract with 1 teaspoon of lemon extract and add 1 teaspoon of fresh lemon zest to the batter. The bright citrus flavor is a wonderful spring and summer variation.
- Orange Pizzelle: Use orange extract and fresh orange zest in place of the anise. The flavor is aromatic and pairs beautifully with a cup of tea.
- Chocolate Pizzelle: Remove the anise extract and reduce the flour by ¼ cup (30g), replacing it with ¼ cup (25g) of sifted unsweetened cocoa powder. Add an extra 2 tablespoons of sugar to compensate for the bitterness of the cocoa.
- Almond Pizzelle: Swap the anise extract for 1 teaspoon of almond extract. The nutty, marzipan-like flavor is a popular alternative in many Italian families.
- Walnut or Hazelnut Pizzelle: Fold 3 tablespoons of finely chopped toasted walnuts or hazelnuts into the finished batter for added texture and a nutty richness.
- Spiced Pizzelle: Add ½ teaspoon of cinnamon and ¼ teaspoon of ground cloves to the dry ingredients for a warmly spiced holiday cookie.
For a different type of classic holiday cookie, try these Gingerbread Cookies.
Storage and Reheating
Pizzelle store exceptionally well compared to most cookies, making them one of the best options for baking ahead of a holiday or event.
The key to keeping them crisp is avoiding moisture at every stage of storage:
- Room temperature: Store fully cooled pizzelle in an airtight container at room temperature for up to 3 weeks. Place a sheet of parchment paper or wax paper between layers to prevent sticking.
- Do not refrigerate: The fridge introduces moisture and will make your crispy pizzelle soft and limp. Room temperature storage is best.
- Freezing: Pizzelle freeze beautifully. Layer them in an airtight freezer-safe container with parchment between layers and freeze for up to 3 months.
- Thawing: Remove from the freezer and allow them to come to room temperature on a wire rack. They should return to their crisp texture within 15 to 20 minutes.
- Re-crisping: If your pizzelle have absorbed moisture and gone soft, place them in a single layer on a baking sheet and warm them in a 300°F (150°C) oven for 3 to 5 minutes. Allow them to cool completely before serving or storing again.
- Avoid airtight containers before they’re fully cool: Sealing warm or even slightly warm cookies traps steam and destroys the crispness you worked to achieve.
Read Also: Eggnog Cookies Recipe
Nutritional Facts
The following values are approximate and based on a standard batch yielding 36 pizzelle, with one serving equal to 2 cookies. Actual values will vary based on specific brands and ingredient substitutions used.
| Nutrient | Per Serving (2 cookies) |
|---|---|
| Calories | ~120 kcal |
| Total Fat | 6g |
| Saturated Fat | 3.5g |
| Cholesterol | 45mg |
| Sodium | 55mg |
| Total Carbohydrates | 14g |
| Dietary Fiber | 0g |
| Sugars | 7g |
| Protein | 2g |
Pizzelle are relatively light as far as cookies go. They contain less sugar and fat per serving than most drop cookies or bar cookies, and they are easy to enjoy in moderation thanks to their delicate, thin structure.
For another light and classic Italian dessert, try this Easy Tiramisu.
Health Benefits of Key Ingredients
While pizzelle are a treat and not a health food, a few of their key ingredients do bring some genuine nutritional value to the table.
Understanding what each ingredient contributes can help you make thoughtful choices about the recipe, particularly if you are making substitutions for dietary reasons.
- Eggs are a nutrient-dense whole food. They provide high-quality protein, vitamin D, vitamin B12, riboflavin, and choline, which supports brain health and liver function. The fat in egg yolks also helps carry fat-soluble vitamins.
- Butter in moderation provides fat-soluble vitamins A, D, E, and K2, as well as conjugated linoleic acid (CLA). Using unsalted, high-quality butter allows you to control sodium and enjoy a cleaner flavor.
- All-purpose flour contributes carbohydrates for energy, along with small amounts of B vitamins and iron. Whole wheat flour can be substituted for a modest fiber boost if desired.
- Anise is more than just a flavoring. Anise seed contains small amounts of iron, calcium, and magnesium. It has also been used in traditional medicine to support digestion and relieve bloating, and its essential oils give it mild antimicrobial properties.
Here is a quick breakdown:
- Eggs: complete protein, choline, vitamins D and B12
- Butter: fat-soluble vitamins A, D, E, and K2
- Flour: B vitamins, iron, energy-providing carbohydrates
- Anise: digestive support, trace minerals, antioxidant compounds
- Sugar: quick energy (enjoy in moderation as part of a balanced diet)
Another favorite treat worth adding to your repertoire: Bourbon Balls
Frequently Asked Questions
1. Do I need a special iron to make pizzelle?
Yes, you do need a pizzelle iron (also called a pizzelle maker or pizzelle press) to make authentic pizzelle.
A standard waffle iron will not work because the grooves are far too deep, and the result will be thick, chewy, and nothing like the thin crispy cookies you’re looking for. Electric pizzelle irons are widely available online and are not expensive, with good non-stick models available for under $30 to $40.
2. Why are my pizzelle soft instead of crispy?
The most common reasons are that the cookies were stacked while still warm, or they were stored before they had fully air-dried and crisped up.
Pizzelle need to cool in a single layer on a wire rack with good airflow. If they seem soft even after cooling, let them air-dry uncovered for another few hours, or briefly warm them in a 300°F (150°C) oven for 3 to 5 minutes and then cool completely again.
3. Can I make pizzelle without anise?
Absolutely. Anise is the traditional flavoring, but it’s easy to substitute with vanilla extract, lemon extract, orange extract, or almond extract.
Use the same quantity of extract called for in the recipe (2 teaspoons) and the batter will work identically. The texture will be the same; only the flavor changes.
4. How far in advance can I make pizzelle?
Pizzelle are one of the best make-ahead cookies because they stay crisp for up to 3 weeks at room temperature in an airtight container.
They also freeze well for up to 3 months. This makes them ideal for Christmas baking season or preparing for a large event or cookie exchange well in advance.
5. Why does my batter overflow the pizzelle iron?
You are likely using too much batter per cookie.
Stick to approximately 1 tablespoon of batter per cookie. A small cookie scoop makes this easy and consistent. Too much batter pushes out the sides of the iron as the lid closes, creating messy edges and uneven cookies. If your first batch overflows, reduce the portion size slightly for the next round.
For a buttery, elegant cookie that also ships and stores well, try these Shortbread Cookies.
Final Thoughts
Making pizzelle at home is one of those deeply satisfying kitchen experiences that never gets old.
The way the whole kitchen fills with the warm, sweet fragrance of butter and anise as each cookie comes off the iron is something genuinely special.
Once you make your first successful batch, you’ll understand why Italian families have been pressing these cookies for generations.
This pizzelle recipe is approachable enough for beginners and reliable enough to become a permanent part of your holiday baking rotation.
Give it a try and see for yourself. If you’ve already made it, leave a comment below and let me know how it went, or share it with someone who needs a little Italian baking inspiration in their life.
Recommended:
- Peanut Butter Cookie Recipe
- Oatmeal Raisin Cookie Recipe
- Best Chocolate Chip Cookies
- Date Filled Cookie Recipe
- Cherry Chip Cookie Recipe
- No Bake Cookie Recipe
- Oatmeal Cookie Recipe
- Easy Sugar Cookie Recipe
- Cranberry Shortbread Cookies
- Baklava Recipe


