
If you are looking for the perfect holiday baking project, this eggnog cookies recipe is exactly what you need. These soft, buttery cookies are packed with the warm, spiced flavors of classic eggnog — think nutmeg, cinnamon, and a hint of vanilla — and finished with a silky eggnog glaze that sets beautifully on top.
What makes these cookies so special is the way the eggnog works double duty. It adds moisture to the dough, giving you that melt-in-your-mouth, almost cakey texture that is so hard to resist. It also infuses every bite with that unmistakable holiday flavor that feels festive without being over the top.
The combination of granulated sugar and brown sugar is not an accident here. The brown sugar adds a subtle depth and chewiness, while the granulated sugar helps the cookies hold their shape. Using egg yolks (just like traditional eggnog is made) rather than whole eggs keeps the texture rich and tender.
These cookies come together quickly, with no complicated techniques required. A basic stand mixer or hand mixer is all you need. Whether you are baking a batch for a holiday cookie exchange or just want something warm and delicious to enjoy with a cup of tea, these are guaranteed to impress.
If you love classic holiday baking, you will also adore the Eggnog Cake Recipe for another festive way to use that carton of eggnog in your fridge.
Why You’ll Love This Eggnog Cookies Recipe
These cookies check every single box for a go-to holiday treat.
They use real eggnog — not just flavoring or spices — which means the flavor is authentic and rich.
The texture is soft and chewy in the center with gently crisp edges, making every bite satisfying. You get that perfect cookie texture that holds up well whether you are eating them fresh from the oven or packing them up for gifting.
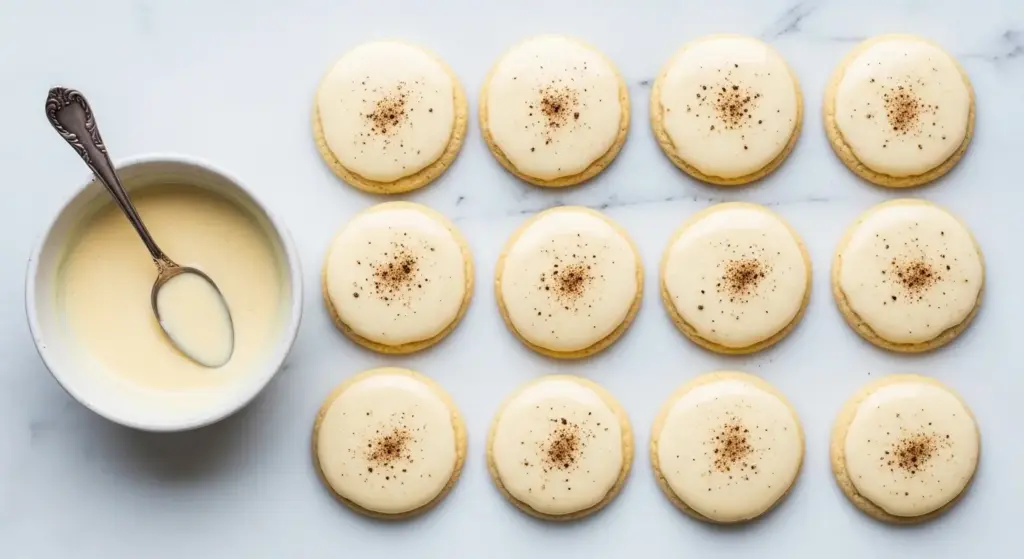
The eggnog glaze on top is optional but highly recommended. It sets firm after a couple of hours, adds an extra layer of flavor, and makes the cookies look polished and bakery-worthy.
They are beginner-friendly. No chilling is required (if you follow the method below), and the steps are simple enough for someone who does not bake often. The results are consistent and reliable every single time.
Here is a quick summary of what makes this recipe a holiday standout:
- Real eggnog flavor from both the cookie dough and the glaze
- Soft and chewy texture with lightly crisp edges
- Simple, no-fuss technique — no rolling, cutting, or chilling needed
- Beautiful finish with a glossy eggnog glaze and a sprinkle of nutmeg
- Great for gifting — they hold up well and stack easily once the glaze sets
- Made with pantry staples plus just one specialty ingredient: eggnog
- Festive and crowd-pleasing for holiday gatherings, cookie trays, and exchanges
Another favorite: Eggnog Pie Recipe
Ingredients
All of the ingredients in this recipe serve a specific purpose. Using full-fat store-bought eggnog is strongly recommended here. Homemade eggnog varies too much in thickness and richness and can cause unpredictable spreading. Stick with the classic carton for the most consistent results.
For the Cookies:
- 2 1/4 cups (280g) all-purpose flour
- 1 teaspoon baking powder
- 1/2 teaspoon ground nutmeg (plus more for garnish)
- 1/2 teaspoon ground cinnamon
- 1/4 teaspoon salt
- 3/4 cup (170g) unsalted butter, softened to room temperature
- 3/4 cup (150g) granulated sugar
- 1/4 cup (50g) packed light brown sugar
- 2 large egg yolks, room temperature
- 1/2 cup (120ml) full-fat store-bought eggnog
- 1 teaspoon pure vanilla extract
- 1/2 teaspoon rum extract (optional but highly recommended)
For the Eggnog Glaze:
- 1 cup (120g) powdered sugar, sifted
- 2–3 tablespoons full-fat eggnog (more as needed)
- Small pinch of nutmeg for sprinkling
This makes approximately 30–32 cookies.
Read Also: Sugar Cookies Recipe
Kitchen Equipment Needed
Having the right tools in place before you start makes the process smooth and stress-free. A stand mixer is ideal for creaming the butter and sugars to the proper fluffy consistency, but a quality hand mixer works just as well.
- Stand mixer or electric hand mixer
- Large mixing bowl
- Medium mixing bowl
- Whisk
- Silicone spatula or rubber scraper
- Parchment paper
- 2 large baking sheets (rimmed half-sheet pans preferred)
- Cookie scoop (medium, about 1.5 tablespoons)
- Wire cooling rack
- Measuring cups and spoons
- Small bowl for glaze
Read Also: Gingerbread Cookie Recipe
Recommended Products for This Recipe
These are products selected based on quality and performance that will genuinely make a difference when baking this recipe.
1. Nielsen-Massey Pure Rum Extract
Rum extract is the ingredient that takes these cookies from good to truly exceptional. It mimics the traditional flavor notes found in classic eggnog and gives the cookies a more authentic, layered taste. A small bottle goes a long way and lasts through many holiday baking seasons.
2. OXO Good Grips Medium Cookie Scoop
Consistent cookie size means even baking, and this is the tool that makes it happen. The OXO medium scoop portions dough cleanly and releases it smoothly, giving you professional-looking cookies with minimal effort. It is a small investment that pays off every single time you bake.
3. Nordic Ware Natural Aluminum Half Sheet Pans
Thin or dark baking sheets cause uneven browning, and these aluminum half sheets solve that problem completely. They conduct heat evenly, prevent over-browning on the bottoms, and are the go-to choice of professional bakers. If you do not already own a quality baking sheet, this is the upgrade to make.
4. Wilton Parchment Paper Sheets
Pre-cut parchment sheets are a small convenience that makes a big difference when baking multiple batches. They prevent sticking, promote even browning, and make cleanup almost effortless. These fit standard half-sheet pans perfectly.
5. Organic Ground Nutmeg
Freshly ground or high-quality pre-ground nutmeg has a noticeably more vibrant, warm flavor than the generic supermarket variety. Since nutmeg is one of the primary flavor drivers in this recipe, using a good-quality option makes a real difference in the final cookie.
This pairs beautifully with the Snickerdoodle Cookie Recipe if you are building out a holiday cookie tray.
Step-by-Step Instructions
1. Preheat the Oven and Prepare Your Baking Sheets
- Set your oven to 350°F (175°C) and allow it to fully preheat before the cookies go in. An oven that is not fully up to temperature will cause the cookies to spread too much before they set.
- Line two large baking sheets with parchment paper. The parchment prevents sticking and promotes even browning on the bottoms of the cookies.
- Set the prepared baking sheets aside while you make the dough.
2. Whisk Together the Dry Ingredients
- In a medium mixing bowl, add 2 1/4 cups (280g) all-purpose flour.
- Add 1 teaspoon baking powder. This is what gives the cookies their slight lift and soft texture. Do not skip it or substitute baking soda — they behave differently here.
- Add 1/2 teaspoon ground nutmeg, 1/2 teaspoon ground cinnamon, and 1/4 teaspoon salt.
- Whisk everything together for about 30 seconds until fully combined and no streaks remain. Set this bowl aside.
3. Cream the Butter and Sugars
- In the bowl of your stand mixer (or a large mixing bowl if using a hand mixer), add 3/4 cup (170g) softened unsalted butter. The butter must be at room temperature — not melted, not cold. It should leave a slight indent when pressed but hold its shape.
- Add 3/4 cup (150g) granulated sugar and 1/4 cup (50g) packed light brown sugar to the butter.
- Beat on medium-high speed for 2 to 3 minutes until the mixture becomes noticeably pale, light, and fluffy. This step incorporates air into the dough, which contributes to the soft, tender texture of the finished cookies. Do not rush this step.
- Scrape down the sides and bottom of the bowl with a silicone spatula to make sure everything is evenly combined.
4. Add the Wet Ingredients
- With the mixer on medium-low speed, add the 2 egg yolks one at a time. Allow each yolk to incorporate fully before adding the next. Using yolks only (rather than whole eggs) keeps the cookies richer and more tender, which is intentional.
- Add 1 teaspoon vanilla extract and 1/2 teaspoon rum extract (if using). Mix briefly to combine.
- With the mixer running on low, slowly pour in the 1/2 cup (120ml) eggnog. The dough may look slightly curdled at this stage — that is completely normal and will come together once the dry ingredients are added.
- Mix just until everything is incorporated.
5. Add the Dry Ingredients
- With the mixer on the lowest speed setting, gradually add the flour mixture in three additions, adding roughly one-third at a time.
- Mix after each addition until the flour is just incorporated before adding the next portion. This method prevents over-mixing, which can make cookies tough.
- Once all the dry ingredients are added and no streaks of flour remain, stop the mixer. The dough will be slightly soft and sticky — this is correct.
- Do not overmix at this stage. As soon as the dough comes together, stop.
6. Portion the Cookie Dough
- Using a medium cookie scoop (about 1.5 tablespoons), scoop portions of the dough onto the prepared baking sheets.
- Space the dough balls approximately 2 inches (5cm) apart. The cookies will spread during baking, and they need room.
- If you want a slightly flatter, more uniform-looking cookie, use the flat bottom of a glass or your palm to gently press each dough ball down just slightly. This is optional but gives the cookies a cleaner surface for glazing.
- Sprinkle the tops of the unbaked cookies very lightly with a pinch of ground nutmeg for extra flavor and a beautiful finish.
7. Bake the Cookies
- Place the baking sheets in the preheated 350°F (175°C) oven, one at a time if your oven does not have room for both.
- Bake for 10 to 12 minutes, or until the edges of the cookies are just set and lightly golden. The centers may look slightly underdone when you pull them out — that is perfect.
- The cookies will continue to firm up as they cool on the pan. Overbaking will make them dry.
- Remove from the oven and allow the cookies to cool on the baking sheet for 5 minutes before transferring to a wire cooling rack to cool completely.
8. Make the Eggnog Glaze
- While the cookies cool, prepare the glaze. In a small bowl, sift 1 cup (120g) powdered sugar to remove any lumps.
- Add 2 tablespoons of full-fat eggnog and stir until a smooth glaze forms. The glaze should be thick enough to coat the back of a spoon but thin enough to spread or drizzle. Add more eggnog, a teaspoon at a time, if needed to reach the right consistency.
- Taste the glaze and adjust. If you want a stronger eggnog flavor, add just a tiny drop of rum extract.
9. Glaze and Finish the Cookies
- Make sure the cookies are completely cool before glazing. If they are even slightly warm, the glaze will melt off and run.
- Use a small offset spatula, the back of a spoon, or simply dip each cookie lightly to spread the glaze over the top.
- Immediately sprinkle a tiny pinch of ground nutmeg over each glazed cookie before the glaze sets.
- Allow the glaze to set for 1 to 2 hours at room temperature before stacking or packaging the cookies.
Read Also: Cut Out Sugar Cookie Recipe
Tips for Success
A few key techniques will take your cookies from good to exceptional. Most failures with this recipe come down to butter temperature and flour measurement — get both right and the rest follows easily.
- Use room temperature butter: Cold butter will not cream properly, and melted butter will cause too much spreading. Let it sit out for 45 minutes to an hour before baking.
- Spoon and level your flour: Scooping flour directly from the bag packs it too tightly and adds too much, leading to dry, dense cookies. Instead, spoon flour into your measuring cup and level with a straight edge.
- Use full-fat store-bought eggnog: Low-fat eggnog has more water content and can cause the cookies to spread too much and bake unevenly. Full-fat varieties are thicker and more reliable.
- Do not skip the rum extract: It adds a depth of flavor that makes these taste authentically like eggnog. If you do not want any rum flavor, vanilla extract alone works, but the rum extract really elevates the final cookie.
- Cool completely before glazing: This is non-negotiable. Even slightly warm cookies will cause the glaze to slide off and pool at the edges.
- Bake one sheet at a time: If possible, bake one tray at a time in the center rack for the most even heat distribution.
- Watch the bake time carefully: These cookies go from perfect to overbaked quickly. Pull them out when the edges look just set and the center looks slightly soft — they firm up as they cool.
You might also enjoy: Peanut Butter Blossom Cookies Recipe
Serving Suggestions
These cookies are designed to be festive and shareable, and there are so many great ways to enjoy and present them.
They are a natural fit for holiday cookie trays and cookie exchanges. Once the glaze sets, they stack beautifully with a sheet of wax paper between layers. They hold their texture and flavor well for several days, making them ideal for gifting.
Pair them with a warm holiday drink for a cozy treat:
- A glass of cold or warm eggnog for double the holiday flavor
- Hot chocolate for a rich, indulgent pairing — try this Hot Chocolate Recipe for a homemade version
- Mulled apple cider for something warming and spiced
- A holiday cocktail like a Hot Toddy for an adults-only pairing
- Coffee or a spiced latte if you prefer something bold to balance the sweetness
- Alongside other holiday cookies and treats on a dessert platter for variety
For a beautiful presentation, arrange the glazed cookies on a platter lined with parchment and scatter a few cinnamon sticks or star anise around them for a festive, elegant look.
Variations to Try
Once you have mastered the base recipe, it is easy to customize these cookies in creative ways. The foundational dough is versatile and takes well to additions and flavor tweaks.
Here are some fun directions to take this recipe:
- Eggnog Thumbprint Cookies: Roll the dough into balls and press your thumb into the center before baking. Fill the indentation with eggnog buttercream or a spoonful of caramel sauce after baking.
- White Chocolate Chip Eggnog Cookies: Fold 3/4 cup white chocolate chips into the dough before portioning. The white chocolate pairs beautifully with the warm spices.
- Eggnog Sandwich Cookies: Skip the glaze and instead sandwich two cookies together with eggnog buttercream for a more indulgent treat.
- Spiked Eggnog Cookies: Replace the rum extract with 1 tablespoon of actual dark rum in the dough for an adult-only version with a deeper flavor.
- Spiced Eggnog Cookies: Amp up the spice profile by adding 1/4 teaspoon ground cloves and a pinch of cardamom to the dry ingredients. The result is a more complex, warming cookie.
- Chocolate Drizzle: Melt a few ounces of dark or white chocolate and drizzle over the top of the glazed cookies for a more dramatic presentation.
Read Also: Old Fashioned Chocolate Chip Cookie Recipe
Storage and Reheating
These cookies store well, which makes them perfect for advance holiday baking. Proper storage keeps them soft and flavorful for days.
- Unglazed cookies: Store in an airtight container at room temperature for up to 4 days. They stay soft and fresh with minimal effort.
- Glazed cookies: Once the glaze is fully set (1 to 2 hours), store in a single layer or with wax paper between layers in an airtight container at room temperature for up to 3 days.
- Refrigerator storage: Store glazed cookies in an airtight container in the refrigerator for up to 5 days. Bring to room temperature for about 20 minutes before serving.
- Freezer storage (unbaked dough): Scoop the dough into balls and freeze on a parchment-lined baking sheet until solid, then transfer to a zip-lock freezer bag. Freeze for up to 2 months. Bake from frozen, adding 2 to 3 extra minutes to the bake time.
- Freezer storage (baked cookies): Freeze unglazed baked cookies in an airtight container for up to 2 months. Thaw at room temperature and glaze before serving.
- Reheating: These cookies do not need to be reheated, but if you prefer a warm cookie, microwave for 8 to 10 seconds only. The glaze will soften temporarily but will re-set as the cookie cools.
This approach works beautifully for the Oatmeal Cookie Recipe as well if you are batch-baking for the holidays.
Nutritional Facts
The following values are estimates based on the standard recipe, per cookie (assuming 30 cookies total). Values will vary depending on the brand of eggnog used and the amount of glaze applied.
| Nutrient | Per Cookie (approx.) |
|---|---|
| Calories | 115 kcal |
| Total Fat | 5g |
| Saturated Fat | 3g |
| Cholesterol | 30mg |
| Sodium | 45mg |
| Total Carbohydrates | 17g |
| Dietary Fiber | 0g |
| Total Sugars | 10g |
| Protein | 1.5g |
| Calcium | 15mg |
| Iron | 0.5mg |
These values are estimates only. Nutritional content is not intended as medical or dietary advice.
For a lighter option, try: No Bake Cookie Recipe
Health Benefits of Key Ingredients
While these are certainly a holiday treat, some of the key ingredients bring meaningful nutritional value to the table.
This does not make cookies a health food, but understanding the ingredients helps you appreciate what you are actually putting in your body.
Here is a look at the standout ingredients and what they contribute:
- Eggs (yolks): Egg yolks are rich in fat-soluble vitamins including vitamin D, vitamin A, and vitamin K2. They also provide choline, which supports brain health and cognitive function.
- Nutmeg: Nutmeg contains antioxidants and has long been used in traditional medicine for its anti-inflammatory properties. In small culinary amounts, it adds warmth and depth without adding calories.
- Cinnamon: One of the most studied spices, cinnamon has been linked to blood sugar regulation, reduced inflammation, and antioxidant activity. It also enhances sweetness perception, which means you may use less sugar overall.
- Butter: Real butter provides fat-soluble vitamins (A, D, E, and K) and butyrate, a short-chain fatty acid that supports gut health. In moderate amounts, it is a more whole-food option than margarine or shortening.
- Eggnog (full-fat): Traditional eggnog provides calcium, vitamin D, and protein from the dairy and egg components. It is calorie-dense but contributes real nutritional value compared to artificial flavoring.
Read Also: Eggnog Recipe
Frequently Asked Questions
1. Can I use homemade eggnog in this recipe?
You can, but store-bought is strongly recommended for consistent results. Homemade eggnog varies significantly in thickness, fat content, and sweetness depending on the recipe used. This variability affects how the cookies spread and bake. If you do use homemade eggnog, choose a version that is full-fat and thick, similar in consistency to commercial eggnog.
2. Do I need to chill the dough before baking?
Not for this recipe. The dough is designed to be baked straight away at 350°F (175°C), which sets the cookies quickly and prevents excess spreading. If your kitchen is particularly warm (above 75°F / 24°C) or if the dough feels very soft after mixing, you can refrigerate it for 20 to 30 minutes. Do not refrigerate it for longer than necessary, as very cold dough may not spread properly.
3. Why do my cookies come out flat?
Flat cookies are usually caused by one of a few things: butter that was too soft or slightly melted, measuring flour too loosely (under-measuring), or an oven that is not fully preheated. Make sure your butter is firm enough to hold its shape when pressed, spoon your flour into the measuring cup rather than scooping, and verify your oven temperature with an oven thermometer.
4. Can I make these cookies without rum extract?
Absolutely. The rum extract adds flavor depth, but vanilla extract alone will still produce a delicious cookie. Simply increase the vanilla to 1.5 teaspoons if you omit the rum extract entirely. Some bakers like to add a tiny pinch of cardamom or extra nutmeg in place of the rum flavor for a different but equally festive result.
5. How do I know when the cookies are done baking?
These cookies are done when the edges look set and lightly golden and the centers still appear slightly soft and just barely underdone. They will look fragile when you pull them from the oven — that is correct. They firm up significantly as they cool. If you wait until the centers look fully baked in the oven, the edges will be overdone and the texture will be dry rather than chewy. Always err on the side of slightly underbaking.
Read Also: Best Chocolate Chip Cookies Recipe
Final Thoughts
This eggnog cookies recipe is one of those holiday baking projects that becomes an annual tradition the first time you try it.
The combination of real eggnog in both the dough and the glaze creates a cookie that is unmistakably festive, without being complicated or requiring hard-to-find ingredients.
They are soft, they are chewy, they look beautiful on a cookie tray, and they deliver that cozy holiday flavor in every single bite.
Give this recipe a try this season — and when you do, come back and leave a comment below. Sharing which variations you tried or how they turned out at your cookie exchange means a lot!
Recommended:
- Eggnog Cake Recipe
- Chewy Chocolate Chip Cookies Recipe
- Peanut Butter Cookie Recipe
- Oatmeal Raisin Cookie Recipe
- Cranberry Shortbread Cookies Recipe
- Fudge Stripe Cookies Recipe
- Monster Cookie Recipe
- Date Filled Cookie Recipe
- Almond Macaroon Cookie Recipe
- Easy Sugar Cookie Recipe


