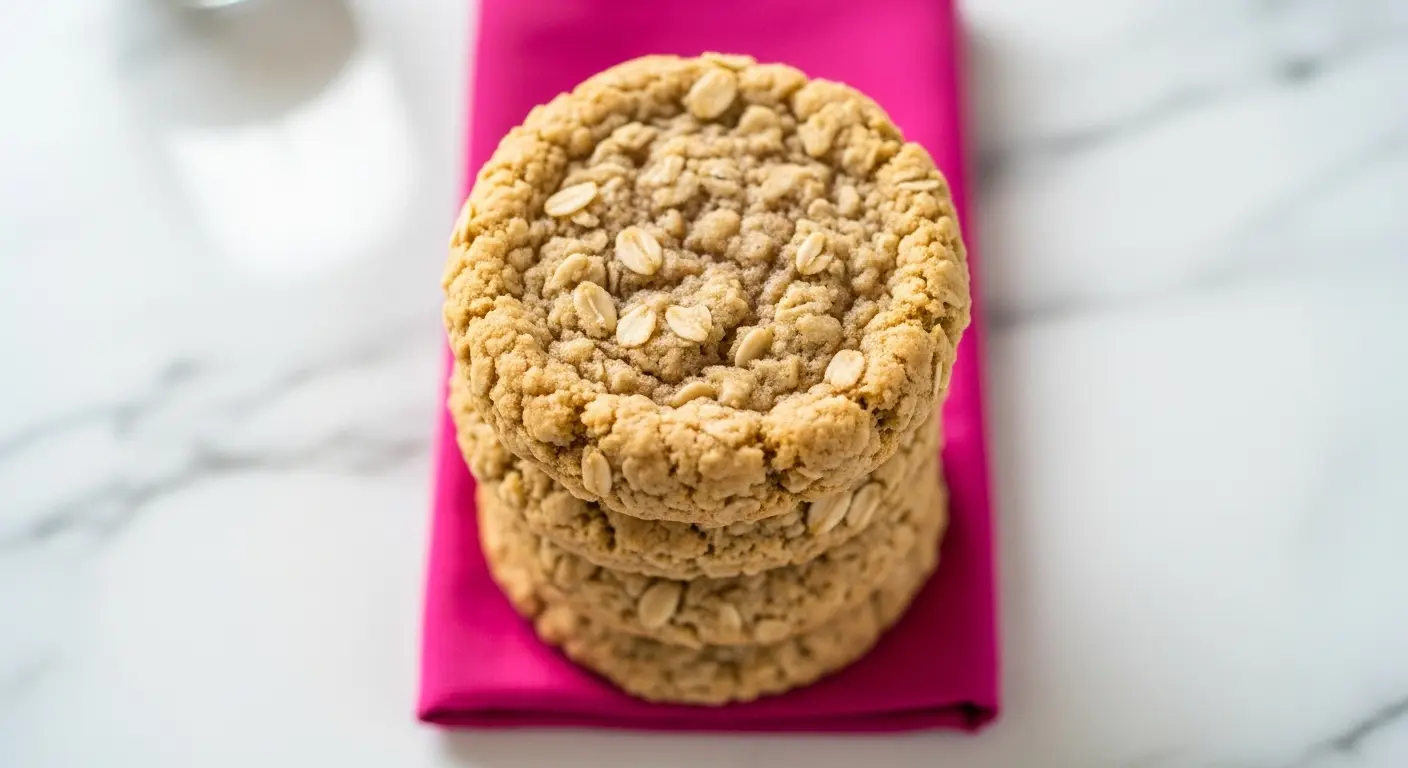
If you’re looking for the ultimate comfort treat that hits all the right notes, an oatmeal cookie recipe deserves a permanent spot in your baking rotation. These chewy-on-the-inside, crispy-on-the-outside cookies combine wholesome oats with warm spices and rich brown sugar for a flavor profile that’s absolutely irresistible.
I’ve been perfecting this recipe for years, tweaking ratios and techniques until I landed on the perfect balance of texture and taste. The beauty of this cookie is that it works for casual weeknight baking sessions or when you need to impress guests at a gathering.
Why You’ll Love This Oatmeal Cookie Recipe
These cookies deliver that satisfying combination of heartiness and indulgence that makes them stand out from typical sugar cookies. The oats add a wonderful texture and depth of flavor that keeps people coming back for more.
You’ll love how versatile these are, too—they’re perfect with a glass of cold milk, a hot cup of coffee, or tucked into lunchboxes. The recipe is straightforward enough for beginners but delivers professional-quality results that look bakery-fresh.
Here’s what makes these oatmeal cookies special:
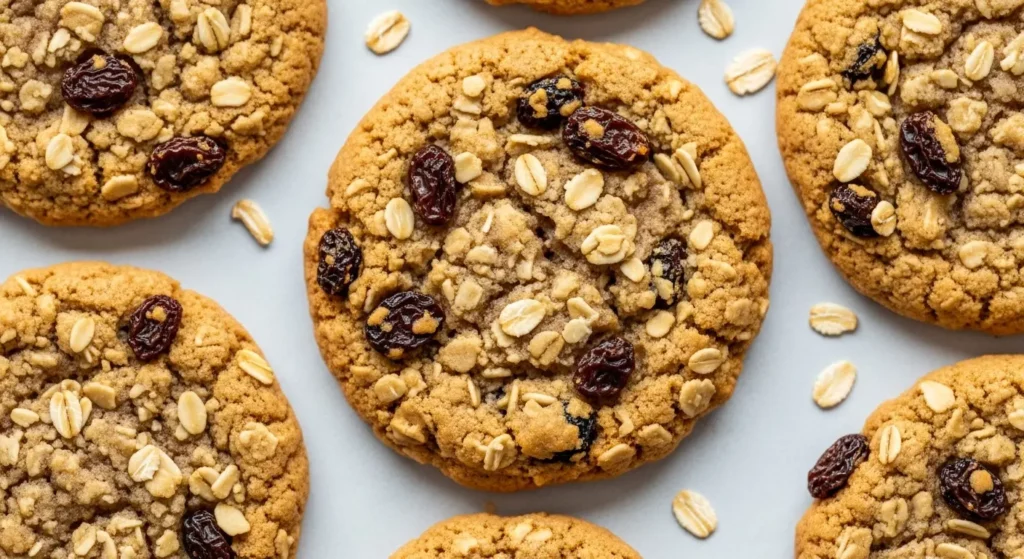
- Chewy centers with slightly crispy edges for perfect texture contrast
- Warm cinnamon and nutmeg spices that complement the oats beautifully
- Customizable mix-ins like raisins, cranberries, or chocolate chips
- Makes about 24 cookies, perfect for sharing or storing
- Keeps fresh for up to a week when stored properly
- No fancy equipment or difficult techniques required
You might also enjoy: Easy Chocolate Cake Recipe
Ingredients
These simple ingredients combine to create magic in your oven. Each component plays an important role in achieving that ideal oatmeal cookie texture and flavor.
- 1 cup (225g) unsalted butter, softened to room temperature
- 1 cup (220g) packed brown sugar
- ½ cup (100g) granulated white sugar
- 2 large eggs
- 1 teaspoon vanilla extract
- 1½ cups (190g) all-purpose flour
- 1 teaspoon baking soda
- ½ teaspoon fine sea salt
- 1 tablespoon ground cinnamon
- ½ teaspoon ground nutmeg
- 3 cups (300g) old-fashioned rolled oats
- 1 cup (150g) raisins or dried cranberries (optional but recommended)
- ½ cup (85g) chopped walnuts or pecans (optional)
Kitchen Equipment Needed
Having the right tools on hand makes the baking process smoother and more enjoyable. These items will help you create perfectly shaped, evenly baked cookies.
- Electric hand mixer or stand mixer
- Large mixing bowls (at least 2)
- Medium mixing bowl
- Measuring cups and spoons (dry and wet)
- Wooden spoon or silicone spatula for stirring
- Baking sheets or cookie sheets (at least 2)
- Parchment paper or silicone baking mats
- Cookie scoop or ice cream scoop
- Wire cooling racks
- Small whisk for combining dry ingredients
- Rubber spatula for folding ingredients
Recommended Products for This Recipe
Over the years of perfecting this recipe, I’ve tested various products and these are my genuine favorites that make a real difference in your baking experience.
I personally recommend investing in these items—they’re not just nice-to-haves, they genuinely improve your results and make the baking process more enjoyable. From premium ingredients to high-quality tools, each recommendation comes from actual use in my kitchen.
1. King Arthur Baking Company Premium All-Purpose Flour
This flour consistently delivers the best results for cookies because of its perfect balance of protein content. It creates structure without making cookies tough, and you’ll notice a difference in how they bake compared to generic brands.
2. Ghirardelli Premium Vanilla Extract
Real vanilla extract makes a noticeable difference in the flavor profile of these cookies. This brand has a rich, deep vanilla flavor that enhances the spices without overpowering them.
3. Bob’s Red Mill Organic Old-Fashioned Rolled Oats
The texture of your oats matters more than you’d think—these oats are perfectly sized to give you that signature oatmeal cookie chewiness. They don’t break down during mixing or baking, maintaining their integrity throughout the process.
4. OXO Good Grips Stainless Steel Cookie Scoop
This cookie scoop ensures every single cookie is the same size, which means they all bake at the same rate and look professionally uniform on the cooling rack. The trigger handle makes scooping hundreds of times much easier on your hand.
5. Williams Sonoma Silicone Baking Mats
These baking mats are reusable, non-toxic, and they heat evenly so you get consistently golden-brown cookies with no burning. They eliminate the need for parchment paper and last for years.
Step-by-Step Instructions
Step 1: Gather and Prepare Your Ingredients
- Line your baking sheets with parchment paper or silicone baking mats so you’re not scrambling once you start scooping dough
- Remove your butter from the refrigerator 30 minutes before starting—it should be soft enough that your finger leaves a slight indent when pressed, but not greasy or melting
- Measure all your ingredients into separate bowls so you have everything ready (this is called mise en place and prevents scrambling mid-recipe)
- Preheat your oven to 350°F (175°C) and allow it to fully reach temperature—this usually takes about 15 minutes
Step 2: Cream the Butter and Sugars Together
- Place the softened butter in your large mixing bowl
- Add both the brown sugar and granulated sugar to the butter
- Using an electric mixer on medium-high speed, beat for 3-4 minutes until the mixture is light, fluffy, and noticeably paler in color—you’re incorporating air which helps the cookies rise
- Stop occasionally to scrape down the sides of the bowl with a spatula to ensure everything is evenly mixed
Step 3: Incorporate the Eggs and Vanilla
- Crack both eggs into a small bowl and beat them lightly with a fork to combine
- Add the beaten eggs to your butter-sugar mixture one at a time, beating on medium speed for about 30 seconds after each addition
- Pour in the vanilla extract and mix on medium speed for another minute until fully incorporated
- The mixture should look smooth and slightly curdled is okay—it will come together in the next steps
Step 4: Combine the Dry Ingredients
- In a separate medium bowl, whisk together the flour, baking soda, salt, cinnamon, and nutmeg
- Whisking these dry ingredients together before adding them to the wet mixture distributes the leavening agent and spices evenly throughout the dough
- Set this bowl aside until you’re ready to use it
Step 5: Mix the Wet and Dry Ingredients
- Pour the dry ingredient mixture into your wet mixture in two additions
- Mix on low speed after each addition, stopping as soon as you don’t see any white streaks of flour—overworking at this point can make cookies tough
- Scrape down the sides and bottom of the bowl to ensure all ingredients are evenly incorporated
Step 6: Add the Oats and Optional Mix-Ins
- Add the rolled oats to your dough and stir gently with a wooden spoon or silicone spatula until they’re evenly distributed throughout
- If you’re using raisins, cranberries, or nuts, fold them in now—folding means gently stirring in an under-and-over motion rather than vigorous mixing
- The final dough should hold together when squeezed but still have some texture from the oats
Step 7: Scoop and Shape the Cookies
- Using a cookie scoop or ice cream scoop, portion the dough onto your prepared baking sheets
- Space them about 2 inches apart because these cookies spread as they bake—leaving enough room prevents them from baking into each other
- If you don’t have a scoop, you can roll the dough into balls about the size of a walnut and flatten them slightly with the bottom of a glass
- Don’t press too hard—you want them lightly flattened, not completely squished
Step 8: Bake Until Golden Brown
- Place the baking sheets in your preheated 350°F (175°C) oven
- Bake for 11-13 minutes, checking around the 11-minute mark—you’re looking for the edges to be golden brown while the centers still look slightly underdone
- The cookies will continue cooking on the hot pan after you remove them from the oven, so err on the side of slightly underbaked rather than overbaked
- If you’re baking two sheets at once, rotate them halfway through for even browning
Step 9: Cool and Enjoy
- Remove the baking sheets from the oven and let the cookies cool on the pan for about 5 minutes—this allows them to set enough to handle
- Transfer the cookies to a wire cooling rack for complete cooling, which takes another 15-20 minutes
- The cookies will continue to firm up as they cool, developing that perfect chewy-crispy texture
Tips for Success
Baking perfect oatmeal cookies requires attention to a few key details that make the difference between good and exceptional results.
The most important tip is to not overbake—pull them from the oven when the centers still look slightly underdone. This is crucial because residual heat will continue cooking them on the pan, resulting in perfectly chewy cookies rather than hard, crunchy ones.
Use room-temperature ingredients, especially the eggs and butter. When everything is at the same temperature, ingredients incorporate smoothly, creating better texture and more even rising.
Here are additional success strategies:
- Don’t skip the creaming step—beating butter and sugar together incorporates air that helps cookies rise properly
- Measure your flour correctly by spooning it into the measuring cup and leveling with a knife, not packing it down
- Use old-fashioned rolled oats, not instant oats—instant oats create a mushy texture rather than chunky and chewy
- Store dough in the refrigerator for 30 minutes before baking if your kitchen is warm—warm dough spreads too much
- Check your oven temperature with an oven thermometer since many ovens run hot or cold, which affects baking time
- Don’t double-batch the dry ingredients—mix only the amount you’re actually using to ensure accurate proportions
Serving Suggestions
These cookies are wonderful served with fresh coffee or cold milk. The warm spices pair beautifully with breakfast beverages the next morning.
They also shine as part of a dessert spread at parties or potlucks because they look homemade and taste absolutely delicious. Kids and adults both love the familiar comfort of these classic cookies.
Consider these serving ideas:
- Dunked in a warm mug of hot chocolate for an elevated treat
- Paired with vanilla ice cream for a simple dessert
- Alongside cinnamon tea for afternoon tea time
- Crumbled over vanilla yogurt for breakfast
- Given as a gift in a decorative tin or jar
This pairs beautifully with my Easy Chocolate Cake Recipe for a complete dessert menu.
Variations to Try
The basic recipe is the perfect foundation for creative experimentation with flavors and mix-ins that appeal to your preferences.
Each variation builds on the classic formula while introducing new elements that keep things interesting. You can rotate between different versions depending on your mood, ingredients on hand, or what you’re in the mood for.
Try these flavor variations:
- Cranberry Orange: Replace raisins with dried cranberries and add 1 tablespoon of orange zest to the wet mixture for bright citrus notes
- Apple Pie Spice: Add an extra ½ teaspoon of cinnamon and ¼ teaspoon of cloves, then fold in ¾ cup of diced dried apples
- Maple Pecan: Reduce vanilla extract to ½ teaspoon and add ½ teaspoon maple extract, then use pecans as your nut mix-in
- Dark Chocolate Chunk: Fold in 1 cup of chopped dark chocolate instead of raisins for a richer, more decadent cookie
- Coconut Almond: Add ¾ cup of shredded coconut and ½ cup of sliced almonds, plus ½ teaspoon almond extract to the wet mixture
- Brown Butter: Brown your butter before creaming (let it cool slightly first) for a deeper, nuttier flavor profile
Read Also: Easy Chocolate Cake Recipe
Storage and Reheating
Proper storage keeps these cookies fresh, soft, and delicious for up to a week, which makes them perfect for meal prep or having treats on hand.
Store your cooled cookies in an airtight container at room temperature on the counter. They actually improve slightly over the first day or two as flavors continue to develop and the texture becomes more uniform throughout.
Here’s how to store them optimally:
- Keep them in a container with a tight-fitting lid to prevent them from drying out
- Place a piece of bread or apple slice in the container to add moisture—replace it daily to keep cookies chewy
- Separate layers with parchment paper to prevent sticking if they’re stacked
- Store in a cool area away from direct sunlight or heat sources like the oven
- Freeze cookies in an airtight freezer bag for up to 3 months if you want to save them longer
- To refresh cookies, warm them in a 300°F (150°C) oven for 5 minutes until they’re soft again
Nutritional Facts
Each cookie contains approximately:
- Calories: 185
- Total Fat: 9g
- Saturated Fat: 5g
- Cholesterol: 28mg
- Sodium: 110mg
- Total Carbohydrates: 24g
- Dietary Fiber: 1.5g
- Sugars: 16g
- Protein: 3g
Note: Nutritional information is approximate and based on standard recipe ingredients. Values may vary depending on specific brands used and mix-in additions.
Health Benefits of Key Ingredients
Oatmeal cookies offer more nutritional value than many other cookie varieties because oats are genuinely wholesome.
These cookies contain whole grain oats, which have been associated with heart health and stable energy levels. The spices add antioxidants and anti-inflammatory properties that go beyond just flavor.
Here’s what each ingredient brings to the table:
- Old-fashioned oats provide fiber that supports digestive health and keeps you feeling fuller longer
- Cinnamon may help regulate blood sugar levels and has been studied for anti-inflammatory properties
- Nutmeg contains compounds with potential anti-inflammatory and antioxidant benefits
- Eggs provide high-quality protein and choline for brain health
- Brown sugar contains molasses, which adds minerals like potassium and calcium compared to white sugar
- Nuts (if using) add healthy fats and vitamin E for skin and immune support
- Dried fruit provides additional fiber and natural sugars along with various vitamins and minerals
Frequently Asked Questions
1. Can I use instant oats instead of rolled oats?
Instant oats will give you a very different texture—they break down too much and create a mushier, less chunky cookie. Stick with old-fashioned rolled oats for the authentic texture that makes these cookies special.
2. What if I don’t have brown sugar?
You can substitute an equal amount of granulated white sugar, though the cookies will have slightly less depth of flavor and won’t be quite as moist. For the most similar result, mix white sugar with a tablespoon of molasses.
3. How do I know when the cookies are done baking?
The edges should be golden brown while the centers still look slightly underdone and soft. They’ll continue cooking on the hot pan after removal from the oven, so this is the perfect stopping point.
4. Can I make the dough ahead of time?
Yes! Prepare the dough and refrigerate it in an airtight container for up to 3 days, or freeze it for up to 3 months. Thaw frozen dough in the refrigerator overnight before scooping and baking.
5. Why are my cookies spreading too much?
This usually means either your oven temperature is too low, your dough was too warm when baked, or you used too much sugar. Try chilling the dough before baking and verify your oven temperature with a thermometer.
Final Thoughts
Oatmeal cookies bring back memories of grandmother’s kitchens and cozy afternoons with a warm treat in hand. This recipe captures that comforting feeling while being straightforward enough for even novice bakers to execute beautifully.
The combination of wholesome oats, warm spices, and buttery richness creates something truly special that goes beyond typical cookies. I encourage you to give this recipe a try and discover why these cookies become an instant favorite in households everywhere.
Make a batch this week and see how quickly they disappear. I’d absolutely love to hear how yours turned out—drop a comment below or share a photo on social media.
Recommended:
- Creamy Tomato Soup Recipe
- Easy Chocolate Cake Recipe
- Easy Garlic Bread Recipe
- Easy Meatballs Recipe
- Homemade Bagel Recipe
- Classic Scone Recipe
- Easy Acai Bowl Recipe
- Easy Tomato Soup Recipe
- Homemade Churro Recipe
- Italian Meatballs Recipe


