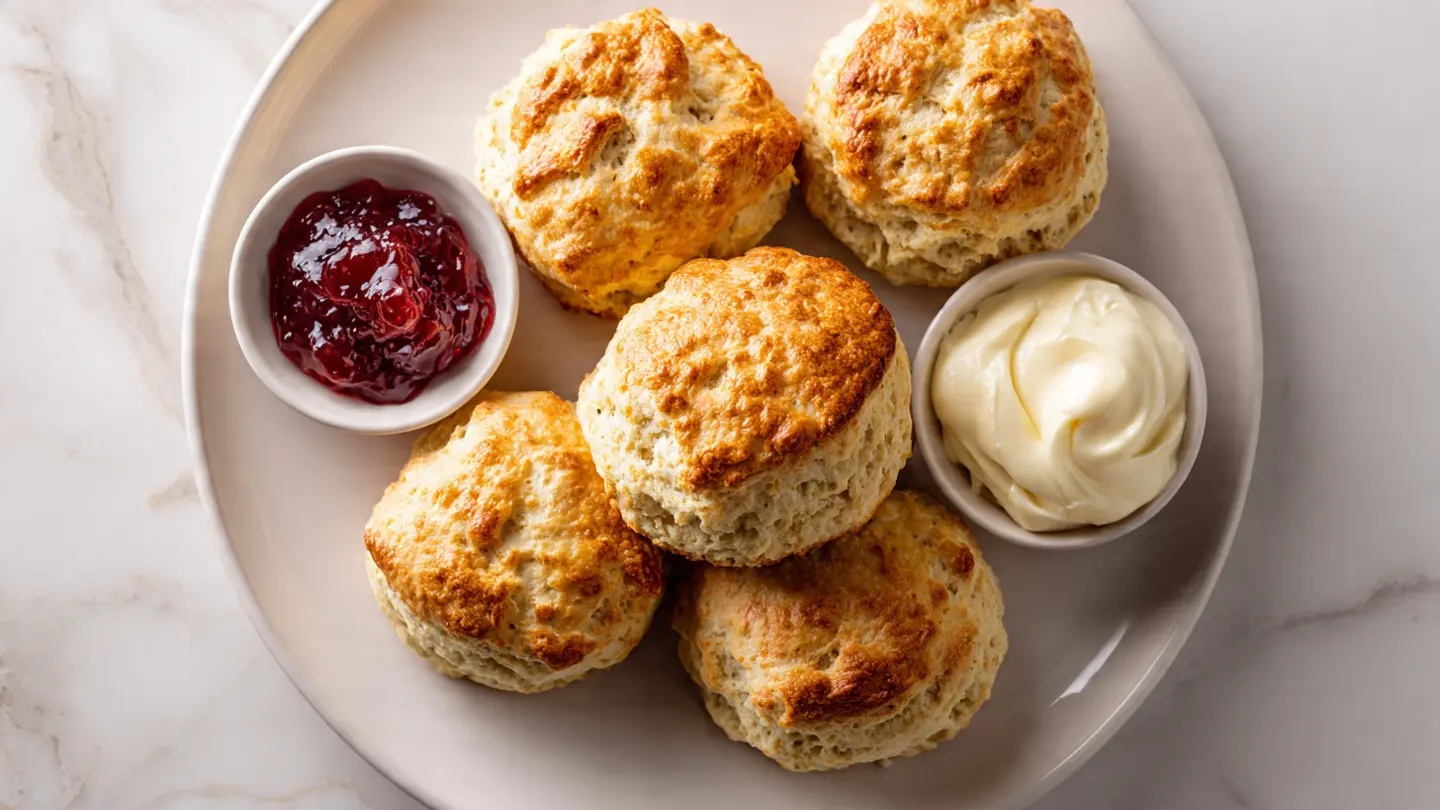
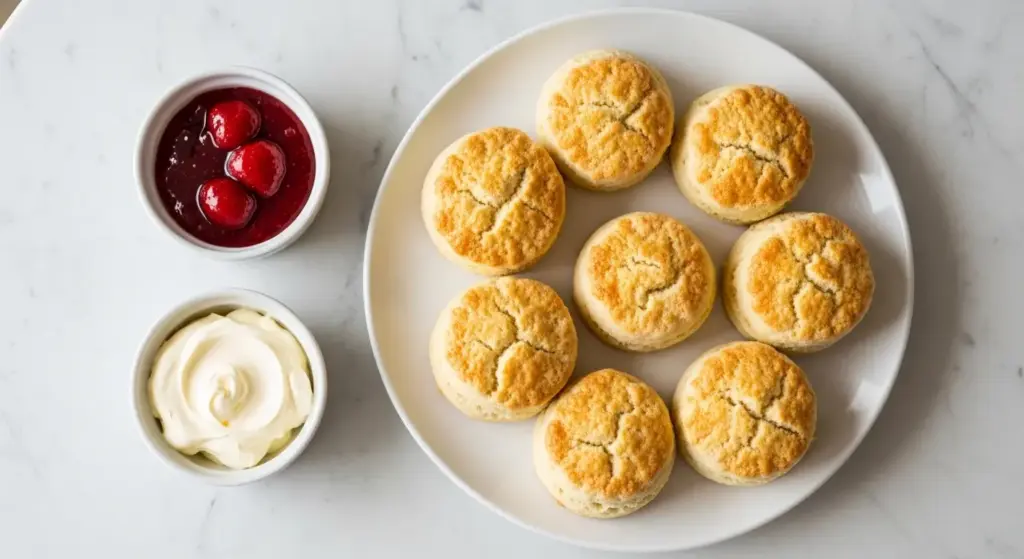
A classic scone recipe is one of those timeless baking staples that belongs in every home baker’s repertoire. These golden, tender pastries with their signature crisp edges and fluffy interiors have graced British tea tables for generations, and for good reason.
The beauty of a well-made scone lies in its simplicity. With just a handful of basic ingredients and minimal hands-on time, you can create something truly special. The key is understanding that less is more when it comes to working the dough.
Traditional scones strike the perfect balance between slightly sweet and subtly buttery. They’re not overly rich or heavy like some American versions. Instead, they provide the ideal canvas for your favorite toppings.
These scones bake up beautifully in under 20 minutes. The outside develops a light golden crust while the inside stays soft and tender. Each bite reveals delicate layers that practically melt in your mouth.
The smell of freshly baked scones filling your kitchen is nothing short of magical. It’s warm, comforting, and inviting. Once you master this recipe, you’ll find yourself making scones for weekend breakfasts, afternoon tea, or special occasions throughout the year.
Why You’ll Love This Classic Scone Recipe
This recipe delivers authentic British-style scones that rival anything you’d find in the finest bakery. The technique ensures consistent results every single time, even for beginners.
- Simple ingredients you already have: No specialty items or hard-to-find components required
- Quick preparation: From mixing bowl to oven in less than 15 minutes of active work
- Perfectly balanced flavor: Just sweet enough without being cake-like, with rich buttery notes
- Tender, flaky texture: The cold butter technique creates beautiful layers that melt in your mouth
- Versatile base recipe: Easy to customize with fruits, nuts, or keep plain for traditional service
- Make-ahead friendly: Shape and freeze the unbaked scones for fresh-baked treats anytime
For another delightful baked treat perfect for breakfast or brunch, try these Air Fryer Egg Bites.
Ingredients
This recipe relies on straightforward pantry staples that work together to create the perfect texture. Each ingredient plays a crucial role in achieving those tender, flaky layers.
- 2 cups (250g) all-purpose flour, plus extra for dusting: Provides structure without making scones tough
- 1/3 cup (65g) granulated sugar: Adds light sweetness and helps with browning
- 1 tablespoon baking powder: Creates lift and helps scones rise tall
- 1/2 teaspoon salt: Balances sweetness and enhances all other flavors
- 1/2 cup (115g) cold unsalted butter, cut into small cubes: Creates flaky layers as it melts during baking
- 1 large egg: Binds ingredients together and adds richness
- 1/2 cup (120ml) cold heavy cream or whole milk: Brings dough together and adds tenderness
- 1 teaspoon vanilla extract (optional): Adds subtle depth of flavor
For the egg wash:
- 1 egg beaten with 1 tablespoon milk or cream: Creates golden, glossy tops
Kitchen Equipment Needed
Having the right tools makes the scone-making process smoother and helps achieve better results. Most of these items are standard kitchen essentials.
- Large mixing bowl: For combining dry ingredients
- Pastry cutter or fork: To cut butter into flour mixture
- Measuring cups and spoons: For accurate measurements
- Baking sheet: A rimmed half-sheet pan works perfectly
- Parchment paper or silicone baking mat: Prevents sticking and ensures even baking
- Rolling pin: For gently shaping the dough
- Round cookie cutter or biscuit cutter (2-3 inches): For cutting perfect circles
- Pastry brush: To apply egg wash evenly
- Wire cooling rack: Allows air circulation for proper cooling
Recommended Products for This Recipe
These carefully selected products can elevate your scone-baking experience and ensure consistently excellent results every time you bake.
1. King Arthur Baking Company All-Purpose Flour
This premium flour has the ideal protein content for tender yet structured scones. The consistent quality means your scones will turn out perfectly fluffy with crisp edges every single time. Many professional bakers rely on this brand for its reliability.
2. Williams Sonoma Goldtouch Nonstick Baking Sheet
This professional-quality baking sheet distributes heat evenly, preventing burnt bottoms while ensuring golden tops. The nonstick surface means easy cleanup, and the pan’s heavyweight construction prevents warping. It’s an investment that will serve you for countless batches.
3. Ateco Plain Edge Round Cutters
This set provides multiple sizes for different occasions, and the sharp edges cut cleanly through dough without sealing the edges. Clean cuts are essential for maximum rise. Professional pastry chefs prefer these stainless steel cutters for their durability and precision.
4. European-Style Butter (Plugra or Kerry Gold)
Higher butterfat content creates richer flavor and better flaky texture in your scones. The quality difference is noticeable in the final product. While slightly more expensive, the superior taste and texture make it worthwhile for special batches.
You might also enjoy: Classic French Toast Recipe
Step-by-Step Instructions
Follow these detailed steps to create perfect scones every time. The technique is straightforward, but attention to detail makes all the difference.
1. Prepare Your Workspace and Ingredients
- Preheat your oven to 400°F (200°C).
- Line a baking sheet with parchment paper or a silicone baking mat.
- Cut the cold butter into small cubes, about 1/2-inch pieces, and return to the refrigerator until needed.
- Measure out all ingredients before you begin.
- Make sure your cream or milk is cold from the refrigerator.
2. Mix the Dry Ingredients
- Add the all-purpose flour, granulated sugar, baking powder, and salt to a large mixing bowl.
- Whisk these dry ingredients together thoroughly for about 30 seconds.
- This ensures the leavening agent is evenly distributed throughout the flour.
- Proper mixing prevents pockets of baking powder that can create uneven rising.
3. Cut in the Cold Butter
- Remove the cubed butter from the refrigerator and add it to the flour mixture.
- Using a pastry cutter, two knives, or your fingertips, work the butter into the flour.
- Continue until the mixture resembles coarse breadcrumbs with some pea-sized pieces of butter remaining.
- This process should take 3-4 minutes, working quickly so the butter stays cold.
- Those larger butter pieces create steam pockets during baking, resulting in flaky layers.
- Avoid overworking, as warm butter will make the scones dense instead of flaky.
4. Prepare the Wet Ingredients
- In a small bowl or measuring cup, whisk together the egg, cold cream (or milk), and vanilla extract if using.
- Beat until well combined and slightly frothy.
- This ensures even distribution of the egg throughout the dough.
5. Combine Wet and Dry Ingredients
- Create a well in the center of your flour-butter mixture.
- Pour the wet ingredients into the well all at once.
- Using a fork or wooden spoon, gently stir the mixture together.
- Mix just until the dough begins to come together and no dry flour remains visible.
- The dough will look shaggy and slightly rough, which is exactly what you want.
- Stop mixing as soon as everything is moistened to avoid developing gluten, which makes scones tough.
6. Shape the Dough
- Turn the shaggy dough out onto a lightly floured work surface.
- Gently knead it 3-4 times, just until it holds together in a cohesive mass.
- Pat the dough into a circle or rectangle about 3/4 to 1 inch thick.
- The exact shape doesn’t matter, but consistent thickness ensures even baking.
- Avoid overworking the dough at this stage to maintain tender texture.
7. Cut the Scones
- Using a floured 2 to 3-inch round cutter, press straight down through the dough without twisting.
- Twisting the cutter seals the edges and prevents proper rising.
- Press the cutter all the way through in one decisive motion.
- Lift the cutter straight up and gently transfer the cut scone to your prepared baking sheet.
- Place scones about 2 inches apart to allow for expansion during baking.
- Gather scraps gently, pat together, and cut additional scones.
- The first cutting yields the tallest scones; re-rolled scraps may be slightly less tall but still delicious.
8. Apply the Egg Wash
- Whisk together 1 egg and 1 tablespoon of milk or cream in a small bowl.
- Using a pastry brush, gently brush the top of each scone with the egg wash.
- Avoid letting excess drip down the sides, as this can prevent even rising.
- The egg wash creates that beautiful golden color and slight shine.
9. Bake the Scones
- Place the baking sheet on the middle rack of your preheated oven.
- Bake for 15-18 minutes until the scones are golden brown on top and lightly browned on the bottom.
- They should feel firm to a gentle touch but not hard.
- The exact timing depends on your oven and the size of your scones.
- Smaller scones may need only 12-14 minutes, while larger ones might need up to 20 minutes.
10. Cool and Serve
- Remove the scones from the oven when they’re golden and fragrant.
- Transfer them immediately to a wire cooling rack.
- Let them cool for at least 5-10 minutes before serving.
- Scones are best enjoyed slightly warm or at room temperature.
- Serve with jam, clotted cream, butter, or your favorite toppings.
Read Also: Easy French Toast Recipe
Tips for Success
These expert tips help you avoid common pitfalls and ensure your scones turn out perfectly every single time.
- Keep everything cold: Cold butter, cold cream, and cold eggs help create the flakiest texture. Some bakers even freeze their flour for 15 minutes before using it. The colder your ingredients, the better your results.
- Don’t overmix: Mix just until ingredients are combined. Overworking develops gluten, making scones tough and dense instead of tender and crumbly. The dough should look slightly rough and shaggy.
- Use a light touch: Handle the dough gently and minimally. Every extra touch warms the butter and develops more gluten. Think of yourself as coaxing the dough together rather than kneading it.
- Cut cleanly: Press your cutter straight down without twisting to allow maximum rise. Dip the cutter in flour between cuts to prevent sticking. A sharp, clean cut ensures tall scones.
- Don’t skip the egg wash: It creates that beautiful golden color and adds professional polish to your finished scones. It also helps create a slightly crisp exterior that contrasts wonderfully with the tender interior.
- Watch the oven closely: Scones can go from perfectly golden to overbaked quickly. Start checking at 12 minutes if you’re making smaller scones. The bottoms should be lightly golden, not dark brown.
- Freeze for later: Unbaked scones freeze beautifully. Place cut scones on a baking sheet and freeze until solid, then transfer to a freezer bag. Bake directly from frozen, adding 2-3 minutes to the baking time.
This pairs beautifully with Belgian Waffle Recipe for a complete breakfast spread.
Serving Suggestions
Classic scones shine when paired with complementary flavors and textures. Here are the best ways to enjoy them.
- Traditional British style: Split warm scones horizontally and top with strawberry jam and clotted cream. The cream-first versus jam-first debate rages on, but both ways are delicious.
- Simple butter: Sometimes the best approach is a generous smear of high-quality butter on a warm scone. The butter melts into all those flaky layers for pure comfort.
- Honey or preserves: Drizzle with honey or serve with your favorite fruit preserves. Raspberry, apricot, and orange marmalade all pair wonderfully with these tender scones.
- Lemon curd: The bright, tangy flavor of lemon curd contrasts beautifully with the buttery richness. This is a particularly refreshing combination for spring and summer.
- Whipped cream and berries: Top with softly whipped cream and fresh berries for a simple yet elegant dessert presentation. This turns scones into something special enough for company.
- Afternoon tea pairing: Serve alongside Classic Deviled Eggs, finger sandwiches, and hot tea for an authentic afternoon tea experience.
- Breakfast accompaniment: Pair with scrambled eggs, bacon, and fresh fruit for a satisfying weekend brunch. The scones add a touch of elegance to your breakfast table.
Variations to Try
Once you’ve mastered the basic recipe, these variations let you customize your scones for different occasions and flavor preferences.
- Fruit scones: Fold in 3/4 cup of dried fruit such as currants, raisins, cranberries, or chopped dried apricots after cutting in the butter. Fresh or frozen blueberries also work beautifully, though frozen berries hold their shape better during mixing.
- Citrus zest: Add 1 tablespoon of finely grated lemon, orange, or lime zest to the dry ingredients for bright, refreshing flavor. The oils in the zest infuse the entire scone with subtle citrus notes.
- Chocolate chip: Stir in 3/4 cup of chocolate chips or chunks for a sweeter, dessert-like scone. Dark, milk, or white chocolate all work well. This variation is especially popular with children.
- Cheese and herb: Reduce sugar to 1 tablespoon and add 1/2 cup shredded sharp cheddar cheese plus 2 tablespoons chopped fresh herbs like chives, thyme, or rosemary for savory scones. These are perfect alongside soups and salads.
- Cinnamon sugar: Mix 2 tablespoons sugar with 1 teaspoon cinnamon and sprinkle over scones before baking instead of using egg wash. This creates a sweet, sparkly top with warm spice notes.
- Maple glazed: Whisk together 1 cup powdered sugar with 2-3 tablespoons maple syrup until smooth, then drizzle over cooled scones. The glaze adds sweetness and makes them feel more like a treat.
- Whole grain: Replace up to half the all-purpose flour with whole wheat flour for added nutrition and a slightly nuttier flavor. You may need to add an extra tablespoon or two of cream to maintain proper dough consistency.
For another breakfast favorite, try this Easy Waffle Recipe.
Storage and Reheating
Proper storage keeps your scones tasting fresh and maintains their wonderful texture for several days.
- Room temperature: Store completely cooled scones in an airtight container at room temperature for up to 2 days. They’ll stay freshest if you wait to split them until serving time. Line the container with paper towels to absorb any excess moisture.
- Refrigeration: For longer storage, refrigerate scones in an airtight container for up to 5 days. Bring to room temperature before serving or rewarm gently. The cool temperature prevents mold growth but can dry them out slightly.
- Freezing baked scones: Wrap cooled scones individually in plastic wrap, then place in a freezer bag. Freeze for up to 3 months. Thaw at room temperature for about an hour, then warm in a 300°F (150°C) oven for 5-7 minutes if desired.
- Freezing unbaked scones: Place cut, unbaked scones on a baking sheet and freeze until solid, about 2 hours. Transfer to a freezer bag and freeze for up to 3 months. Bake directly from frozen, adding 2-3 extra minutes to the baking time. This method yields the freshest-tasting results.
- Reheating: Warm individual scones in a 300°F (150°C) oven for 5-8 minutes until heated through. Avoid the microwave if possible, as it can make scones tough and chewy. If you must use the microwave, heat for just 10-15 seconds.
Read Also: Buttermilk Pancake Recipe
Nutritional Facts
Per scone (based on 8 scones, without toppings):
- Calories: 285
- Total Fat: 15g
- Saturated Fat: 9g
- Trans Fat: 0g
- Cholesterol: 75mg
- Sodium: 195mg
- Total Carbohydrates: 33g
- Dietary Fiber: 1g
- Sugars: 9g
- Protein: 5g
- Vitamin A: 12% DV
- Calcium: 8% DV
- Iron: 10% DV
Nutritional information is approximate and will vary based on specific ingredients used and serving size.
Health Benefits of Key Ingredients
While scones are an indulgent treat, several ingredients offer nutritional value beyond pure pleasure.
- Butter: Provides fat-soluble vitamins A, D, E, and K, which support various bodily functions including vision, bone health, and immune function. The conjugated linoleic acid (CLA) in butter from grass-fed cows may offer additional health benefits. Butter also contains butyrate, a short-chain fatty acid that supports gut health.
- Eggs: Packed with high-quality protein containing all nine essential amino acids. Eggs provide choline, important for brain health and development, plus lutein and zeaxanthin for eye health. One egg supplies about 6 grams of protein and various B vitamins.
- Flour: Enriched all-purpose flour contains iron, which helps transport oxygen throughout your body, and B vitamins that support energy metabolism. While refined, it provides easily digestible carbohydrates for quick energy.
- Milk or cream: Excellent source of calcium and vitamin D for strong bones and teeth. Also provides protein, potassium, and vitamin B12. The fat in cream helps your body absorb fat-soluble vitamins from other ingredients.
This pairs wonderfully with Classic Hummus Recipe for a delightful afternoon spread.
Frequently Asked Questions
1. Why didn’t my scones rise properly?
The most common culprits are old baking powder that’s lost its potency or overworking the dough. Check your baking powder’s expiration date and test it by mixing a teaspoon with hot water; it should bubble vigorously. Also ensure you’re cutting the scones with a straight downward motion without twisting, as twisting seals the edges and prevents rising.
2. Can I make scones without a pastry cutter?
Absolutely! You can use two knives in a crisscross cutting motion, a fork to mash the butter into the flour, or even your fingertips. If using your fingers, work quickly to keep the butter cold and aim for a texture like coarse breadcrumbs.
3. Why are my scones dry and crumbly?
Dry scones usually result from too much flour or overbaking. Make sure you’re measuring flour correctly by spooning it into the measuring cup and leveling off, not packing it down. Start checking for doneness at the minimum baking time and remove scones when they’re just golden, not deeply browned.
4. Can I substitute ingredients to make healthier scones?
Yes, but expect some texture and flavor changes. You can replace up to half the all-purpose flour with whole wheat flour, use milk instead of cream, or reduce sugar slightly. However, reducing the butter too much will significantly impact the signature flaky texture that makes scones special.
5. How do I know when my scones are done baking?
Perfectly baked scones are golden brown on top and lightly browned on the bottom, with slightly crispy edges. They should feel firm to a gentle touch but not hard. If you insert a toothpick into the center, it should come out clean or with just a few moist crumbs.
For more breakfast inspiration, explore this French Toast Casserole Recipe.
Final Thoughts
Mastering a classic scone recipe opens up a world of baking possibilities and adds a touch of elegance to any meal. These tender, flaky pastries prove that the simplest recipes often yield the most satisfying results.
The beauty of this recipe lies in its versatility and foolproof technique. Once you understand the basic method, you can customize flavors endlessly while maintaining that perfect texture. Whether you enjoy them plain with butter or dressed up with fruit and cream, homemade scones are always a treat worth making.
I hope this recipe becomes a regular in your baking rotation. Try making a batch this weekend and share your results in the comments below!
Recommended:
- Classic Bruschetta Recipe
- Breakfast Casserole Recipe
- Easy Granola Recipe
- Homemade Granola Recipe
- Old Fashioned Pancake Recipe
- German Pancake Recipe
- Kodiak Pancake Recipe
- Betty Crocker Pancake Recipe
- Strawberry Bruschetta Recipe
- Chicken Bruschetta Recipe


