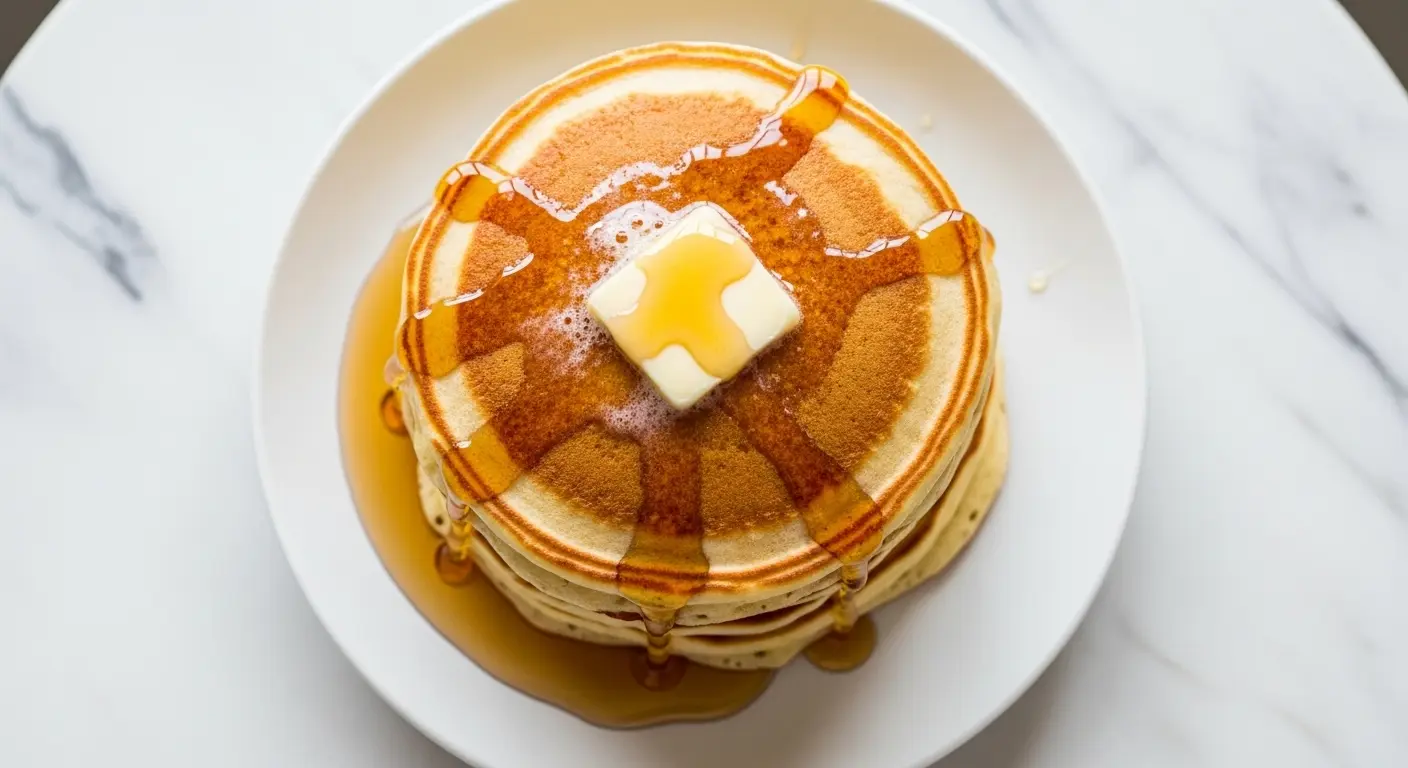
Nothing beats waking up to the smell of fresh pancakes on the griddle. This Betty Crocker pancake recipe has been a breakfast staple in American kitchens since 1950, and for good reason.
These classic pancakes are fluffy, golden, and absolutely delicious. The recipe comes straight from the pages of the iconic Betty Crocker cookbook, a trusted source that has guided home cooks for generations.
What makes this recipe so special is its simplicity. With just seven basic ingredients that you likely already have in your pantry, you can whip up a batch of perfect pancakes in about 15 minutes. The batter comes together quickly, and the pancakes cook up beautifully on the griddle with those signature bubbles that tell you it’s time to flip.
I’ve made these pancakes countless times, and they never disappoint. The texture is always light and fluffy, with a tender crumb that holds up beautifully to syrup, butter, and your favorite toppings. The slight sweetness from the sugar balances perfectly with savory breakfast sides like bacon or sausage.
This recipe is incredibly forgiving, making it perfect for both beginners and experienced cooks. The key is not overmixing the batter, which helps maintain that desirable fluffy texture. A few lumps in the batter are completely fine and actually preferred over a smooth, overworked batter that can lead to tough pancakes.
One of the best things about this recipe is how versatile it is. While the classic version is fantastic on its own, you can easily customize it with add-ins like blueberries, chocolate chips, or chopped nuts. I’ve also made variations with whole wheat flour and buttermilk that turned out wonderfully.
Why You’ll Love This Betty Crocker Pancake Recipe
This recipe has earned its place as a breakfast classic for several important reasons. First, it delivers consistently fluffy, tender pancakes every single time you make it.
The ingredient list is straightforward and budget-friendly. You won’t need to make a special trip to the store or hunt down exotic ingredients. Everything you need is probably sitting in your kitchen right now.
Here’s what makes this recipe truly special:
- Quick preparation: From start to finish, these pancakes take just 15 minutes to make, making them perfect for busy mornings
- Foolproof technique: The simple method works beautifully even for beginners, with clear indicators like bubbles forming to tell you when to flip
- Perfectly balanced flavor: The slight sweetness complements rather than overpowers, allowing toppings to shine
- Light and fluffy texture: The proper ratio of baking powder to flour creates pancakes that rise beautifully and stay tender
- Highly customizable: The base recipe adapts easily to different flavors, dietary preferences, and add-ins
- Makes perfect portions: The recipe yields about 9 four-inch pancakes, ideal for a family breakfast
- Time-tested reliability: This recipe has appeared in every Betty Crocker cookbook since 1950 because it simply works
Another favorite for weekend mornings is this Easy French Toast Recipe.
Ingredients
Getting the measurements right is crucial for perfect pancakes, so I’ve included both imperial and metric measurements for each ingredient. These simple pantry staples come together to create something truly delicious.
- 1 large egg
- 1 cup (240 ml) all-purpose flour
- 3/4 cup (180 ml) whole milk
- 1 tablespoon (15 ml) vegetable oil or melted butter
- 1 tablespoon (12 g) granulated sugar
- 3 teaspoons (12 g) baking powder
- 1/4 teaspoon (1.5 g) salt
The quality of your ingredients matters. Using fresh baking powder ensures your pancakes rise properly, while room temperature eggs blend more smoothly into the batter.
This simple combination creates the perfect balance of tenderness and structure, giving you pancakes that are fluffy without being cake-like, and sturdy enough to hold up to your favorite toppings.
You might also enjoy making a Classic French Toast Recipe for variety.
Kitchen Equipment Needed
Having the right tools makes the pancake-making process smoother and more enjoyable. You don’t need anything fancy, just a few basic kitchen essentials that make the job easier.
- Large mixing bowl for dry ingredients
- Medium mixing bowl for wet ingredients
- Wire whisk or hand mixer for beating the egg
- Measuring cups and spoons
- Nonstick griddle or large skillet
- Spatula for flipping
- 1/4 cup measuring cup or ladle for pouring batter
- Pastry brush for oiling the griddle (optional)
A flat griddle works best because it allows you to cook multiple pancakes at once and provides even heat distribution. If using a skillet, make sure it’s large enough to comfortably fit 2-3 pancakes without crowding.
The nonstick surface prevents sticking and makes cleanup a breeze, though you can also use a well-seasoned cast iron griddle with excellent results.
For another delicious breakfast option, try this Buttermilk Pancake Recipe.
Recommended Products for This Recipe
These carefully selected products can help you achieve bakery-quality pancakes at home. I’ve tested these items personally and found they make a noticeable difference in both the cooking process and final results.
1. King Arthur All-Purpose Flour
This premium flour has the perfect protein content for pancakes, creating just the right amount of gluten for structure without making them tough. The consistent milling ensures even mixing, and the unbleached formula delivers better flavor than bleached alternatives. It’s my go-to flour for all my baking projects.
2. Presto Electric Griddle
This 22-inch griddle has a built-in warming tray and maintains consistent temperature across the entire surface, eliminating hot spots that can cause uneven browning. The large cooking surface lets you make 8-10 pancakes at once, perfect for feeding a family. Cleanup is simple thanks to the nonstick coating and removable drip tray.
3. Pure Maple Syrup Grade A
Real maple syrup makes all the difference compared to artificial pancake syrup. This Grade A amber syrup has a rich, complex flavor with natural sweetness that enhances rather than overwhelms your pancakes. Once you try real maple syrup, you’ll never go back to the imitation stuff.
4. Rumford Aluminum-Free Baking Powder
This double-acting baking powder provides reliable leavening without the metallic aftertaste some brands can leave. The aluminum-free formula is gentler and produces consistently fluffy pancakes. Fresh baking powder is critical for proper rise, so replace yours every 6 months.
5. OXO Good Grips Pancake Turner
This wide, flexible spatula makes flipping pancakes effortless. The angled design slides easily under delicate pancakes without tearing them, and the heat-resistant nylon won’t scratch your griddle. The comfortable grip reduces hand fatigue during batch cooking.
Read Also: Old Fashioned Pancake Recipe
Step-by-Step Instructions
Follow these detailed instructions for perfect pancakes every time. Each step has been carefully explained to ensure success, even if this is your first time making pancakes from scratch.
1. Prepare Your Ingredients and Equipment
- Gather all ingredients and measure them accurately before you begin
- Take the egg and milk out of the refrigerator 15-20 minutes before starting so they can come to room temperature, which helps them blend more smoothly
- If using butter instead of oil, melt it now and let it cool slightly
- Set up your mixing bowls, whisk, and measuring tools on the counter
- Place your griddle or skillet on the stove but don’t heat it yet
Starting with organized ingredients and equipment makes the entire process smoother and prevents mistakes. Room temperature ingredients incorporate better, creating a more uniform batter.
2. Beat the Egg Until Fluffy
- Crack the egg into a medium mixing bowl
- Using a wire whisk or hand mixer, beat the egg vigorously for about 1-2 minutes
- Continue beating until the egg becomes light, frothy, and has increased slightly in volume
- The egg should be pale yellow and have a slightly foamy texture when properly beaten
- If using a hand mixer, beat on medium-high speed
Properly beating the egg incorporates air, which contributes to the light, fluffy texture of your pancakes. This step is more important than it might seem, so don’t skip it or rush through it.
3. Add Wet Ingredients to the Egg
- Pour the 3/4 cup milk into the bowl with the beaten egg
- Add the 1 tablespoon vegetable oil or melted butter
- Whisk these ingredients together until they’re well combined and uniform in color
- The mixture should look smooth and slightly frothy
- Make sure the melted butter isn’t too hot, or it might cook the egg
Combining the wet ingredients first ensures they’re evenly distributed before adding the flour, which helps prevent overmixing later.
4. Mix the Dry Ingredients
- In a large mixing bowl, combine the 1 cup flour, 1 tablespoon sugar, 3 teaspoons baking powder, and 1/4 teaspoon salt
- Use a whisk or fork to stir the dry ingredients together thoroughly
- Make sure the baking powder is evenly distributed throughout the flour with no lumps
- Whisking for about 30 seconds should be sufficient
- Breaking up any lumps in the flour now prevents them in the final batter
Mixing the dry ingredients separately ensures even distribution of the leavening agent and prevents pockets of baking powder that could create an uneven rise or bitter spots.
5. Combine Wet and Dry Ingredients
- Pour the wet ingredient mixture into the bowl with the dry ingredients
- Using a wooden spoon or rubber spatula, gently stir the ingredients together
- Stir just until the flour is moistened and incorporated
- The batter should be slightly lumpy, not perfectly smooth
- Stop mixing as soon as you no longer see dry flour
- A few small lumps are perfectly fine and actually desirable
- Resist the urge to keep stirring to get rid of all the lumps
Overmixing develops gluten in the flour, which makes pancakes tough and chewy instead of light and fluffy. Those lumps will disappear during cooking, so don’t worry about them.
6. Let the Batter Rest (Optional but Recommended)
- Allow the batter to rest for 5-10 minutes at room temperature
- During this time, the flour will fully hydrate and the baking powder will begin to activate
- You’ll notice the batter becomes slightly thicker and bubbles may appear on the surface
- Don’t stir the batter after it has rested
- Use this time to heat your griddle
Resting the batter allows the gluten strands to relax and gives the baking powder time to start working, resulting in even fluffier pancakes.
7. Heat the Griddle
- Place your griddle or skillet over medium-high heat
- If using an electric griddle, set it to 375°F (190°C)
- Let it preheat for 3-5 minutes until it reaches the proper temperature
- Test the temperature by sprinkling a few drops of water on the surface
- If the water droplets dance and sizzle immediately before evaporating, the griddle is ready
- If the water just sits there or evaporates slowly, the griddle needs more time to heat
- If the water evaporates instantly with loud sizzling, the heat is too high
Proper griddle temperature is crucial for evenly cooked pancakes with golden-brown surfaces. Too cool and they’ll be pale and doughy. Too hot and they’ll burn on the outside while remaining raw inside.
8. Grease the Griddle
- Lightly brush the hot griddle with vegetable oil or spray with cooking spray
- Alternatively, you can use a small pat of butter for extra flavor
- Use just enough to coat the surface with a thin, even layer
- Wipe away any excess with a paper towel
- If using a nonstick griddle, you may be able to skip this step after the first batch
A light coating of oil prevents sticking and helps create those beautiful golden-brown spots on the pancake surface.
9. Pour the Batter
- Use a 1/4 cup measuring cup or ladle to scoop the batter
- Pour the batter onto the hot griddle in a circular motion from the center outward
- Space pancakes about 2 inches apart to allow for spreading and easy flipping
- Don’t spread the batter with a spoon, let it spread naturally to maintain the fluffy texture
- Each 1/4 cup of batter should make a 4-inch pancake
- You can make them larger or smaller by adjusting the amount of batter
Pouring from a consistent height creates more uniform pancakes. The batter should spread into a nearly perfect circle on its own if the consistency is right.
10. Watch for Bubbles and Dry Edges
- Let the pancakes cook undisturbed for about 2-3 minutes
- Watch for bubbles to form on the surface of the pancake
- The bubbles should pop and leave small holes
- Check the edges, they should look dry and slightly set
- The bottom should be golden brown when you gently lift an edge with your spatula
- When most of the surface is covered with popped bubbles and the edges look dry, it’s time to flip
These visual cues are your best indicators for the perfect flip time. Flipping too early results in undercooked, pale pancakes. Flipping too late can lead to tough, overcooked ones.
11. Flip the Pancakes
- Slide your spatula completely under the pancake, getting under the center
- Lift quickly but smoothly and flip the pancake in one confident motion
- The pancake should land flat on the griddle without folding
- Don’t press down on the pancake with the spatula after flipping
- Only flip once for the best texture
A confident flip is better than a hesitant one. Practice makes perfect, and even imperfect flips still result in delicious pancakes.
12. Cook the Second Side
- Cook for an additional 1-2 minutes on the second side
- This side cooks faster than the first, usually about half the time
- The second side won’t have as many bubbles, which is normal
- The pancake should be golden brown when you lift it to check
- It should feel firm to the touch and spring back slightly when gently pressed
- When done, the pancake should be cooked through with no raw batter in the center
The second side cooks more quickly because the pancake is already heated through from the first side.
13. Keep Pancakes Warm
- Transfer cooked pancakes to a plate
- Cover loosely with aluminum foil to keep them warm
- Alternatively, place them on an oven-safe plate in a 200°F (95°C) oven
- Don’t stack them too tightly or they may become soggy
- Placing a piece of parchment paper between layers helps prevent sticking
Keeping pancakes warm ensures the whole batch can be enjoyed hot at the same time, rather than eating as you cook.
14. Continue Cooking Remaining Batter
- Repeat the process with the remaining batter
- You may need to adjust the heat slightly between batches
- Lightly grease the griddle again if the pancakes start to stick
- Stir the batter very gently before pouring each new batch, as it may settle slightly
- The first pancake is often a test pancake to dial in your temperature
Maintaining consistent temperature throughout is key to uniform results across all batches.
15. Serve Immediately
- Arrange the pancakes on serving plates
- Top with butter and let it melt into the warm pancakes
- Drizzle with pure maple syrup, honey, or your favorite syrup
- Add fresh berries, whipped cream, or other desired toppings
- Serve while hot for the best taste and texture
Pancakes are always best enjoyed fresh off the griddle when they’re at their fluffiest and most tender.
For another breakfast favorite, check out this German Pancake Recipe.
Tips for Success
These helpful tips come from years of pancake-making experience and will help you avoid common pitfalls while achieving bakery-quality results at home.
- Don’t overmix the batter: Stir just until the ingredients are combined. A lumpy batter makes fluffier pancakes than a smooth one. Overmixing develops gluten, which creates tough, chewy pancakes.
- Use fresh baking powder: Baking powder loses potency over time. Test yours by adding a teaspoon to hot water. If it fizzes vigorously, it’s still good. Replace baking powder every 6 months for best results.
- Let the batter rest: Allowing the batter to sit for 5-10 minutes gives the flour time to hydrate and the baking powder time to activate, resulting in fluffier pancakes.
- Get the temperature right: Too hot and pancakes burn on the outside while staying raw inside. Too cool and they turn out pale and dense. The water droplet test is your best friend.
- Only flip once: Flipping multiple times makes pancakes tough and prevents proper browning. Wait for the bubbles and dry edges, then flip once and only once.
- Don’t press down: Resist the urge to press pancakes with your spatula. This squeezes out air and makes them dense instead of fluffy.
- Adjust batter consistency if needed: If your batter seems too thick, add milk 1 tablespoon at a time. If too thin, add flour 1 tablespoon at a time. It should pour but not run.
- Keep your griddle clean: Wipe away any batter drips or burnt bits between batches to prevent them from affecting the flavor and appearance of your pancakes.
- Use room temperature ingredients: Cold milk and eggs can create a lumpy batter that doesn’t mix as well. Let them sit out for 15-20 minutes before starting.
- Preheat thoroughly: Give your griddle plenty of time to heat evenly. Uneven heating causes inconsistent browning and cooking.
You might also enjoy: IHOP Pancake Recipe
Serving Suggestions
These classic pancakes are incredibly versatile and pair beautifully with both sweet and savory accompaniments. Here are some delicious ways to serve them that will make your breakfast extra special.
Classic Toppings
- Butter and pure maple syrup for the traditional experience
- Fresh berries like strawberries, blueberries, or raspberries
- Whipped cream and a dusting of powdered sugar
- Warm fruit compote or fruit preserves
- Chopped nuts like pecans, walnuts, or almonds for added crunch
- Honey or agave nectar as a syrup alternative
- Chocolate chips or chocolate syrup for a decadent treat
Creative Combinations
- Lemon curd and fresh blueberries for a bright, tangy flavor
- Peanut butter and sliced bananas for a protein-rich breakfast
- Cream cheese and strawberry jam for a sweet and tangy combination
- Nutella and sliced strawberries for chocolate lovers
- Greek yogurt and granola for added protein and texture
- Caramelized apples with cinnamon for a fall-inspired breakfast
- Ricotta cheese and honey for an elegant Italian-style serving
Savory Options
- Crispy bacon or sausage links on the side
- Scrambled eggs for a complete breakfast plate
- Fried eggs on top for a breakfast stack
- Hash browns or Breakfast Potatoes as a hearty side
These pancakes also work wonderfully for brunch alongside dishes like Easy Egg Salad or Classic Deviled Eggs.
Variations to Try
Once you’ve mastered the basic recipe, these variations will help you customize your pancakes to suit different tastes and occasions. Each variation maintains the same great texture while adding new flavors.
- Buttermilk Pancakes: Replace regular milk with buttermilk for tangy, extra-fluffy pancakes. The acidity in buttermilk reacts with baking powder for added lift. You may want to add 1/4 teaspoon baking soda as well.
- Blueberry Pancakes: Gently fold 1/2 cup fresh or frozen blueberries into the batter just before cooking. If using frozen, don’t thaw them first as they’ll release less juice.
- Chocolate Chip Pancakes: Stir in 1/2 cup chocolate chips to the batter for a sweet treat. Mini chips distribute more evenly than regular-sized ones.
- Banana Pancakes: Mash 1 ripe banana and fold it into the wet ingredients before combining with dry ingredients. The natural sweetness means you can reduce the sugar if desired.
- Whole Wheat Pancakes: Replace half the all-purpose flour with whole wheat flour for added nutrition and a nuttier flavor. You may need to add 1-2 tablespoons more milk.
- Cinnamon Pancakes: Add 1 teaspoon ground cinnamon to the dry ingredients for warm, spiced pancakes perfect for fall mornings.
- Lemon Poppy Seed: Add 1 tablespoon poppy seeds and 1 teaspoon lemon zest to the batter for a bright, sophisticated flavor.
- Pumpkin Spice: Mix in 1/3 cup pumpkin puree and 1 teaspoon pumpkin pie spice for seasonal pancakes.
- Protein Pancakes: Add 1-2 scoops of vanilla protein powder, reducing the flour by an equal amount. These are great post-workout.
- Vegan Pancakes: Replace the egg with a flax egg (1 tablespoon ground flaxseed mixed with 3 tablespoons water, left to sit for 5 minutes) and use plant-based milk.
Another favorite: Kodiak Pancake Recipe
Storage and Reheating
Proper storage keeps your pancakes fresh and delicious for several days, making them perfect for meal prep or saving leftovers. Here’s how to store and reheat them for best results.
Refrigerator Storage
- Let pancakes cool completely to room temperature before storing
- Stack cooled pancakes with parchment paper or wax paper between each one to prevent sticking
- Place the stack in an airtight container or resealable plastic bag
- Store in the refrigerator for up to 4 days
- The parchment paper makes it easy to remove individual pancakes without them sticking together
Freezer Storage
- Cool pancakes completely on a wire rack
- Arrange pancakes in a single layer on a baking sheet
- Freeze for 1-2 hours until solid
- Once frozen, stack pancakes with parchment paper between each layer
- Transfer to a freezer-safe bag or container, removing as much air as possible
- Label with the date and store for up to 2 months
- Individual freezing prevents them from sticking together, so you can remove just what you need
Reheating Methods
- Microwave: Place 1-2 pancakes on a microwave-safe plate and heat for 20-30 seconds on high power. For frozen pancakes, microwave for 45-60 seconds. This is the quickest method but can make pancakes slightly chewy.
- Oven: Preheat oven to 350°F (175°C). Arrange pancakes in a single layer on a baking sheet. Cover loosely with foil and heat for 5-10 minutes (10-15 minutes if frozen). This method keeps them fluffy and warms them evenly.
- Toaster: Place pancakes in the toaster on a medium setting. This works great for adding a bit of crispiness to the edges. Watch carefully to prevent burning.
- Skillet: Heat a lightly oiled skillet over medium heat. Warm pancakes for 1-2 minutes per side. This method restores some of the fresh-cooked texture.
Read Also: Gluten Free Pancake Recipe
Nutritional Facts
This nutritional information is calculated per pancake based on the recipe as written, which makes approximately 9 four-inch pancakes. Values are approximate and may vary based on specific ingredients used.
Per Pancake (1 of 9)
- Calories: 95
- Total Fat: 2.5g
- Saturated Fat: 0.5g
- Cholesterol: 25mg
- Sodium: 190mg
- Total Carbohydrates: 15g
- Dietary Fiber: 0.5g
- Sugars: 2g
- Protein: 3g
- Calcium: 8% DV
- Iron: 6% DV
Notes on Nutrition
These values don’t include toppings like butter, syrup, or fruit, which will increase the calorie and sugar content. Using whole milk adds slightly more calories and fat compared to low-fat or skim milk.
If you substitute ingredients like whole wheat flour, the fiber content increases. Adding mix-ins like blueberries or bananas changes the nutritional profile as well.
This recipe provides a moderate amount of protein and carbohydrates, making it a satisfying breakfast option. The relatively low sugar content means you’re not starting your day with an excessive sugar spike.
For those watching calories or macros, these pancakes can fit into a balanced diet. Pair them with protein-rich sides like eggs or Greek yogurt for a more complete meal.
For a lighter alternative, try this Pancake Recipe Without Milk.
Health Benefits of Key Ingredients
While pancakes are generally considered a treat, the ingredients in this recipe do offer some nutritional value. Understanding the benefits of each component helps you appreciate what you’re eating.
All-Purpose Flour
Flour provides the structure and body of pancakes. It’s a source of carbohydrates for energy, along with small amounts of protein, iron, and B vitamins. While all-purpose flour is refined, it’s often enriched with nutrients like folate, riboflavin, and niacin that support metabolism and energy production.
Eggs
Eggs are nutritional powerhouses that add protein, healthy fats, and important nutrients to pancakes. They contain all nine essential amino acids, making them a complete protein source. Eggs also provide choline for brain health, lutein and zeaxanthin for eye health, and vitamin D for bone health. The egg helps bind the ingredients while contributing to the fluffy texture.
Milk
Milk adds calcium for strong bones and teeth, along with protein, vitamin D, vitamin B12, and potassium. The liquid hydrates the flour and helps create the proper batter consistency. Calcium is essential for muscle function and nerve transmission, while vitamin D aids calcium absorption.
Baking Powder
While primarily a leavening agent, baking powder does contribute small amounts of calcium and phosphorus. Its main benefit is creating the light, fluffy texture that makes pancakes so enjoyable. The carbon dioxide bubbles it produces during cooking give pancakes their characteristic rise and tender crumb.
Benefits of Homemade vs. Store-Bought
Making pancakes from scratch lets you control exactly what goes into them. You avoid artificial flavors, colors, and preservatives often found in packaged mixes. You can also adjust ingredients to suit dietary needs, reduce sodium, or increase nutritional value by adding whole grains or other nutritious ingredients.
Read Also: Belgian Waffle Recipe
Frequently Asked Questions
1. Can I make the batter ahead of time?
Yes, you can prepare pancake batter ahead of time, but with some limitations. For best results, make the batter up to 2 hours in advance and store it covered in the refrigerator. The batter will thicken as it sits, so you may need to stir in a tablespoon or two of milk before cooking.
Keep in mind that the baking powder will lose some potency over time, which means pancakes made from batter that’s been sitting for several hours won’t be quite as fluffy as those made from fresh batter. For truly make-ahead pancakes, I recommend cooking them completely and then refrigerating or freezing them for reheating later.
2. Why are my pancakes tough and rubbery?
Tough, rubbery pancakes are almost always the result of overmixing the batter. When you stir pancake batter too much, you develop the gluten proteins in the flour, which creates a chewy, dense texture instead of a light, fluffy one.
Mix the batter just until the dry ingredients are moistened, even if it looks lumpy. Those lumps will disappear during cooking, and your pancakes will be much more tender.
3. Can I substitute buttermilk for regular milk?
Absolutely! Buttermilk is actually a fantastic substitution that makes pancakes extra fluffy and adds a pleasant tangy flavor. When using buttermilk, add 1/4 teaspoon of baking soda to the dry ingredients along with the baking powder.
The acid in buttermilk reacts with the baking soda to create additional leavening, making your pancakes even lighter. If you don’t have buttermilk, you can make a substitute by adding 1 tablespoon of lemon juice or white vinegar to the milk and letting it sit for 5 minutes.
4. How do I know when to flip the pancakes?
The pancakes will tell you when they’re ready to flip through several visual cues. First, watch for bubbles to form across the surface of the pancake. When those bubbles start to pop and leave small holes, check the edges.
The edges should look dry and slightly set rather than wet and shiny. If you gently lift a corner with your spatula, the bottom should be golden brown. This usually takes about 2-3 minutes on the first side.
5. Can I freeze leftover pancakes?
Yes, pancakes freeze beautifully and make excellent quick breakfasts on busy mornings. To freeze them properly, let the pancakes cool completely, then arrange them in a single layer on a baking sheet and freeze until solid (about 1-2 hours). Once frozen, stack them with parchment paper between each pancake and store in a freezer bag for up to 2 months.
To reheat, you can microwave frozen pancakes for 45-60 seconds, heat them in a 350°F oven for 10-15 minutes, or pop them in the toaster. They’ll taste almost as good as fresh-made.
For more breakfast ideas, try this Easy Waffle Recipe.
Final Thoughts
This Betty Crocker pancake recipe is truly a breakfast classic that deserves a place in every home cook’s repertoire. With just seven simple ingredients and about 15 minutes of your time, you can create golden, fluffy pancakes that rival anything from a restaurant.
The beauty of this recipe lies in its simplicity and reliability. It’s been tested by generations of home cooks since 1950, and it continues to deliver perfect results every single time. The straightforward method makes it accessible for beginners while the delicious outcome keeps experienced cooks coming back.
I hope you’ll give this recipe a try and experience the joy of homemade pancakes made from scratch. There’s something truly special about sitting down to a stack of warm, buttery pancakes on a weekend morning. Make them your own by experimenting with different toppings and variations, and don’t be afraid to get creative.
I’d love to hear how your pancakes turn out! Share your results in the comments below, and let me know what your favorite toppings are. Happy cooking!
Recommended:
- French Toast Casserole Recipe
- Breakfast Casserole Recipe
- Air Fryer French Toast Recipe
- Air Fryer Bacon Recipe
- Classic Egg Salad Recipe
- Air Fryer Egg Bites Recipe
- Cloud Eggs Recipe
- Air Fryer Egg Cups Recipe
- Homemade Granola Recipe
- Easy Granola Recipe


