When the holidays roll around, my kitchen fills with the sweet scent of freshly baked cookies. And there’s one treat that always steals the show: peanut butter blossom cookies recipe that my grandmother taught me decades ago.
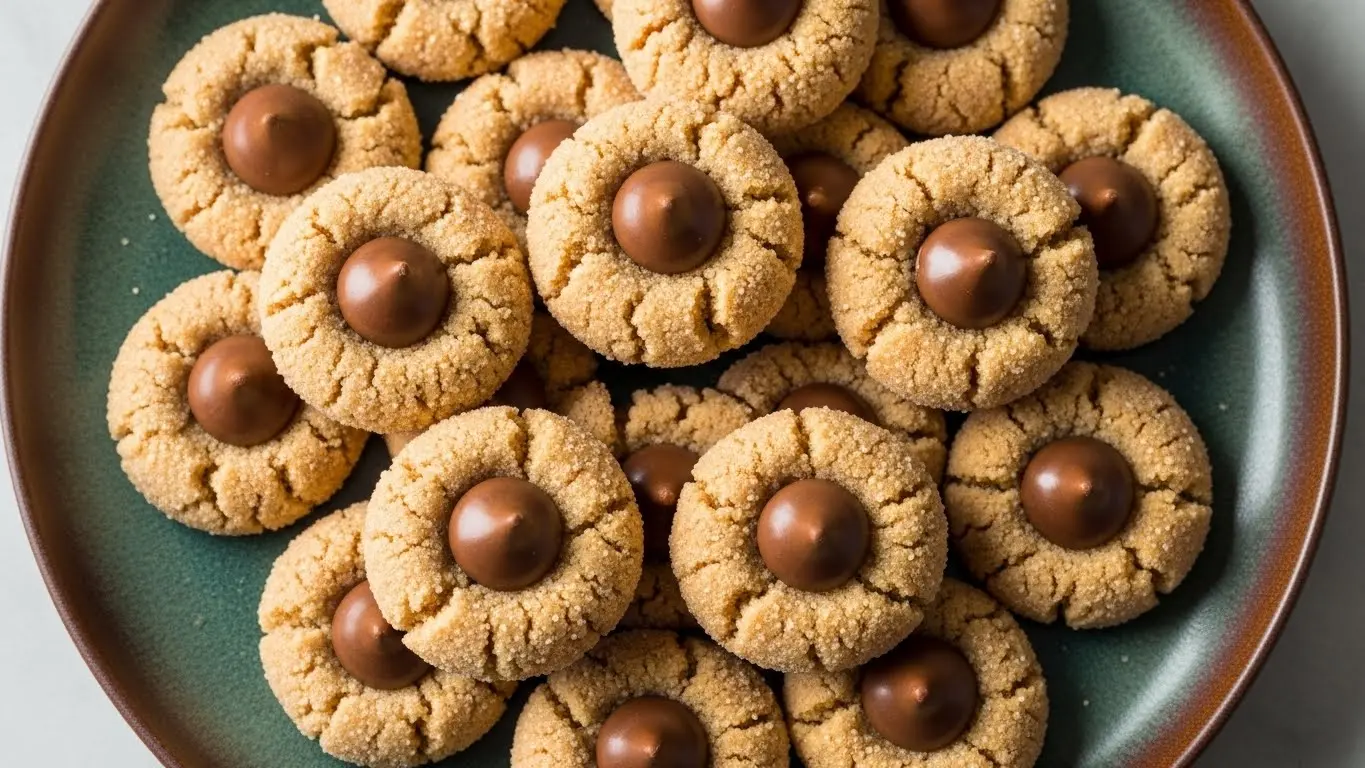
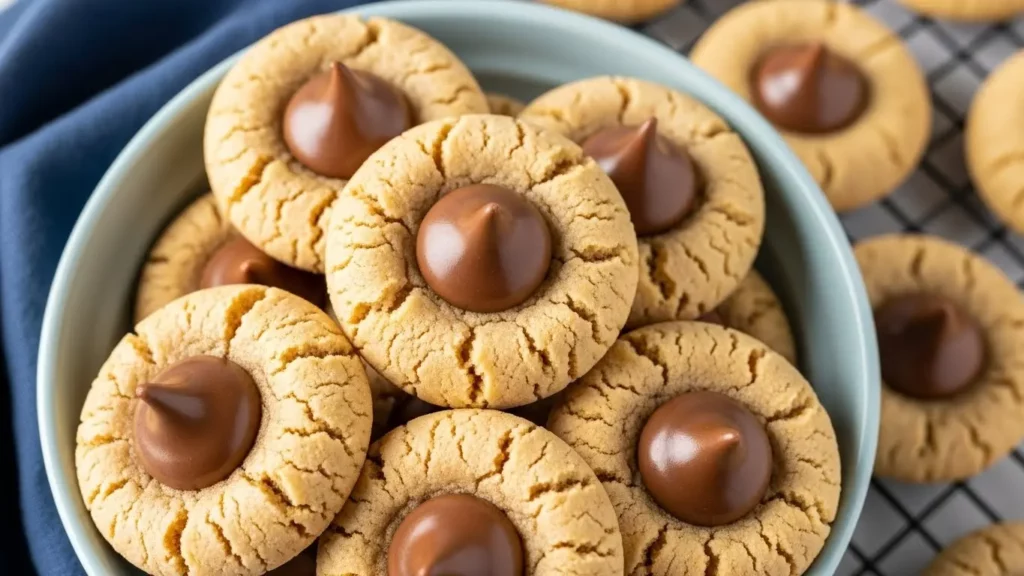
These cookies are pure magic—soft, chewy peanut butter cookies with a chocolate kiss pressed right into the center. The combination of nutty, sweet peanut butter and rich chocolate creates something absolutely irresistible.
I’ve been making these cookies for over twenty years now, and they’ve become a non-negotiable part of our holiday traditions. My kids fight over who gets to unwrap the chocolate kisses and press them into the warm cookies.
The best part? They’re surprisingly simple to make. You don’t need any fancy equipment or hard-to-find ingredients—just basic pantry staples and a bag of chocolate kisses.
These cookies also freeze beautifully, which means you can make them weeks in advance. I usually double or triple the batch because they disappear faster than you’d think.
Why You’ll Love This Peanut Butter Blossom Cookies Recipe
These cookies have been winning hearts at bake sales, cookie exchanges, and family gatherings for generations. There’s something deeply comforting about their classic appearance and familiar flavors.
The texture is absolutely perfect—crispy edges with soft, tender centers that practically melt in your mouth. Rolling the dough in sugar before baking creates a beautiful sparkle and adds just the right amount of sweetness.
Here’s what makes this peanut butter blossom cookies recipe stand special:
- Simple ingredients: Everything you need is probably already in your pantry
- Crowd-pleaser: I’ve never met someone who doesn’t love the peanut butter and chocolate combo
- Kid-friendly: Children love helping press the chocolate kisses into the cookies
- Make-ahead friendly: The dough can be refrigerated for up to 3 days or frozen for months
- Perfect for gifting: They look gorgeous packaged in tins or clear bags with ribbons
- Customizable: You can use different flavored kisses or even caramels for variety
Another favorite from my cookie collection is this Snickerdoodle Cookie Recipe that pairs wonderfully with these blossoms.
Ingredients
You’ll need simple ingredients that come together to create these iconic cookies. The creamy peanut butter is the star here, so use a good quality brand for best results.
- 1¾ cups all-purpose flour
- 1 teaspoon baking soda
- ½ teaspoon salt
- ½ cup unsalted butter, softened
- ½ cup creamy peanut butter
- ½ cup granulated sugar, plus extra for rolling
- ½ cup packed light brown sugar
- 1 large egg
- 1 tablespoon milk
- 1 teaspoon vanilla extract
- 48 Hershey’s Kisses chocolates, unwrapped
Kitchen Equipment Needed
Having the right tools makes this recipe even easier. I recommend investing in quality baking sheets that won’t warp in the oven.
- Stand mixer or hand mixer
- Large mixing bowl
- Medium mixing bowl
- Cookie scoop (1-tablespoon size)
- Baking sheets
- Parchment paper or silicone baking mats
- Wire cooling racks
- Small bowl for rolling sugar
Recommended Products for This Recipe
After making these cookies countless times, I’ve found a few products that genuinely make a difference in the final result. These are my personal go-to items that I reach for every time I bake these beauties.
1. Jif Creamy Peanut Butter
I’ve tested this recipe with at least a dozen different peanut butter brands, and Jif consistently gives the best texture and flavor. The consistency is perfect—not too oily, not too thick—and it creates cookies that stay soft for days. Natural peanut butters with separated oils just don’t work as well here.
2. Nordic Ware Natural Aluminum Baking Sheets
These baking sheets are absolute workhorses in my kitchen. They heat evenly, never warp even after years of use, and the cookies brown perfectly without any hot spots. I own four of these and use them constantly.
3. OXO Good Grips Cookie Scoop
This cookie scoop ensures every single cookie is exactly the same size, which means they all bake evenly. No more some cookies burning while others are underdone. The spring-loaded release makes portioning dough incredibly fast.
4. KitchenAid Stand Mixer
While you can absolutely make these with a hand mixer, my KitchenAid has been my baking companion for over fifteen years. It creams the butter and sugars to absolute perfection and makes the whole process effortless, especially when making multiple batches.
You might also enjoy: Peanut Butter Cookie Recipe
Step-by-Step Instructions
Follow these detailed steps for perfect peanut butter blossom cookies every single time. Take your time with each step—rushing through won’t save you much time and might compromise the results.
1. Prepare Your Workspace and Preheat the Oven
- Clear your counter space and gather all ingredients and equipment before you begin
- Preheat your oven to 375°F (190°C)
- Line two baking sheets with parchment paper or silicone baking mats
- Unwrap all your chocolate kisses and set them aside (this is a great task for kids!)
- Place about ¼ cup of granulated sugar in a small bowl for rolling the cookies later
2. Mix the Dry Ingredients
- In a medium bowl, whisk together the flour, baking soda, and salt
- Make sure there are no lumps in the baking soda—break them up with your fingers if needed
- Set this bowl aside while you work on the wet ingredients
- This step can be done up to a day in advance if you want to save time
3. Cream the Butter and Sugars
- In a large mixing bowl or the bowl of your stand mixer, add the softened butter
- Add both the granulated sugar and brown sugar
- Beat on medium speed for 2-3 minutes until the mixture is light and fluffy
- Stop the mixer and scrape down the sides of the bowl at least once to ensure everything incorporates evenly
- The mixture should look pale and almost doubled in volume when properly creamed
4. Add the Peanut Butter and Wet Ingredients
- Add the peanut butter to the butter-sugar mixture and beat for another minute
- Crack the egg into a small bowl first to check for shells, then add it to the mixing bowl
- Pour in the milk and vanilla extract
- Beat on medium speed for about 1 minute until everything is smooth and well combined
- The mixture should look creamy and uniform with no streaks of butter or peanut butter visible
5. Incorporate the Dry Ingredients
- With the mixer on low speed, gradually add the flour mixture to the wet ingredients
- Add it in three separate additions, mixing just until combined after each addition
- Stop the mixer as soon as you no longer see streaks of flour
- Do not overmix—this will make your cookies tough instead of tender
- The dough should be soft but not sticky, and it should hold together when pressed
6. Shape and Roll the Cookie Dough
- Use a 1-tablespoon cookie scoop or roll tablespoon-sized portions of dough between your palms to form balls
- Each ball should be about 1 inch in diameter for the classic blossom cookie size
- Roll each dough ball in the granulated sugar, making sure it’s completely coated
- Place the sugar-coated balls on your prepared baking sheets
- Space them about 2 inches apart—they will spread as they bake
7. Bake the Cookies
- Place one baking sheet in the preheated oven
- Bake for 8-10 minutes, or until the edges are just beginning to turn golden
- The centers will still look slightly underdone—this is exactly what you want
- Do not overbake or the cookies will be dry and crumbly instead of soft
- Remove the baking sheet from the oven and place it on a wire rack
8. Add the Chocolate Kisses
- Immediately press a chocolate kiss firmly into the center of each hot cookie
- Work quickly—the cookies need to be warm for the kisses to stick properly
- Press straight down firmly but not so hard that you crack the cookie
- The cookie will crack slightly around the edges when you press the kiss in—this is normal and creates that signature look
- If a kiss won’t stick, the cookie has cooled too much; pop the sheet back in the oven for 30 seconds
9. Cool the Cookies
- Let the cookies cool on the baking sheet for exactly 5 minutes
- This allows them to set properly so they don’t fall apart when you move them
- After 5 minutes, carefully transfer the cookies to a wire cooling rack
- Let them cool completely before storing or eating
- The chocolate will be soft for the first 15-20 minutes, then will firm up as it cools
This pairs beautifully with my Hot Chocolate Recipe for the ultimate holiday treat.
Tips for Success
These tips will help you avoid common pitfalls and ensure your peanut butter blossoms turn out perfect every single time. I’ve learned these lessons through years of baking thousands of these cookies.
- Use room temperature butter: Cold butter won’t cream properly with the sugar, resulting in dense cookies. Leave your butter out for about an hour before baking.
- Don’t skip the sugar rolling: The granulated sugar coating isn’t just decorative—it adds a delightful crunch and helps the cookies hold their shape during baking.
- Press kisses while cookies are hot: This is crucial! If you wait too long, the cookies will crack or the kisses won’t adhere properly.
- Measure flour correctly: Spoon flour into your measuring cup and level it off with a knife. Scooping directly from the bag packs in too much flour and makes dry cookies.
- Chill dough if too soft: If your kitchen is warm and the dough feels too soft to handle, refrigerate it for 15-20 minutes before shaping.
- Rotate baking sheets: If your oven has hot spots, rotate the baking sheet halfway through baking for even browning.
- Use quality chocolate: Generic chocolate kisses just don’t taste the same. Hershey’s Kisses have the perfect flavor and texture for these cookies.
Serving Suggestions
These cookies are perfect on their own, but there are so many delicious ways to enjoy them. I love getting creative with how I serve these beauties at parties and gatherings.
Peanut butter blossoms pair wonderfully with cold milk, hot coffee, or a steaming mug of cocoa. They’re also fantastic crumbled over ice cream for a quick dessert that looks fancy but takes zero effort.
For parties, I arrange them on a platter with other classic cookies like Sugar Cookies and Gingerbread Cookies. The variety makes the display more interesting and gives guests options.
Here are my favorite ways to serve these cookies:
- Alongside a holiday dessert board with Fudge Brownies and peppermint bark
- Packaged in clear cellophane bags tied with festive ribbons for homemade gifts
- Stacked in a pyramid on a cake stand for a stunning centerpiece
- Served with hot apple cider at fall gatherings
- Paired with Eggnog during Christmas celebrations
- Included in cookie exchange boxes with complementary flavors
Read Also: Oatmeal Cookie Recipe
Variations to Try
Once you’ve mastered the classic version, these fun variations will keep things interesting. I rotate through these different versions depending on the season and what I’m craving.
- Chocolate peanut butter blossoms: Replace ¼ cup of flour with unsweetened cocoa powder for a double-chocolate version that’s absolutely incredible.
- Almond blossoms: Swap peanut butter for almond butter and use a whole roasted almond instead of a chocolate kiss for a nut-forward treat.
- Candy cane blossoms: Use candy cane kisses during the holidays for a festive peppermint twist that looks stunning.
- Caramel center: Press a Rolo candy or caramel square into the center instead of a chocolate kiss for a gooey surprise.
- Mini blossoms: Use a smaller cookie scoop and Hershey’s Hugs or miniature candy pieces to make bite-sized versions perfect for parties.
- Nutella filling: Make an indentation instead of using a kiss, and fill with Nutella after the cookies come out of the oven.
- Crunchy version: Add ½ cup of finely chopped peanuts to the dough for extra texture and nuttiness.
Storage and Reheating
Proper storage ensures these cookies stay fresh and delicious for weeks. I’ve tested every storage method imaginable, and here’s what actually works.
Store cooled cookies in an airtight container at room temperature for up to one week. Place parchment paper between layers to prevent the chocolate kisses from sticking together.
- Room temperature storage: Keep in an airtight container for up to 7 days. The cookies will stay soft if you add a slice of bread to the container.
- Refrigerator storage: These cookies don’t need refrigeration, but you can store them in the fridge for up to 2 weeks if your kitchen is very warm.
- Freezer storage: Freeze baked cookies in a freezer-safe container for up to 3 months. Layer between parchment paper and thaw at room temperature.
- Freezing dough: Roll dough into balls, freeze on a baking sheet, then transfer to a freezer bag for up to 3 months. Bake from frozen, adding 1-2 minutes to the baking time.
- Reheating: Warm cookies in a 300°F oven for 3-5 minutes if you want them slightly warm. The chocolate will soften but won’t melt completely.
Another favorite: No Bake Cookie Recipe
Nutritional Facts
Here’s the approximate nutritional information per cookie (makes 48 cookies):
- Calories: 95
- Total Fat: 5g
- Saturated Fat: 2g
- Cholesterol: 10mg
- Sodium: 65mg
- Total Carbohydrates: 12g
- Dietary Fiber: 0.5g
- Sugars: 8g
- Protein: 2g
Keep in mind these are treats meant to be enjoyed in moderation. The combination of protein from the peanut butter and the smaller portion size makes them more satisfying than many other cookies.
Health Benefits of Key Ingredients
While these are definitely indulgent cookies, some of the ingredients offer surprising nutritional benefits. Understanding what’s in your food can help you feel good about enjoying treats in moderation.
Peanut butter provides plant-based protein and healthy fats that keep you satisfied longer than pure sugar cookies. It also contains vitamin E, magnesium, and potassium that support heart health and muscle function.
Here’s what the key ingredients bring to the table:
- Peanut butter: Rich in protein, healthy monounsaturated fats, vitamin E, magnesium, and potassium. Contains resveratrol, an antioxidant also found in red wine.
- Eggs: Provide high-quality protein and essential amino acids. Rich in choline, which supports brain health and metabolism.
- Dark chocolate kisses: Contain flavonoids that may support heart health. Dark chocolate provides antioxidants and can improve mood.
- Butter: Supplies vitamin A, vitamin E, and vitamin K2. Contains conjugated linoleic acid (CLA) which has been studied for various health benefits.
- Brown sugar: Contains small amounts of minerals like calcium, potassium, iron, and magnesium from the molasses content.
Read Also: Peanut Butter Pie Recipe
Frequently Asked Questions
1. Can I use natural peanut butter for this recipe?
I don’t recommend using natural peanut butter for peanut butter blossoms. Natural peanut butter has a different oil content and consistency that will make your cookies spread too much and turn out oily.
Conventional peanut butter like Jif or Skippy contains stabilizers that give these cookies their perfect texture. If you only have natural peanut butter, try reducing the butter in the recipe by 2 tablespoons.
2. Why did my cookies crack when I pressed in the chocolate kisses?
Cookies crack when they’ve cooled too much or if you press too hard. You need to press the kisses in immediately when the cookies come out of the oven—within 30 seconds is ideal.
Press firmly but gently straight down, stopping as soon as you feel resistance. A few small cracks around the edges are normal and actually add to the traditional look of these cookies.
3. Can I make these cookies ahead of time?
Absolutely! These cookies are perfect make-ahead treats. You can bake them completely and store them in an airtight container for up to a week, or freeze them for up to 3 months.
You can also freeze the shaped dough balls before baking. Just roll them in sugar, freeze on a baking sheet, then transfer to a freezer bag. Bake directly from frozen, adding 1-2 minutes to the baking time.
4. My cookies spread too much in the oven. What went wrong?
Excessive spreading usually happens because the butter was too soft or melted, the dough was too warm, or you didn’t use enough flour. Make sure your butter is softened but still holds its shape when pressed.
If your kitchen is warm, chill the shaped dough balls for 15 minutes before baking. Also, measure flour by spooning it into the cup and leveling off—scooping directly from the bag compacts the flour and you’ll end up with less than the recipe needs.
5. Can I substitute crunchy peanut butter for creamy?
You can use crunchy peanut butter, but the texture will be different. The cookies will have small peanut pieces throughout, which some people love and others find disruptive to the smooth texture.
If you do use crunchy, I recommend reducing any additional chopped nuts you might add. The chocolate kiss will still adhere properly regardless of which type of peanut butter you use.
You might also enjoy: Oatmeal Raisin Cookie Recipe
Final Thoughts
There’s truly something magical about peanut butter blossom cookies. They bring back childhood memories and create new ones with each batch you bake.
These cookies have earned their place as a holiday staple for good reason—they’re delicious, beautiful, and easier to make than they look. The combination of textures and flavors never gets old, no matter how many times you make them.
I hope this peanut butter blossom cookies recipe becomes a treasured tradition in your home just like it has in mine. Bake a batch this weekend and watch them disappear before your eyes.
Don’t forget to share your baking adventures in the comments below! I’d love to hear which variation you tried or any creative twists you came up with.
Recommended:
- Buckeyes Recipe
- Muddy Buddy Recipe
- Cake Pop Recipe
- Hot Fudge Sauce Recipe
- Pumpkin Roll Recipe
- Fruit Tart Recipe
- Cheese Ball Recipe
- Buffalo Chicken Dip Recipe
- Pumpkin Bar Recipe
- Toffee Recipe


