
I grew up thinking peanut butter belonged in sandwiches and cookies, nothing more. Then my grandmother served this peanut butter pie at a family gathering, and my entire perspective shifted.
The first bite was pure bliss. Creamy, rich, and impossibly smooth, with that perfect balance of sweet and salty that only peanut butter can deliver.
Since that day, I’ve been making this dessert for every special occasion, and it never fails to steal the show. The best part is how simple it is to make.
No fancy techniques required. Just a few straightforward steps, and you’ll have a dessert that tastes like it came from a bakery.
If you love peanut butter, this pie will become your new obsession. If you think you don’t like peanut butter desserts, this might just change your mind.
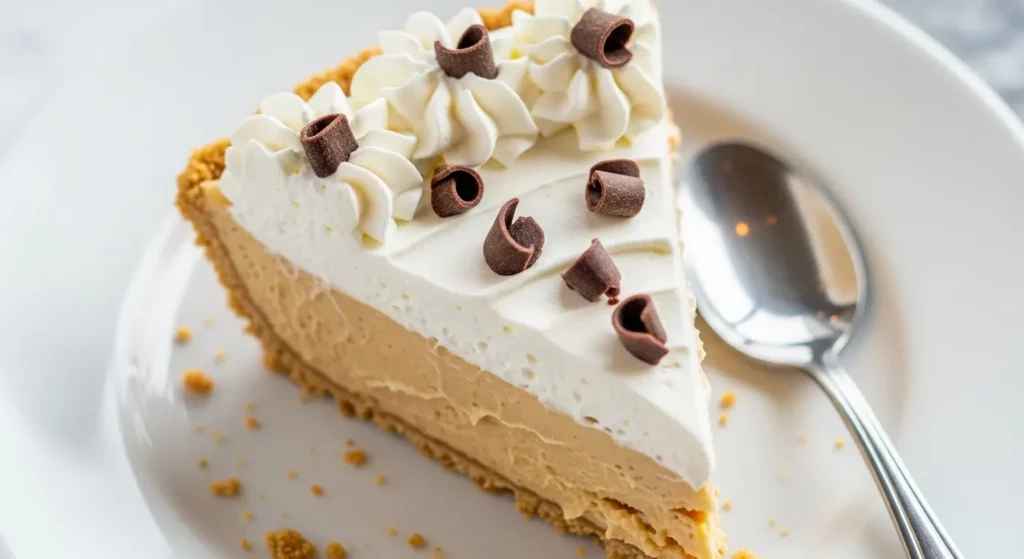
Why You’ll Love This Peanut Butter Pie Recipe
This dessert delivers everything you could want in a homemade treat without the stress. The filling comes together in minutes, and the no-bake method means you won’t heat up your kitchen.
The texture is what really sets this apart from other pies. It’s creamy but not runny, firm enough to slice cleanly, yet melts on your tongue.
Here’s what makes this dessert stand out:
- Simple ingredients – You probably have most of what you need in your pantry right now
- No-bake convenience – Just chill and serve, perfect for warm weather
- Crowd-pleaser guaranteed – Even people who claim they don’t like peanut butter ask for seconds
- Make-ahead friendly – Tastes even better after sitting overnight in the fridge
- Customizable – Easy to adjust sweetness or add your favorite toppings
- Budget-friendly – Uses affordable ingredients that go a long way
Another favorite: Chocolate Pie Recipe
Ingredients
The beauty of this dessert lies in its straightforward ingredient list. Nothing here is hard to find, and you can grab everything in a single grocery run.
I always use creamy peanut butter for the smoothest texture, but feel free to experiment based on your preferences.
For the Crust:
- 1½ cups graham cracker crumbs (about 10-12 crackers)
- ⅓ cup granulated sugar
- 6 tablespoons unsalted butter, melted
For the Filling:
- 8 oz cream cheese, softened to room temperature
- 1 cup creamy peanut butter
- 1 cup powdered sugar
- 1 teaspoon vanilla extract
- 1 cup heavy whipping cream
- Pinch of salt
For the Topping:
- 1 cup heavy whipping cream
- 2 tablespoons powdered sugar
- Chocolate shavings or chopped peanuts (optional)
Kitchen Equipment Needed
Having the right tools makes this recipe even easier. Most of these items are kitchen staples, so you likely already own them.
The stand mixer or hand mixer is really the only specialized equipment you need, and it makes whipping the cream effortless.
- 9-inch pie pan
- Stand mixer or hand mixer
- Large mixing bowls
- Rubber spatula
- Measuring cups and spoons
- Food processor (optional, for making graham cracker crumbs)
Recommended Products for This Recipe
After making this pie countless times, I’ve found a few products that genuinely make the process smoother and the results even better. These aren’t just random recommendations – they’re tools and ingredients I actually use in my own kitchen.
1. KitchenAid Stand Mixer
A good mixer transforms this recipe from a workout to a breeze. The KitchenAid whips the cream to perfect peaks in minutes and handles the thick peanut butter mixture without straining.
2. Jif Natural Creamy Peanut Butter
This is my go-to brand for this pie. It has the perfect consistency and flavor without being overly sweet or oily.
The natural version still tastes rich and creamy but doesn’t have that artificial aftertaste you get with some brands.
3. Emile Henry Pie Dish
This ceramic pie dish distributes cold evenly, which helps the filling set beautifully. The deep sides are perfect for a generous slice, and it looks stunning when you bring it to the table.
Plus, it goes from freezer to table without any issues.
4. Ghirardelli Chocolate Shavings
If you’re topping your pie with chocolate, these shavings melt slightly on contact with the whipped cream, creating little pockets of fudgy goodness. They’re worlds better than regular chocolate chips and make the presentation look professional.
You might also enjoy: Banana Cream Pie Recipe
Step-by-Step Instructions
1. Prepare the Graham Cracker Crust
- Start by crushing your graham crackers into fine crumbs using a food processor or by placing them in a sealed plastic bag and crushing with a rolling pin
- In a medium bowl, combine the graham cracker crumbs with the granulated sugar and stir until evenly mixed
- Pour in the melted butter and mix thoroughly until the mixture resembles wet sand and holds together when pressed
- Transfer the mixture to your pie pan and press firmly into the bottom and up the sides, creating an even layer
- Use the bottom of a measuring cup to really pack it down and smooth the surface
- Place the crust in the refrigerator to chill while you prepare the filling
2. Make the Peanut Butter Filling
- In a large bowl, beat the softened cream cheese with a mixer on medium speed for about 2 minutes until it’s smooth and fluffy with no lumps
- Add the peanut butter, powdered sugar, vanilla extract, and a pinch of salt to the cream cheese
- Beat on medium-low speed until everything is fully combined and the mixture is smooth and creamy, scraping down the sides of the bowl as needed
- In a separate chilled bowl, whip the heavy cream on high speed until stiff peaks form (this usually takes about 3-4 minutes)
- Gently fold half of the whipped cream into the peanut butter mixture using a rubber spatula, using a gentle circular motion to keep the mixture light and airy
- Once the first half is incorporated, fold in the remaining whipped cream until no white streaks remain
3. Assemble the Pie
- Remove the chilled crust from the refrigerator
- Pour the peanut butter filling into the prepared crust, spreading it evenly with a spatula
- Smooth the top with the back of a spoon or an offset spatula, creating gentle swirls if desired
- Cover the pie loosely with plastic wrap, making sure the wrap doesn’t touch the surface of the filling
- Refrigerate for at least 4 hours, or preferably overnight, to allow the filling to set completely
4. Prepare the Whipped Cream Topping
- About 30 minutes before serving, whip the remaining heavy cream with the powdered sugar until soft peaks form
- Spread or pipe the whipped cream over the chilled pie, covering the entire surface or leaving a border around the edges for a rustic look
- If desired, garnish with chocolate shavings, chopped peanuts, or a drizzle of melted chocolate
5. Slice and Serve
- For the cleanest slices, dip your knife in hot water and wipe it dry between each cut
- Use a sharp knife to cut through the filling smoothly without crushing the crust
- Serve immediately and watch as everyone goes back for seconds
Read Also: Key Lime Pie Recipe
Tips for Success
Making this pie is straightforward, but these tips will help you achieve bakery-quality results every single time. Small adjustments make a big difference in both texture and presentation.
- Room temperature cream cheese is crucial – Take it out of the fridge at least an hour before you start baking to ensure it blends smoothly without lumps
- Don’t skip chilling the crust – A cold crust helps the filling set faster and creates a better texture contrast
- Use full-fat ingredients – Low-fat cream cheese or whipped topping won’t give you the same rich, creamy texture
- Fold, don’t stir – When incorporating the whipped cream, use gentle folding motions to keep the filling light and airy
- Chill overnight for best results – The flavors meld together beautifully, and the texture becomes even creamier after 24 hours
- Adjust sweetness to taste – If you prefer a less sweet pie, reduce the powdered sugar in the filling by ¼ cup
- Prevent a soggy crust – Make sure your crust is firmly packed and completely chilled before adding the filling
Serving Suggestions
This pie stands perfectly well on its own, but a few thoughtful additions can elevate it from delicious to unforgettable. The rich peanut butter filling pairs beautifully with both sweet and tangy accompaniments.
I love serving it with a drizzle of warm chocolate sauce or a dollop of fresh whipped cream on the side.
Here are my favorite ways to serve this dessert:
- Coffee pairing – A hot cup of freshly brewed coffee cuts through the richness perfectly
- Fresh berries – Strawberries or raspberries add a bright, tart contrast
- Chocolate drizzle – Warm chocolate sauce creates an indulgent chocolate-peanut butter combination
- Salted caramel – A spoonful of salted caramel sauce balances the sweetness
- Crushed pretzels – Sprinkle on top for a sweet and salty crunch
- Vanilla ice cream – A scoop on the side makes this dessert even more decadent
This pairs beautifully with my Broccoli Salad for a complete meal.
Variations to Try
One of the things I love most about this recipe is how easily it adapts to different flavors and dietary preferences. Once you’ve mastered the basic version, these variations will keep things interesting.
- Chocolate peanut butter pie – Mix ⅓ cup cocoa powder into the filling for a rich, chocolatey twist
- Peanut butter cup pie – Layer chopped peanut butter cups between the crust and filling, and sprinkle more on top
- Banana peanut butter pie – Slice two ripe bananas and layer them in the crust before adding the filling
- Crunchy version – Use chunky peanut butter instead of creamy for added texture
- Oreo crust – Swap the graham crackers for crushed Oreo cookies for a cookies-and-cream vibe
- Lighter version – Replace half the heavy cream with Greek yogurt for a tangier, slightly lighter filling
- Salted caramel swirl – Drizzle salted caramel into the filling and swirl with a knife before chilling
Storage and Reheating
Proper storage keeps this pie fresh and delicious for days. The good news is that it actually tastes better after the flavors have had time to meld together in the refrigerator.
- Refrigerator storage – Cover the pie tightly with plastic wrap or aluminum foil and store for up to 5 days
- Freezer storage – Wrap the pie (without the whipped cream topping) in two layers of plastic wrap, then aluminum foil, and freeze for up to 2 months
- Thawing frozen pie – Transfer to the refrigerator 4-6 hours before serving, then add fresh whipped cream topping
- Individual slices – Wrap each slice separately in plastic wrap for easy grab-and-go desserts throughout the week
- Avoid condensation – Let the pie sit at room temperature for 10 minutes before serving for the best texture
Read Also: Sweet Potato Pie Recipe
Nutritional Facts
This information is based on one slice, assuming the pie is cut into 8 equal pieces. Keep in mind these are estimates and can vary based on the specific brands and measurements you use.
- Calories: 520
- Total Fat: 38g
- Saturated Fat: 18g
- Cholesterol: 75mg
- Sodium: 280mg
- Total Carbohydrates: 40g
- Dietary Fiber: 2g
- Sugars: 30g
- Protein: 10g
Health Benefits of Key Ingredients
While this is definitely an indulgent dessert, some of the ingredients do offer nutritional benefits. Moderation is key, but it’s nice to know you’re getting a little something good along with all that deliciousness.
Peanut butter provides a solid dose of protein and healthy fats, which can help you feel satisfied longer.
Here’s what these ingredients bring to the table:
- Peanut butter – Rich in protein, healthy monounsaturated fats, and vitamin E, which supports heart health and provides sustained energy
- Cream cheese – Contains calcium for bone health and vitamin A for immune function
- Heavy cream – Provides fat-soluble vitamins and helps with the absorption of other nutrients
- Graham crackers – Made from whole wheat flour, offering small amounts of fiber
- Vanilla extract – Contains trace amounts of antioxidants
You might also enjoy: Lemon Meringue Pie Recipe
Frequently Asked Questions
1. Can I use natural peanut butter instead of regular?
I don’t recommend using natural peanut butter for this recipe. Natural varieties tend to be oilier and can separate, making the filling less stable and potentially runny.
Stick with regular creamy peanut butter for the best texture and consistency.
2. How far in advance can I make this pie?
You can make this pie up to 2 days before you need it. In fact, it tastes even better the next day after the flavors have had time to develop.
Just wait to add the whipped cream topping until a few hours before serving to keep it fresh and fluffy.
3. Can I make this pie gluten-free?
Absolutely! Simply replace the graham cracker crust with gluten-free graham crackers or crushed gluten-free cookies.
The filling is naturally gluten-free, so that part requires no adjustments at all.
4. Why is my filling too runny?
A runny filling usually means the cream cheese wasn’t soft enough when you started, or the whipped cream wasn’t whipped to stiff peaks. Make sure your cream cheese sits at room temperature for at least an hour before mixing.
The pie also needs adequate chilling time – at least 4 hours, but overnight is better.
5. Can I use Cool Whip instead of heavy cream?
You can, but I strongly recommend using real whipped cream for the best flavor and texture. Cool Whip will work in a pinch, but you’ll need about 2 cups of it (8 oz container) to replace the whipped heavy cream in the filling.
The taste won’t be quite as rich and creamy.
Final Thoughts
This peanut butter pie has earned its place as one of my most-requested desserts for good reason. It’s ridiculously easy to make, requires no baking, and delivers that perfect combination of creamy, sweet, and slightly salty that keeps everyone coming back for more.
The best part is watching people’s faces light up after that first bite. Give it a try this weekend, and I guarantee it’ll become a staple in your dessert rotation too.
I’d love to hear how your pie turns out! Drop a comment below with any questions or share your favorite variations.
Recommended:
- Peach Pie Recipe
- Cherry Pie Recipe
- Blueberry Pie Recipe
- Boston Cream Pie Recipe
- Peanut Butter Cookie Recipe
- No Bake Cookie Recipe
- Peanut Sauce Recipe
- Caramel Sauce Recipe
- Cheese Sauce Recipe
- Strawberry Sauce Recipe


