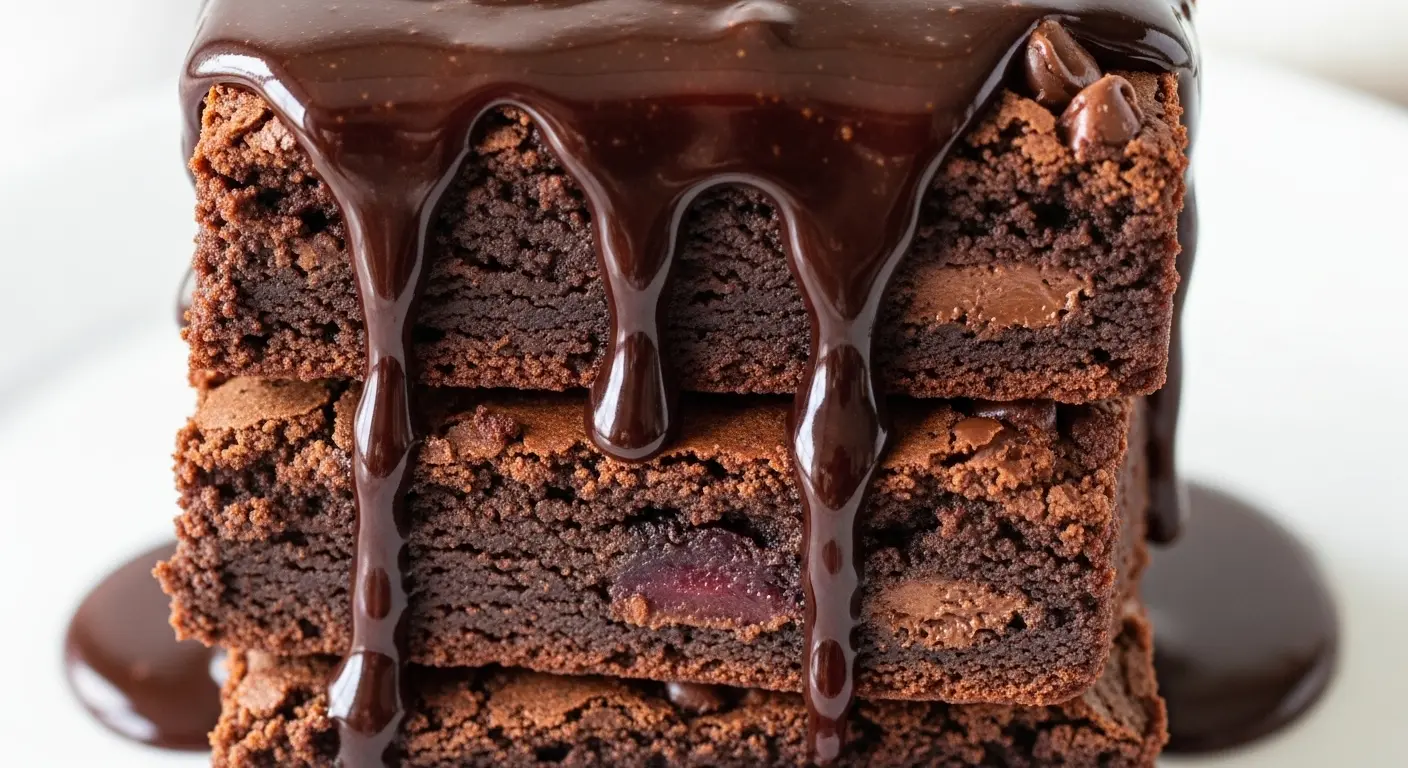
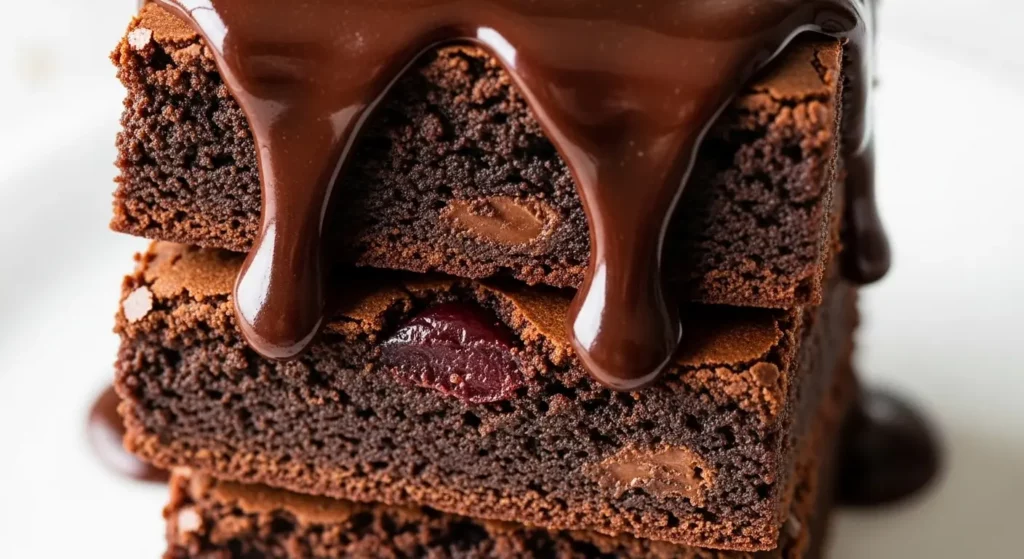
If you’ve been craving something rich, chocolatey, and absolutely irresistible, this Fudge Brownie Recipe is about to become your new favorite treat. These brownies are the perfect balance of fudgy centers and slightly crinkled tops, with an intense chocolate flavor that’ll satisfy even the most serious chocolate lovers.
I’ve spent years perfecting this recipe, and I can honestly say these are the best brownies I’ve ever made. The secret is in the technique and using quality ingredients.
They’re surprisingly simple to make, requiring just one bowl and about 10 minutes of prep time. No fancy equipment needed, no complicated steps—just straightforward baking that delivers bakery-quality results every single time.
Why You’ll Love This Fudge Brownie Recipe
These brownies hit all the right notes for any occasion. They’re decadent enough to serve at dinner parties but easy enough to whip up on a random Tuesday afternoon when you need a chocolate fix.
The texture is absolutely perfect—fudgy and dense without being undercooked, with those gorgeous crackly tops that make brownies so visually appealing. Plus, they stay moist for days (if they last that long).
- Incredibly fudgy texture that melts in your mouth
- Simple one-bowl method that minimizes cleanup
- Intense chocolate flavor from both cocoa powder and melted chocolate
- Versatile base for endless flavor variations
- Perfect for any occasion, from casual weeknight desserts to special celebrations
- Crowd-pleaser that works for kids and adults alike
You might also enjoy: Chocolate Souffle Recipe
Ingredients
This recipe uses pantry staples along with quality chocolate to create brownies that taste absolutely luxurious. The combination of unsweetened cocoa powder and melted dark chocolate gives these brownies their signature deep, complex chocolate flavor.
- 1 cup (226g) unsalted butter
- 2 cups (400g) granulated sugar
- 4 large eggs, at room temperature
- 1 cup (120g) all-purpose flour
- ¾ cup (75g) unsweetened cocoa powder
- ½ teaspoon salt
- 1 teaspoon vanilla extract
- 8 oz (226g) dark chocolate (60-70% cacao), chopped
- Optional: 1 cup (175g) chocolate chips for extra chocolatey brownies
Kitchen Equipment Needed
Having the right tools makes this recipe even easier to execute. You really don’t need much beyond basic baking essentials.
- 9×13-inch baking pan (metal works best for even heat distribution)
- Large mixing bowl
- Medium saucepan for melting butter and chocolate
- Whisk or electric mixer
- Rubber spatula
- Parchment paper or aluminum foil for easy removal
- Fine-mesh sieve for sifting cocoa powder
- Toothpick for testing doneness
Recommended Products for This Recipe
After making these brownies countless times, I’ve found a few products that truly make a difference in both the process and the final result.
1. Ghirardelli Premium Cocoa Powder
This cocoa powder has a rich, deep chocolate flavor that really shines through in these brownies. It’s Dutch-processed, which means it has a smoother, less acidic taste than regular cocoa powder.
2. Guittard Extra Dark Chocolate Baking Bars
These chocolate baking bars are what I use every time I make these brownies. They melt beautifully and have a complex flavor that makes your brownies taste professionally made.
3. USA Pan Bakeware Rectangular Cake Pan
This professional-grade baking pan distributes heat evenly, which means no more burnt edges or undercooked centers. The nonstick coating is incredibly durable, and the pan’s rigid construction prevents warping.
4. Madagascar Vanilla Extract
Quality vanilla extract makes a noticeable difference in baked goods. The complex, sweet vanilla notes complement the chocolate perfectly and add depth to every bite.
Another favorite: Chocolate Pie Recipe
Step-by-Step Instructions
Follow these detailed steps carefully for perfect brownies every time. The key is not to overbake them—you want them just set in the center.
1. Prepare Your Pan and Preheat the Oven
- Preheat your oven to 350°F (175°C).
- Line your 9×13-inch baking pan with parchment paper, leaving an overhang on two sides for easy lifting later.
- Lightly grease the parchment paper with butter or cooking spray to prevent sticking.
- Set the prepared pan aside while you make the batter.
2. Melt the Butter and Chocolate
- Cut the butter into tablespoon-sized pieces for faster, more even melting.
- Chop the dark chocolate into small, uniform pieces (about ½-inch chunks work well).
- Place the butter and chopped chocolate in a medium saucepan over low heat.
- Stir constantly with a rubber spatula until completely melted and smooth, about 5-7 minutes.
- Remove from heat and let cool for about 5 minutes—you don’t want it so hot that it cooks the eggs when you add them.
3. Mix in the Sugar
- Add the granulated sugar to the slightly cooled chocolate-butter mixture.
- Whisk vigorously for about 1 minute until the mixture is smooth and glossy.
- The sugar won’t fully dissolve at this stage, and that’s perfectly fine—it will continue to dissolve as you mix in the other ingredients.
4. Add the Eggs and Vanilla
- Crack the eggs into a separate bowl first to check for shells or bad eggs.
- Add the eggs one at a time to the chocolate mixture, whisking well after each addition.
- Make sure each egg is fully incorporated before adding the next one—this ensures a smooth, uniform batter.
- Stir in the vanilla extract and mix until evenly distributed throughout the batter.
5. Incorporate the Dry Ingredients
- Sift the cocoa powder through a fine-mesh sieve into a separate bowl to remove any lumps.
- Add the flour and salt to the sifted cocoa powder.
- Whisk the dry ingredients together to combine them evenly.
- Add the dry ingredients to the wet ingredients in two additions, folding gently with a rubber spatula after each addition.
- Mix just until no flour streaks remain—overmixing will result in cakey rather than fudgy brownies.
- If using chocolate chips, fold them in now with a few gentle strokes.
6. Bake the Brownies
- Pour the batter into your prepared pan, spreading it evenly to the corners with your spatula.
- Tap the pan gently on the counter a few times to release any air bubbles.
- Place in the preheated oven and bake for 28-32 minutes.
- The brownies are done when a toothpick inserted 2 inches from the edge comes out with a few moist crumbs (not wet batter).
- The center should still look slightly underdone—it will continue cooking as it cools, giving you that perfect fudgy texture.
7. Cool and Cut
- Remove the pan from the oven and place it on a wire rack.
- Let the brownies cool completely in the pan, at least 2 hours—this is crucial for clean cuts.
- Once cooled, use the parchment paper overhang to lift the entire brownie slab out of the pan.
- Place on a cutting board and use a sharp knife to cut into squares (wipe the knife clean between cuts for neat edges).
- For extra-clean cuts, chill the brownies in the refrigerator for 30 minutes before slicing.
Read Also: Mug Cake Recipe
Tips for Success
These tips will help you avoid common brownie-making pitfalls and ensure perfect results every time. Small details make a big difference in the final texture.
- Don’t overbake—this is the number one mistake people make with brownies. They should look slightly underdone in the center when you remove them from the oven.
- Use room temperature eggs—cold eggs can cause the melted chocolate to seize up and create a grainy texture. Let them sit on the counter for 30 minutes before using.
- Measure flour correctly—spoon it into your measuring cup and level it off with a knife rather than scooping directly from the bag, which packs it down.
- Line your pan with parchment—this makes removal so much easier and ensures clean edges on your brownies.
- Let them cool completely—I know it’s tempting to cut into warm brownies, but they’ll be gooey and fall apart. Patience pays off here.
- Use quality chocolate—since chocolate is a star ingredient, using a good brand makes a noticeable difference in flavor.
This pairs beautifully with my Chocolate Martini Recipe for an elegant dessert course.
Serving Suggestions
These brownies are delicious on their own, but there are so many ways to dress them up for special occasions. They’re incredibly versatile.
- Classic style: Dust with powdered sugar and serve with a cold glass of milk
- A la mode: Top warm brownies with vanilla ice cream and drizzle with hot fudge sauce
- Fancy presentation: Serve with fresh raspberries and a dollop of whipped cream
- Coffee pairing: Enjoy alongside a hot cup of coffee or espresso for the ultimate afternoon treat
- Brownie sundae: Layer with ice cream, whipped cream, nuts, and a cherry on top
- Simple elegance: Pair with Caramel Sauce drizzled over the top
Variations to Try
Once you’ve mastered the basic recipe, these variations will keep things interesting. Each one adds a unique twist while maintaining that perfect fudgy texture.
- Peppermint brownies: Add ½ teaspoon peppermint extract and fold in crushed candy canes
- Espresso brownies: Stir 1 tablespoon instant espresso powder into the melted chocolate mixture
- Salted caramel brownies: Swirl Caramel Sauce into the batter and sprinkle with flaky sea salt before baking
- Nutty brownies: Fold in 1 cup of chopped walnuts, pecans, or hazelnuts
- Cream cheese brownies: Swirl cream cheese mixture (8 oz cream cheese, ¼ cup sugar, 1 egg) into the batter
- Peanut butter brownies: Drop spoonfuls of peanut butter on top and swirl with a knife before baking
- Mexican hot chocolate brownies: Add 1 teaspoon cinnamon and ¼ teaspoon cayenne pepper to the dry ingredients
Storage and Reheating
Proper storage keeps these brownies fresh and delicious for days. They actually taste even better the next day once the flavors have had time to develop.
- Room temperature: Store in an airtight container at room temperature for up to 4 days
- Refrigerator: Keep in an airtight container in the fridge for up to 1 week (this makes them extra fudgy)
- Freezer: Wrap individual brownies in plastic wrap, then place in a freezer bag for up to 3 months
- Reheating: Microwave for 10-15 seconds for that fresh-from-the-oven warmth, or warm in a 300°F oven for 5-7 minutes
- Best served: These are delicious at room temperature, slightly chilled, or warmed up—it’s all about personal preference
For a lighter option, try: Peach Cobbler Recipe
Nutritional Facts
Per brownie (based on 24 servings):
- Calories: 195
- Total Fat: 11g
- Saturated Fat: 7g
- Cholesterol: 55mg
- Sodium: 65mg
- Total Carbohydrates: 24g
- Dietary Fiber: 2g
- Sugars: 18g
- Protein: 3g
Note: Nutritional information is approximate and will vary based on specific ingredients used and portion sizes.
Health Benefits of Key Ingredients
While brownies are definitely an indulgent treat, some ingredients do offer nutritional benefits. Everything in moderation, right?
Dark chocolate contains flavonoids and antioxidants that support heart health and may improve cognitive function. Studies have shown that moderate consumption of dark chocolate can have positive effects on cardiovascular health.
- Dark chocolate: Rich in antioxidants, iron, and magnesium; may improve heart health and brain function
- Cocoa powder: Contains flavonoids that support cardiovascular health and may reduce inflammation
- Eggs: Provide high-quality protein, vitamins D and B12, and choline for brain health
- Butter: Contains vitamins A, E, and K2; provides conjugated linoleic acid when from grass-fed sources
- Flour: Enriched varieties provide iron and B vitamins essential for energy production
Read Also: Tres Leches Cake Recipe
Frequently Asked Questions
1. Why are my brownies cakey instead of fudgy?
This usually happens from overbaking or using too much flour. Make sure you’re measuring flour correctly by spooning it into the cup rather than scooping. Also, take the brownies out when they still look slightly underdone in the center—they’ll continue cooking as they cool.
2. Can I use milk chocolate instead of dark chocolate?
You can, but the brownies will be much sweeter and less intensely chocolatey. Dark chocolate with 60-70% cacao gives the best balance of sweetness and deep chocolate flavor. If you prefer sweeter brownies, try using 50-60% cacao chocolate.
3. How do I know when the brownies are done?
Insert a toothpick about 2 inches from the edge of the pan. It should come out with a few moist crumbs clinging to it, but not wet batter. The center should still look slightly shiny and underdone—this ensures fudgy brownies.
4. Can I make these brownies ahead of time?
Absolutely! These brownies actually improve in flavor after sitting for a day. You can make them up to 3 days ahead and store them covered at room temperature. For longer storage, freeze them for up to 3 months.
5. Why did my brownies sink in the middle?
This can happen if you overmix the batter after adding the flour, which incorporates too much air. It can also occur if your oven temperature is too high, causing rapid rising and then collapse. Use an oven thermometer to verify your temperature is accurate.
Final Thoughts
This Fudge Brownie Recipe has been a staple in my kitchen for years, and I hope it becomes one in yours too. The combination of simple ingredients, straightforward technique, and absolutely delicious results makes these brownies a winner every single time.
There’s something incredibly satisfying about pulling a pan of homemade brownies from the oven, watching that crackly top form as they cool, and enjoying that first fudgy bite. These brownies are perfect for gifting, bringing to potlucks, or simply treating yourself after a long day.
Give this recipe a try and let me know how they turn out! Drop a comment below with your favorite way to enjoy these brownies, or share a photo if you make them—I’d love to see your creations.
Recommended:
- Boston Cream Pie Recipe
- Cake Pop Recipe
- No Bake Cookie Recipe
- Peanut Butter Cookie Recipe
- Oatmeal Cookie Recipe
- Snickerdoodle Cookie Recipe
- Gingerbread Cookie Recipe
- Baklava Recipe
- Toffee Recipe
- Pumpkin Bar Recipe


