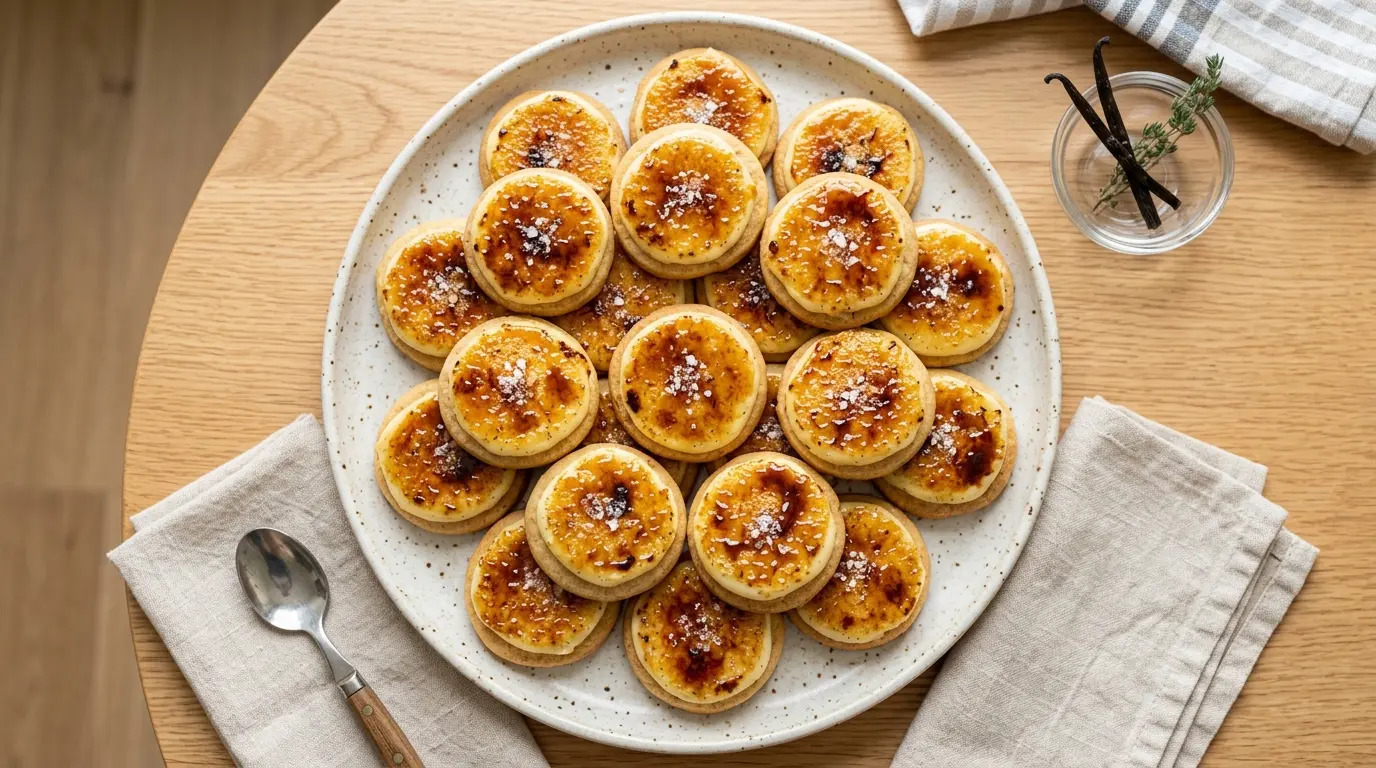
If you have ever dreamed of your favorite French dessert in cookie form, this Creme Brulee Cookies recipe is exactly what you need.
These cookies nail that signature experience: a soft, buttery sugar cookie base topped with silky vanilla pastry cream, finished with a caramelized sugar shell you crack right through with a spoon. Every bite delivers that perfect contrast between the crisp brulee layer and the creamy custard underneath.
They look incredibly impressive on a dessert table, but the process is surprisingly approachable for home bakers. You do not need to be a pastry chef to pull these off. You just need a culinary torch, a little patience for the pastry cream to chill, and a batch of good sugar cookie dough.
The secret to making these work is building the pastry cream properly. A high cornstarch-to-yolk ratio keeps the custard firm enough to hold its shape on top of the cookie without melting under the heat of the torch. That thick, stable cream is the foundation that makes the brulee topping actually crackle instead of turning into a puddle.
Read on and you will find every step broken down clearly, so your first batch comes out bakery-worthy.
You might also enjoy: Creme Brulee Cheesecake

Why You’ll Love This Creme Brulee Cookies Recipe
These cookies hit a sweet spot between elegant and easy, and they taste genuinely special.
The flavor profile is pure classic creme brulee: rich vanilla custard, caramelized sugar, and a buttery cookie base that brings everything together. If you love the dessert, you will be absolutely sold on this cookie version.
They are also endlessly crowd-pleasing. People who see the torched sugar topping at a party are immediately curious, and one bite always converts them into fans.
Here is what makes this recipe particularly great:
- The textures are extraordinary. You get a chewy cookie, a creamy custard layer, and a crispy caramelized top all in a single bite.
- The vanilla flavor is front and center. Using vanilla bean paste in both the dough and the pastry cream gives a deep, authentic custard taste that vanilla extract alone cannot match.
- They are make-ahead friendly. The pastry cream can be prepared a day in advance and the cookies can be baked ahead, so you only need to torch and serve on the day.
- The wow factor is real. These look like something from a high-end patisserie, but the technique is completely achievable at home.
- They are customizable. Once you have the base down, there are plenty of fun variations to try, from citrus twists to chocolate versions.
Read Also: Easy Creme Brulee Recipe
Ingredients
You will need two sets of ingredients for this recipe: one for the sugar cookie dough and one for the vanilla pastry cream. Every single component plays a role in the final result, so do not skip or substitute without reading the tips section.
Here is everything you will need:
For the Sugar Cookie Dough:
- 2 1/4 cups (280 g) all-purpose flour
- 1/2 tsp baking powder
- 1/4 tsp salt
- 1 cup (225 g) unsalted butter, softened to room temperature
- 3/4 cup (150 g) granulated white sugar
- 1 large egg, at room temperature
- 2 tsp vanilla bean paste
For the Vanilla Pastry Cream:
- 2 cups (480 ml) whole milk
- 4 large egg yolks
- 1/2 cup (100 g) granulated white sugar
- 1/4 cup (30 g) cornstarch
- 1/4 tsp salt
- 2 tsp vanilla bean paste
- 2 tbsp (28 g) unsalted butter, cold and cubed
For the Brulee Topping:
- 1/2 cup (100 g) granulated white sugar (for sprinkling and torching)
The pastry cream uses whole milk rather than cream because you want a firm, pipeable texture rather than the ultra-rich, loose custard you would get in a traditional baked creme brulee. The higher cornstarch ratio keeps it stable at room temperature long enough to torch without melting.
Another favorite: Pastry Cream Recipe
Kitchen Equipment Needed
Having the right tools on hand will make this process smoother, especially when it comes to torching and piping the pastry cream. The culinary torch is the one piece of equipment you absolutely cannot skip.
Here is what you will need:
- Two large baking sheets
- Parchment paper or silicone baking mats
- Stand mixer or hand mixer
- Medium saucepan
- Heatproof mixing bowls
- Fine mesh strainer
- Piping bag with a round tip (or a zip-lock bag with the corner snipped)
- Cookie scoop (about 2 tablespoons / 30 ml capacity)
- Culinary torch
- Plastic wrap
- Wire cooling rack
- Offset spatula
- Measuring cups and spoons
Read Also: Sugar Cookies Recipe
Recommended Products for This Recipe
These are products that genuinely make a difference in how this recipe turns out. Each one is recommended based on quality and real performance in the kitchen.
1. Nielsen-Massey Madagascar Bourbon Vanilla Bean Paste
Vanilla is the star flavor in both the cookie dough and the pastry cream, so the quality of your vanilla matters enormously. Nielsen-Massey’s vanilla bean paste delivers rich, complex flavor with real vanilla specks, giving your pastry cream that authentic creme brulee look and taste. It is a marked step up from standard vanilla extract for custard-based desserts.
2. Bernzomatic Professional Culinary Torch
A reliable torch is non-negotiable for this recipe. The Bernzomatic produces an even, controlled flame that caramelizes the sugar quickly and consistently without scorching the pastry cream underneath. It also has a locking mechanism and a simple ignition, making it easy and safe to use even for beginners.
3. Ateco Disposable Piping Bags
Piping the pastry cream neatly onto each cookie is much easier with quality disposable piping bags. Ateco bags are thick enough to resist bursting under pressure and wide enough to use without a coupler, making the whole process cleaner and quicker. They work perfectly for getting a smooth, even mound of custard on each cookie.
4. USA Pan Baking Sheets
Even, consistent heat distribution is key to getting cookies that bake uniformly without burnt bottoms. USA Pan’s aluminum baking sheets are a home baker staple because they conduct heat beautifully and resist warping. Your cookies will bake flat and even, which is exactly what you need for a stable pastry cream base.
The same pastry cream technique used here also works beautifully in a Fruit Tart Recipe if you want to put your custard skills to more use.

Step-by-Step Instructions
Step 1: Make the Pastry Cream
Start with the pastry cream since it needs at least two hours to chill before use. Making it first means it will be ready by the time your cookies are baked and cooled.
- In a medium saucepan, pour in 2 cups (480 ml) of whole milk and add 2 tsp of vanilla bean paste.
- Place the saucepan over medium heat and warm the milk until you see small bubbles forming around the edges and wisps of steam rising from the surface. Do not let it boil. This should take about 5 to 7 minutes.
- While the milk heats, place 4 large egg yolks, 1/2 cup (100 g) of granulated sugar, 1/4 cup (30 g) of cornstarch, and 1/4 tsp of salt into a large heatproof bowl.
- Whisk vigorously until the mixture turns pale yellow and slightly thick. It will start out very thick and somewhat clumpy, but it will smooth out as you whisk.
- Once the milk is steaming, slowly pour about 1/4 of the hot milk into the egg mixture while whisking constantly. This step is called tempering, and it gently raises the temperature of the egg yolks without scrambling them.
- Pour in the remaining hot milk in a thin, steady stream, whisking the entire time.
- Transfer the entire mixture back into the saucepan.
- Cook over medium heat, stirring constantly with a wooden spoon or silicone spatula, making sure to scrape the bottom and corners of the pan. After 3 to 5 minutes, the mixture will thicken quickly. Keep stirring until it comes to a full bubbling boil and you see large, slow bubbles breaking the surface.
- Remove the pan from the heat immediately. Add the 2 tbsp (28 g) of cold cubed unsalted butter and stir until it is completely melted and incorporated. The butter adds a silky, glossy finish to the pastry cream.
- Pour the pastry cream through a fine mesh strainer into a clean bowl to remove any lumps.
- Press a sheet of plastic wrap directly against the surface of the pastry cream so it is touching it completely. This prevents a skin from forming.
- Refrigerate for at least 2 hours, or up to 24 hours, until fully chilled and firm.
Step 2: Prepare the Cookie Dough
Once your pastry cream is chilling, move on to the sugar cookie dough. You want to make the dough while the pastry cream is setting.
- Preheat your oven to 350 degrees F (175 degrees C). Line two large baking sheets with parchment paper or silicone baking mats and set them aside.
- In a medium bowl, whisk together 2 1/4 cups (280 g) of all-purpose flour, 1/2 tsp of baking powder, and 1/4 tsp of salt. Set this dry mixture aside.
- In the bowl of your stand mixer fitted with the paddle attachment, or in a large bowl if using a hand mixer, beat 1 cup (225 g) of softened unsalted butter and 3/4 cup (150 g) of granulated sugar together on medium-high speed for 2 to 3 minutes. Stop and scrape down the sides of the bowl halfway through. The mixture should look light, fluffy, and noticeably paler in color.
- Add 1 large egg and 2 tsp of vanilla bean paste to the butter mixture. Beat on medium speed for about 1 minute until the egg is fully incorporated and the mixture looks smooth.
- Reduce the mixer to low speed. Add the flour mixture all at once and mix until just combined. The dough will be thick. Do not overmix. Stop as soon as you no longer see streaks of flour.
- If the dough feels sticky, you can gently fold it with a rubber spatula into a more cohesive ball. It should hold its shape without sticking to your hands, but it should not feel dry or crumbly.
Step 3: Portion and Bake the Cookies
Getting consistent portions is important here because all the cookies need to bake evenly and provide a uniform base for the pastry cream.
- Use a cookie scoop or a tablespoon to portion the dough into balls of about 2 tablespoons (30 g) each. Roll each portion between your palms to form a smooth ball.
- Place the dough balls onto the prepared baking sheets, spacing them about 2 inches (5 cm) apart. You should get about 18 to 20 cookies total.
- Using the back of a round measuring spoon (1 tablespoon size works well), press a shallow well into the center of each dough ball. This indentation will hold the pastry cream later. Press firmly but gently so the edges of the cookie do not crack.
- Bake the cookies in the preheated oven for 11 to 13 minutes. The edges should look set and barely beginning to turn golden, but the centers should still look slightly underdone and pale. They will firm up as they cool.
- As soon as you take the cookies out of the oven, you can use the back of a measuring spoon to gently reinforce the well in each cookie while they are still warm and pliable.
- Allow the cookies to cool on the baking sheet for 5 minutes before transferring them to a wire cooling rack. Let them cool completely before adding the pastry cream. Putting pastry cream on a warm cookie will melt the custard.
Step 4: Pipe the Pastry Cream
Once the cookies are fully cooled and the pastry cream is thoroughly chilled, it is time to assemble.
- Remove the pastry cream from the refrigerator. It will be very thick and firm, almost pudding-like. Give it a quick stir with a spatula to loosen it slightly, but do not overmix or it may become runny.
- Transfer the pastry cream to a piping bag fitted with a round tip, or use a zip-lock bag with one corner snipped off.
- Pipe a generous mound of pastry cream into the well of each cooled cookie, filling it to the top and creating a slightly domed surface. Aim for a smooth, even top since this is what will be torched.
- If you have extra pastry cream, you can re-pipe on top of any cookies that look thin.
- Once all cookies are filled, place them back in the refrigerator for 15 to 20 minutes so the pastry cream firms up again before torching.
Step 5: Brulee the Sugar Topping
This is the most exciting step and the one that transforms these from regular filled cookies into something truly special.
- Remove the chilled, filled cookies from the refrigerator. Work quickly so the pastry cream does not warm up too much before torching.
- Sprinkle a thin, even layer of granulated sugar over the top of each pastry cream mound. Use about 1/2 to 1 teaspoon per cookie. You want full, even coverage with no bare spots, as the sugar will caramelize into a uniform shell.
- Hold your culinary torch about 2 to 3 inches (5 to 8 cm) above the sugar and move it in slow, circular motions. Watch the sugar melt and then turn amber. Keep the flame moving at all times to avoid burning any single spot.
- The process takes about 20 to 30 seconds per cookie. Stop when the sugar is a deep golden amber and has fully hardened into a glassy shell.
- If you want an extra-thick, more crackly brulee layer, let the first sugar layer cool for 1 to 2 minutes, then add a second thin layer of sugar and torch again.
- Let the torched cookies rest for 1 to 2 minutes before serving so the sugar shell fully sets. Serve immediately for the best crunch. The longer the cookies sit after torching, the softer the brulee layer becomes as moisture from the pastry cream absorbs into the sugar.
For another cookie recipe that delivers a similar kind of wow factor, try the Snickerdoodle Cookie Recipe.
Tips for Success
Getting creme brulee cookies right comes down to a few key techniques. Pay attention to these points and your batch will turn out perfectly.
Here are the most important things to keep in mind:
- Chill the pastry cream thoroughly. Warm or under-chilled pastry cream will spread off the cookie and melt when torched. Give it a full 2 hours in the fridge, ideally overnight.
- Use vanilla bean paste, not extract. The paste provides a more concentrated vanilla flavor and contains real vanilla specks that make your pastry cream look authentic. It makes a noticeable difference in both taste and appearance.
- Do not overbake the cookies. They should look slightly underdone when you pull them from the oven. Overbaked cookies will be dry and crumbly, making it harder for them to hold the weight of the pastry cream.
- Work with cold pastry cream when torching. Cold pastry cream is less likely to melt away from the heat of the torch, especially with the double-layer sugar method.
- Keep the torch moving. A stationary flame will burn the sugar in one spot while leaving others uncaramelized. Steady, circular motions give you an even, glassy brulee shell.
- Torch right before serving. The crunch is best within the first 10 to 15 minutes after torching. If you need to prep ahead, fill the cookies and refrigerate, then torch just before serving.
- Sprinkle sugar evenly. Bare patches in the sugar layer will not caramelize, leaving you with a spotty topping. Use a small spoon to distribute the sugar as evenly as possible.
Read Also: Easy Sugar Cookie Recipe
Serving Suggestions
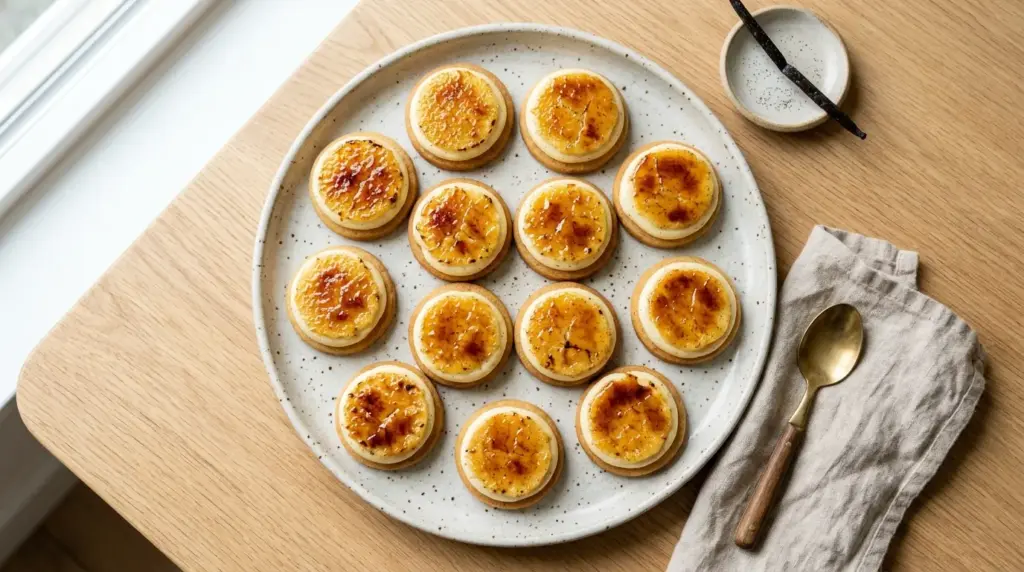
These cookies are best served fresh, right after the brulee topping sets. They make a stunning addition to any dessert table and pair well with a variety of accompaniments.
Here are some great ways to serve and present them:
- At a dinner party: Arrange the cookies on a white serving platter and torch them tableside for maximum drama. Guests love watching the sugar caramelize right in front of them.
- With a hot drink: Serve alongside a strong espresso, a vanilla latte, or a cup of hot tea to complement the rich custard flavors.
- As part of a dessert spread: These work beautifully next to other elegant French-inspired treats. Pairing them with a Chocolate Ganache dip on the side adds a luxurious chocolate element to the dessert table.
- Topped with fruit: A few fresh raspberries or a small spoonful of berry compote placed beside the brulee topping adds a bright, tart contrast to the sweet custard.
- Gifted in a box: Pack these in a pastry box lined with parchment for a truly impressive edible gift. Note that the brulee topping is best torched fresh, so if you are gifting them, either torch before packaging or gift the cookies with pastry cream already piped and let the recipient torch them.
Variations to Try
Once you are comfortable with the base recipe, these variations are worth exploring. Each one puts a different spin on the same brilliant concept.
- Lemon Creme Brulee Cookies: Add 1 tablespoon of fresh lemon zest to the pastry cream along with the vanilla. The bright citrus flavor cuts through the richness beautifully, giving the cookies a fresher, more summery feel.
- Chocolate Pastry Cream Version: Replace 2 tablespoons of cornstarch with 2 tablespoons of unsweetened cocoa powder and add 2 ounces of finely chopped dark chocolate to the hot cream at the end. You get a deep, chocolatey custard with the same crackly brulee top.
- Espresso Brulee Cookies: Stir 1 tablespoon of instant espresso powder into the hot milk before adding it to the egg mixture. The coffee flavor pairs wonderfully with the caramelized sugar shell.
- Brown Butter Cookie Base: Brown the butter for the cookie dough before creaming it (chill until resolidified but still soft). Brown butter adds a nutty, toffee-like depth to the cookie base that elevates the whole cookie.
- Cream Cheese Topping Version: If you do not have a culinary torch, swap the pastry cream for a sweetened cream cheese frosting and torch granulated sugar on top. The texture is slightly different but still captures that signature creme brulee crunch.
- Mini Creme Brulee Cookies: Use 1 tablespoon of dough per cookie instead of 2 for bite-size versions. Reduce the baking time to 9 to 10 minutes and pipe a smaller mound of pastry cream on each.
For a crunchy cookie that is just as satisfying without the custard work, check out the Shortbread Cookie Recipe.
Storage and Reheating
Creme brulee cookies are at their best right after torching, but there are ways to store them if needed. The key is keeping the pastry cream stable and re-torching before serving.
Here are the storage guidelines:
- Assembled and torched cookies: Store in an airtight container in the refrigerator for up to 2 days. Note that the brulee shell will soften in the fridge due to moisture. Re-sprinkle with sugar and torch again briefly before serving to restore the crunch.
- Cookies without pastry cream (just the baked cookie base): Store in an airtight container at room temperature for up to 4 days or in the freezer for up to 2 months.
- Pastry cream (unpipped, in a bowl): Store covered in the refrigerator for up to 3 days. Press plastic wrap directly onto the surface to prevent a skin from forming.
- Assembled but untorched cookies: Keep in the refrigerator for up to 24 hours. Torch right before serving.
- Reheating: These cookies do not need to be warmed. Simply re-torch the sugar topping at room temperature for the best brulee crunch.
You might also enjoy: Vanilla Bean Ice Cream Recipe
Nutritional Facts
The following values are approximate and based on one cookie (out of 18 total), including pastry cream and brulee topping. Nutritional content will vary depending on exact ingredient brands and portion sizes.
| Nutrient | Amount Per Cookie |
|---|---|
| Calories | 280 kcal |
| Total Fat | 15 g |
| Saturated Fat | 9 g |
| Cholesterol | 95 mg |
| Sodium | 90 mg |
| Total Carbohydrates | 32 g |
| Sugars | 20 g |
| Protein | 4 g |
Read Also: Caramel Sauce Recipe
Health Benefits of Key Ingredients
While these are certainly an indulgent treat, some of the core ingredients do carry genuine nutritional value.
Here is a closer look at a few standouts:
- Egg yolks: Rich in fat-soluble vitamins including A, D, E, and K, egg yolks also provide choline, which supports brain health and liver function. They contribute to the creamy, nutrient-dense quality of the pastry cream.
- Whole milk: A reliable source of calcium, phosphorus, and vitamin D, whole milk supports bone density and provides complete protein. Its fat content is also what gives the pastry cream its characteristic richness and smooth mouthfeel.
- Vanilla bean paste: Pure vanilla contains small amounts of antioxidants and has traditionally been used to support digestive comfort. Beyond nutrition, the vanillin compounds in real vanilla also contribute to its calming, mood-lifting aroma.
- Butter: Grass-fed butter in particular contains conjugated linoleic acid (CLA) and fat-soluble vitamins. In this recipe, the butter in the pastry cream adds the glossy finish that mirrors the silky texture of classic baked creme brulee.
- Eggs (whole): The egg in the cookie dough provides structure and richness while contributing high-quality protein. Eggs are also a source of lutein and zeaxanthin, two antioxidants that support eye health.
This cookie uses real, whole-food ingredients throughout, which is always a good foundation even for a dessert recipe.
Another favorite: Cream Cheese Frosting Recipe
Frequently Asked Questions
1. Can I make these without a culinary torch?
You can use your oven’s broiler as a substitute, but it requires careful attention. Place the filled cookies on a baking sheet, sprinkle with sugar, and place them under a hot broiler for 30 to 60 seconds, watching them constantly. The results are less precise than a torch, but it does work in a pinch.
2. Why did my pastry cream turn lumpy?
Lumps usually form when the egg mixture gets too hot too fast, scrambling the yolks, or when the cornstarch was not fully whisked in before adding the hot milk. Always temper the eggs gradually by pouring in only a small amount of hot milk first. Straining the finished pastry cream through a fine mesh strainer will also catch and remove any lumps before chilling.
3. Can I use cream cheese instead of pastry cream?
Yes, a sweetened cream cheese frosting is a popular shortcut. Beat 8 oz (225 g) of softened cream cheese with 2 to 3 tablespoons of powdered sugar and 1 teaspoon of vanilla bean paste until smooth. It will not taste exactly like classic creme brulee custard, but it provides a stable, spoonable base that works well under the torched sugar.
4. How do I prevent the brulee topping from getting soggy?
The brulee topping softens quickly when it absorbs moisture from the pastry cream. To maintain maximum crunch, torch the cookies right before serving rather than hours in advance. If you need to pre-fill the cookies, keep them refrigerated without the sugar topping, then add and torch the sugar at the last moment.
5. Can I freeze the assembled cookies?
It is not recommended to freeze fully assembled cookies with pastry cream, as the custard can become grainy and weep liquid when thawed. You can freeze the plain baked cookie bases very successfully for up to 2 months. Thaw at room temperature, then pipe the pastry cream and torch the topping fresh.
Read Also: Best Chocolate Chip Cookies Recipe
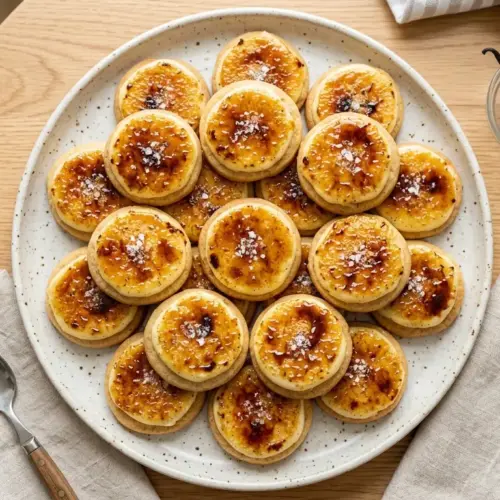
Creme Brulee Cookies

Equipment
- Two large baking sheets
- Parchment paper - or silicone baking mats
- Stand mixer - or hand mixer
- Medium saucepan
- Heatproof mixing bowls
- Fine-mesh strainer
- Piping bag - with a round tip or a zip-lock bag with the corner snipped
- Cookie scoop - about 2 tablespoons / 30 ml capacity
- Culinary torch - non-negotiable for this recipe
- Plastic wrap
- Wire cooling rack
- Offset spatula
- Measuring cups and spoons
Ingredients
For the Sugar Cookie Dough
- 2 1/4 cups all-purpose flour - 280g
- 1/2 tsp baking powder
- 1/4 tsp salt
- 1 cup unsalted butter - 225g, softened to room temperature
- 3/4 cup granulated white sugar - 150g
- 1 large egg - at room temperature
- 2 tsp vanilla bean paste
For the Vanilla Pastry Cream
- 2 cups whole milk - 480 ml
- 4 large egg yolks
- 1/2 cup granulated white sugar - 100g
- 1/4 cup cornstarch - 30g
- 1/4 tsp salt
- 2 tsp vanilla bean paste
- 2 tbsp unsalted butter - 28g, cold and cubed
For the Brulee Topping
- 1/2 cup granulated white sugar - 100g, for sprinkling and torching
Instructions
- Make the pastry cream first. Warm milk and vanilla bean paste in a saucepan over medium heat until steaming. Whisk egg yolks, sugar, cornstarch, and salt until pale and thick. Temper by slowly whisking in hot milk, then return to saucepan and cook while stirring constantly until bubbling and thickened. Remove from heat, stir in cold butter cubes until melted, then strain through a fine mesh sieve. Press plastic wrap directly on the surface and refrigerate for at least 2 hours.
- Preheat oven to 350°F (175°C) and line baking sheets with parchment. Whisk together flour, baking powder, and salt in a medium bowl. Beat softened butter and sugar in a stand mixer until light and fluffy. Add egg and vanilla bean paste, beating until smooth. Reduce mixer speed and add flour mixture, mixing just until combined.
- Portion dough into 2-tablespoon balls and place 2 inches apart on baking sheets. Press a shallow well into the center of each dough ball using the back of a measuring spoon. Bake for 11-13 minutes until edges are set and centers are slightly underdone. Reinforce the wells while warm, then cool completely on a wire rack.
- Once cookies and pastry cream are fully cooled and chilled, stir the pastry cream to loosen slightly. Transfer to a piping bag and pipe a generous mound into the well of each cookie, creating a slightly domed surface. Refrigerate filled cookies for 15-20 minutes to firm up before torching.
- Sprinkle a thin, even layer of granulated sugar over each pastry cream mound. Hold a culinary torch 2-3 inches above the sugar and move in slow circular motions until the sugar melts and turns a deep golden amber. Let rest for 1-2 minutes to set, then serve immediately for the best crunch.
Notes
- Chill the pastry cream thoroughly. Warm or under-chilled pastry cream will spread off the cookie and melt when torched. Give it a full 2 hours in the fridge, ideally overnight.
- Use vanilla bean paste, not extract. The paste provides a more concentrated vanilla flavor and contains real vanilla specks that make your pastry cream look authentic. It makes a noticeable difference in both taste and appearance.
- Do not overbake the cookies. They should look slightly underdone when you pull them from the oven. Overbaked cookies will be dry and crumbly, making it harder for them to hold the weight of the pastry cream.
- Work with cold pastry cream when torching. Cold pastry cream is less likely to melt away from the heat of the torch, especially with the double-layer sugar method.
- Keep the torch moving. A stationary flame will burn the sugar in one spot while leaving others uncaramelized. Steady, circular motions give you an even, glassy brulee shell.
- Torch right before serving. The crunch is best within the first 10 to 15 minutes after torching. If you need to prep ahead, fill the cookies and refrigerate, then torch just before serving.
- Sprinkle sugar evenly. Bare patches in the sugar layer will not caramelize, leaving you with a spotty topping. Use a small spoon to distribute the sugar as evenly as possible.
- Make-ahead friendly. The pastry cream can be prepared a day in advance and the cookies can be baked ahead, so you only need to torch and serve on the day.
- Without a torch? Use your oven’s broiler as a substitute. Place filled cookies on a baking sheet under a hot broiler for 30-60 seconds, watching constantly. Results are less precise but work in a pinch.
- Storage: Store torched cookies in an airtight container in the refrigerator for up to 2 days. Re-sprinkle with sugar and torch again briefly before serving to restore the crunch. Plain baked cookies can be frozen for up to 2 months.
Final Thoughts
This Creme Brulee Cookies recipe is one of those bakes that looks far more complicated than it actually is.
Once you make the pastry cream and bake the cookie base, the rest comes together quickly. That moment when the torch hits the sugar and it crisps up into a golden, glassy shell is genuinely satisfying every single time.
These are the kind of cookies that make people put down whatever they are doing and ask for the recipe. They are elegant, deeply flavorful, and completely unlike anything you would pick up from a grocery store.
Give them a try for your next dinner party, holiday cookie swap, or just because you deserve something special on a Tuesday. If you make a batch, leave a comment below and let me know how they turned out. Tag a friend who would love these too!
Recommended:
- Creme Brulee Cheesecake Recipe
- Peanut Butter Cookie Recipe
- Oatmeal Cookie Recipe
- Chewy Chocolate Chip Cookies Recipe
- Cut Out Sugar Cookie Recipe
- Gingerbread Cookie Recipe
- Lemon Shortbread Cookies Recipe
- Peanut Butter Blossom Cookies Recipe
- No Bake Cookie Recipe
- Monster Cookie Recipe



