If you’ve ever wanted to bake a truly stunning white cake recipe from scratch, you’re in the right place. This is the kind of cake that shows up at birthdays, bridal showers, and holiday tables — tall, cloud-white layers with a tight, velvety crumb that melts on your tongue.
What makes a white cake different from a standard vanilla cake is one key detail: it uses only egg whites, no yolks. That’s what keeps the crumb pure white and gives it that signature light texture you just can’t get from a yellow cake batter.
This recipe leans on a few classic techniques — creaming butter and sugar until pale and fluffy, folding in stiff egg whites at the end — that ensure every layer bakes up tall and tender.
Paired with a silky vanilla buttercream frosting, this cake becomes the kind of thing people ask you to bring to every gathering.
Why You’ll Love This White Cake Recipe
This cake wins people over every single time it hits the table, and the reasons are pretty simple.
The texture is genuinely extraordinary. That combination of cake flour, egg whites, and buttermilk creates a crumb so soft it practically dissolves, which is something all-purpose flour and whole eggs just can’t replicate.
It’s also incredibly versatile. You can dress it up with fresh berries, fill the layers with lemon curd, or keep it elegant with a clean white frosting — and it works beautifully every time.
Here’s what else you’ll love about this recipe:
- Pure white color from egg whites only, which makes it a show-stopper for special occasions
- Tender, fine crumb thanks to cake flour and the reverse creaming method
- Mild, sweet flavor that pairs with virtually any frosting or filling
- Reliable rise because beaten egg whites add lift without relying solely on leavening agents
- Freezer-friendly layers that you can bake ahead and assemble later
- Crowd-pleasing appeal that kids and adults both love equally
For a fun twist, you can use the same base batter to make a funfetti cake recipe by folding in rainbow sprinkles before baking.
Ingredients
A great white cake starts with good-quality basics. Here’s what you’ll need, and why each one matters:
- Cake flour gives you that fine, velvety crumb that sets a white cake apart. All-purpose flour produces a slightly denser texture, so cake flour is worth tracking down.
- Cold butter vs. room temperature: Room temperature butter creams properly and creates a tender crumb.
- Egg whites only — this is non-negotiable for keeping the cake white and light.
- Buttermilk adds just a touch of tang and reacts with the leavening agents to help the layers rise evenly.
Here is the full ingredient list for two 9-inch cake layers:
- 3 cups (360g) cake flour, sifted
- 1 tablespoon (12g) baking powder
- 1/2 teaspoon (3g) salt
- 1 cup (225g / 2 sticks) unsalted butter, room temperature
- 2 cups (400g) granulated sugar
- 6 large egg whites, room temperature
- 1 tablespoon (15ml) pure vanilla extract
- 1 teaspoon (5ml) almond extract (optional, but highly recommended)
- 1 cup (240ml) whole buttermilk, room temperature
For the Vanilla Buttercream Frosting:
- 1 1/2 cups (340g / 3 sticks) unsalted butter, room temperature
- 5 cups (600g) powdered sugar, sifted
- 3-4 tablespoons (45-60ml) heavy cream or whole milk
- 2 teaspoons (10ml) pure vanilla extract
- Pinch of salt
You might also enjoy: Classic Vanilla Cake Recipe
Kitchen Equipment Needed
Having the right tools makes baking this cake so much smoother. Here’s what to gather before you start:
- Two 9-inch round cake pans — investing in quality pans with straight sides ensures even layers
- A stand mixer or hand mixer — essential for properly creaming the butter and beating the egg whites
- A large mixing bowl and a medium mixing bowl
- A kitchen scale (highly recommended for accuracy with baking)
- A fine mesh sieve or sifter for the cake flour
- Rubber spatulas for folding
- Parchment paper rounds for the cake pan bottoms
- A wire cooling rack
- An offset spatula for frosting
- A cake turntable (optional but very helpful for smooth frosting)
- A cake decorating turntable for professional-looking results
- A kitchen scale for baking for precise measurements
- A stand mixer for effortlessly creaming butter and beating egg whites
Read Also: Classic Yellow Cake Recipe
Recommended Products for This Recipe
These are products that genuinely make a difference in how your white cake turns out, selected based on quality and how well they perform in this specific recipe.
1. Nordic Ware Natural Aluminum 9-Inch Round Cake Pans
These pans heat evenly and have straight sides, which means your layers bake up level without domed tops. The light aluminum color also prevents over-browning on the edges. They’re a staple in any serious home baker’s kitchen and are far more reliable than dark nonstick pans for delicate white cakes.
2. Bob’s Red Mill Super-Fine Cake Flour
Cake flour is the single most important ingredient for that soft, tender crumb, and Bob’s Red Mill produces a consistent, finely milled product. It’s lower in protein than all-purpose flour, which means less gluten development and a noticeably more delicate texture in every slice.
3. Nielsen-Massey Pure Vanilla Extract
The vanilla flavor in this cake is front and center, so it’s worth using a real, high-quality extract. Nielsen-Massey is made from premium Madagascan vanilla beans and has a depth of flavor that artificial extracts simply can’t match.
4. OXO Good Grips Offset Icing Spatula
Getting clean, smooth frosting on a layer cake is much easier with an offset spatula than with a regular butter knife. The angled blade gives you control and leverage, especially when working around the sides of the cake. This is the one tool most home bakers wish they’d bought sooner.
5. Wilton Parchment Paper Rounds
Pre-cut parchment rounds save so much time and frustration. Instead of tracing and cutting your own, these drop right into the pan and ensure your cake layers release cleanly every single time.
The same elegant layered approach works beautifully in a lemon cake recipe if you’d like something with a citrusy twist.
Step-by-Step Instructions
1. Prepare Your Pans and Oven
- Preheat your oven to 350°F (175°C). Make sure the rack is positioned in the center of the oven for even heat distribution.
- Grease two 9-inch round cake pans generously with butter or nonstick spray, making sure to cover the sides as well as the bottom.
- Cut two circles of parchment paper to fit the bottoms of the pans. Press them in, then grease the parchment as well. This double layer of preparation ensures your cakes release cleanly.
- Lightly dust the greased pans with a small amount of cake flour, tapping out any excess. This creates a thin coating that further prevents sticking.
2. Sift and Mix the Dry Ingredients
- Sift the cake flour directly into a medium mixing bowl. Sifting removes any lumps and aerates the flour, which contributes to a lighter crumb.
- Add the baking powder and salt to the sifted flour.
- Whisk the dry ingredients together gently until well combined. Set this bowl aside.
3. Beat the Butter and Sugar
- Place the room-temperature butter in the bowl of your stand mixer fitted with the paddle attachment. If using a hand mixer, use a large mixing bowl.
- Beat the butter on medium speed for about 2 minutes until it looks lighter in color and slightly fluffy.
- With the mixer running on medium, gradually add the granulated sugar in a slow, steady stream.
- Once all the sugar is in, increase the speed to medium-high and beat for 4 to 5 minutes. The mixture should look pale, very fluffy, and almost white. This step is critical — don’t rush it. Proper creaming builds structure into the cake.
- Scrape down the sides and bottom of the bowl with a rubber spatula and beat for one more minute.
4. Add the Vanilla and Almond Extracts
- Add the pure vanilla extract and almond extract (if using) to the butter-sugar mixture.
- Beat on medium for about 30 seconds until fully incorporated.
- Scrape the bowl down again. The almond extract might seem optional, but even just a small amount adds a subtle, bakery-style depth of flavor that makes people wonder what your secret is.
5. Add the Egg Whites
- With the mixer on medium-low, add the egg whites to the creamed butter mixture two at a time, beating for about 20-30 seconds after each addition before adding more.
- After all egg whites are in, scrape the bowl and beat on medium for about 1 minute until the mixture is smooth and uniform. The batter may look slightly curdled at this point — that’s completely normal and will come together when the flour is added.
6. Alternate Adding the Flour Mixture and Buttermilk
- With the mixer on low speed, add one-third of the flour mixture and mix just until the flour starts to disappear.
- Pour in half of the buttermilk and mix on low until just combined.
- Add another third of the flour mixture, followed by the remaining buttermilk.
- Finally, add the last third of the flour and mix on low just until the batter is smooth and no streaks of flour remain. Do not overmix — overmixing develops gluten and makes the cake tough.
- Remove the bowl from the mixer and give the batter one or two final folds by hand with a rubber spatula to make sure the bottom of the bowl is fully incorporated.
7. Divide the Batter and Bake
- Divide the batter evenly between the two prepared cake pans. For best results, use a kitchen scale to weigh the pans and ensure the layers are exactly the same height.
- Smooth the tops of the batter gently with an offset spatula or the back of a spoon.
- Bake at 350°F (175°C) for 30 to 35 minutes. The cakes are done when a toothpick inserted in the center comes out with just a few moist crumbs (not wet batter), and the edges have just started to pull away from the sides of the pan.
- Do not open the oven door during the first 25 minutes of baking, as this can cause the layers to sink in the center.
8. Cool the Cakes
- Remove the pans from the oven and set them on a wire cooling rack. Let the cakes cool in the pans for exactly 10 minutes — no longer, or they may become difficult to release.
- Run a thin knife or offset spatula around the edge of each cake to loosen it.
- Invert each cake onto the wire rack, peel off the parchment paper, and let them cool completely — at least 1 full hour — before frosting. Frosting a warm cake will melt the buttercream and cause it to slide off.
9. Make the Vanilla Buttercream Frosting
- Beat the room-temperature butter in the stand mixer with the paddle attachment on medium-high speed for about 3 to 4 minutes until it is pale and fluffy.
- Reduce the speed to low and add the sifted powdered sugar one cup at a time, mixing until each addition is fully incorporated before adding the next.
- Add the vanilla extract and a pinch of salt, then mix on low.
- Add 3 tablespoons of heavy cream and increase the speed to medium-high. Beat for 2 to 3 minutes until the frosting is light, airy, and spreadable. Add the remaining tablespoon of cream if a softer consistency is needed.
- Scrape the bowl and give the frosting one final stir by hand to push out any large air bubbles.
10. Assemble and Frost the Cake
- Place one cooled cake layer on a cake board or serving plate. Place a few strips of parchment paper under the edges of the cake to keep the board clean while frosting.
- Spoon a generous amount of buttercream onto the center of the first layer and spread it out evenly with an offset spatula, going all the way to the edges.
- Place the second cake layer on top, flat side up (this gives you a level surface).
- Apply a thin “crumb coat” of frosting all over the top and sides of the cake. This first thin layer traps crumbs and creates a clean base for the final coat. Refrigerate for 20 to 30 minutes until the crumb coat is firm.
- Apply the final coat of frosting generously and smooth it out using your offset spatula and a cake turntable. Work in long, steady strokes for the smoothest finish.
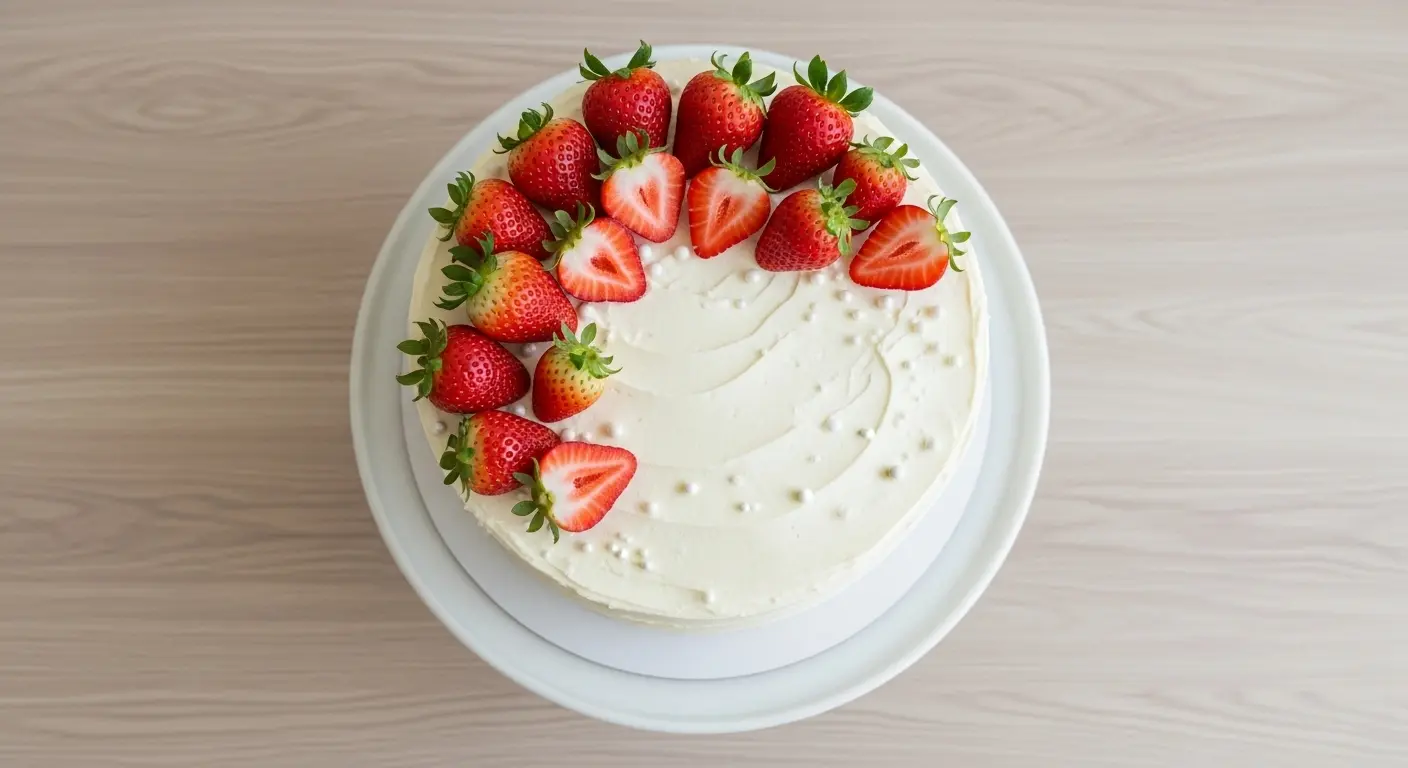
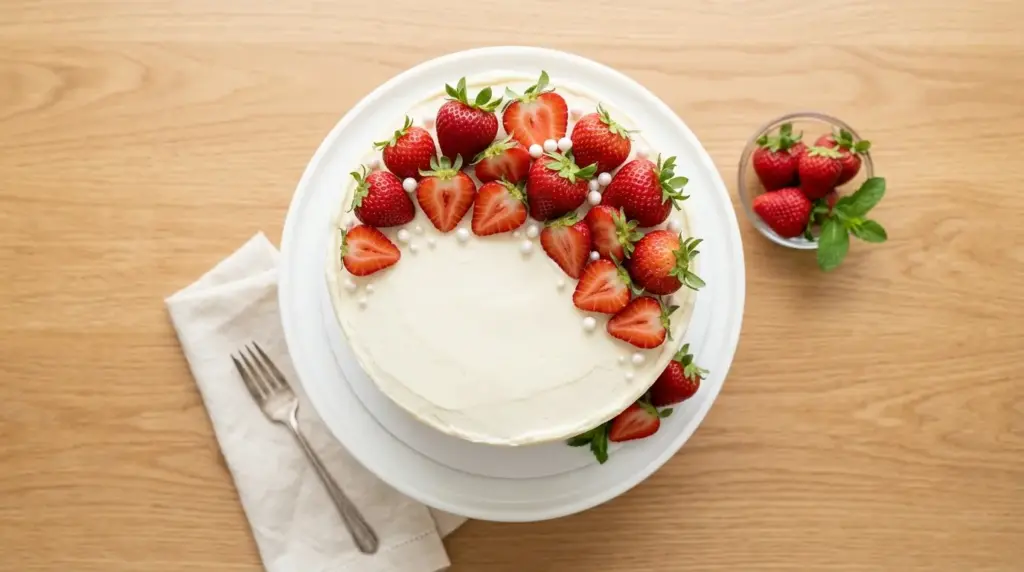
- Decorate as you like — fresh flowers, sprinkles, berries, or keep it elegantly plain.
Read Also: Strawberry Cake Recipe
Tips for Success
A few small adjustments can be the difference between a good white cake and a truly spectacular one. Keep these in mind:
- Use room temperature ingredients. Cold butter won’t cream properly, and cold eggs or buttermilk can cause the batter to curdle. Set everything out at least 1 hour before you start baking.
- Don’t skip the sifting. Cake flour can clump, and sifting prevents lumps while also aerating the flour for a lighter crumb.
- Don’t overmix once the flour goes in. The moment the flour is incorporated, stop the mixer. Overmixing builds gluten and results in a tougher cake.
- Weigh your ingredients. Baking is chemistry, and measuring by weight instead of volume is significantly more accurate, especially for flour.
- Let the layers cool completely. This is not optional. A warm cake will melt your frosting and make the whole assembly a mess.
Here are the top tips at a glance:
- Use only egg whites, never yolks, to keep the crumb white and light
- Beat the butter and sugar for the full 4 to 5 minutes — this is where your texture is built
- Alternate flour and buttermilk in thirds to keep the batter emulsified
- Use cake flour, not all-purpose, for the best texture
- Refrigerate after the crumb coat for a cleaner, more professional-looking final coat
- Always use a kitchen scale for precision
This technique works equally well if you decide to try a red velvet cake recipe using a similar creaming method.
Serving Suggestions
This white cake is elegant enough to serve on its own and versatile enough to be dressed up for any occasion. It pairs beautifully with so many accompaniments.
Consider serving slices alongside a scoop of vanilla bean ice cream for a simple, crowd-pleasing dessert combination that feels special without any extra effort.
Here are more ways to serve it:
- Top with a spoonful of fresh strawberry sauce for a bright, fruity contrast
- Serve with a drizzle of chocolate ganache for a black and white effect
- Add a layer of pastry cream between the cake layers for a Boston cream pie-inspired version
- Dust with powdered sugar and arrange fresh raspberries or strawberries on top for a simple, stunning presentation
- Pair with a cup of coffee or a floral tea for an afternoon tea setting
- Fill the layers with lemon curd for a bright, tangy surprise inside each slice
Variations to Try
Once you’ve mastered the classic version, there are so many delicious directions you can take this recipe. The base batter is incredibly adaptable:
- Lemon White Cake: Add 2 tablespoons of fresh lemon zest to the batter and fill the layers with lemon curd for a bright, citrusy version.
- Almond White Cake: Increase the almond extract to 1 tablespoon and top with sliced almonds for a French-inspired twist.
- Coconut White Cake: Replace the buttermilk with full-fat coconut milk and fold 1/2 cup of shredded sweetened coconut into the batter. Frost with coconut buttercream.
- Strawberry White Cake: Fill the layers with fresh strawberry jam or a strawberry cream filling for a gorgeous summer cake.
- Marble White Cake: Swirl a small amount of chocolate ganache into the white batter in each pan before baking for a marbled visual effect.
Here are the quick variation ideas at a glance:
- Lemon white cake with lemon curd filling
- Almond white cake with almond buttercream
- Coconut white cake with coconut milk and shredded coconut
- Strawberry white cake with jam filling
- Marble white cake with swirled chocolate ganache
- Funfetti version with rainbow sprinkles folded into the batter
For a deeply rich chocolate version that uses a similar technique, the chocolate cake recipe on this site is a great companion bake.
Storage and Reheating
Proper storage keeps this cake tasting fresh for several days, and knowing the right method for each situation helps you plan ahead:
White cake stores well at room temperature or in the refrigerator depending on the filling and frosting used. Buttercream-frosted cakes are stable at room temperature for up to 2 days in a cool kitchen.
Here are the storage guidelines:
- Room temperature: Cover the cake with a cake dome or loosely with plastic wrap and store for up to 2 days. Keep it away from direct sunlight and heat.
- Refrigerator: Store in an airtight container or tightly covered with plastic wrap for up to 5 days. Allow the cake to come to room temperature for about 30 minutes before serving for the best texture.
- Freezer (unfrosted layers): Wrap each cooled cake layer individually in two layers of plastic wrap, then in a layer of foil. Freeze for up to 3 months. Thaw overnight in the refrigerator before frosting.
- Freezer (frosted slices): Place individual slices on a parchment-lined sheet pan and freeze until solid, then transfer to a zip-top bag. Freeze for up to 2 months.
- Reheating: This cake is best served at room temperature. If slices are cold from the refrigerator, allow them to sit out for 20 to 30 minutes before serving. Microwaving is not recommended as it can dry out the crumb.
Read Also: Pound Cake Recipe
Nutritional Facts
The following values are approximate for one slice (1/12 of a two-layer 9-inch cake with vanilla buttercream frosting):
| Nutrient | Amount Per Serving |
|---|---|
| Calories | 540 kcal |
| Total Fat | 24g |
| Saturated Fat | 15g |
| Cholesterol | 62mg |
| Sodium | 190mg |
| Total Carbohydrates | 78g |
| Dietary Fiber | 0.5g |
| Total Sugars | 61g |
| Protein | 4g |
| Calcium | 60mg |
| Iron | 1mg |
Nutritional values are estimates based on standard ingredient brands and may vary depending on specific products and serving sizes used.
You might also enjoy: Angel Food Cake Recipe
Health Benefits of Key Ingredients
While this is certainly a celebratory treat rather than a health food, a few of the key ingredients do offer some genuine nutritional value worth noting.
Eggs whites, which form the structural base of this cake, are an excellent source of high-quality protein with virtually no fat or cholesterol. They provide all the essential amino acids the body needs for muscle maintenance and repair.
Here’s a closer look at what the key ingredients contribute:
- Egg whites: High in protein, fat-free, and rich in essential amino acids that support muscle function and immune health
- Butter: A natural source of fat-soluble vitamins A, D, E, and K2, which support bone health, immune function, and vision
- Buttermilk: Contains probiotics and beneficial bacteria that support gut health, as well as calcium and riboflavin
- Whole milk (in frosting): Provides calcium, phosphorus, and vitamin D, which are essential for bone health and nerve function
- Vanilla extract: Contains small amounts of antioxidants and has been associated with anti-inflammatory properties in studies
Read Also: Lemon Chiffon Cake Recipe
Frequently Asked Questions
1. Can I use all-purpose flour instead of cake flour?
You can substitute all-purpose flour in a pinch, but the texture will be noticeably different. Cake flour has a lower protein content (about 7-9%) compared to all-purpose flour (about 10-12%), which means less gluten development and a much softer crumb. If you must use all-purpose flour, substitute 1 cup of all-purpose flour minus 2 tablespoons, then add 2 tablespoons of cornstarch for every cup called for. This DIY version isn’t quite as fine as true cake flour, but it gets reasonably close.
2. Why did my white cake turn out yellow?
The most common reason a white cake turns yellow is the use of whole eggs or egg yolks. This recipe calls for egg whites only, and that’s intentional. Even one yolk can tint the batter noticeably. Another culprit can be vanilla extract — pure vanilla extract has a slight amber tint that can affect the color. For the whitest possible result, you can use clear vanilla extract instead of pure vanilla.
3. Can I make this cake ahead of time?
Absolutely. In fact, the unfrosted cake layers can be baked up to 2 days in advance and stored tightly wrapped at room temperature. For longer storage, freeze the layers (well-wrapped) for up to 3 months. The assembled and frosted cake can be refrigerated for up to 3 days — just bring it back to room temperature before serving so the butter in the crumb and frosting can soften.
4. What’s the difference between white cake and vanilla cake?
The main difference is the use of eggs. Vanilla cake typically uses whole eggs, which gives it a slightly yellow color and a richer, denser crumb. White cake uses only egg whites, resulting in a purer white color and a noticeably lighter, more delicate texture. Both are flavored with vanilla, but the egg whites make white cake unique in both appearance and mouthfeel.
5. Can I use this recipe to make cupcakes?
Yes, this batter works beautifully as cupcakes. Line a standard muffin tin with cupcake liners and fill each one about two-thirds full. Bake at 350°F (175°C) for 18 to 22 minutes, until a toothpick comes out with just a few moist crumbs. This recipe makes approximately 24 standard cupcakes. Let them cool completely before frosting with the vanilla buttercream.
This same batter, scaled down, also works well in a mug cake recipe format for single-serving quick desserts.
Final Thoughts
A classic white cake recipe is one of those foundational baking skills that pays dividends for years. Once you understand the technique — proper creaming, using egg whites only, alternating the flour and liquid — you can adapt the base to dozens of different flavors and occasions.
This cake is everything a celebration dessert should be: beautiful, delicious, and made with care. Whether you’re baking it for a birthday, a wedding shower, or simply because someone you love deserves a slice of something special, it always delivers.
Give this recipe a try and let us know how it goes in the comments below. We’d love to hear what frosting or filling you paired it with, and please share a photo if you make it!
Recommended:
- Funfetti Cake Recipe
- Cream Cheese Frosting Recipe
- Chocolate Buttercream Frosting Recipe
- Sour Cream Coffee Cake Recipe
- Best Carrot Cake Recipe
- Tres Leches Cake Recipe
- Checkerboard Cake Recipe
- Boston Cream Pie Recipe
- Carrot Cake with Cream Cheese Frosting Recipe
- Classic Pineapple Upside Down Cake Recipe


