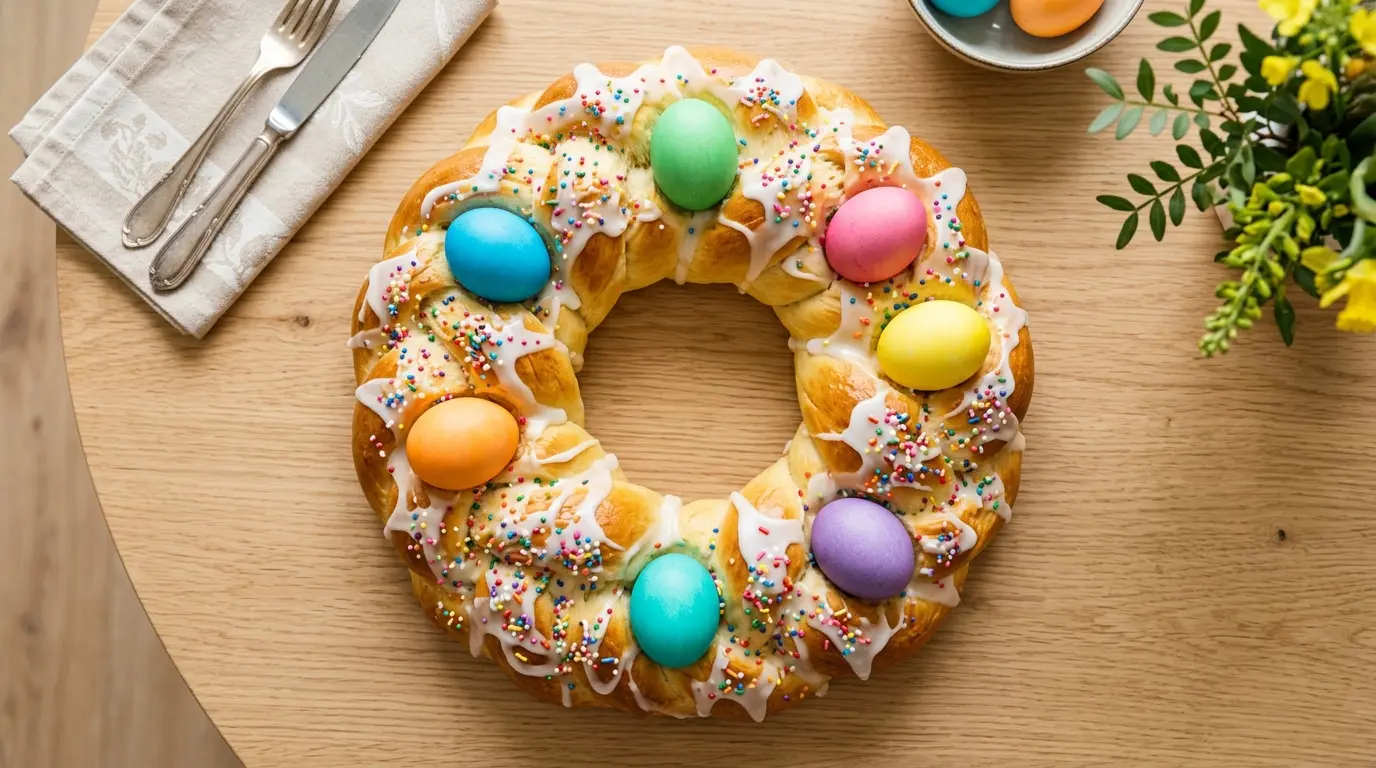
Every spring, when the holidays roll around, my kitchen fills with the most wonderful aroma of citrus and warm yeast dough. This Easter bread recipe is one I look forward to making every year, and honestly, it might be the most impressive thing you can put on your table.
This is the classic Italian Easter bread, known as Pane di Pasqua, a lightly sweetened, brioche-style braided loaf nestled with colorful dyed eggs and finished with a simple glaze and rainbow sprinkles. It looks like it came from a fancy bakery, but it’s completely doable at home.
The secret to its pillowy, melt-in-your-mouth texture comes down to a rich dough made with whole milk, butter, and eggs. Whole milk creates a tenderness that water-based doughs just can’t match, while the butter adds a subtle richness that makes every bite feel special.
Orange zest is the magic ingredient here. It adds a floral, citrusy fragrance that is unmistakably festive and lifts the whole loaf from ordinary to extraordinary.
If you’ve never made yeast bread before, don’t be nervous. The process is simple, the steps are clear, and the result is a stunning centerpiece that your family will talk about for years.
You might also love this Challah Recipe, another beautifully braided celebration bread that follows a similar technique.

Why You’ll Love This Easter Bread Recipe
Making this Easter bread recipe at home is genuinely one of the most rewarding things you can do in the kitchen this time of year.
The dough is soft and pillow-like, with a hint of sweetness and citrus that makes it feel genuinely special rather than just like a regular loaf of bread.
It’s a showstopper on the table. The golden braid wrapped around colorful eggs looks like it belongs on the cover of a magazine, yet the process is approachable for even beginner bakers.
Here’s exactly why this recipe earns a spot in your Easter tradition:
- Tender, enriched dough: The combination of eggs, butter, and whole milk creates an incredibly soft crumb that practically melts in your mouth.
- Beautiful presentation: Braiding the dough and nesting colored eggs inside makes an eye-catching centerpiece that doubles as a conversation starter.
- Fragrant and festive: Orange zest and a touch of vanilla give the bread a delicate, floral aroma that fills the entire house.
- Perfectly sweet: It’s lightly sweetened, making it versatile enough to enjoy at brunch or alongside your Easter dinner.
- Great for making ahead: The dough can be prepared the night before, saving you time on Easter morning.
- Family-friendly activity: Kids absolutely love helping place the colored eggs and sprinkling the nonpareils on top.
This pairs wonderfully with a Brioche Recipe if you want to bake two beautiful celebration breads for your Easter table.
Ingredients
This Easter bread uses simple pantry staples alongside a few key ingredients that make all the difference. The orange zest is non-negotiable. It’s what gives authentic Italian Easter bread its signature aroma and flavor, and skipping it would make the loaf taste generic.
For the Dough:
- 4 cups (500g) all-purpose flour, plus more for kneading
- 2 1/4 teaspoons (7g) active dry yeast (1 standard packet)
- 1/2 cup (120ml) whole milk, warmed to 110°F (43°C)
- 1/3 cup (67g) granulated sugar
- 1/4 teaspoon salt
- 3 large eggs, at room temperature
- 4 tablespoons (57g) unsalted butter, softened
- 1 teaspoon pure vanilla extract
- Zest of 1 large orange (about 1 tablespoon)
For Assembly:
- 5 raw eggs, dyed with Easter egg dye (or left undyed)
- 1 egg, beaten (for egg wash)
- 1 tablespoon whole milk (for egg wash)
For the Glaze:
- 1 cup (120g) powdered sugar
- 2-3 tablespoons whole milk
- 1/2 teaspoon pure vanilla extract
For Decoration:
Speaking of festive holiday breads, this Panettone Recipe is another classic that’s absolutely worth adding to your holiday baking list.
Kitchen Equipment Needed
Having the right tools on hand makes the whole process smoother and helps you get the best possible texture in your dough. You don’t need anything overly specialized, but a stand mixer does make kneading much easier and more consistent.
- Stand mixer with dough hook attachment (or large mixing bowl and hands)
- Large mixing bowl (for proofing the dough)
- Measuring cups and spoons
- Kitchen scale (recommended for accuracy)
- Instant-read thermometer (for checking milk temperature and dough doneness)
- Large baking sheet lined with parchment paper
- Parchment paper
- Plastic wrap or clean kitchen towel
- Pastry brush (for egg wash and glaze)
- Wire cooling rack
- Microplane or fine grater (for orange zest)
- Small bowl (for egg wash and glaze mixing)
Read Also: Cinnamon Swirl Bread Recipe
Recommended Products for This Recipe
These are products I genuinely recommend based on quality, reliability, and how much they improve your results. Each one solves a common baking challenge.
1. KitchenAid Artisan Stand Mixer
A stand mixer with a dough hook takes all the hard work out of kneading enriched dough. Easter bread dough is buttery and elastic, and hand-kneading it for 10 minutes can be exhausting. With a stand mixer, you get consistent, fully developed gluten without the arm workout, which means a lighter, fluffier final loaf.
2. Wilton Easter Egg Dye Kit
The colorful eggs nestled into the bread are one of the most iconic parts of this recipe. A dedicated Easter egg dye kit gives you vivid, saturated colors that stay bright even after the bread bakes, making the finished loaf truly pop with holiday cheer.
3. OXO Good Grips Microplane Zester
Getting the most flavor from your orange zest requires a sharp, fine-toothed zester. A quality microplane zests effortlessly, captures only the fragrant outer peel (not the bitter white pith beneath), and makes a real difference in the aroma of your finished bread.
4. USA Pan Baking Sheet
A heavy-duty, rimmed baking sheet ensures even heat distribution so your Easter bread bakes through without burning on the bottom. The light-colored surface prevents over-browning and gives you that perfect golden crust.
5. Nielsen-Massey Pure Vanilla Extract
High-quality vanilla extract makes a noticeable difference in enriched doughs. Nielsen-Massey uses pure vanilla beans and a cold-process method that preserves the full spectrum of vanilla’s flavor compounds, resulting in a more complex and aromatic finished bread.
Another favorite: Cranberry Orange Bread Recipe

Step-by-Step Instructions
1. Dye Your Eggs
- Start by dyeing your 5 raw eggs at least a few hours before (or the night before) you plan to bake.
- Use a store-bought Easter egg dye kit and follow the package instructions, using cold or room-temperature water (not boiling) so the eggs don’t cook through.
- Place the dyed eggs on a paper towel-lined rack and let them dry completely before embedding them in the dough.
- Note: The eggs will be raw when they go into the bread and will cook during baking. This is traditional and perfectly safe.
2. Activate the Yeast
- Warm your whole milk to 110°F (43°C). It should feel like warm bathwater on the inside of your wrist, not hot. If it’s too hot, it will kill the yeast; if it’s too cold, the yeast won’t activate.
- In the bowl of your stand mixer (or a large bowl if kneading by hand), combine the warmed milk, granulated sugar, and active dry yeast.
- Stir gently to combine and let the mixture rest for 5 to 10 minutes.
- You’ll know the yeast is active when the mixture becomes visibly foamy and smells pleasantly bread-like. If nothing happens after 10 minutes, your yeast may be old. Discard and start with a fresh packet.
3. Mix the Dough
- To the foamy yeast mixture, add the 3 room-temperature eggs, vanilla extract, and orange zest.
- Add the softened butter (cut into small pieces so it incorporates easily) and the salt.
- Begin adding the flour, one cup at a time, mixing on low speed with the dough hook attachment (or stirring with a wooden spoon if doing by hand).
- Once all 4 cups of flour have been added, the dough should come together into a shaggy ball.
- If the dough seems too sticky to work with, add extra flour one tablespoon at a time, but resist adding too much. A slightly tacky dough is correct and will result in a softer loaf.
4. Knead the Dough
- With the dough hook attached, knead the dough on medium speed for 8 to 10 minutes.
- If kneading by hand, turn the dough out onto a lightly floured surface and knead by pushing the dough away with the heel of your hand, folding it back over itself, and rotating 90 degrees, repeating for 8 to 10 minutes.
- The dough is properly kneaded when it is smooth, elastic, and slightly tacky but does not stick to your hands or the bowl.
- To test: poke the dough with your finger. It should spring back slowly, not immediately.
5. First Rise
- Lightly grease a large, clean bowl with a little butter or oil.
- Shape the kneaded dough into a smooth ball and place it in the greased bowl, turning once so all sides are coated.
- Cover the bowl tightly with plastic wrap or a clean, damp kitchen towel.
- Set the bowl in a warm, draft-free area and allow the dough to rise until doubled in size, about 1 to 1.5 hours.
- Good warm spots include near a warm oven, on top of the refrigerator, or inside your oven with only the oven light turned on.
6. Divide and Shape the Ropes
- Once the dough has doubled, gently punch it down to release the gas bubbles.
- Turn the dough out onto a lightly floured surface and divide it into 6 equal pieces using a bench scraper or sharp knife.
- Roll each piece into a rope approximately 16 to 18 inches (40 to 45 cm) long. Try to keep each rope as even in thickness as possible for a uniform braid.
- If the dough springs back and resists rolling, let it rest, uncovered, for 5 minutes before trying again. This relaxes the gluten and makes shaping much easier.
7. Braid and Shape the Loaves
- Take 3 ropes and pinch them together at one end, then braid them loosely, being careful not to braid too tightly because the dough needs room to expand during the second rise and baking.
- When you reach the other end, pinch the ends together to seal.
- Bring both sealed ends together to form a ring and pinch firmly to seal the ring shape.
- Repeat with the remaining 3 ropes to form a second braided ring.
- Place each ring on a parchment-lined baking sheet, spacing them at least 3 inches (7.5 cm) apart.
- Gently tuck 2 to 3 dyed eggs into the gaps of the braid of each ring, pressing them in enough to hold but not so hard that you break the eggs or distort the braid shape. One loaf will hold 2 eggs and the other 3, or you can do a single large ring with all 5 eggs.
8. Second Rise
- Loosely cover both braided rings with plastic wrap or a clean towel.
- Allow them to rise again in a warm spot for 45 minutes to 1 hour, until they look noticeably puffed and pillowy.
- While the dough is rising, preheat your oven to 350°F (175°C) and make sure an oven rack is positioned in the center.
9. Apply the Egg Wash and Bake
- In a small bowl, whisk together 1 beaten egg and 1 tablespoon of whole milk to make the egg wash.
- Using a pastry brush, carefully brush the egg wash over the exposed surface of the braided dough, being careful not to brush it onto the colored eggs (it can dull their color).
- Place the baking sheets in the preheated oven and bake for 25 to 30 minutes, until the bread is a deep golden brown and an instant-read thermometer inserted into the thickest part of the braid (avoiding the eggs) reads 190°F (88°C).
- If the top begins to brown too quickly before the inside is cooked, tent the bread loosely with aluminum foil for the remaining baking time.
- Remove from the oven and allow to cool on the baking sheet for 10 minutes, then transfer to a wire cooling rack to cool completely before glazing.
10. Glaze and Decorate
- In a small bowl, whisk together 1 cup powdered sugar, 2 to 3 tablespoons whole milk, and 1/2 teaspoon vanilla extract until completely smooth. Add milk one teaspoon at a time to reach your preferred drizzle consistency. It should flow in a slow, steady ribbon from a spoon.
- Once the bread is fully cooled (glazing warm bread will cause the glaze to melt and disappear into the crust), drizzle the glaze generously over the braided rings.
- Immediately scatter rainbow nonpareil sprinkles over the wet glaze before it sets.
- Allow the glaze to set for about 10 to 15 minutes before slicing or serving.
This Cinnamon Babka Recipe is another spectacular enriched bread to keep in your baking rotation, especially if you love working with sweet, yeasted doughs.
Tips for Success
Getting the best possible results comes down to a handful of important techniques. These tips address the most common places where Easter bread can go wrong.
Here are the most important things to keep in mind:
- Use room-temperature ingredients: Cold butter, eggs, or milk will slow down yeast activity and make the dough difficult to work with. Take everything out of the fridge 30 to 60 minutes before you start.
- Don’t overheat your milk: Milk above 120°F (49°C) will kill the yeast. Use an instant-read thermometer to be precise.
- Check your yeast before you begin: If your yeast doesn’t foam during the activation step, stop and use a fresh packet. This single step will save you from a dough that doesn’t rise.
- Don’t rush the rises: Both the first and second rise are essential for flavor development and texture. Cutting them short leads to a dense, tight crumb.
- Braid loosely: A tight braid leaves no room for the dough to expand during the second rise and in the oven, which can cause the braid to crack or the eggs to pop out.
- Keep dyed eggs raw: Place the eggs into the braid raw. They will cook through completely during the 25 to 30 minute baking time.
- Cool completely before glazing: This is the most commonly skipped step. If the bread is warm, the glaze will just melt off. Patience here pays off in a beautiful, picture-perfect finish.
Read Also: Authentic German Stollen Recipe
Serving Suggestions
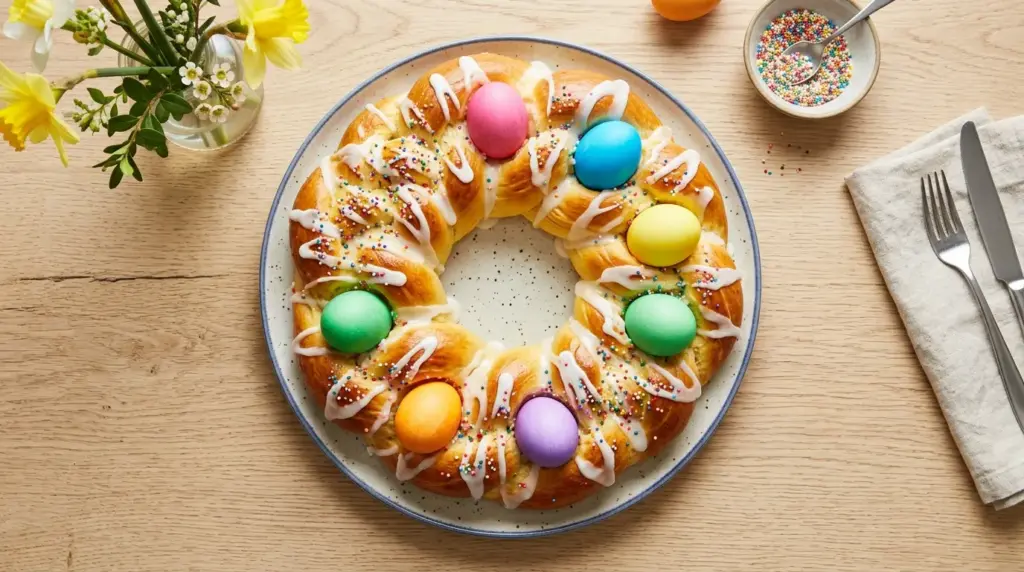
This Easter bread is a versatile addition to any Easter celebration, suitable for brunch, dessert, or a snack throughout the holiday weekend.
It shines alongside a spread of classic Easter dishes and pairs especially well with anything bright, fresh, or savory to contrast its sweetness.
Here are some of the best ways to serve it:
- Serve warm slices alongside a plate of Deviled Eggs for a classic Easter brunch spread
- Pair with fresh fruit salad for a light and colorful holiday breakfast
- Serve alongside sliced Ham as a slightly sweet bread to complement the savory main dish
- Enjoy a slice toasted with a thin layer of salted butter and a drizzle of honey for an indulgent morning treat
- Use leftover slices to make an incredible French toast the next day, because the enriched dough absorbs custard beautifully
- Plate individual slices with a small bowl of strawberry jam or lemon curd for a festive Easter brunch station
Variations to Try
Once you have the base recipe down, there are so many fun and delicious directions you can take this bread. Each variation changes the flavor profile while keeping the same beautiful braided structure.
Try one of these crowd-pleasing twists:
- Lemon Easter Bread: Swap the orange zest for lemon zest and add 1 tablespoon of fresh lemon juice to the glaze for a brighter, tangier flavor.
- Anise Flavored: Add 1/2 teaspoon of anise extract to the dough. This is a classic Italian variation that adds a subtle, licorice-like warmth that is deeply traditional.
- Chocolate Chip: Fold 1/2 cup of mini chocolate chips into the dough just before shaping for a kid-friendly version that everyone will devour.
- Cinnamon Raisin Easter Bread: Add 1 teaspoon of cinnamon and 1/2 cup of plumped raisins (soaked in warm water for 10 minutes) to the dough. This version is especially cozy and pairs perfectly with a cup of tea.
- Single-Egg Individual Wreaths: Divide the dough into 5 portions, braid each one into a small ring, and press one egg into each. These individual-sized rings make a beautiful and easy-to-serve brunch presentation.
- No-Glaze Version: Skip the sweet glaze and brush the baked loaf with melted butter straight from the oven for a simpler, less sweet finish.
You might also love this Cinnamon Raisin Bread Recipe if you enjoy the warm spice variation above.
Storage and Reheating
Easter bread is best on the day it’s baked, but it keeps remarkably well for a few days if stored properly. The enriched dough actually stays softer longer than a standard lean bread thanks to the butter and eggs.
Follow these simple storage tips to keep your loaf fresh:
- Room temperature: Wrap the cooled, unglazed loaf tightly in plastic wrap or store in an airtight container. It will keep at room temperature for up to 2 days. If already glazed, store loosely covered to prevent the glaze from becoming sticky.
- Refrigerator: Place the tightly wrapped bread in the refrigerator for up to 5 days. Allow it to come to room temperature for 30 minutes before serving, or warm slices briefly in the microwave.
- Freezer: Freeze unglazed bread, tightly wrapped in plastic wrap and placed inside a zip-top freezer bag, for up to 2 months. Thaw overnight at room temperature and add the glaze and sprinkles fresh before serving.
- Reheating: Wrap individual slices in a damp paper towel and microwave on low power for 15 to 20 seconds to revive their softness. Alternatively, place the whole loaf, wrapped in foil, in a 300°F (150°C) oven for 10 to 15 minutes.
Another favorite bread to bake on repeat: Monkey Bread Recipe
Nutritional Facts
The following nutritional information is an estimate based on one serving, calculated for a loaf divided into 10 slices, including the glaze. Nutrition will vary depending on exact ingredients and portion size.
| Nutrient | Per Serving (1 slice) |
|---|---|
| Calories | 310 kcal |
| Total Carbohydrates | 52g |
| Sugars | 22g |
| Dietary Fiber | 1g |
| Total Fat | 8g |
| Saturated Fat | 4g |
| Protein | 8g |
| Cholesterol | 115mg |
| Sodium | 95mg |
| Calcium | 55mg |
| Iron | 2.5mg |
If you are looking for ways to use up extra egg-rich baked goods, this Brioche French Toast Recipe is a beautiful way to transform leftover Easter bread into an indulgent next-day breakfast.
Health Benefits of Key Ingredients
While Easter bread is certainly a treat, several of its core ingredients actually bring real nutritional value to the table.
Here’s a closer look at what makes each one worth celebrating:
- Eggs: Eggs are one of the most complete protein sources available, providing all nine essential amino acids. They’re also rich in choline, which supports brain health, and in vitamins B12, D, and A. The eggs embedded in the bread also contribute to your daily protein intake.
- Whole milk: Full-fat milk is a significant source of calcium, vitamin D, and phosphorus, all of which are essential for strong bones and teeth. It also provides B vitamins, including riboflavin (B2) and B12, and the fat content aids in the absorption of fat-soluble vitamins.
- Orange zest: The outer peel of an orange is packed with flavonoids and antioxidants, specifically a compound called hesperidin, which has been linked to anti-inflammatory effects and improved heart health. It also provides a concentrated source of vitamin C.
- All-purpose flour: While not a superfood, wheat flour provides carbohydrates for energy, along with B vitamins and small amounts of iron and zinc.
- Butter: Grass-fed butter in moderate amounts provides butyric acid, a short-chain fatty acid linked to gut health, as well as fat-soluble vitamins A, E, and K2.
Read Also: Soft Dinner Rolls Recipe
Frequently Asked Questions
1. Can I make Easter bread without a stand mixer?
Absolutely. A stand mixer with a dough hook makes the kneading process significantly easier, especially because this is an enriched dough that can feel a bit sticky. If you’re kneading by hand, plan for a solid 10 minutes of sustained effort on a lightly floured surface. The goal is a smooth, elastic dough that bounces back when you poke it. Keep your work surface only lightly floured to avoid adding too much extra flour, which can make the bread dense.
2. Do the eggs in the bread actually cook through?
Yes, completely. The raw dyed eggs go into the braid before the second rise, and by the time the bread bakes at 350°F (175°C) for 25 to 30 minutes, the eggs are fully cooked, similar to hard-boiled eggs. They are safe to eat once the bread comes out of the oven. Just be aware that the yolk will be fully set, not jammy, due to the length of baking time.
3. Can I make this recipe the night before Easter?
Yes, and it works beautifully. You can complete the first rise, shape the braided rings, then cover them tightly with plastic wrap and refrigerate overnight. In the morning, let them sit at room temperature for 45 to 60 minutes to warm up and complete their second rise before brushing with egg wash and baking. This approach makes Easter morning much more relaxed.
4. My dough didn’t rise. What went wrong?
The most common reason is inactive yeast. This can happen if the yeast is expired, if the milk was too hot (above 120°F/49°C) and killed the yeast, or if the milk was too cold (below 100°F/38°C) and failed to activate it. Always check the expiration date on your yeast packet and use an instant-read thermometer to verify the milk temperature. If the yeast mixture doesn’t foam after 10 minutes, discard it and start over with fresh yeast and properly warmed milk.
5. Can I use instant yeast instead of active dry yeast?
Yes. Instant yeast (also called rapid-rise or fast-acting yeast) can be substituted in equal amounts. The key difference is that you do not need to activate instant yeast in warm liquid first. Simply add it directly to the flour with the other dry ingredients. Your rise times may also be slightly shorter with instant yeast, so start checking the dough after 45 minutes during the first rise rather than waiting the full hour and a half.
You might also enjoy: Sweet Dinner Rolls Recipe
Italian Easter Bread (Pane di Pasqua)

Equipment
- Stand mixer - with dough hook attachment (or large mixing bowl and hands)
- Large mixing bowl - for proofing the dough
- Measuring cups and spoons
- Kitchen scale - recommended for accuracy
- Instant-read thermometer - for checking milk temperature and dough doneness
- Large baking sheet - lined with parchment paper
- Parchment paper
- Plastic wrap - or clean kitchen towel
- Pastry brush - for egg wash and glaze
- Wire cooling rack
- Microplane or fine grater - for orange zest
- Small bowl - for egg wash and glaze mixing
- Bench scraper - optional, for dividing dough
Ingredients
For the Dough
- 4 cups all-purpose flour - 500g, plus more for kneading
- 2 1/4 teaspoons active dry yeast - 7g, 1 standard packet
- 1/2 cup whole milk - 120ml, warmed to 110°F (43°C)
- 1/3 cup granulated sugar - 67g
- 1/4 teaspoon salt
- 3 large eggs - room temperature
- 4 tablespoons unsalted butter - 57g, softened
- 1 teaspoon pure vanilla extract
- 1 large orange - zest only (about 1 tablespoon), organic if possible
For Assembly
- 5 raw eggs - dyed with Easter egg dye (or left undyed)
- 1 egg - beaten for egg wash
- 1 tablespoon whole milk - for egg wash
For the Glaze
- 1 cup powdered sugar - 120g
- 2-3 tablespoons whole milk - for glaze consistency
- 1/2 teaspoon pure vanilla extract
For Decoration
- rainbow nonpareil sprinkles - for topping
Instructions
- Dye 5 raw eggs using a store-bought kit with cold or room-temperature water. Let them dry completely before using.
- Warm milk to 110°F (43°C), then combine with sugar and yeast. Let rest for 5-10 minutes until foamy.
- Add the 3 room-temperature eggs, vanilla, orange zest, softened butter, and salt to the yeast mixture. Gradually add flour, mixing until a shaggy ball forms.
- Knead the dough with a dough hook on medium speed for 8-10 minutes until smooth, elastic, and slightly tacky.
- Place the dough in a greased bowl, cover, and let rise in a warm place until doubled in size, about 1 to 1.5 hours.
- Punch down the dough and divide it into 6 equal pieces. Roll each piece into a 16-18 inch rope.
- Take 3 ropes, pinch the ends together, and braid loosely. Form into a ring by bringing the sealed ends together. Repeat with the remaining 3 ropes.
- Place rings on a parchment-lined baking sheet. Gently tuck dyed eggs into the gaps of each braid.
- Cover and let rise again until puffed, about 45 minutes to 1 hour. Meanwhile, preheat oven to 350°F (175°C).
- Whisk together the beaten egg and 1 tablespoon of milk. Brush the egg wash over the exposed dough, avoiding the dyed eggs.
- Bake for 25-30 minutes until deep golden brown and the internal temperature reaches 190°F (88°C). Tent with foil if browning too quickly.
- Let cool on the baking sheet for 10 minutes, then transfer to a wire cooling rack to cool completely.
- Whisk together powdered sugar, 2-3 tablespoons of milk, and vanilla until smooth. Drizzle over the cooled bread and immediately top with sprinkles.
- Allow the glaze to set for 10-15 minutes before slicing and serving.
Notes
- Room-temperature ingredients: Take eggs, butter, and milk out of the fridge 30-60 minutes before starting. Cold ingredients slow yeast activity and make the dough hard to work with.
- Yeast temperature: Milk must be between 100°F and 110°F (38°C-43°C). Above 120°F (49°C) will kill the yeast. Use an instant-read thermometer for accuracy.
- Check your yeast: If the yeast doesn’t foam during the activation step, discard and start with a fresh packet. This is the most common reason for dough failure.
- Braid loosely: A tight braid has no room for the dough to expand during the second rise and baking, which can cause cracking or the eggs to pop out.
- Don’t rush the rises: Both rises are essential for flavor development and a light, airy texture. Cutting them short leads to dense bread.
- Raw eggs in the bread: The dyed eggs are raw when placed in the braid. They cook completely during the 25-30 minute bake time and are safe to eat.
- Cool before glazing: Glazing warm bread will cause the glaze to melt and soak into the crust. Let it cool completely for a picture-perfect finish.
- Make-ahead option: Complete the first rise, shape the braids, then cover and refrigerate overnight. Let sit at room temperature for 45-60 minutes before baking.
- Lemon variation: Swap orange zest for lemon zest and add 1 tablespoon of lemon juice to the glaze for a brighter, tangier flavor.
- Storage: Store unglazed bread wrapped tightly at room temperature for up to 2 days or in the refrigerator for up to 5 days. Freeze unglazed for up to 2 months.
Final Thoughts
Baking Easter bread is one of those kitchen projects that feels deeply meaningful because it connects you to a long tradition of celebration, family, and the simple joy of creating something beautiful with your own hands.
The first time you pull those golden, fragrant rings out of the oven, with their colorful eggs and glistening glaze, you’ll understand why generations of families have made this bread a centerpiece of their Easter table.
I hope this recipe becomes part of your tradition too. If you try it, leave a comment below and let me know how it turned out, or share a photo. I genuinely love hearing from you!
Recommended:
- Pan Dulce Recipe
- Pandesal Recipe
- Chocolate Babka Recipe
- Apple Cinnamon Bread Recipe
- Lemon Blueberry Bread Recipe
- Hokkaido Milk Bread Recipe
- Irish Soda Bread Recipe
- Italian Bread Recipe
- Artisan Bread Recipe
- No Knead Bread Recipe



