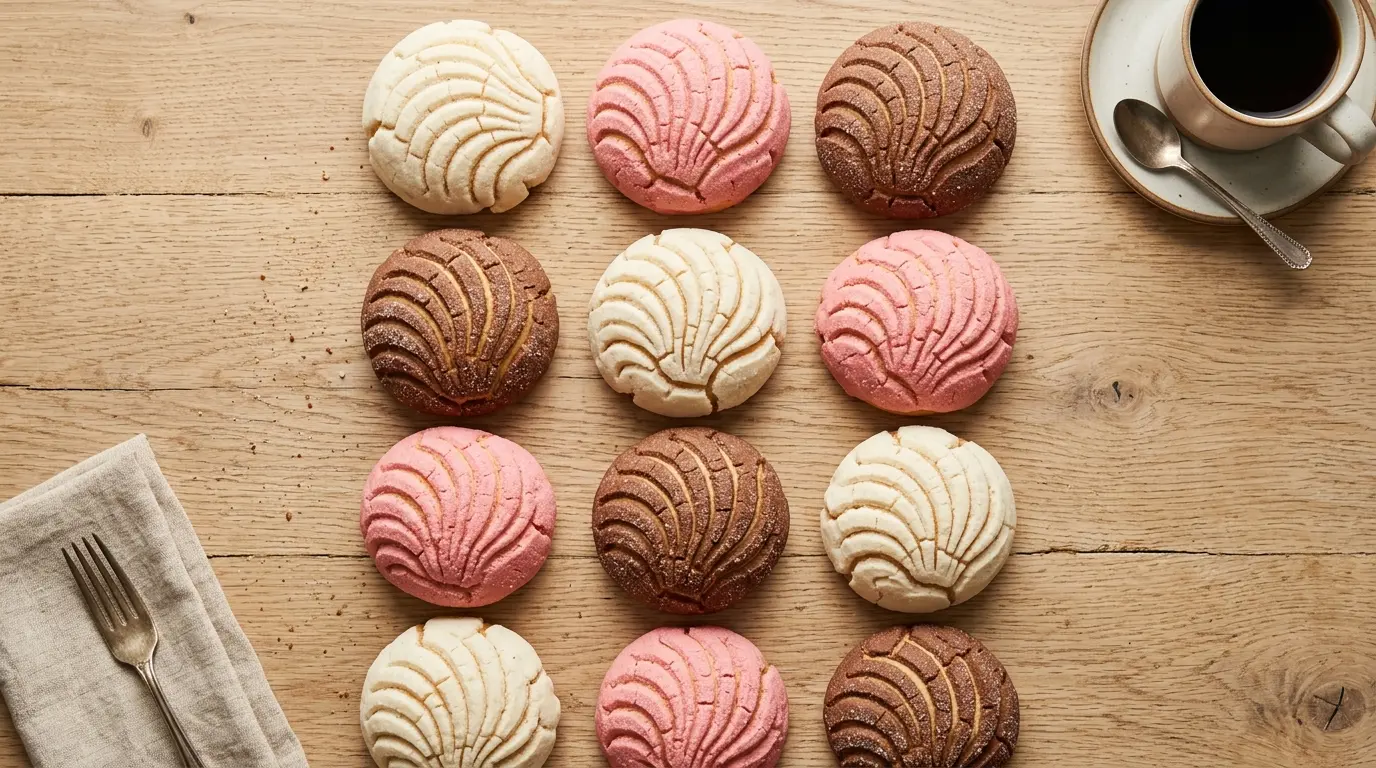
If you have ever walked past a Mexican bakery and caught the warm, buttery smell drifting through the door, you already know exactly what pan dulce does to a person. This pan dulce recipe gives you everything you need to make classic conchas at home, from the pillowy, enriched dough to that iconic sugar shell topping that cracks and crumbles with every bite.
These soft, slightly sweet rolls are one of the most recognized pastries in Mexican cuisine.
They are traditionally enjoyed at breakfast alongside a steaming cup of hot chocolate or café de olla, but honestly, any time of day is the right time for a fresh-from-the-oven concha.
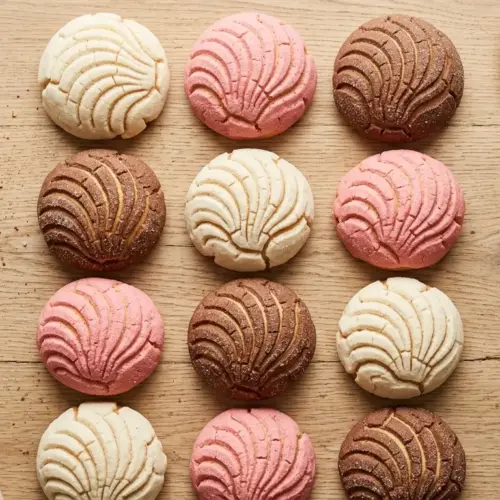
The name “pan dulce” literally means “sweet bread” in Spanish, while “concha” translates to “shell,” which describes the beautiful scored sugar topping that patterns each roll.
Making them at home takes a little patience, especially during the rise times, but the process is straightforward and the result is absolutely worth it.
If you enjoy making enriched sweet breads, you might also love this Pandesal Recipe, another beloved soft roll that makes a wonderful morning treat.
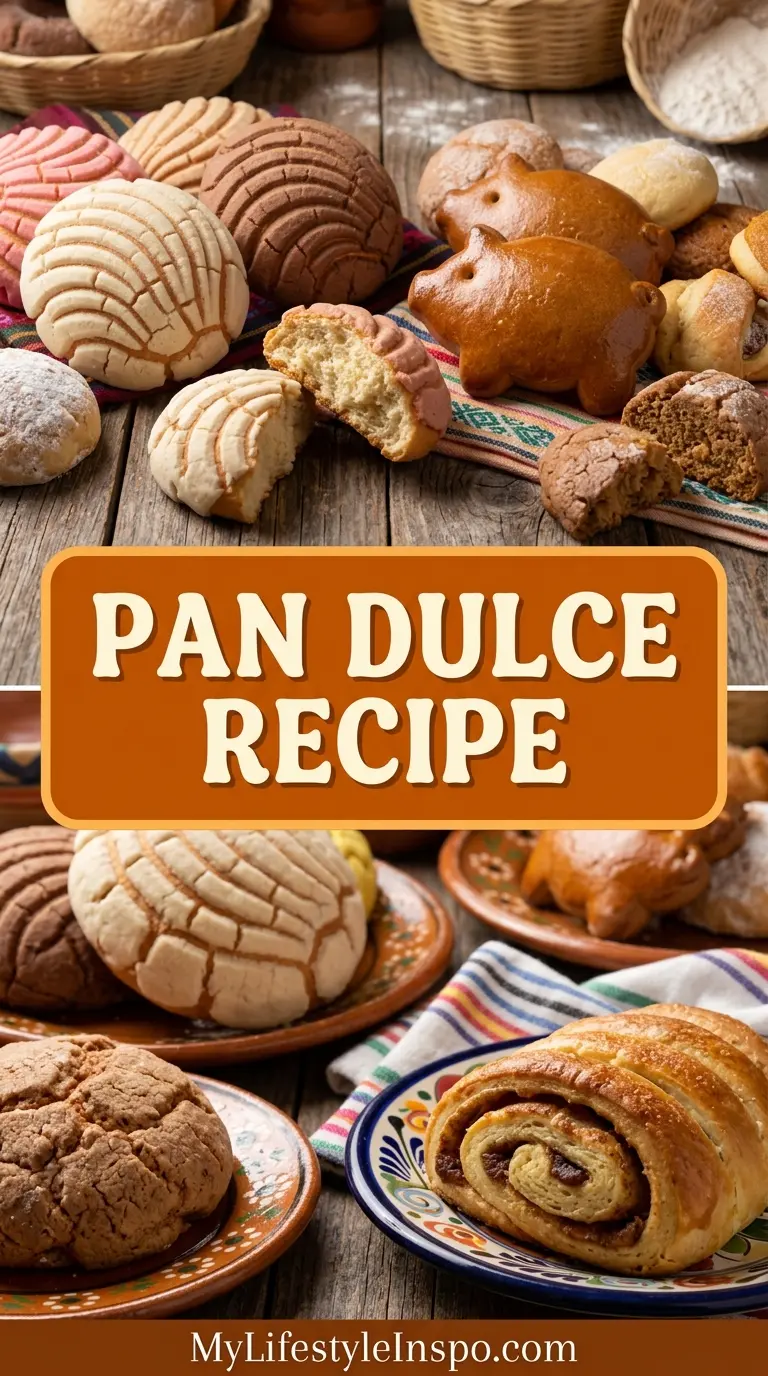
Why You’ll Love This Pan Dulce Recipe
Once you taste a homemade concha, the store-bought versions will never quite measure up.
The dough is buttery, soft, and just sweet enough, while the sugar topping adds a satisfying crunch that contrasts beautifully with the tender crumb underneath.
These rolls come together with simple pantry ingredients and no special equipment is required beyond a stand mixer or a strong arm for kneading.
The colorful topping options, from classic white vanilla to rich chocolate or vibrant pink, make them as fun to make as they are to eat.
They scale beautifully too, so you can make a big batch for weekend baking and enjoy them throughout the week.
Here is what makes this recipe a keeper:
- Classic flavor and texture that matches what you would find at a real Mexican panadería
- Customizable topping colors and flavors including vanilla, chocolate, cinnamon, and strawberry
- Beginner-friendly steps with detailed guidance so nothing is left to guesswork
- Make-ahead friendly since the dough can be refrigerated overnight for a slow rise
- Freezer-friendly so you can always have fresh conchas on hand
Read Also: Brioche Recipe
Ingredients
Pan dulce uses simple, wholesome ingredients, but the quality of each one matters. Use whole milk for the richest dough, and make sure your butter is unsalted so you can control the salt level. Room-temperature eggs will incorporate more smoothly into the dough and help it rise evenly.
For the Dough:
- 4 cups (500g) all-purpose flour, plus more for dusting
- 2 1/4 teaspoons (7g) active dry yeast (1 standard packet)
- 1/2 cup (120ml) whole milk, warmed to 110°F (43°C)
- 1/3 cup (65g) granulated sugar, plus 1 teaspoon for activating yeast
- 1/2 teaspoon salt
- 1/2 teaspoon ground cinnamon
- 1/2 teaspoon pure vanilla extract
- 2 large eggs, room temperature
- 6 tablespoons (85g) unsalted butter, melted and slightly cooled
- 2 tablespoons (30ml) vegetable oil
For the Sugar Shell Topping (Vanilla):
- 1 cup (125g) all-purpose flour
- 3/4 cup (90g) powdered sugar
- 1/2 cup (113g) unsalted butter, softened to room temperature
- 1 teaspoon pure vanilla extract
- Pinch of salt
Optional Topping Add-Ins:
- 2 tablespoons (15g) unsweetened cocoa powder for chocolate topping
- 1/2 teaspoon strawberry extract plus pink gel food coloring for strawberry topping
- Gel food coloring in desired colors
You might also enjoy this Monkey Bread Recipe if you love pull-apart sweet breads for sharing.
Kitchen Equipment Needed
You do not need specialty equipment to make pan dulce, but a few key tools will make the process much smoother. A stand mixer with a dough hook is highly recommended because enriched doughs like this one can be sticky and require extended kneading. A kitchen thermometer is also important for checking milk and oven temperatures accurately.
- Stand mixer with dough hook attachment (or large bowl for hand kneading)
- Large mixing bowls
- Kitchen thermometer for checking milk temperature
- Baking sheets (2 half-sheet pans)
- Parchment paper
- Plastic wrap or clean kitchen towel
- Bench scraper or knife
- Concha stamp or cutter (optional; a paring knife works perfectly)
- Wire cooling rack
- Pastry brush (optional)
- Measuring cups and spoons
Read Also: Cinnamon Babka Recipe
Recommended Products for This Recipe
These are products chosen for quality and performance that can genuinely make a difference when baking pan dulce at home.
1. KitchenAid Stand Mixer
A stand mixer with a dough hook takes the effort out of kneading enriched dough, which can otherwise be a 10-15 minute arm workout. The consistent kneading action develops the gluten evenly, giving you that soft, elastic texture that makes conchas so pillowy. It is one of those investments that pays off in every bread and pastry recipe you make.
2. Concha Stamp Set
A concha stamp set creates those perfectly even, traditional seashell patterns that make pan dulce instantly recognizable. While a paring knife works in a pinch, a stamp set gives you clean, even grooves with very little effort. It is a small, inexpensive tool that makes a big visual difference.
3. Nordic Ware Half-Sheet Baking Pans
Heavy-gauge aluminum baking pans distribute heat evenly, preventing the bottoms of your conchas from over-browning before the centers are fully cooked. Thin, flimsy pans are one of the most common culprits behind dense or unevenly baked sweet bread. These pans are a reliable, long-lasting choice for all your baking projects.
4. Gel Food Coloring Set
Gel food coloring is essential for creating the vibrant, true colors in the sugar topping without adding excess liquid that can affect the texture. Liquid food coloring dilutes the topping mixture and can make it too soft to score cleanly. A multi-color gel set gives you the flexibility to make every color of the rainbow.
5. Instant-Read Kitchen Thermometer
Getting the milk to exactly 110°F (43°C) is one of the most important steps for activating the yeast correctly. Too cool and the yeast will not activate; too hot and you will kill it. An instant-read thermometer removes all the guesswork and ensures reliable results every time.
You might also love the soft, enriched dough in this Chocolate Babka Recipe if you are on a sweet bread kick.
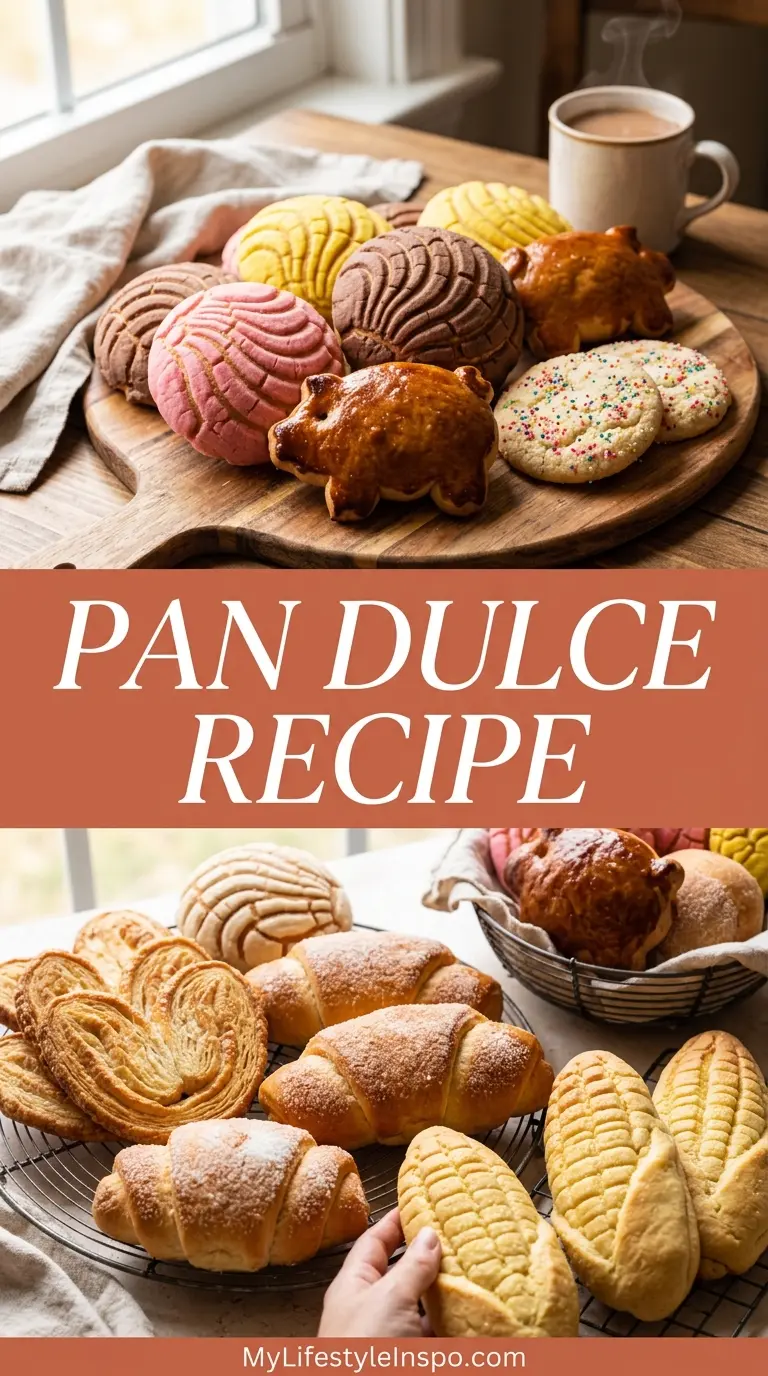
Step-by-Step Instructions
Step 1: Activate the Yeast
- Warm the whole milk in the microwave in 15-second intervals, or gently heat it on the stovetop, until it reaches 110°F to 115°F (43°C to 46°C). Use a kitchen thermometer to check precisely. Milk that is too cold will not activate the yeast; milk that is above 120°F (49°C) will kill it.
- Pour the warmed milk into a small bowl or cup and stir in the 2 1/4 teaspoons of active dry yeast along with 1 teaspoon of granulated sugar.
- Stir gently to combine and loosely cover the bowl with plastic wrap or a small plate.
- Allow the mixture to sit at room temperature for 5 to 10 minutes, or until it becomes visibly foamy and puffy on top. This foam is the yeast feeding on the sugar and releasing carbon dioxide, which is what makes your bread rise. If the mixture does not foam after 10 minutes, the yeast may be expired and you should start fresh with a new packet.
Step 2: Make the Dough
- In the bowl of your stand mixer fitted with the dough hook, add the 4 cups of all-purpose flour, 1/3 cup of granulated sugar, 1/2 teaspoon salt, and 1/2 teaspoon ground cinnamon. Whisk these dry ingredients together briefly to combine.
- Pour in the foamy yeast-milk mixture, the 2 beaten room-temperature eggs, 6 tablespoons of melted and slightly cooled butter, 2 tablespoons of vegetable oil, and 1/2 teaspoon of vanilla extract.
- Mix on low speed for about 1 minute until the dough begins to come together into a shaggy mass.
- Increase the mixer speed to medium and knead the dough for 6 to 8 minutes, until it is smooth, soft, and slightly tacky but not sticky. The dough will pull away from the sides of the bowl cleanly when ready.
- If the dough is too sticky and sticks heavily to your hands, add flour one tablespoon at a time, up to 2 to 3 extra tablespoons. Avoid adding too much flour, as this will make the conchas dense rather than soft.
- If kneading by hand, turn the dough onto a lightly floured surface and knead for 10 to 12 minutes, using the heel of your hand to stretch and fold the dough repeatedly until smooth and elastic.
Step 3: First Rise
- Lightly grease a large, clean bowl with vegetable oil or cooking spray.
- Shape the dough into a smooth ball and place it into the greased bowl, turning it over once so all sides are lightly coated with oil. This prevents the surface from drying out during the rise.
- Cover the bowl tightly with plastic wrap or a clean damp kitchen towel.
- Place the bowl in a warm, draft-free spot. The inside of an oven with just the light on works perfectly, as does a warm corner of your kitchen. The ideal temperature is around 75°F to 80°F (24°C to 27°C).
- Allow the dough to rise for 1.5 to 2 hours, or until it has doubled in size. The rise time can vary depending on the warmth of your kitchen.
Step 4: Make the Sugar Shell Topping
- While the dough is rising, prepare the sugar topping. In a medium bowl, beat the 1/2 cup of softened unsalted butter and 3/4 cup of powdered sugar together with a fork or hand mixer until it becomes smooth and creamy, about 2 minutes.
- Add 1 teaspoon of vanilla extract and a pinch of salt and stir to combine.
- Add the 1 cup of all-purpose flour and mix until a smooth, thick dough forms. It should have the consistency of soft cookie dough that holds its shape without crumbling.
- To make a chocolate topping variation, take half of the topping dough and knead in 2 tablespoons of unsweetened cocoa powder until evenly combined. Knead it directly on your work surface to incorporate fully.
- To add color, knead a small amount of gel food coloring into the topping dough on your work surface until the color is evenly distributed throughout. Use gel coloring, not liquid, to avoid altering the dough consistency.
- Divide the topping mixture into 12 equal portions (about 1 tablespoon each). Roll each portion into a smooth ball between your palms, then flatten each ball into a thin disc approximately 3 to 3.5 inches (8cm) in diameter. Place the discs on a parchment-lined surface and set aside.
Step 5: Shape the Conchas
- After the dough has doubled in size, gently punch it down to release the air.
- Turn the dough out onto a lightly floured work surface and divide it into 12 equal pieces. A bench scraper or sharp knife makes this easy. For uniform conchas, you can weigh each piece on a kitchen scale; each piece should be about 65 to 70 grams.
- Roll each piece into a smooth, tight ball by cupping your hand over the dough and rotating it against the work surface in a circular motion. The surface should be smooth and taut with no seams visible.
- Line your baking sheets with parchment paper and place the dough balls on the prepared pans, spacing them about 3 inches (8cm) apart to allow for spreading during the second rise and baking.
Step 6: Add the Topping and Score
- Take one of the flattened topping discs and gently lay it over the top of a dough ball, pressing it down lightly so it adheres. It should drape over and cover most of the top surface.
- Repeat with the remaining dough balls and topping discs.
- Using a concha stamp, press it firmly down onto the topping and twist slightly to create the seashell pattern. If you do not have a concha stamp, use a paring knife or sharp knife to score lines into the topping. For a classic seashell pattern, score 5 to 6 curved lines radiating from the center. For a simpler cross-hatch pattern, score parallel lines in one direction, then cross with parallel lines in the other direction.
- Be careful to cut only through the sugar topping and not into the dough below. The cuts should be about 1/4 inch (6mm) deep.
Step 7: Second Rise
- Once all the conchas are shaped and scored, cover them loosely with plastic wrap or a clean kitchen towel.
- Allow them to rise in a warm place for 40 to 60 minutes, or until they look noticeably puffy. They will not double in size again, but they should expand and look lighter.
- About 10 to 15 minutes before the second rise is complete, preheat your oven to 350°F (175°C) so it is fully heated and ready when the conchas are.
Step 8: Bake the Pan Dulce
- Once the oven is preheated and the conchas have completed their second rise, place the baking sheets in the center rack of the oven.
- Bake for 18 to 22 minutes. The conchas are done when the undersides are lightly golden brown. The tops will remain the color of the topping and may not brown significantly, so check the bottoms to judge doneness. You can gently lift one concha with a spatula to check.
- Avoid overbaking, as this is one of the most common reasons conchas turn out dry rather than soft and fluffy. If you are unsure, err on the side of pulling them a minute or two early rather than leaving them too long.
- Remove the pans from the oven and allow the conchas to cool on the baking sheet for 5 minutes before transferring them to a wire cooling rack.
- Allow them to cool for at least 10 minutes before eating so the crumb has time to set fully. They are best enjoyed warm.
This Tres Leches Cake Recipe is another wonderful Mexican baked treat to serve alongside your freshly baked conchas for a complete Mexican-inspired spread.
Tips for Success
Even experienced bakers can run into challenges with enriched yeast doughs. These practical tips will help you avoid the most common pitfalls and ensure a perfect batch every time.
- Check your yeast first. Always proof your yeast in warm milk before adding it to the flour. If it does not foam, do not proceed with a dead yeast packet.
- Do not rush the rise. Enriched doughs often rise more slowly than lean bread doughs because the butter and sugar slow down the yeast. Give it the full time it needs.
- Milk temperature matters. Use a thermometer every time. The sweet spot is 110°F to 115°F (43°C to 46°C). Too hot and you will kill the yeast; too cool and it will not activate.
- Gel food coloring only. Liquid food coloring adds moisture that changes the consistency of the sugar topping and makes it harder to score.
- Do not add too much extra flour. A slightly tacky dough is correct. A dry, stiff dough will bake up dense and tough.
- Use softened butter for the topping. Butter that is too cold will make the topping crumbly and hard to press; butter that is too warm will be greasy and hard to shape.
- Space your conchas well. Leave at least 3 inches between each one on the baking sheet so they do not fuse together as they expand.
- Check doneness by lifting, not by color. The tops will not brown much. Flip one gently to check that the bottom is golden.
Another enriched sweet dough worth trying is this Panettone Recipe, an Italian holiday bread with a similar buttery, soft texture.
Serving Suggestions
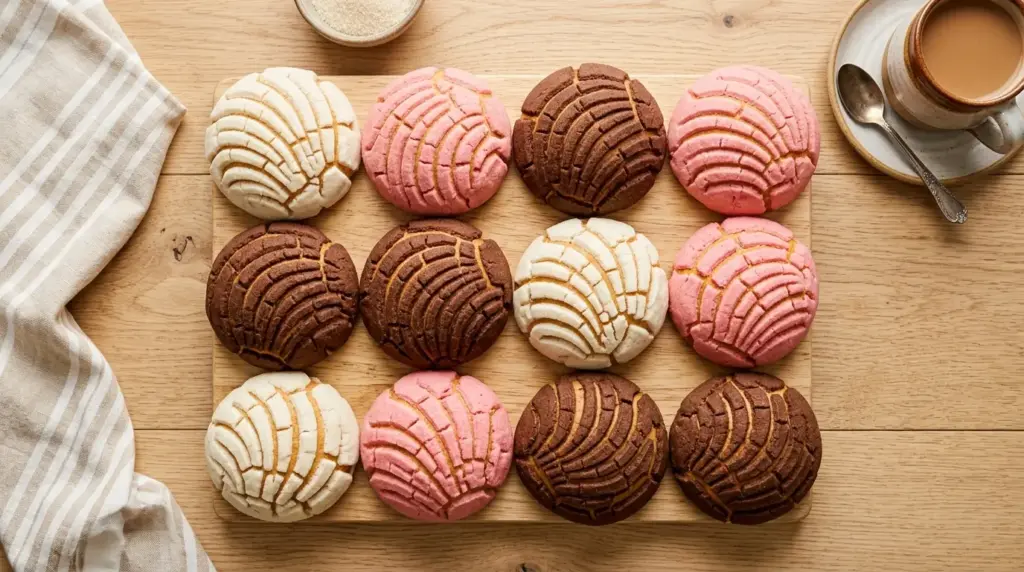
Pan dulce is traditionally eaten as a breakfast or late-night snack (merienda) with something warm to drink. The slight sweetness of the bread pairs beautifully with the bitterness of coffee or the richness of hot chocolate, creating a balance that has been beloved in Mexican households for generations.
The best ways to enjoy your freshly baked pan dulce:
- Serve warm alongside a cup of Champurrado for a deeply traditional Mexican pairing
- Pair with Hot Chocolate for a cozy breakfast or afternoon snack
- Slice in half and spread with cream cheese, strawberry jam, or Nutella for a more indulgent treat
- Serve as part of a Mexican brunch spread alongside Caldo de Pollo
- Enjoy as a snack at room temperature with a glass of cold whole milk, exactly as generations of Mexican children have done
- Use slightly stale conchas as the base for a rich Banana Bread Pudding the next day
Variations to Try
One of the most delightful things about pan dulce is how easily the basic recipe can be customized. The dough itself is versatile, and the topping is practically a blank canvas.
Try these fun variations to keep things interesting:
- Chocolate Conchas: Add 2 tablespoons of unsweetened cocoa powder to the sugar topping for a rich, dark brown shell. You can also add 1 tablespoon of cocoa to the dough itself for double chocolate flavor.
- Strawberry Conchas: Mix strawberry extract and pink gel food coloring into the topping for a fruity, vibrant pink version that children especially love.
- Cinnamon Conchas: Add 1 teaspoon of ground cinnamon and a pinch of ground cloves to the topping mixture for a warm, spiced variation.
- Lemon Conchas: Add 1 tablespoon of fresh lemon zest and a few drops of yellow food coloring to the topping for a bright, citrusy version.
- Matcha Conchas: Knead 1 to 2 teaspoons of matcha powder into the topping for a subtly earthy and visually striking green variation.
- Overnight Dough: Prepare the dough through the first rise, then punch it down and refrigerate overnight. Shape and bake the next morning for an even deeper flavor. Allow the shaped conchas to come to room temperature and complete the second rise before baking.
- Mini Conchas: Divide the dough into 24 pieces instead of 12 for smaller, two-bite versions perfect for parties and gatherings.
If you enjoy making beautiful pastries from scratch, this Croissant Recipe is another satisfying baking project with similarly impressive results.
Storage and Reheating
Pan dulce is best on the day it is baked, but it stores well for several days if properly wrapped. The key is keeping air away from the bread to prevent it from staling quickly.
Here is how to store and reheat your conchas:
- Room Temperature: Place completely cooled conchas in an airtight container or zip-top bag and store at room temperature for up to 3 days.
- Freezer: Bake and cool the conchas completely, then freeze them in a single layer on a baking sheet for 1 hour until firm. Transfer to a freezer-safe bag or container and freeze for up to 3 months.
- Reheating from room temperature: Wrap in a slightly damp paper towel and microwave for 15 to 20 seconds to revive the softness.
- Reheating from frozen: Thaw at room temperature on the counter for 1 to 2 hours, then warm in a 325°F (165°C) oven for 5 to 8 minutes.
- Refreshing day-old conchas: A brief 5-minute warm in the oven at 300°F (150°C) works wonders to bring back that fresh-baked softness.
For another delicious sweet roll that stores and reheats beautifully, check out these Soft Dinner Rolls.
Nutritional Facts
The following nutritional information is estimated per concha (1 of 12 rolls) based on the standard recipe above. Values are approximate and will vary based on exact ingredient brands and topping variations used.
| Nutrient | Amount Per Serving |
|---|---|
| Calories | 385 kcal |
| Total Fat | 18g |
| Saturated Fat | 10g |
| Cholesterol | 70mg |
| Sodium | 130mg |
| Total Carbohydrates | 50g |
| Dietary Fiber | 1g |
| Total Sugars | 15g |
| Protein | 7g |
| Vitamin A | 400 IU |
| Calcium | 30mg |
| Iron | 2mg |
Note: These values are estimates based on standard nutritional databases. For precise tracking, enter the exact ingredients and brands you use into a nutrition tracking app.
You might also enjoy Sweet Dinner Rolls as a simpler enriched bread to add to your baking rotation.
Health Benefits of Key Ingredients
Pan dulce is an indulgent treat rather than a health food, but several of its core ingredients do offer genuine nutritional value. Enjoying conchas as part of a balanced diet, rather than an everyday staple, lets you appreciate both the pleasure and the nourishment they provide.
Here are the key ingredients and what they contribute nutritionally:
- Eggs are one of the most nutrient-dense foods available, providing high-quality complete protein, choline for brain health, and fat-soluble vitamins A, D, E, and K. They are what gives the dough its richness and beautiful golden interior.
- Whole milk contributes calcium, phosphorus, vitamin B12, and vitamin D, all of which support bone health and nervous system function. Using whole milk rather than low-fat versions also adds creaminess that makes the dough far more tender.
- All-purpose flour provides carbohydrates for energy and contains some B vitamins. While it is not a high-fiber food, it serves as the structural backbone of the bread.
- Butter in moderate amounts provides fat-soluble vitamins and adds the rich flavor that makes conchas so satisfying. It contributes to the tender crumb texture that defines a good concha.
- Vanilla extract contains small amounts of antioxidants and adds flavor complexity that helps reduce the amount of added sugar needed to achieve a satisfying sweetness.
Read Also: Authentic German Stollen Recipe
Frequently Asked Questions
1. What is pan dulce made of?
Pan dulce is made from a simple enriched yeast dough of flour, sugar, milk, eggs, butter, and vanilla. The most important element is the sugar shell topping, which is made from a mixture of softened butter, powdered sugar, flour, and flavorings. Together, the two components create the signature contrast of soft, fluffy bread and crunchy, sweetened topping.
2. Why is my pan dulce dense instead of fluffy?
Dense conchas are almost always the result of one of three issues: the yeast was not properly activated (not foamy after proofing), the dough was not given enough time to rise fully, or too much flour was added during kneading. Make sure your milk is exactly 110°F to 115°F when you add the yeast, and resist the urge to add extra flour unless the dough is truly unworkably sticky.
3. Can I make pan dulce without a stand mixer?
Absolutely. Making pan dulce by hand is very doable, it just requires more effort. Knead the dough by hand on a lightly floured surface for 10 to 12 minutes, using the heel of your hand to push the dough away from you, then fold it back and rotate. The dough is ready when it is smooth, elastic, and springs back when you poke it with a finger.
4. How do I know when my pan dulce is fully baked?
The most reliable way to check is to gently lift one concha with a spatula and look at the bottom. It should be a light, even golden brown. The tops of conchas do not brown significantly because the sugar topping insulates them. If the bottoms are golden and the bread feels set when pressed gently, they are done. An internal temperature of 190°F (88°C) confirms they are fully baked.
5. Can I use instant yeast instead of active dry yeast?
Yes. If using instant yeast (also called rapid-rise yeast), you can skip the proofing step and add the yeast directly to the dry ingredients. Use the same amount (2 1/4 teaspoons) and add the warm milk directly with the other wet ingredients. Instant yeast may cause your dough to rise slightly faster, so keep an eye on it during both rise periods.
This Easy Churro Recipe is another beloved Mexican sweet treat that pairs beautifully with the same cup of hot chocolate you would serve alongside your freshly baked conchas.
Pan Dulce (Conchas)

Equipment
- Stand mixer with dough hook - Recommended for kneading the enriched dough; alternatively, a large bowl and strong arm for hand kneading
- Kitchen thermometer - Essential for checking milk temperature (110°F-115°F) and ensuring proper yeast activation
- Large mixing bowls - For preparing dough and sugar topping
- Baking sheets - Two half-sheet pans
- Parchment paper - For lining baking sheets
- Plastic wrap or clean kitchen towel - For covering dough during rises
- Bench Scraper or Paring Knife - For dividing dough and scoring the topping
- Concha Stamp Set - Optional, but creates a traditional seashell pattern easily; a paring knife works well too
- Wire cooling rack - For cooling conchas after baking
- Measuring cups and spoons - For accurate ingredient measurement
Ingredients
- 4 cups all-purpose flour - 500g, plus more for dusting
- 2 ¼ teaspoons active dry yeast - 7g, 1 standard packet
- ½ cup whole milk - 120ml, warmed to 110°F (43°C)
- ⅓ cup granulated sugar - 65g, plus 1 teaspoon for activating yeast
- ½ teaspoon salt
- ½ teaspoon ground cinnamon
- ½ teaspoon pure vanilla extract
- 2 large eggs - room temperature
- 6 tablespoons unsalted butter - 85g, melted and slightly cooled
- 2 tablespoons vegetable oil - 30ml
For the Sugar Shell Topping (Vanilla Base)
- 1 cup all-purpose flour - 125g
- ¾ cup powdered sugar - 90g
- ½ cup unsalted butter - 113g, softened to room temperature
- 1 teaspoon pure vanilla extract
- 1 pinch salt
Optional Topping Add-Ins
- 2 tablespoons unsweetened cocoa powder - 15g, for chocolate topping
- ½ teaspoon strawberry extract - plus pink gel food coloring for strawberry topping
- gel food coloring - in desired colors
Instructions
- Warm milk to 110°F (43°C). Stir in yeast and 1 teaspoon sugar; let foam for 5-10 minutes until puffy.
- In a stand mixer with dough hook, combine flour, sugar, salt, and cinnamon. Add yeast mixture, eggs, melted butter, oil, and vanilla. Mix on low until shaggy, then knead on medium for 6-8 minutes until smooth and elastic.
- Shape dough into a ball, place in a greased bowl, cover, and let rise in a warm place for 1.5-2 hours until doubled in size.
- Beat butter and powdered sugar until creamy. Add vanilla and salt, then mix in flour until a soft cookie-like dough forms. Divide into 12 portions and flatten into 3-inch discs.
- Punch down the dough and divide into 12 equal pieces (about 65-70g each). Roll each into a smooth ball and place on parchment-lined baking sheets, 3 inches apart.
- Place a topping disc over each dough ball and press gently to adhere. Score with a concha stamp or paring knife to create a seashell or cross-hatch pattern, cutting only through the topping.
- Cover loosely and let rise for 40-60 minutes until puffy. Preheat oven to 350°F (175°C) during the last 15 minutes.
- Bake for 18-22 minutes until the bottoms are lightly golden. Cool on the pan for 5 minutes, then transfer to a wire rack to set for at least 10 minutes before serving.
Notes
- Yeast Success: Always proof your yeast in warm milk (110°F-115°F). If it doesn’t foam within 10 minutes, start with fresh yeast.
- Topping Color: Use gel food coloring only—liquid colors add moisture that changes the topping consistency and makes scoring difficult.
- Flour Carefully: A slightly tacky dough is correct. Adding too much flour will make the conchas dense instead of pillowy soft.
- Don’t Overbake: Check doneness by gently lifting a concha to see if the bottom is golden. The tops won’t brown much due to the sugar topping.
- Overnight Option: After the first rise, punch down the dough and refrigerate overnight. Shape and bake the next morning for deeper flavor.
- Flavor Variations: Add 2 tablespoons cocoa powder to the topping for chocolate conchas, or knead in strawberry extract and pink coloring for a fruity version.
- Storage: Store cooled conchas in an airtight container at room temperature for up to 3 days. Freeze for up to 3 months.
- Reheating: Microwave a room-temperature concha wrapped in a damp paper towel for 15-20 seconds, or warm in a 325°F oven for 5-8 minutes.
- No Stand Mixer: Knead by hand on a floured surface for 10-12 minutes until smooth, elastic, and springy to the touch.
- Scoring Tip: Cut only about ¼ inch (6mm) deep through the topping—avoid cutting into the dough beneath.
Final Thoughts
Homemade pan dulce is one of those baking projects that feels deeply rewarding from start to finish.
The process of watching the dough rise, pressing the seashell pattern into the topping, and pulling a tray of golden, fragrant conchas from the oven is genuinely joyful.
If you have grown up eating pan dulce, this recipe will bring back some of the warmest memories.
If you are trying it for the first time, you are in for a truly special treat.
Give this recipe a try and let us know how it goes in the comments below. We would love to see your conchas, especially the colorful ones!
Recommended:
- Monkey Bread Recipe
- Homemade Churro Recipe
- Tres Leches Cake
- Rugelach Recipe
- Dutch Baby Recipe
- Dinner Rolls Recipe
- Baklava Recipe
- Cinnamon Swirl Bread Recipe
- Pumpkin Roll Recipe
- Brioche French Toast Recipe



