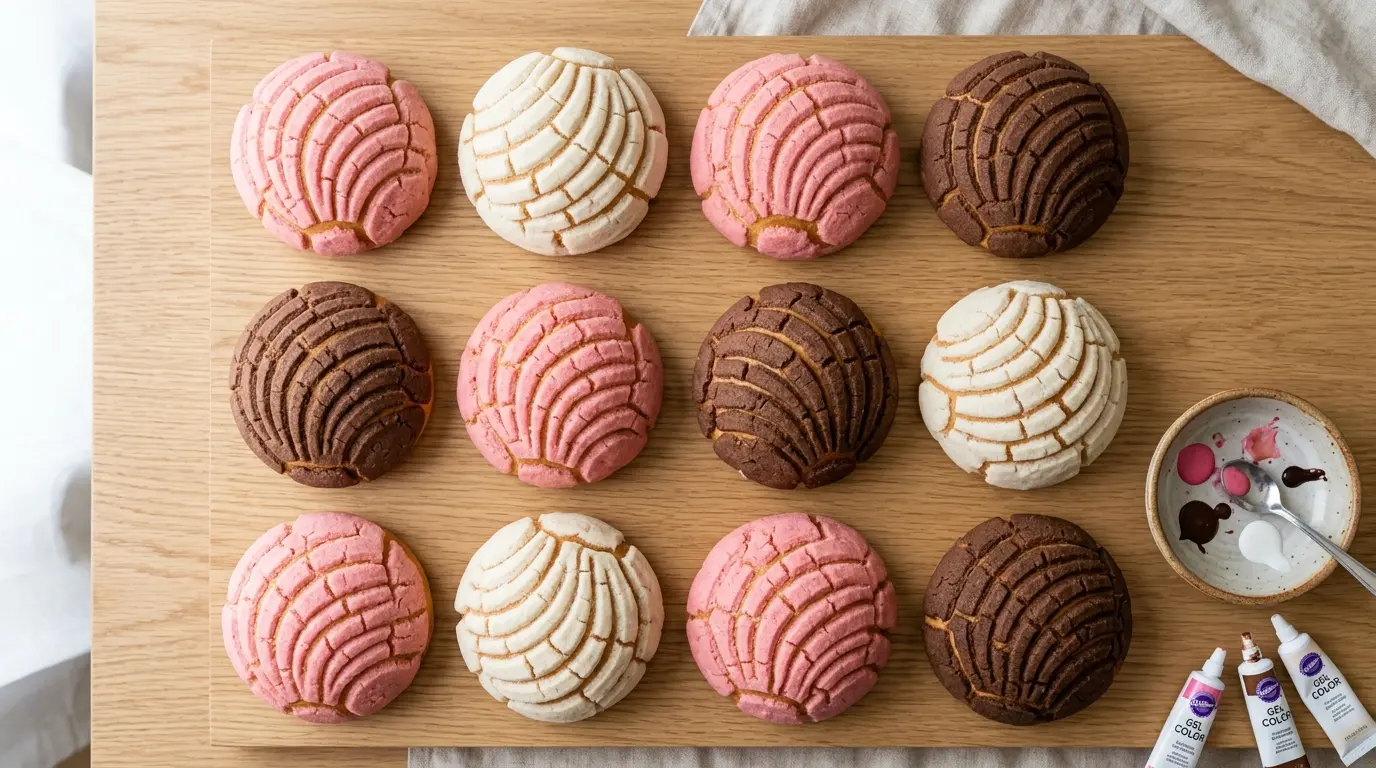
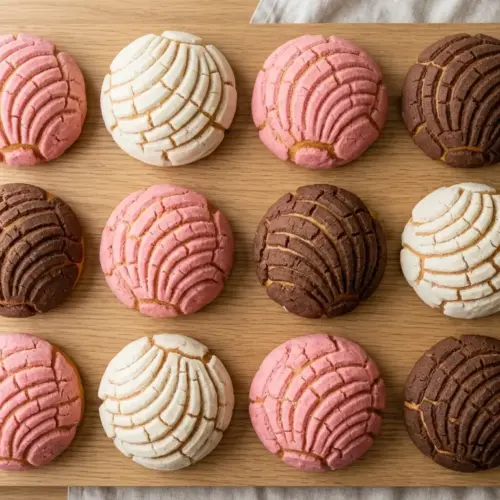
If you’ve ever walked into a Mexican panadería and been instantly drawn to those colorful, shell-patterned sweet buns piled high in the display case, you already know the magic of a concha recipe. These iconic pan dulce (sweet breads) are the heartbeat of Mexican baking culture. They’re soft, buttery, and pillowy on the inside, with a crisp, sweet sugar topping scored into a beautiful seashell pattern that gives them their name (“concha” means “shell” in Spanish).
Making conchas from scratch is a genuinely rewarding kitchen project. Yes, it takes a little patience with two rise times, but the technique itself is approachable even for beginners.
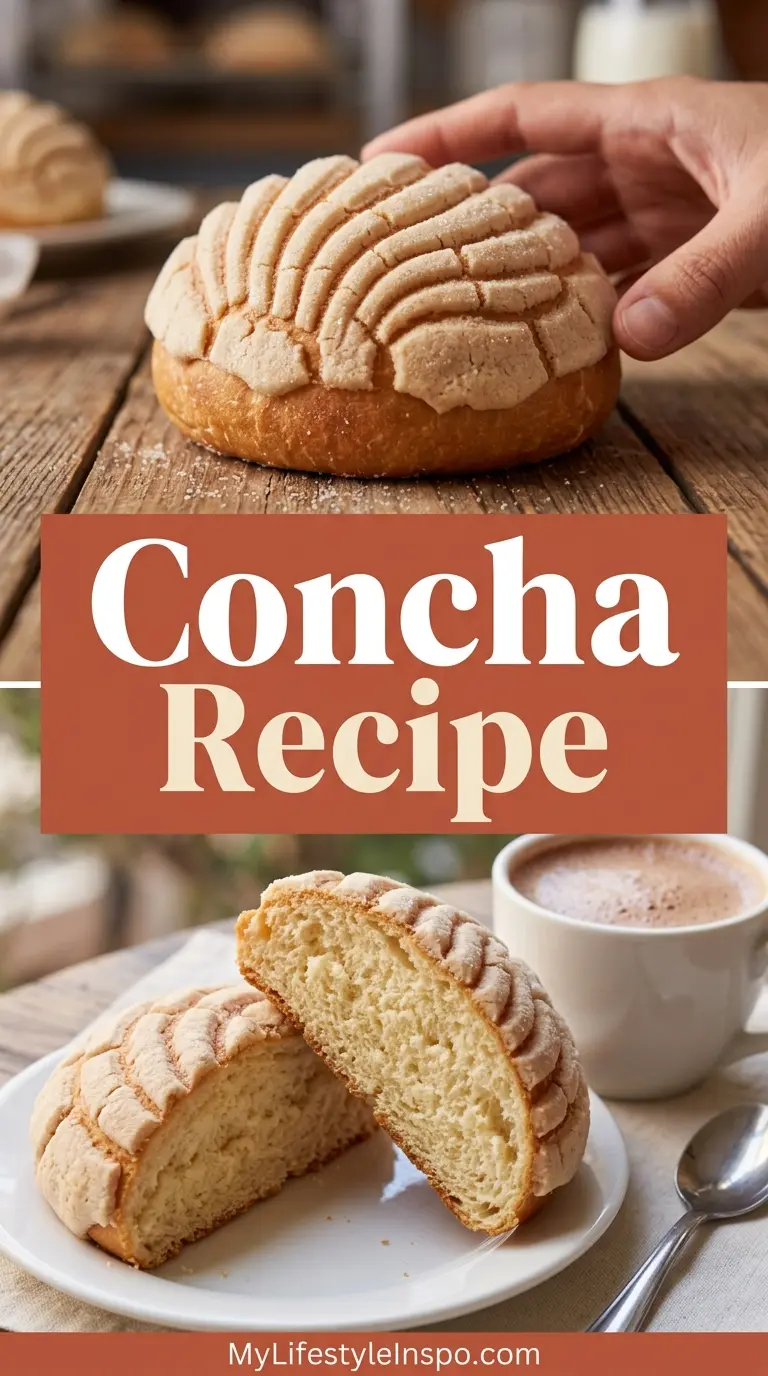
The dough is an enriched yeast dough, similar in spirit to brioche, made rich with eggs, butter, and milk. The topping is a simple mixture of powdered sugar, shortening or butter, and flour that gets pressed flat and draped over each bun before scoring. Once baked, you get that perfect contrast of fluffy bread with a delicately crumbly, sweet crust.
This post walks you through every step, from blooming the yeast to scoring that signature shell design. By the time these come out of your oven, your kitchen will smell like a panadería, and your family will be lining up.
If you love fluffy, enriched sweet breads, you’ll also enjoy this Pandesal Recipe, another beloved soft roll that’s perfect for breakfast.
Why You’ll Love This Concha Recipe
Conchas are one of those recipes that reward your effort in a big way. The process is simple once you know what you’re doing, and the results are truly spectacular.
The dough is incredibly soft and tender, with a subtle sweetness and a faint hint of vanilla that makes every bite feel like a treat.
The topping is the star of the show. That crumbly, slightly crisp sugar shell adds both texture and extra sweetness without being overwhelming.
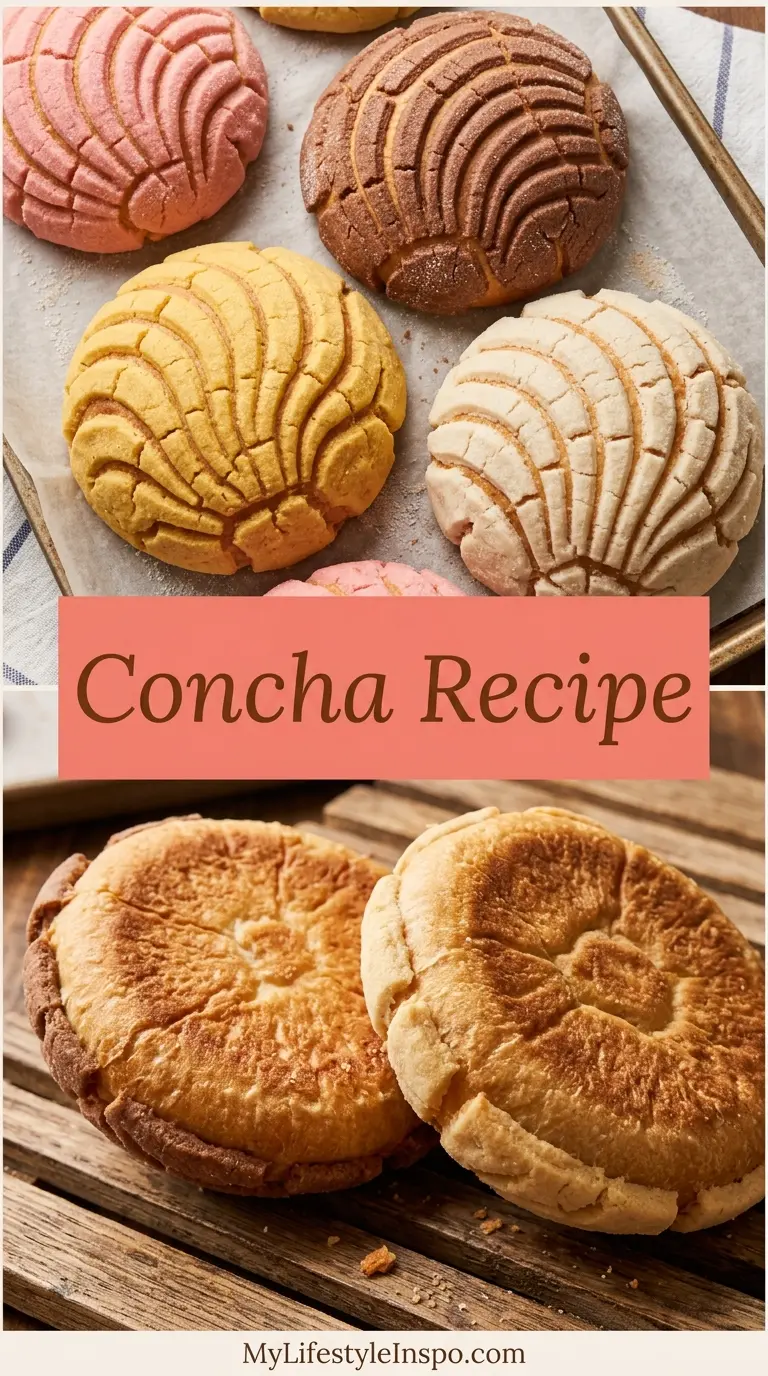
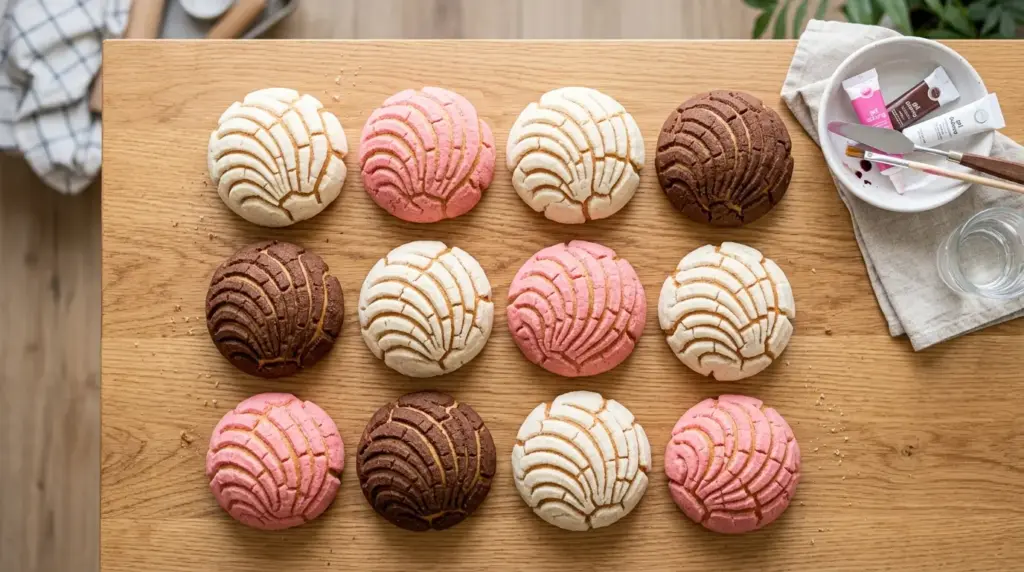
These are endlessly customizable. You can make classic white, pink, chocolate, or any color topping you like using a few drops of food coloring.
They’re versatile too. Conchas are welcome at the breakfast table, as an afternoon snack with coffee, or even as a base for a creative ice cream sandwich.
Homemade conchas are far superior to store-bought ones. The difference in freshness and fluffiness is immediately noticeable.
Making them is also a wonderful way to connect with Mexican culinary tradition. This is a recipe with deep roots, and bringing it into your kitchen honors that heritage in the most delicious way possible.
You might also enjoy: Challah Recipe
Ingredients
You’ll need two sets of ingredients for this recipe: one for the enriched dough and one for the sugar topping. Keep your butter at room temperature so it incorporates smoothly, and make sure your milk is warm (not hot) to activate the yeast properly.
For the Dough:
- 4 cups (500g) bread flour, plus more for dusting (all-purpose flour works but bread flour gives a better rise and chew)
- 2 1/4 teaspoons (7g / 1 packet) active dry yeast
- 1/2 cup (120ml) warm whole milk (105-110°F / 40-43°C)
- 1/2 cup (100g) granulated sugar
- 1/2 teaspoon fine sea salt
- 2 large eggs, room temperature
- 1/2 cup (115g / 1 stick) unsalted butter, softened and cut into small pieces
- 1 teaspoon pure vanilla extract
- 1/2 teaspoon ground cinnamon
For the Sugar Topping:
- 1 cup (125g) all-purpose flour
- 3/4 cup (90g) powdered sugar
- 1/2 cup (115g) vegetable shortening or unsalted butter, softened
- 1 teaspoon pure vanilla extract
- Gel food coloring in pink, yellow, or any color of your choice (optional)
- 1 tablespoon unsweetened cocoa powder (optional, for chocolate topping)
Read Also: Brioche Recipe
Kitchen Equipment Needed
Having the right tools makes this recipe much smoother. A stand mixer does the heavy lifting for the dough, though you can absolutely knead by hand if you prefer.
- Stand mixer with dough hook attachment (or large bowl for hand kneading)
- Large mixing bowl
- Plastic wrap or clean kitchen towel
- Baking sheets (two half-sheet pans work well)
- Parchment paper
- Concha stamp or cutter (optional, a sharp paring knife works just fine)
- Instant-read thermometer (for checking milk temperature)
- Wire cooling rack
- Small rolling pin or your hands for flattening the topping discs
Another great enriched bread for your baking repertoire: Panettone Recipe
Recommended Products for This Recipe
These are products that genuinely make a difference when baking conchas, based on quality and performance.
1. KitchenAid 5-Quart Stand Mixer
A stand mixer takes the effort out of developing gluten in an enriched dough like this one. The dough hook works the butter and eggs in smoothly and consistently, giving you that silky, elastic texture that’s essential for fluffy conchas. This is one kitchen investment that will serve you for decades.
2. Concha Cutter and Stamp Set
A concha stamp makes scoring the sugar topping quick, even, and authentically patterned. You get that classic shell design without the guesswork of using a knife. Most sets include both a round cutter and a shell-shaped stamp, which also helps you press the topping evenly onto each bun.
3. Nordic Ware Half-Sheet Baking Pan
Good-quality, heavy-duty baking pans distribute heat evenly, which matters for getting a golden base on your conchas without overbrowning. The Nordic Ware pans are a favorite among serious home bakers for a reason; they’re sturdy, warp-resistant, and last for years.
4. Gel Food Coloring Set
Gel food coloring gives you vibrant, saturated color in the sugar topping without adding extra liquid (which can throw off the texture). A set with multiple colors lets you make a beautiful variety of pink, yellow, and white conchas all in one batch.
5. Bread Flour (King Arthur)
Bread flour has a higher protein content than all-purpose flour, which develops more gluten and gives conchas a better structure, chew, and rise. Using bread flour is one of the most effective ways to ensure your conchas turn out fluffy rather than dense.
The same buttery, enriched dough technique works beautifully in Cinnamon Babka as well.
Step-by-Step Instructions
Step 1: Bloom the Yeast
- Pour the warm milk into the bowl of your stand mixer (or a large bowl if kneading by hand). The temperature should be between 105-110°F (40-43°C). Use your instant-read thermometer to check; too hot will kill the yeast, and too cold won’t activate it.
- Add 1 tablespoon of the granulated sugar to the warm milk.
- Sprinkle the active dry yeast over the milk and stir briefly to combine.
- Let the mixture sit undisturbed for 5 to 10 minutes. You’re waiting for it to become foamy and fragrant, which tells you the yeast is alive and active.
- If the mixture doesn’t foam after 10 minutes, your yeast may be expired. Discard and start over with fresh yeast before proceeding.
Step 2: Mix the Dough
- Once the yeast is foamy, add the eggs, remaining granulated sugar, vanilla extract, and ground cinnamon to the yeast mixture.
- Give everything a quick stir to combine.
- Attach the dough hook to your stand mixer. Add the bread flour and fine sea salt to the bowl.
- Mix on low speed for 1 to 2 minutes until the flour is incorporated and no dry streaks remain.
- Increase the speed to medium and mix for about 3 minutes, until the dough starts to come together.
Step 3: Add the Butter
- With the mixer running on medium-low, add the softened butter a few pieces at a time. This slow addition is important: adding all the butter at once can prevent it from fully incorporating into the dough.
- Continue mixing for 6 to 8 minutes after all the butter has been added. The dough should become smooth, elastic, and slightly tacky but not sticky. It should pull away cleanly from the sides of the bowl.
- If the dough is very sticky and not forming a smooth ball, add flour one tablespoon at a time, up to 3 extra tablespoons, until it comes together.
- Once the dough is ready, remove it from the bowl and knead it by hand on a lightly floured surface for 2 to 3 minutes. This final hand-kneading helps develop a really soft, pliable texture.
Step 4: First Rise
- Lightly grease a large, clean bowl with a neutral oil or cooking spray.
- Shape the dough into a smooth ball and place it in the greased bowl. Turn it over once so all sides are lightly coated.
- Cover the bowl tightly with plastic wrap or a clean kitchen towel.
- Place the bowl in a warm, draft-free spot. If your kitchen is cool, you can place the covered bowl in an oven that has been turned off but preheated to 100°F (38°C) briefly, then turned off.
- Let the dough rise for 1 to 1.5 hours, or until it has doubled in size. The timing will vary depending on the temperature of your environment.
Step 5: Make the Sugar Topping
- While the dough is rising, prepare the sugar topping. In a medium bowl, combine the softened shortening (or butter) and powdered sugar.
- Mix together with a fork or by hand until the mixture comes together and is smooth, almost like a soft paste.
- Add the vanilla extract and mix again.
- Add the all-purpose flour and mix until everything is fully combined into a soft, pliable, dough-like consistency. It should hold its shape without crumbling but shouldn’t feel wet or greasy.
- If you’re making different colors, divide the topping into separate portions at this stage. Add a few drops of gel food coloring to each portion and knead it in until the color is even.
- For a chocolate topping, add 1 tablespoon of unsweetened cocoa powder to one portion and knead it in.
- Cover the topping portions with plastic wrap and set aside at room temperature until needed.
Step 6: Shape the Conchas
- Once the dough has doubled, gently punch it down to deflate it.
- Turn the dough out onto a lightly floured surface and divide it into 12 equal pieces, each weighing approximately 80 to 85 grams (about 3 oz).
- Working with one piece at a time, cup the dough in your palm and roll it against the work surface in a circular motion to form a smooth, taut ball. The surface should be smooth with no seams on the bottom.
- Place the shaped dough balls on two parchment-lined baking sheets, spacing them at least 3 inches (7.5 cm) apart to allow for spreading during the second rise.
- Gently press each ball slightly with your palm to flatten it into a slightly domed disc shape.
Step 7: Add the Topping
- Divide the sugar topping into 12 equal pieces, one for each dough ball.
- Working with one piece of topping at a time, place it between two sheets of plastic wrap and use your hands or a small rolling pin to flatten it into a round disc about 3 to 3.5 inches (7.5 to 9 cm) in diameter, and about 1/8 inch (3mm) thick.
- Carefully peel the topping disc off the plastic and drape it over one of the dough balls. Press it gently but firmly to adhere it to the top and sides of the dough. It won’t cover the very bottom; that’s normal.
- Repeat with the remaining topping portions and dough balls.
- Once all the conchas are topped, use your concha stamp or a sharp paring knife to score the shell pattern into the topping. Press firmly enough to score the topping but try not to cut all the way through into the dough. Traditional shell patterns include radiating lines from the center, crosshatch grids, or a full seashell shape.
Step 8: Second Rise
- Cover the shaped, topped conchas loosely with plastic wrap or a clean kitchen towel. Do not press the covering down; leave room for the dough to puff up.
- Let them rise in a warm spot for 45 minutes to 1 hour, until noticeably puffed. They won’t double in size like during the first rise, but they should look visibly larger and feel light and airy.
- About 15 minutes before the second rise is complete, preheat your oven to 375°F (190°C).
Step 9: Bake
- Once the oven is fully preheated and the conchas have completed their second rise, place the baking sheets on the center rack of the oven.
- Bake for 16 to 18 minutes, or until the tops look set and the topping has a slightly hardened, crackled appearance. The sides and bottoms should be lightly golden. Avoid overbaking; the tops won’t brown significantly because of the sugar topping, so watch the bottom and sides instead.
- If you’re baking two trays at once, rotate them halfway through baking (front to back, top to bottom) to ensure even baking.
- Remove the conchas from the oven and let them cool on the baking sheet for 5 minutes before transferring to a wire rack.
Step 10: Cool and Serve
- Transfer the baked conchas to a wire cooling rack and allow them to cool for at least 20 minutes before eating.
- While warm conchas are irresistible, the sugar topping will be slightly soft and pasty right out of the oven. Cooling allows the topping to set into that characteristic crisp, slightly crumbly shell.
- Serve at room temperature and enjoy with a warm drink for a truly traditional pairing. Conchas are wonderful with coffee, hot chocolate, or warm atole.
Serve yours alongside a cup of this traditional Mexican warm drink: Champurrado Recipe
Tips for Success
Getting conchas right on your first attempt comes down to a few key practices. Take these to heart and you’ll be rewarded with fluffy, bakery-quality results.
- Check your yeast temperature carefully. Milk that’s too hot (above 115°F / 46°C) will kill the yeast before it can activate. Use a thermometer every time.
- Don’t rush the rises. Enriched doughs like this one are denser with butter and eggs, which slows down yeast activity. Give the dough the full time it needs.
- Add butter slowly. Incorporating the butter piece by piece is what gives the dough its smooth, silky texture. Don’t rush this step.
- Score lightly. When cutting the pattern into the topping, press firmly enough to mark the topping but avoid cutting all the way through into the dough. Deep cuts can cause the topping to separate during baking.
- Keep the topping dough-like. The sugar topping should feel like soft playdough. If it’s crumbly, knead in a tiny bit of shortening. If it’s greasy, add a small amount of powdered sugar.
- Don’t overbake. Conchas are done when the topping looks set and the bottoms are lightly golden. Overbaking leads to a dry, tough crumb.
Read Also: Soft Dinner Rolls Recipe
Serving Suggestions
Conchas are most traditionally enjoyed for breakfast or as a merienda (afternoon snack), and they shine brightest when paired with something warm and comforting to drink.
The most classic pairing is a mug of hot chocolate, especially a Mexican-style one made with Abuelita chocolate tablets, cinnamon, and warm milk. The warm, spiced sweetness of the drink complements the light, buttery bread perfectly.
Café de olla, a traditional Mexican coffee brewed with piloncillo (unrefined cane sugar) and cinnamon, is another beloved pairing that enhances the cinnamon notes in the dough.
Plain warm conchas are also wonderful with a spread of softened butter and a drizzle of honey.
For something more creative, split a concha horizontally and fill it with a generous scoop of vanilla ice cream. This concha ice cream sandwich is popular at Mexican street fairs and festivals.
- Serve with warm Mexican hot chocolate or café de olla
- Spread with softened butter and honey for a simple breakfast
- Use as the base for a concha ice cream sandwich with vanilla or strawberry ice cream
- Pack into lunchboxes for a special snack that kids adore
- Arrange on a bread basket for a Mexican-themed dinner party alongside pozole or other traditional dishes
- Dip into warm atole or champurrado for a traditional Mexican comfort combination
For a complete Mexican breakfast spread, pair your conchas with Caldo de Pollo to round out the table.
Variations to Try
The classic white vanilla concha is the original and most beloved version, but once you’ve got the base recipe down, there’s plenty of room to get creative with flavors and colors.
- Pink Conchas: Add 2 to 3 drops of pink or red gel food coloring to the topping for the most iconic panadería look. Pink conchas are arguably the most popular colored variety.
- Chocolate Conchas: Mix 1 tablespoon of unsweetened cocoa powder into the topping to create the dark brown, chocolate-flavored variety. This is the second most popular traditional flavor.
- Strawberry Conchas: Add a few drops of pink coloring and 1/2 teaspoon of strawberry extract to the topping for a fruity twist.
- Matcha Conchas: Mix 1 teaspoon of matcha green tea powder into the topping for a modern, slightly earthy variation.
- Citrus Zest Dough: Add 1 tablespoon of orange or lemon zest to the dough for a bright, citrusy note that complements the sweet topping.
- Cinnamon Sugar Topping: Increase the cinnamon in the dough and add 1 teaspoon of cinnamon to the topping for a warmly spiced version.
- Mini Conchas: Divide the dough into 24 pieces instead of 12 to make miniature conchas that are perfect for parties and gift baskets.
If you love baking sweet enriched breads, you’ll also enjoy this Cinnamon Swirl Bread Recipe.
Storage and Reheating
Conchas are best the day they are baked, but they store reasonably well if handled properly. The main thing to protect is that sugar topping, which can absorb moisture and go soft if not stored correctly.
- Room temperature: Store conchas in an airtight container or in a resealable bag at room temperature for up to 3 to 4 days. Avoid the refrigerator, which dries out the bread quickly.
- Freezing unbaked dough: You can freeze the shaped, topped conchas before the second rise. Place them on a parchment-lined tray in the freezer until solid, then transfer to a freezer bag. When ready to bake, thaw overnight in the refrigerator, bring to room temperature, and let them complete their second rise (this may take 2 to 3 hours) before baking as directed.
- Freezing baked conchas: Let baked conchas cool completely, then wrap each one individually in plastic wrap and store in a freezer bag for up to 1 month.
- Reheating: To restore that fresh-baked softness, wrap a concha in a damp paper towel and microwave for 20 to 25 seconds. Alternatively, place it in a 300°F (150°C) oven for 5 minutes.
- Day-old conchas: If your conchas have gotten a bit stale, slice them horizontally and use them like bread for a custard-soaked breakfast treat.
Day-old conchas are wonderful transformed into Brioche French Toast, dipped in a vanilla custard and pan-fried in butter until golden.
Nutritional Facts
The following nutritional values are estimates per concha, based on a recipe yielding 12 conchas. Values will vary based on exact ingredient brands and portion sizes.
| Nutrient | Per Concha |
|---|---|
| Calories | 385 kcal |
| Carbohydrates | 52g |
| Protein | 7g |
| Total Fat | 16g |
| Saturated Fat | 8g |
| Cholesterol | 55mg |
| Sodium | 110mg |
| Fiber | 1.5g |
| Sugar | 18g |
These values are approximations and should not be used for strict dietary planning. Conchas are an occasional treat; enjoy them for what they are.
You might also love: Tres Leches Cake Recipe
Health Benefits of Key Ingredients
While conchas are definitely a treat rather than a health food, a few of their core ingredients do offer some genuine nutritional value worth noting.
Eggs are a nutritional powerhouse in this dough, providing high-quality complete protein, B vitamins (especially B12 and choline), and healthy fats. Choline in particular supports brain health and is important for nerve function.
Whole milk contributes calcium for strong bones, vitamin D, potassium, and phosphorus. Using whole milk in enriched bread doughs also contributes to the soft, tender crumb that makes conchas so enjoyable.
Bread flour (a refined wheat flour with higher protein content) provides some iron, B vitamins including folate and niacin, and a small amount of fiber. Choosing unbleached flour is a simple way to avoid some of the additives found in bleached varieties.
Unsalted butter contains fat-soluble vitamins A, D, E, and K2. While it should be enjoyed in moderation, it is a whole food with a simpler ingredient list than many processed fats.
Vanilla extract contains small amounts of antioxidants and has been studied for anti-inflammatory properties. It also enhances the perception of sweetness, which means you can use less sugar while still getting a satisfying flavor.
- Eggs: complete protein, B vitamins, choline
- Whole milk: calcium, vitamin D, potassium
- Bread flour: iron, B vitamins, some fiber
- Butter: fat-soluble vitamins A, D, E, K2
- Vanilla extract: antioxidants, anti-inflammatory compounds
- Cinnamon: antioxidants, blood sugar regulation support
Another beloved Mexican sweet treat: Easy Churro Recipe
Frequently Asked Questions
1. Can I use all-purpose flour instead of bread flour?
Yes, you can substitute all-purpose flour in equal amounts, and your conchas will still taste great. Bread flour has a higher protein content, which creates more gluten and gives the dough a better rise, fluffier interior, and chewier texture. With all-purpose flour, the conchas may be slightly denser and could sink a little in the center, but they will still be delicious.
2. My topping keeps cracking and falling off during baking. What went wrong?
This usually happens for one of two reasons. Either the topping was pressed on too lightly and didn’t adhere properly to the dough, or the conchas were overproofed during the second rise, causing the dough to expand too quickly in the oven and crack the topping dramatically. Make sure to press the topping firmly onto the dough, and keep your second rise to 45 to 60 minutes maximum rather than letting it go longer.
3. Can I make the dough the night before?
Absolutely. After the first rise, punch the dough down, cover the bowl tightly with plastic wrap, and refrigerate it overnight (up to 12 hours). The next day, take the dough out and let it come to room temperature for about 30 minutes before shaping. Then continue with shaping, topping, the second rise, and baking as instructed.
4. Why didn’t my conchas rise properly?
The most common culprits are yeast that didn’t activate (either expired or killed by milk that was too hot), a kitchen that’s too cold for the dough to rise properly, or too much flour added during mixing, which weighs the dough down. Always bloom your yeast first and confirm it’s foamy before proceeding. If your kitchen is cool, find a warmer spot for your rises, such as on top of the refrigerator or inside an oven with just the light on.
5. Do conchas need to be refrigerated?
No. Refrigerating conchas actually makes them go stale faster because the cool temperature causes the starches in the bread to crystallize more quickly. Store them at room temperature in an airtight container for up to 3 to 4 days. If you need to keep them longer, freezing is the better option.
For another beautifully soft and sweet roll, check out: Sweet Dinner Rolls Recipe
Conchas (Mexican Sweet Bread)

Equipment
- Stand mixer with dough hook attachment - or large bowl for hand kneading
- Large mixing bowl
- Plastic wrap - or clean kitchen towel
- Baking sheets - two half-sheet pans
- Parchment paper
- Concha stamp or cutter - optional, a sharp paring knife works just fine
- Instant-read thermometer - for checking milk temperature
- Wire cooling rack
- Small rolling pin - optional, or use your hands for flattening topping discs
Ingredients
For the Dough
- 4 cups bread flour - 500g, plus more for dusting; all-purpose flour works but bread flour gives a better rise and chew
- 2 1/4 teaspoons active dry yeast - 7g / 1 packet
- 1/2 cup whole milk - 120ml, warm (105-110°F / 40-43°C)
- 1/2 cup granulated sugar - 100g
- 1/2 teaspoon fine sea salt
- 2 large eggs - room temperature
- 1/2 cup unsalted butter - 115g / 1 stick, softened and cut into small pieces
- 1 teaspoon pure vanilla extract
- 1/2 teaspoon ground cinnamon
For the Sugar Topping
- 1 cup all-purpose flour - 125g
- 3/4 cup powdered sugar - 90g
- 1/2 cup vegetable shortening - 115g, or unsalted butter, softened
- 1 teaspoon pure vanilla extract
- gel food coloring - pink, yellow, or any color of your choice (optional)
- 1 tablespoon unsweetened cocoa powder - optional, for chocolate topping
Instructions
- Bloom the yeast by combining warm milk (105-110°F), 1 tablespoon sugar, and yeast; let stand 5-10 minutes until foamy.
- Add eggs, remaining sugar, vanilla, and cinnamon to the yeast mixture. Add flour and salt; mix on low until incorporated, then medium for 3 minutes until dough comes together.
- With mixer on medium-low, add softened butter piece by piece. Continue mixing 6-8 minutes until dough is smooth, elastic, and pulls away from bowl sides.
- Knead dough by hand 2-3 minutes on a lightly floured surface until soft and pliable. Shape into a ball and place in a greased bowl.
- Cover and let rise in a warm spot for 1-1.5 hours until doubled in size.
- Make the topping by creaming shortening and powdered sugar until smooth. Mix in vanilla and flour to form a soft, playdough-like consistency.
- Divide dough into 12 equal pieces (about 80-85g each). Shape each into a smooth, taut ball and place on parchment-lined baking sheets, 3 inches apart.
- Divide topping into 12 pieces. Flatten each between plastic wrap into a 3-3.5 inch round disc. Drape over each dough ball, pressing firmly to adhere.
- Score the shell pattern into each topping using a concha stamp or sharp paring knife. Press firmly but don’t cut through to the dough.
- Cover loosely and let rise for 45 minutes to 1 hour until puffed. Preheat oven to 375°F (190°C) during the last 15 minutes.
- Bake for 16-18 minutes until tops are set and bottoms are lightly golden. Cool on baking sheet 5 minutes, then transfer to a wire rack.
- Cool completely for at least 20 minutes before serving. The topping sets into a crisp, crumbly shell as it cools.
Notes
- Check yeast temperature carefully: milk must be between 105-110°F (40-43°C). Too hot kills the yeast; too cold won’t activate it.
- Don’t rush the rises. Enriched doughs are denser with butter and eggs, which slows yeast activity. Give the dough the full time needed.
- Add butter slowly, a few pieces at a time, for a smooth, silky dough texture.
- Score lightly: press firmly to mark the topping but avoid cutting all the way through into the dough. Deep cuts can cause the topping to separate during baking.
- The sugar topping should feel like soft playdough. If crumbly, knead in a tiny bit of shortening; if greasy, add a small amount of powdered sugar.
- Don’t overbake. Conchas are done when the topping looks set and the bottoms are lightly golden. Overbaking leads to a dry, tough crumb.
- Store in an airtight container at room temperature for up to 3-4 days. Do not refrigerate, as this speeds staling.
- Freeze baked conchas individually wrapped for up to 1 month. To reheat, microwave 20-25 seconds wrapped in a damp paper towel or warm in a 300°F oven for 5 minutes.
- Unbaked, shaped conchas can be frozen before the second rise. Thaw overnight in the refrigerator, bring to room temperature, and proof 2-3 hours before baking.
Final Thoughts
Making conchas at home is one of the most satisfying bread-baking projects you can take on. These aren’t just rolls; they’re a piece of Mexican culinary heritage, deeply loved by generations of families across Mexico and beyond.
The process requires a little time and patience, but nothing about it is technically difficult. Once you’ve made a batch and pulled those colorful, patterned buns from the oven, you’ll understand immediately why they hold such a special place in so many hearts.
Give this concha recipe a try and let me know how it goes in the comments below! I’d love to know what colors and flavors you chose, and whether your family loved them as much as mine does. If you share your conchas on social media, tag me so I can see your beautiful bakes.
Recommended:
- Japanese Milk Bread Recipe
- Chocolate Babka Recipe
- Monkey Bread Recipe
- Croissant Recipe
- Cinnamon Raisin Bread Recipe
- Birria Tacos Recipe
- Flour Tortilla Recipe
- Picadillo Recipe
- Pico de Gallo Recipe
- Mexican Rice Recipe



