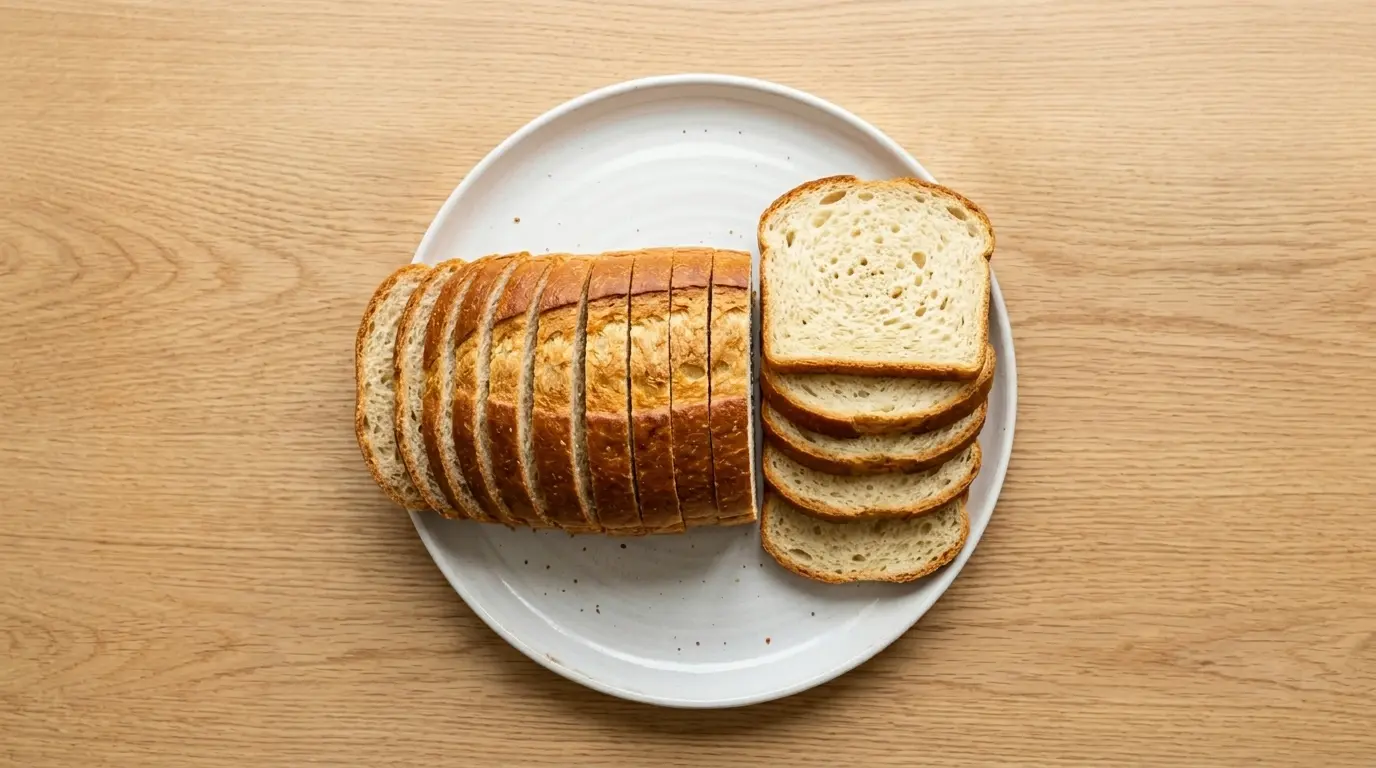
Sandwich Bread Recipe is the kind of baking project that turns your whole kitchen into the best smelling room in the house. This soft, golden loaf slices clean, holds up to any filling you pile on it, and tastes worlds better than anything wrapped in plastic at the store.
If you have ever felt intimidated by yeast, this recipe is the perfect place to start. It uses simple pantry staples, a few rounds of patient rising, and one loaf pan to produce bakery quality bread at home.
Once you taste a warm slice fresh out of the oven with a little butter melting into it, you will understand why so many home bakers make this their go to weekly bread.
If you are new to working with yeast, the Easy Naan Bread Recipe is another forgiving place to build your confidence.

Why You’ll Love This Sandwich Bread Recipe
This bread checks every box for an easy, satisfying homemade staple. The texture is soft and fluffy, the crust is tender rather than tough, and the flavor is buttery without being heavy.
It also happens to be incredibly beginner friendly. There is no fancy equipment required, and the dough comes together with basic mixing and kneading techniques anyone can master.
- Soft, pillowy crumb that is perfect for sandwiches, toast, or French toast
- Made with simple pantry ingredients you likely already have on hand
- No advanced bread baking skills or special equipment required
- Slices cleanly for neat sandwiches without falling apart
- Freezes beautifully, so you can always have a loaf on hand
- Customizable with whole wheat flour, herbs, or seeds if you want variety
If you love the idea of homemade bread but want something with a bit more tang, the Sourdough Sandwich Bread Recipe is a wonderful next recipe to try.
Ingredients
This recipe uses a short list of ingredients that work together to create structure, softness, and flavor. The yeast and sugar team up to create rise and a hint of sweetness, while the butter and milk add richness and a tender crumb.
- 4 cups (500g) all-purpose flour, plus more for kneading
- 2 and 1/4 teaspoons (7g) active dry yeast or instant yeast
- 1/4 cup (50g) granulated sugar
- 1 and 1/2 teaspoons (9g) fine salt
- 1 cup (240ml) whole milk, warmed to about 110°F (43°C)
- 1/4 cup (60ml) water, warmed to about 110°F (43°C)
- 3 tablespoons (42g) unsalted butter, softened
- 1 large egg, room temperature
- 1 tablespoon neutral oil, for greasing the bowl and pan
Every ingredient here plays a specific role. The warm milk and water activate the yeast, the egg adds richness and helps the crumb stay soft for days, and the softened butter folds into the dough to create that signature tender bite.
This bread pairs wonderfully with sweet spreads too, and a batch of Honey Butter on a warm slice is something everyone should try at least once.
Kitchen Equipment Needed
You do not need a bread baking arsenal to make this recipe a success. A few reliable tools make the process much smoother and help your loaf bake evenly.
- Stand mixer with dough hook attachment, or a large mixing bowl for hand kneading
- 9×5 inch loaf pan
- Measuring cups and spoons
- Kitchen scale for accurate flour measurement
- Mixing bowl for proofing the dough
- Clean kitchen towel or plastic wrap, for covering the dough while it rises
- Instant read thermometer, to check liquid temperature and doneness
- Wire cooling rack
A kitchen scale might feel like an unnecessary extra step, but weighing your flour instead of scooping it makes a real difference in bread baking. Too much flour packed into a measuring cup is one of the most common reasons homemade bread turns out dense.
For more bread baking inspiration, check out the White Bread Recipe, which uses a similar method with a slightly different ratio of ingredients.
Recommended Products for This Recipe
These are a few specific products that consistently deliver better results when making homemade sandwich bread. They are chosen based on quality, durability, and how much of a difference they make in the final loaf.
1. USA Pan Bakeware Loaf Pan
This loaf pan uses a corrugated surface and aluminized steel that promotes even heat circulation, which means your bread bakes consistently without hot spots or burnt edges. The nonstick coating also makes releasing your finished loaf simple, with no sticking or tearing. It is a long lasting investment that will outperform flimsy pans for years of baking.
2. KitchenAid Stand Mixer
A stand mixer takes the guesswork and elbow grease out of kneading, giving you a smooth, elastic dough in a fraction of the time. The dough hook attachment handles the sticky, heavy dough so your hands stay clean and your kneading stays consistent. It is a versatile tool that will earn its place on your counter well beyond this one recipe.
3. Red Star Platinum Instant Yeast
This yeast is formulated with dough conditioners that help your bread rise higher and more reliably than standard active dry yeast. It performs especially well in enriched doughs like this one, which contain butter, milk, and egg. Reliable yeast means fewer failed loaves and more consistent results every single time.
4. OXO Good Grips Bench Scraper
A bench scraper makes handling sticky bread dough so much easier, helping you scrape, lift, and shape the dough without it sticking to your hands or counter. It is also handy for portioning dough evenly and cleaning up your work surface afterward. This small tool solves one of the most frustrating parts of bread making.
If you want to put your new loaf pan to work again soon, the Brioche Recipe is another rewarding enriched bread worth baking next.

Step-by-Step Instructions
1. Activate the Yeast
- In a small bowl or liquid measuring cup, combine the warmed milk and warmed water. The temperature should feel like a warm bath, around 110°F (43°C), since liquid that is too hot can kill the yeast.
- Sprinkle the yeast over the warm liquid and let it sit undisturbed for about 5 minutes.
- Watch for the mixture to become foamy and slightly puffed on top, which confirms the yeast is alive and active.
- If the mixture does not foam after 10 minutes, the yeast may be expired, and you should start over with a fresh packet.
2. Mix the Dough
- In the bowl of your stand mixer fitted with the dough hook, combine the flour, sugar, and salt. Whisk briefly to distribute the salt evenly through the flour.
- Add the activated yeast mixture, the softened butter, and the egg to the dry ingredients.
- Mix on low speed for about 1 minute until a rough, shaggy dough begins to form.
- Scrape down the sides of the bowl with a spatula so all the flour gets incorporated into the dough.
3. Knead the Dough
- Increase the mixer speed to medium low and knead for 6 to 8 minutes, until the dough becomes smooth, elastic, and slightly tacky to the touch.
- If kneading by hand, turn the dough out onto a lightly floured surface and knead for 10 to 12 minutes, folding and pressing the dough repeatedly.
- The dough is ready when it springs back slowly after you poke it with a finger.
- If the dough feels overly sticky, add flour one tablespoon at a time, but avoid adding too much, since a slightly tacky dough produces a softer loaf.
4. First Rise
- Lightly oil a large clean bowl and transfer the dough into it, turning the dough to coat it all over with oil.
- Cover the bowl tightly with plastic wrap or a damp kitchen towel.
- Place the bowl in a warm, draft free spot and let the dough rise for 1 to 1.5 hours, or until it has doubled in size.
- To test if the dough has risen enough, press two fingers into it gently. If the indentation stays, it is ready to shape.
5. Shape the Loaf
- Punch down the risen dough gently to release the air, then transfer it to a lightly floured surface.
- Pat the dough into a rough rectangle, about the same length as your loaf pan.
- Roll the dough up tightly from one short end to the other, pinching the seam closed as you go.
- Grease your loaf pan with the neutral oil, then place the shaped dough into the pan seam side down.
6. Second Rise
- Cover the loaf pan loosely with plastic wrap or a kitchen towel.
- Let the dough rise again in a warm spot for 45 minutes to 1 hour, until it domes about an inch above the rim of the pan.
- Avoid letting the dough over proof, since dough that rises too long can collapse during baking.
- While the dough finishes its second rise, preheat your oven to 350°F (175°C).
7. Bake the Bread
- Once the oven is fully preheated, place the loaf pan on the center rack.
- Bake for 30 to 35 minutes, until the top is deep golden brown.
- Check for doneness by tapping the bottom of the loaf, which should sound hollow, or by using an instant read thermometer inserted into the center, which should read about 190°F (88°C).
- If the top is browning too quickly, tent the loaf loosely with aluminum foil for the remaining bake time.
8. Cool and Slice
- Remove the loaf from the oven and let it rest in the pan for 10 minutes.
- Turn the bread out onto a wire cooling rack and let it cool completely, which usually takes about 1.5 to 2 hours.
- Resist slicing the bread while it is still warm, since cutting too early can cause the crumb to compress and turn gummy.
- Once fully cooled, slice with a serrated knife for clean, even pieces.
For another cozy baked good to round out your weekend, the No Knead Bread Recipe is a wonderfully low effort option.
Tips for Success
Small details make a noticeable difference when baking yeast bread, and a few simple habits will help you get consistent results every time. Paying attention to temperature and timing is especially important since yeast is a living ingredient that reacts to its environment.
- Always check that your milk and water are warm, not hot, since temperatures above 120°F (49°C) can kill the yeast
- Weigh your flour with a kitchen scale for the most accurate and consistent results
- Knead the dough until it passes the windowpane test, where a small piece stretches thin without tearing
- Let the dough rise in a slightly warm oven with the light on if your kitchen runs cool
- Avoid rushing the rises, since proper fermentation is what gives the bread its flavor and texture
- Use room temperature eggs and butter so they incorporate evenly into the dough
Patience really is the secret ingredient in this recipe. Rushing the rise times is the most common reason home bakers end up with a dense, tight crumb instead of the soft, airy texture this bread is known for.
If you enjoy mastering bread techniques, you might also like the Artisan Bread Recipe for a slightly different crust and crumb experience.
Serving Suggestions
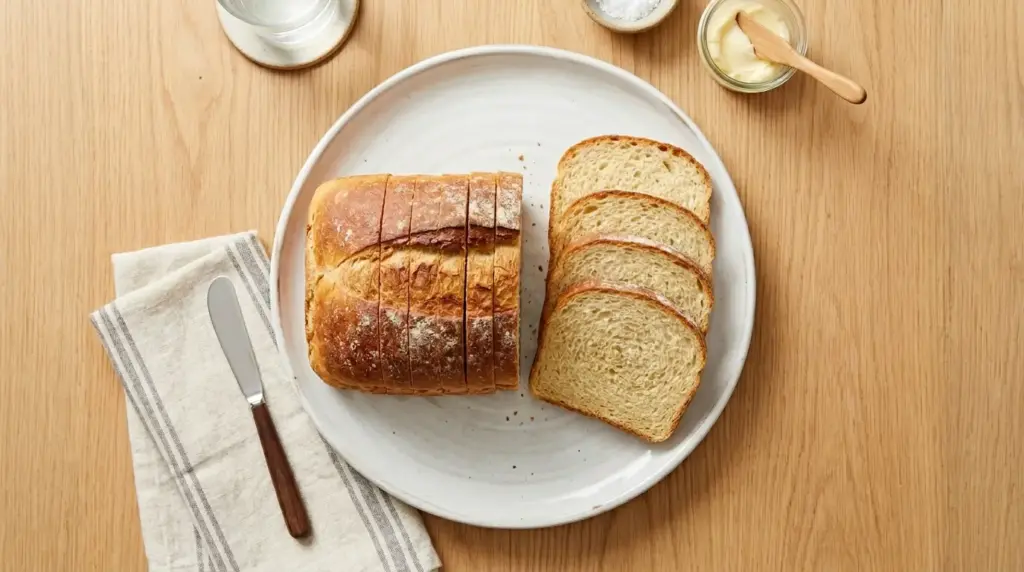
Fresh sandwich bread is wonderfully versatile, working just as well piled high with deli meats as it does lightly toasted with a smear of butter. Its soft texture and mild flavor make it the perfect canvas for almost any filling or topping you can imagine.
- Classic deli sandwiches with sliced turkey, cheese, and crisp lettuce
- Buttered and toasted alongside a bowl of soup
- Used as the base for a hearty buffalo chicken sandwich
- Sliced thick for French toast on a lazy weekend morning
- Spread with cinnamon butter for an easy breakfast treat
- Cut into cubes for homemade croutons or bread pudding
This bread also makes incredible grilled cheese, since the slightly sweet crumb caramelizes beautifully against a hot buttered pan. A thick slice toasted simply with butter and a sprinkle of cinnamon sugar is a treat all on its own too.
You might also enjoy: Chicken Cordon Bleu Sandwich Recipe
Variations to Try
Once you feel confident with the base recipe, there are plenty of simple ways to switch things up depending on your mood or what you have in the pantry. These variations keep the same basic method while changing the flavor or texture slightly.
- Whole wheat swap: Replace up to half the all-purpose flour with whole wheat flour for a heartier loaf
- Honey sandwich bread: Swap the granulated sugar for honey for a deeper, more rounded sweetness
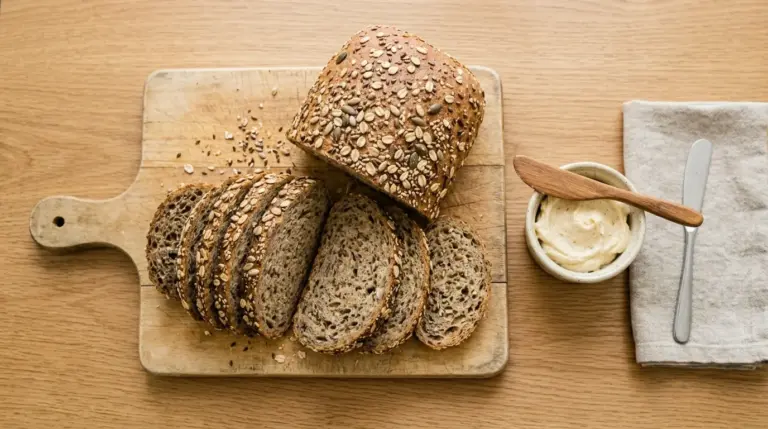
- Herb loaf: Add 2 tablespoons of chopped fresh rosemary or thyme to the dough for a savory twist
- Seeded crust: Brush the top of the shaped loaf with egg wash and sprinkle with sesame or poppy seeds before baking
- Cinnamon swirl version: Roll the dough out flat, sprinkle with cinnamon sugar, then roll back up before placing it in the pan
- Dairy free option: Substitute the milk with unsweetened almond or oat milk and use a plant based butter
Each of these variations uses the same basic technique, so once you understand the method, experimenting becomes much easier. Start with small changes, like swapping the sweetener, before moving on to bigger structural changes like adding mix ins.
If you love experimenting with bread, the Whole Wheat Bread Recipe is a great next loaf to bake.
Storage and Reheating
Proper storage keeps this bread soft and fresh for as long as possible, since homemade bread lacks the preservatives found in store bought loaves. Storing it correctly also prevents it from drying out or molding too quickly.
- Store at room temperature in a sealed bread bag or airtight container for up to 4 days
- Avoid refrigerating the bread, since cold temperatures actually speed up staling
- Freeze sliced bread in a zip top freezer bag for up to 3 months
- Thaw frozen slices at room temperature or pop them directly into the toaster
- Refresh slightly stale bread by wrapping it in foil and warming it in a 300°F (150°C) oven for 10 minutes
- Always let the loaf cool completely before storing to prevent trapped steam and sogginess
If you know you will not finish the loaf within a few days, freezing slices individually is the best way to preserve freshness. This way you can pull out exactly what you need without thawing the entire loaf at once.
For a bread with a longer natural shelf life thanks to its acidity, the Easy Sourdough Bread Recipe is worth exploring as well.
Nutritional Facts
The nutritional values below are estimated per slice, based on a loaf cut into 12 even slices. These numbers will vary slightly depending on your specific brands and exact measurements.
| Nutrient | Amount per Slice |
|---|---|
| Calories | 145 |
| Carbohydrates | 24g |
| Protein | 4g |
| Fat | 4g |
| Saturated Fat | 2g |
| Fiber | 1g |
| Sugar | 3g |
| Sodium | 190mg |
These values make this bread a reasonably balanced choice, especially compared to many store bought white breads that contain added preservatives and higher sodium levels.
For another comforting homemade staple with a similar nutritional profile, take a look at the French Bread Recipe.
Health Benefits of Key Ingredients
While sandwich bread is certainly a treat, a few of its ingredients offer genuine nutritional value beyond simply tasting good. Understanding what each ingredient contributes can help you feel good about baking from scratch.
The egg in this recipe adds protein along with vitamins like B12 and choline, both of which support energy metabolism. Milk contributes calcium and additional protein, helping make this bread slightly more nutritionally rounded than a basic flour and water dough.
- Whole milk provides calcium, vitamin D, and protein for bone and muscle support
- Eggs supply high quality protein along with choline for brain health
- Unsalted butter contains vitamin A and contributes healthy fats in moderation
- Yeast is a natural source of B vitamins, including thiamine and folate
- Using whole wheat flour in the variation boosts fiber and supports digestive health
Baking bread at home also gives you full control over sodium and sugar content, something you do not get with most store bought options. This makes homemade sandwich bread a smart swap if you are trying to reduce processed ingredients in your diet.
If you are interested in more nutrient dense baked goods, the Healthy Banana Bread Recipe is another great option to explore.
Frequently Asked Questions
1. Why is my sandwich bread dense instead of fluffy?
Dense bread is usually caused by too much flour or under proofed dough. Try weighing your flour with a kitchen scale instead of scooping it with a measuring cup, and make sure you give the dough the full rise time until it has properly doubled in size.
2. Can I make this recipe without a stand mixer?
Absolutely, this dough can be kneaded entirely by hand. It will take about 10 to 12 minutes of kneading on a floured surface to develop the same smooth, elastic texture you would get from a mixer.
3. What is the best flour for sandwich bread?
All-purpose flour works wonderfully and produces a soft, tender crumb, which is exactly what this recipe is designed for. Bread flour can be substituted for a slightly chewier texture with more structure, thanks to its higher protein content.
4. How do I know when the dough has risen enough?
The dough should roughly double in size during each rise. A simple test is to press two fingers gently into the dough. If the indentation remains rather than springing back immediately, the dough is ready for the next step.
5. Can I freeze this bread after baking?
Yes, this bread freezes beautifully for up to 3 months. Slice it first, then store the slices in a freezer safe bag so you can grab individual pieces straight from the freezer whenever you need them.
You might also enjoy: Pull Apart Garlic Bread Recipe
Final Thoughts
Baking your own sandwich bread is one of those small kitchen wins that feels disproportionately rewarding. Slicing into a loaf you made completely from scratch is a small joy worth repeating.
Once you get the hang of the rhythm of mixing, rising, and baking, this recipe becomes second nature. It is the kind of bread that turns an ordinary lunch into something a little more special.
I hope this Sandwich Bread Recipe becomes a regular in your kitchen rotation. Give it a try this week, and let me know in the comments how your loaf turns out, or share a photo if you make it your own with one of the variations above.
Recommended:
- Ciabatta Recipe
- Italian Bread Recipe
- Beer Bread Recipe
- Irish Soda Bread Recipe
- Dutch Oven Bread Recipe
- Challah Recipe
- Soft Dinner Rolls Recipe
- Classic Baguette Recipe
- Rosemary Focaccia Recipe
- Pita Bread Recipe
- Buffalo Chicken Sandwich Recipe
- Cinnamon Butter Recipe
