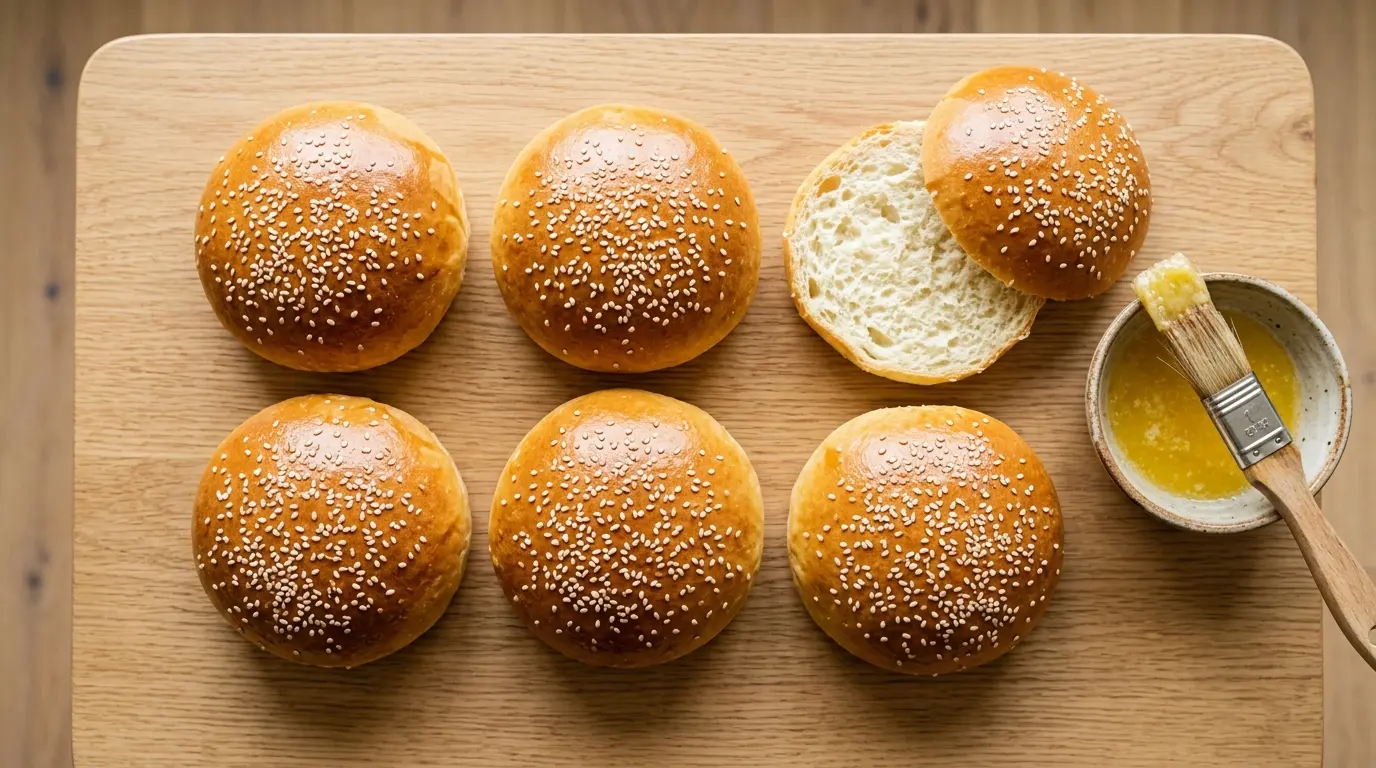
If you’ve never made a homemade burger buns recipe from scratch, you’re in for a serious treat. These buns come out pillowy-soft on the inside with a light golden crust on the outside, and they hold up beautifully to even the juiciest, messiest burgers without going soggy or falling apart.
Store-bought buns just can’t compete. Once you pull a batch of these out of the oven, that familiar bakery smell filling your kitchen, you’ll wonder why you ever settled for the packaged kind.
This recipe uses simple pantry staples: all-purpose flour, active dry yeast, butter, eggs, sugar, salt, and warm water. What makes the difference is the method. Enriching the dough with butter and egg gives these buns their rich flavor and soft, tender crumb. The two-rise process develops just enough structure so the buns stay fluffy without becoming dense or cakey.
You’ll also get an egg wash brushed on top before baking, which is what gives them that gorgeous shiny, golden-brown finish. Toss on some sesame seeds and you’ve got a bun that looks and tastes completely bakery-worthy.
The whole process takes about 3 hours from start to finish, but the hands-on time is only around 20 minutes. The rest is just letting the dough do its thing.
You might also enjoy: Classic Smash Burger Recipe

Why You’ll Love This Homemade Burger Buns Recipe
Making your own burger buns is one of those small kitchen wins that pays off in a big way.
Once you try these, every backyard cookout or weeknight burger night becomes noticeably better.
Here’s why this recipe is worth keeping on rotation:
- Full control over ingredients. No preservatives, no mystery additives, just clean, real ingredients you probably already have at home.
- Customizable size. You can make standard 8-bun batches, go smaller for sliders, or go larger for bigger, heartier sandwiches.
- Perfect texture every time. Soft and pillowy on the inside, lightly golden and sturdy on the outside, these buns hold up to saucy burgers without disintegrating.
- They freeze beautifully. Make a double batch and freeze half. You’ll have fresh-tasting homemade buns ready to go anytime.
- Incredibly versatile. These aren’t just for burgers. Use them for pulled pork sandwiches, fried chicken sandwiches, sloppy joes, or even a classic egg sandwich at brunch.
- Way more satisfying. There’s something deeply satisfying about handing someone a burger you built from the ground up, bun included.
If you love homemade rolls, you’ll also want to try this Potato Rolls Recipe for your next dinner.
Ingredients
You only need a handful of everyday ingredients to make these homemade burger buns. The key is using them correctly, so read through the notes before you start.
Here’s what to gather:
- 3 cups (360g) all-purpose flour, plus more for dusting
- 2¼ teaspoons (7g) active dry yeast (1 standard packet)
- ¾ cup (180ml) warm water (105°F to 110°F / 40°C to 43°C)
- ¼ cup (60ml) whole milk, warmed to room temperature
- 2 tablespoons (25g) granulated white sugar
- 1½ teaspoons (9g) fine salt
- 1 large egg, at room temperature (for the dough)
- 3 tablespoons (42g) unsalted butter, softened to room temperature
- Egg wash: 1 large egg + 1 tablespoon water, beaten together
- 1 tablespoon sesame seeds (optional, but classic)
A note on yeast: Make sure your yeast is fresh and not expired. Old yeast is the number-one reason buns don’t rise. If you see the yeast foaming vigorously in the warm water, you’re good to go.
A note on flour: Measure flour by spooning it into your measuring cup and leveling it off, or better yet, use a kitchen scale. Too much flour from packing the cup leads to dry, dense buns.
Read Also: Soft Dinner Rolls Recipe
Kitchen Equipment Needed
You don’t need anything fancy to make these buns, but having the right tools makes the process smoother.
- Stand mixer with dough hook attachment (or a large bowl for hand-kneading)
- Large mixing bowl (for the first rise)
- Baking sheet (rimmed half-sheet pan works best)
- Parchment paper
- Kitchen scale (highly recommended for accurate flour measurement)
- Instant-read thermometer (to check water temperature)
- Pastry brush (for applying the egg wash)
- Plastic wrap or a clean kitchen towel (for covering the dough during rises)
- Wire cooling rack
This pairs wonderfully with a Sub Roll Recipe technique if you want to practice your shaping skills on a slightly different style of roll.
Recommended Products for This Recipe
These are products that genuinely make a difference when baking homemade burger buns. They’re based on quality and performance, not just popularity.
1. KitchenAid Stand Mixer with Dough Hook
A stand mixer takes all the effort out of kneading and ensures the dough develops proper gluten structure, which is what gives these buns their soft, chewy texture. The dough hook attachment does in 5 minutes what would take 10 to 15 minutes by hand. It’s one of the most versatile tools you can own for bread baking.
2. OXO Good Grips Kitchen Scale
Measuring flour by weight is the single most reliable way to get consistent buns every time. Even a small difference in flour quantity can make buns too dense or too dry. A digital kitchen scale removes all the guesswork.
3. USA Pan Bakeware Half Sheet Pan
A quality, heavy-gauge baking sheet distributes heat evenly so the bottoms of your buns bake golden without burning. Thin, flimsy pans create hot spots that can lead to uneven results. This pan is a workhorse in any home kitchen.
4. Thermapen Instant-Read Thermometer
Getting your water temperature right (between 105°F and 110°F / 40°C to 43°C) is critical for activating yeast correctly. Too hot kills it; too cold means sluggish rising. An instant-read thermometer removes all the uncertainty and works for everything from bread to meat.
5. Sesame Seeds for Baking
Toasted white sesame seeds on top of a burger bun are completely classic. A high-quality bag of sesame seeds gives you that nutty crunch and beautiful look that immediately signals “homemade and intentional.” They also work for everything from salad dressings to stir-fries.
Another favorite roll to try with a stand mixer: Pretzel Rolls Recipe

Step-by-Step Instructions
Step 1: Activate the Yeast
- Measure ¾ cup (180ml) of warm water. Use an instant-read thermometer to confirm the temperature is between 105°F and 110°F (40°C to 43°C). Water that’s too hot will kill the yeast; too cold and it won’t activate.
- Pour the warm water into the bowl of your stand mixer (or a large mixing bowl if kneading by hand).
- Add 2 tablespoons (25g) of granulated sugar and 2¼ teaspoons (7g) of active dry yeast.
- Stir briefly to combine, then let the mixture sit undisturbed for 7 to 10 minutes.
- After 7 to 10 minutes, the yeast should look foamy and bubbly, almost like a thick foam raft on top of the water. If nothing happens after 10 minutes, your yeast may be dead or your water was the wrong temperature. Start over with fresh yeast.
Step 2: Add the Wet Ingredients
- Once the yeast is foamy, add ¼ cup (60ml) of room-temperature whole milk to the yeast mixture. Whole milk adds richness and a slightly softer crumb compared to water alone.
- Crack 1 large egg directly into the bowl. The egg enriches the dough, contributing to the golden color and the slightly tender, rich texture of the buns.
- Add 3 tablespoons (42g) of softened unsalted butter, cut into small pieces for easier incorporation.
- Stir briefly to break up the egg and combine the wet ingredients loosely before adding the flour.
Step 3: Mix in the Dry Ingredients
- In a separate bowl, whisk together 3 cups (360g) of all-purpose flour and 1½ teaspoons (9g) of fine salt.
- If using a stand mixer, attach the dough hook. Turn the mixer to its lowest speed and gradually add the flour-salt mixture to the yeast and wet ingredient mixture, about ½ cup at a time.
- Continue adding flour until all of it has been incorporated. The dough will start out shaggy, then slowly come together into a cohesive mass.
- If kneading by hand, add the flour gradually and use your hands to work it in until a rough dough forms before turning it out to knead.
Step 4: Knead the Dough
- Once all the flour is combined, increase the mixer speed to medium (speed 4 or 5 on a KitchenAid) and let the dough hook knead the dough for 6 to 8 minutes.
- After 6 to 8 minutes, the dough should be smooth, slightly elastic, and just barely tacky to the touch. A helpful test: press your fingertip into the dough. It should feel like the back of a Post-It note, slightly sticky but not wet, not dry.
- If the dough is sticking excessively to the bowl and sides, add flour one tablespoon at a time. Do not add more than 2 to 3 extra tablespoons total, or the buns will be dense.
- If kneading by hand, turn the dough out onto a lightly floured surface and knead for 10 to 12 minutes, pushing the dough away from you with the heel of your hand, folding it back, rotating, and repeating.
- The butter needs to fully incorporate into the dough during kneading. If you notice greasy streaks, keep kneading until the dough looks uniform and smooth.
Step 5: First Rise
- Lightly grease a large, clean mixing bowl with a neutral oil or cooking spray.
- Transfer the kneaded dough into the greased bowl. Turn it once so all sides are lightly coated with oil, which prevents drying and sticking.
- Cover the bowl tightly with plastic wrap or a clean kitchen towel.
- Place the bowl in a warm, draft-free spot. The ideal temperature for rising dough is around 75°F to 80°F (24°C to 27°C). You can use the inside of your oven with just the oven light on, which typically creates a gentle warmth.
- Let the dough rise until it has doubled in size, about 1 to 1½ hours. You’ll know it’s ready when you press two fingers into the dough and the indentation springs back slowly rather than immediately.
Step 6: Divide and Shape the Buns
- Once the dough has doubled, gently punch it down to release the built-up gas. Turn the dough out onto a lightly floured surface.
- Using a kitchen scale, divide the dough into 8 equal pieces, about 90g to 100g each. Using a scale ensures all buns bake evenly.
- To shape each piece: take one portion of dough and fold the edges inward toward the center, pinching them together at the bottom to create a smooth surface on top.
- Flip the dough ball so the seam side is facing down on your work surface.
- Cup your hand over the dough ball like a loose claw. Using light pressure, move your hand in small, quick circles. The friction between the dough and the work surface will pull the dough tight and create a smooth, round ball. This is called “rolling under tension” and it’s what gives buns a nice dome shape.
- Once shaped, gently press each dough ball down with your palm to flatten it slightly to about 3 inches (7.5cm) in diameter. Burger buns should be wide rather than tall, or they won’t hold toppings comfortably.
Step 7: Second Rise
- Line a large rimmed baking sheet with parchment paper. Place the shaped buns on the parchment, spacing them at least 2 to 2.5 inches (5 to 6cm) apart to allow for spreading during the second rise and baking.
- Cover the buns loosely with plastic wrap or a clean kitchen towel. You want to keep air from drying out the tops without pressing the wrap directly onto the dough.
- Let the buns rise again for 45 minutes to 1 hour. They should look noticeably puffier and feel soft and airy when you gently touch them. Do not rush this step. Properly proofed buns bake up light and airy; under-proofed buns bake up dense with a tight crumb.
- While the buns are in their second rise, preheat your oven to 375°F (190°C). Give the oven a full 20 to 30 minutes to fully preheat so the temperature is stable when the buns go in.
Step 8: Apply Egg Wash and Sesame Seeds
- In a small bowl, whisk together 1 large egg and 1 tablespoon of water until well combined. This is your egg wash.
- Using a pastry brush, gently brush the top and slightly down the sides of each risen bun with the egg wash. Use light strokes and try not to press down on the buns, which could deflate them.
- If using sesame seeds, sprinkle them over the egg-washed tops immediately. The egg wash acts as glue, so the seeds will stick once the egg sets during baking.
Step 9: Bake the Buns
- Place the baking sheet on the center rack of your preheated 375°F (190°C) oven.
- Bake for 15 to 18 minutes, or until the buns are deeply golden brown on top. If they’re browning too quickly, you can loosely tent them with foil for the last few minutes.
- To check for doneness, lift one bun. The bottom should also be light golden-brown, not pale and doughy.
- The internal temperature of a fully baked bun should read around 190°F to 200°F (88°C to 93°C) if you want to check with an instant-read thermometer.
Step 10: Cool Before Slicing
- Transfer the baked buns immediately to a wire cooling rack.
- Let them cool for at least 20 to 30 minutes before slicing. This is not optional. The interior of the buns is still cooking and setting up from residual heat. Cutting them too early leads to a gummy, sticky crumb.
- Once fully cooled, slice horizontally with a serrated bread knife. Toast the cut sides in a skillet with a little butter or on a grill before adding your burger patty for an extra layer of flavor and texture.
This method also works beautifully if you want to try your hand at a Brioche Recipe for an even richer, more decadent bun.
Tips for Success
A few simple adjustments make a noticeable difference in how these buns turn out.
Here are the most important ones to keep in mind:
- Weigh your flour. A kitchen scale is the most reliable way to measure flour. Packing flour into a measuring cup can add 20% to 30% more flour than the recipe intends, which leads to dry, dense buns.
- Check your yeast before starting. If your yeast does not foam within 10 minutes, it’s dead and needs to be replaced. This is the single most common reason bread doesn’t rise.
- Don’t rush the rises. Cold dough rises slowly, and that’s okay. Flavors develop during rising time. If your kitchen is cold, the dough may need an extra 30 minutes. Trust the dough, not the clock.
- Keep the dough just slightly tacky. The finished dough should feel very slightly sticky. If you keep adding flour to get a completely non-sticky dough, the buns will be too dry after baking.
- Use room-temperature butter and eggs. Cold butter doesn’t incorporate evenly and can leave streaks in the dough. Cold eggs can lower the temperature of your yeast mixture, slowing activation.
- Don’t skip the egg wash. It’s what gives the buns their golden, shiny, bakery-style finish. Without it, the buns bake up pale and matte.
- Toast the cut sides. Before loading up your burger, toast the sliced buns cut-side-down in a hot dry skillet for 60 to 90 seconds. It adds flavor and creates a barrier that prevents the bun from going soggy.
Read Also: Dinner Rolls Recipe
Serving Suggestions
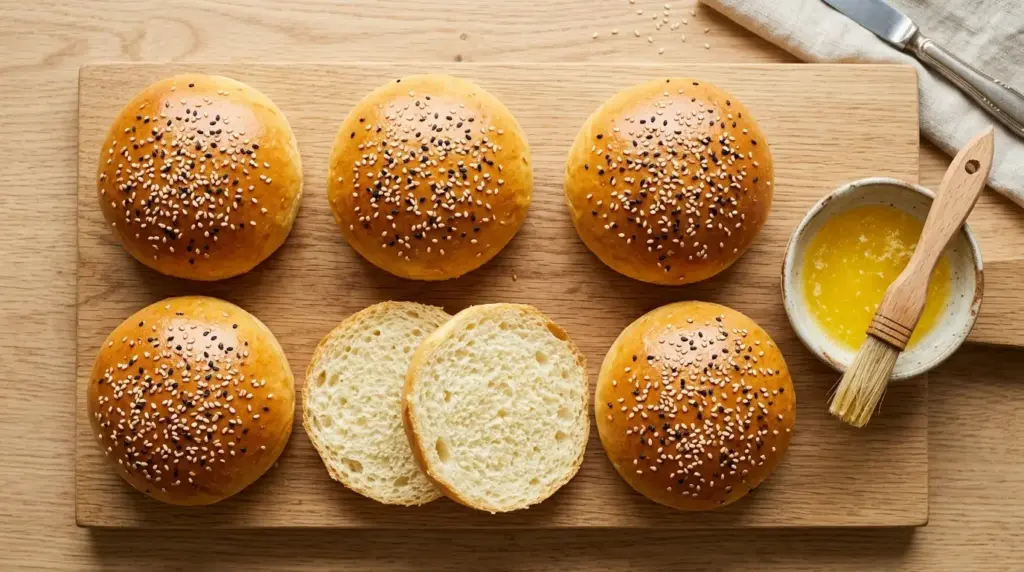
These homemade buns are endlessly versatile and work just as well for sandwiches and wraps as they do for classic burgers.
Here are some of the best ways to put them to use:
- Classic cheeseburger. Pile on a juicy beef patty, cheddar cheese, lettuce, tomato, red onion, and a generous spread of Burger Sauce. The buns are sturdy enough to handle the whole stack.
- Smash burger night. These buns are the ideal vessel for a crispy-edged smash patty with American cheese and pickles. The soft interior soaks up the burger juices in the best way.
- Pulled pork. Load up a bun with slow-cooked pulled pork and top it with a generous scoop of Creamy Coleslaw for a satisfying, complete meal.
- Fried chicken sandwich. A golden, crispy fried chicken thigh with pickles and honey butter on one of these buns is a seriously good meal.
- Air fryer turkey burgers. These buns are soft enough to complement leaner patties without overpowering them.
- BLT or club sandwich. Slice the buns thin and use them for a stacked BLT with extra crispy bacon.
- Egg and cheese. The next morning, toast a leftover bun and fill it with scrambled eggs and melted cheese for a homemade breakfast sandwich that beats anything at the drive-through.
For sides, Onion Rings are a classic pairing that rounds out any burger meal perfectly.
Variations to Try
Once you’ve made the base recipe a few times, it’s fun to experiment with different flavors and additions.
Here are some ideas worth exploring:
- Brioche-style buns: Add an extra tablespoon of butter and one additional egg yolk to the dough for a richer, more golden, slightly sweeter bun. This is the style you’d find at upscale burger restaurants.
- Whole wheat buns: Replace half the all-purpose flour with whole wheat flour for a heartier bun with a nuttier flavor. Expect a slightly denser texture, but the buns will still be soft.
- Pretzel-style buns: Before baking, briefly dip or brush the shaped, risen buns with a baked baking soda solution and sprinkle with coarse salt. This gives them the chewy, glossy exterior of a traditional pretzel.
- Garlic herb buns: Knead 1 teaspoon of garlic powder and 1 tablespoon of fresh chopped chives or rosemary into the dough. These pair exceptionally well with grilled chicken sandwiches.
- Cheese-topped buns: Instead of sesame seeds, sprinkle shredded parmesan or cheddar over the egg-washed tops before baking. The cheese melts into a crispy, savory crust.
- Slider buns: Divide the dough into 16 smaller pieces (about 45g each) and reduce the baking time to 12 to 14 minutes. Perfect for parties and backyard cookouts.
- Everything bagel seasoning buns: Replace the sesame seeds with your favorite everything bagel seasoning blend for a complex, savory topping that works with any burger or sandwich.
Another variation worth exploring is this Hoagie Roll Recipe if you want to shape the same-style dough into long sandwich rolls.
Storage and Reheating
These buns stay fresh for several days at room temperature and freeze exceptionally well for longer storage.
Follow these guidelines to keep them at their best:
- Room temperature: Store fully cooled buns in an airtight container or zip-top bag at room temperature for up to 3 to 4 days. Avoid refrigerating them as cold temperatures cause bread to stale faster.
- Freezing: Wrap each cooled bun individually in plastic wrap, then place them in a freezer-safe zip-top bag. Freeze for up to 2 to 3 months. For convenience, slice the buns before freezing so you can toast them straight from frozen.
- Thawing: Let frozen buns thaw at room temperature for 1 to 2 hours. Alternatively, wrap them in foil and warm in a 350°F (175°C) oven for 8 to 10 minutes.
- Reheating: For the best texture after storage, always toast the cut sides in a dry skillet over medium heat for about 60 seconds. This revives the texture and adds a light, buttery crunch.
- Make-ahead option: After the first rise, cover the punched-down dough tightly and refrigerate for up to 24 hours. When ready, bring it to room temperature for 30 minutes, then divide, shape, and proceed with the second rise.
You might also enjoy learning how to make No-Knead Bread for another low-effort, high-reward homemade bread option.
Nutritional Facts
The following values are approximate per bun based on 8 buns per batch. Values will vary based on exact ingredient brands and any optional toppings.
| Nutrient | Per Bun |
|---|---|
| Calories | 220 kcal |
| Total Fat | 6g |
| Saturated Fat | 3g |
| Cholesterol | 52mg |
| Sodium | 310mg |
| Total Carbohydrates | 34g |
| Dietary Fiber | 1g |
| Total Sugars | 3g |
| Protein | 6g |
| Iron | 2mg |
These buns are noticeably lighter in sodium and free of the preservatives found in most commercially packaged burger buns.
Read Also: Sandwich Bread Recipe
Health Benefits of Key Ingredients
While burger buns are certainly a treat rather than a health food, the homemade version does offer real advantages over the store-bought alternative.
Here’s what the key ingredients contribute:
- All-purpose flour provides complex carbohydrates, which are your body’s primary energy source. Unlike ultra-processed refined products, homemade bread made with whole ingredients doesn’t come with the added chemical preservatives and dough conditioners found in commercial baking.
- Eggs are one of the most nutrient-dense foods available. They contribute high-quality protein, B vitamins including B12 and choline, and healthy fats that support brain function and sustained energy.
- Unsalted butter adds fat-soluble vitamins A, D, E, and K, along with conjugated linoleic acid (CLA), which has been studied for its potential metabolic benefits. In this recipe, butter is used in modest amounts that contribute to flavor without excess.
- Active dry yeast is a natural leavening agent. Unlike chemical leaveners, yeast fermentation produces flavor compounds that give bread its depth and complexity. Yeast also contains B vitamins and trace minerals.
- Whole milk contributes calcium, potassium, and protein, which support bone health and muscle function. The small amount used here adds richness without significantly impacting the overall nutritional profile.
A better bun is a small but meaningful upgrade, especially when paired with quality protein and fresh toppings.
Another great homemade bread to explore for its nutritional profile: Whole Wheat Bread Recipe
Frequently Asked Questions
1. Can I use instant yeast instead of active dry yeast?
Yes, you can swap active dry yeast for an equal amount of instant yeast without any problem. The key difference is that instant yeast does not need to be proofed in warm water first. Simply add it directly to your flour and dry ingredients, then add the warm water and wet ingredients and mix as normal. Your rise times may also be shorter by about 15 to 30 minutes, so keep an eye on the dough rather than relying strictly on the clock.
2. Why didn’t my buns rise properly?
The most common reason is inactive or expired yeast. Always check that your yeast foams vigorously in warm water before adding the remaining ingredients. Another common culprit is water that’s too hot (over 120°F / 49°C kills yeast) or too cold (below 100°F / 38°C slows activation significantly). Finally, a very cold kitchen can dramatically slow the rise. Move the dough to a warmer spot, like the inside of your oven with just the light on, and give it more time.
3. Can I make the dough ahead of time?
Absolutely. After the dough completes its first rise, punch it down, shape it into a ball, and place it in a greased bowl covered with plastic wrap. Refrigerate for up to 24 hours. When you’re ready to bake, take the dough out, let it come to room temperature for about 30 minutes, then divide, shape, and do the second rise as normal before baking. Cold fermentation actually develops more flavor, so make-ahead dough often tastes even better.
4. My buns came out flat. What went wrong?
Flat buns usually mean one of three things: the yeast was inactive, the buns were not shaped tightly enough to hold their form during baking, or the dough was over-proofed during the second rise and collapsed. When shaping, create real surface tension by pulling the dough tight as you roll it. For the second rise, buns are ready when they look puffy and feel soft, not when they look dramatically huge. Over-proofed dough loses structure.
5. Can I make these buns without a stand mixer?
Yes, these buns can absolutely be made by hand. Combine your wet and dry ingredients in a large mixing bowl and stir until a rough dough forms. Turn it out onto a lightly floured surface and knead by hand for 10 to 12 minutes until the dough is smooth, elastic, and just slightly tacky. It’s a good arm workout and the results are just as good. The only thing to watch out for is avoiding the temptation to add too much flour during hand kneading. Sticky dough is normal at first and will smooth out as the gluten develops.
Read Also: Buttermilk Bread Recipe
Homemade Burger Buns

Equipment
- Stand mixer with dough hook attachment - or a large bowl for hand-kneading
- Large mixing bowl - for the first rise
- Baking sheet - rimmed half-sheet pan works best
- Parchment paper
- Kitchen scale - highly recommended for accurate flour measurement
- Instant-read thermometer - to check water temperature
- Pastry brush - for applying the egg wash
- Plastic wrap - or a clean kitchen towel for covering the dough during rises
- Wire cooling rack
Ingredients
- 3 cups all-purpose flour - 360g, plus more for dusting
- 2¼ teaspoons active dry yeast - 7g, 1 standard packet
- ¾ cup warm water - 180ml, 105°F to 110°F / 40°C to 43°C
- ¼ cup whole milk - 60ml, warmed to room temperature
- 2 tablespoons granulated white sugar - 25g
- 1½ teaspoons fine salt - 9g
- 1 large egg - at room temperature, for the dough
- 3 tablespoons unsalted butter - 42g, softened to room temperature
For the Egg Wash
- 1 large egg
- 1 tablespoon water
For Topping (Optional)
- 1 tablespoon sesame seeds - optional, but classic
Instructions
- Measure ¾ cup (180ml) of warm water between 105°F and 110°F (40°C to 43°C). Pour into stand mixer bowl, add 2 tablespoons sugar and 2¼ teaspoons yeast. Stir briefly and let sit for 7-10 minutes until foamy.
- Once yeast is foamy, add ¼ cup room-temperature whole milk, 1 large egg, and 3 tablespoons softened unsalted butter cut into pieces. Stir briefly to combine.
- Whisk together 3 cups all-purpose flour and 1½ teaspoons fine salt. With mixer on lowest speed, gradually add flour mixture about ½ cup at a time until all is incorporated and dough comes together.
- Increase mixer speed to medium and knead for 6-8 minutes until smooth, slightly elastic, and just barely tacky. Add flour 1 tablespoon at a time if dough is excessively sticky (maximum 2-3 extra tablespoons).
- Lightly grease a large bowl with oil. Transfer dough to bowl, turn to coat all sides. Cover tightly with plastic wrap and let rise in a warm, draft-free spot until doubled in size, about 1 to 1½ hours.
- Punch down dough and turn out onto lightly floured surface. Divide into 8 equal pieces (about 90g-100g each) using a kitchen scale. Shape each piece by folding edges inward and rolling under tension to create smooth, round balls. Flatten slightly to about 3 inches in diameter.
- Line a baking sheet with parchment paper. Place shaped buns on parchment, spacing them at least 2 to 2.5 inches apart. Cover loosely with plastic wrap and let rise again for 45 minutes to 1 hour until puffy and soft.
- Preheat oven to 375°F (190°C). Whisk together 1 large egg and 1 tablespoon water for egg wash. Gently brush tops and slightly down sides of each risen bun with egg wash. Sprinkle with sesame seeds if using.
- Bake on center rack for 15-18 minutes until deeply golden brown. If browning too quickly, tent loosely with foil. Internal temperature should reach 190°F to 200°F (88°C to 93°C).
- Transfer buns to a wire cooling rack immediately. Cool for at least 20-30 minutes before slicing to prevent gummy texture. Slice horizontally with a serrated bread knife and toast cut sides before serving.
Notes
- Weigh your flour: A kitchen scale is the most reliable way to measure flour. Packing flour into a measuring cup can add 20% to 30% more flour than intended, leading to dry, dense buns.
- Check your yeast: If your yeast does not foam within 10 minutes, it’s dead and needs to be replaced. This is the most common reason bread doesn’t rise.
- Don’t rush the rises: Cold dough rises slowly, and that’s okay. Flavors develop during rising time. If your kitchen is cold, the dough may need an extra 30 minutes.
- Keep the dough tacky: The finished dough should feel very slightly sticky. If you keep adding flour to get a completely non-sticky dough, the buns will be too dry after baking.
- Use room-temperature ingredients: Cold butter doesn’t incorporate evenly and can leave streaks in the dough. Cold eggs can lower the temperature of your yeast mixture, slowing activation.
- Toast the cut sides: Before loading up your burger, toast the sliced buns cut-side-down in a hot dry skillet for 60 to 90 seconds. It adds flavor and creates a barrier that prevents the bun from going soggy.
- Storage: Store fully cooled buns in an airtight container at room temperature for up to 3 to 4 days. Avoid refrigerating as cold causes bread to stale faster.
- Freezing: Wrap each cooled bun individually in plastic wrap, then place in a freezer-safe bag. Freeze for up to 2 to 3 months. Thaw at room temperature for 1-2 hours or warm in a 350°F oven for 8-10 minutes.
- Make-ahead option: After the first rise, cover the punched-down dough tightly and refrigerate for up to 24 hours. Bring to room temperature for 30 minutes, then shape and proceed with the second rise.
- No stand mixer? You can make these buns by hand. Combine wet and dry ingredients in a bowl, stir until a rough dough forms, then knead on a floured surface for 10-12 minutes until smooth and elastic.
Final Thoughts
Making homemade burger buns from scratch is genuinely one of the most rewarding things you can do in the kitchen.
The recipe is straightforward, the ingredients are simple, and the results are dramatically better than anything you’ll find at the grocery store.
These buns are soft, golden, and have the kind of structure that holds up to a loaded burger without going soggy or falling apart.
The next time you’re planning a cookout, a backyard barbecue, or just a classic weeknight burger night, give this recipe a try.
You’ll never look at a bag of store-bought buns the same way again. Drop a comment below and let me know how they turned out, or share what creative toppings you put on your bun!
Recommended:
- Crack Burger Recipe
- Cheeseburger Soup Recipe
- Air Fryer Turkey Burgers Recipe
- Cheeseburger Skillet Recipe
- Potato Salad Recipe
- Fried Pickles Recipe
- Air Fryer French Fries Recipe
- Baked Beans Recipe
- Broccoli Salad Recipe
- Classic Deviled Eggs Recipe



