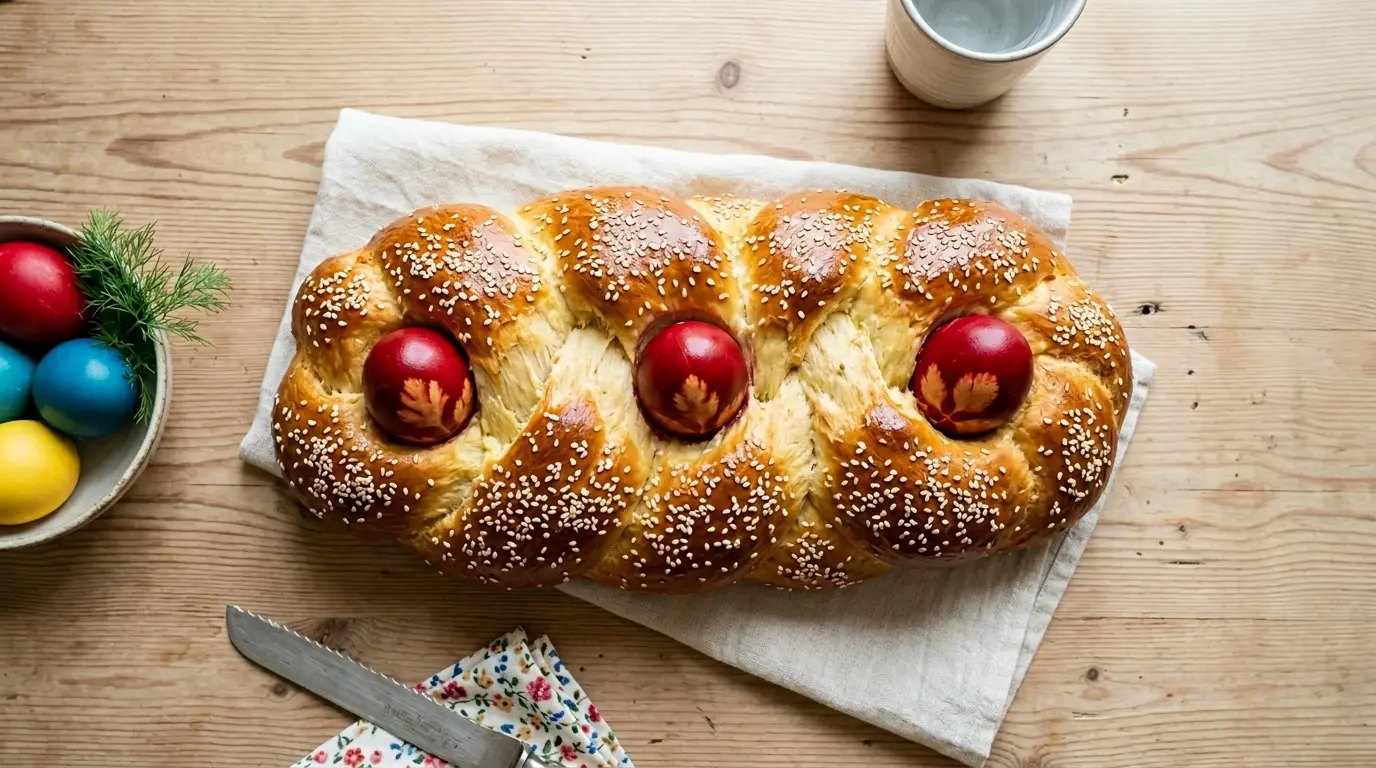
Making a Tsoureki recipe at home is one of the most rewarding baking projects you can take on. This iconic Greek sweet bread is soft, braided, and fragrant with the distinctive scent of mahlab, a spice ground from cherry pits that gives tsoureki a flavor unlike anything else you’ve tasted.
Tsoureki has deep roots in Greek culture, traditionally baked for Orthodox Easter after 40 days of Lent, but it’s honestly too beautiful and delicious to save for just one occasion.
The dough is enriched with butter, eggs, and milk, which produces a cloud-soft crumb and a gorgeous stringy, pull-apart texture that stays tender for days.
What truly sets this bread apart is the combination of two specialty aromatics: mahlab and mastic resin. Mahlab delivers a subtle bitter-almond and cherry note, while mastic (a resin from the mastic tree native to Chios, Greece) adds a clean, faintly piney warmth that is completely unique.
Together, they create a flavor that is unmistakably tsoureki and impossible to replicate with any substitution.
If you love Greek Easter baking traditions, this recipe pairs beautifully with this Greek Easter Bread Recipe for a full holiday spread.
Why You’ll Love This Tsoureki Recipe
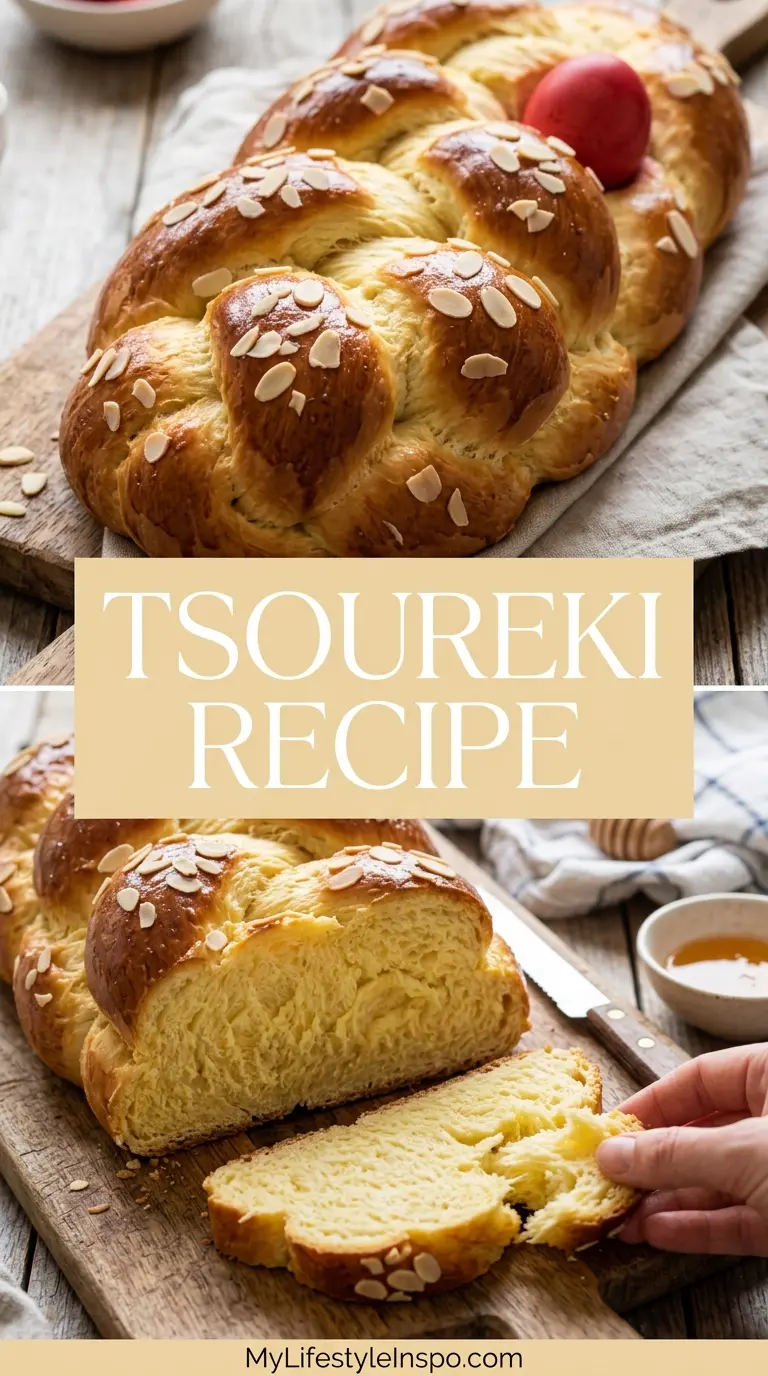
Tsoureki sits in a wonderful category of enriched breads that are soft, tender, and just sweet enough to enjoy for breakfast or as a dessert. Once you make it, you’ll understand why Greek families pass this recipe down through generations.
- The flavor is completely unique. Mahlab and mastic give this bread an aromatic quality that no other sweet bread can replicate, making it instantly recognizable.
- The texture is extraordinary. A properly made tsoureki has a soft, stringy, pull-apart crumb, sometimes described as fluffy like cotton, thanks to the enriched dough and thorough gluten development.
- It stays fresh for days. The high fat content from butter and eggs keeps the bread soft and moist for up to 4 days at room temperature.
- It’s a showstopper. The braided form and deep golden, egg-washed crust make this one of the most visually impressive breads you can put on a holiday table.
- It’s versatile. Enjoy it plain, toasted with butter and honey, or use day-old slices to make extraordinary French toast.
- Make-ahead friendly. The dough can be prepared the night before and left to cold-proof in the refrigerator, which also deepens the flavor.
Another favorite for anyone who loves enriched holiday bread: Easter Bread Recipe
Ingredients
All the magic in tsoureki comes down to quality ingredients, especially the two specialty aromatics that give it its soul. You can find mahlab spice and mastic resin at Greek or Middle Eastern grocery stores, or easily online.
Dough:
- 4 cups (500g) all-purpose flour or bread flour, plus more for dusting
- 1 packet (2 1/4 teaspoons / 7g) active dry yeast
- 1/2 cup (120ml) whole milk, warmed to 110°F (43°C)
- 1/2 cup (100g) granulated sugar, divided (reserve 1 teaspoon for activating yeast)
- 3 large eggs, at room temperature
- 1/2 cup (115g) unsalted butter, softened to room temperature
- 1 teaspoon pure vanilla extract
- 1 teaspoon (3g) mahlab, finely ground (buy whole seeds and grind fresh for best flavor)
- 1/4 teaspoon (1g) mastic resin, ground (freeze the resin crystals for 10 minutes before grinding to prevent sticking)
- Zest of 1 large orange
- 1/2 teaspoon salt
Egg Wash:
- 1 large egg
- 1 tablespoon whole milk
Optional Toppings:
- 2 tablespoons sesame seeds or slivered almonds
- 3 red hard-boiled eggs (for the traditional Easter presentation)
Read Also: Challah Recipe
Kitchen Equipment Needed
Having the right tools makes working with enriched dough so much easier, especially when it comes to achieving the smooth, elastic dough that gives tsoureki its famous texture.
- Stand mixer with dough hook attachment (strongly recommended over kneading by hand)
- Large mixing bowl
- Small bowl (for activating the yeast and preparing the egg wash)
- Bench scraper (for dividing dough cleanly)
- Half-sheet baking pan
- Parchment paper
- Plastic wrap or clean kitchen towel (for covering dough during rising)
- Pastry brush
- Kitchen scale (for accurately dividing the dough into equal braid strands)
- Instant-read thermometer (to verify milk temperature)
- Wire cooling rack
The same buttery, enriched dough technique you’ll master here translates perfectly to making a classic Brioche at home.
Recommended Products for This Recipe
These are products chosen based on quality and performance that will genuinely make your tsoureki baking experience easier and more successful.
1. Greek Mahlab Spice (Whole Seeds)
Mahlab is the heart of tsoureki’s unique flavor, and buying whole seeds to grind fresh makes a noticeable difference in the final bread. Pre-ground mahlab loses its potency quickly and can even turn rancid, giving the bread a flat or slightly off flavor. Sourcing a quality whole mahlab and grinding it fresh just before baking ensures the boldest, most authentic taste in every slice.
2. Chios Mastic Resin Tears
Authentic mastic resin from Chios, Greece, is the only real substitute for itself. The resin comes in small teardrop-shaped crystals that need to be frozen and ground before use, and the result is a subtly piney, aromatic flavor that no extract or commercial product can replicate. When sourced from Chios, you’re getting the original ingredient that Greek bakers have used for centuries.
3. KitchenAid Stand Mixer
Tsoureki dough requires extended kneading to develop the gluten structure responsible for its signature stringy crumb. A KitchenAid stand mixer with the dough hook handles this effortlessly, kneading the enriched dough to silky perfection without fatiguing your arms. It also makes it easy to add butter gradually, which is one of the most critical steps for a properly textured loaf.
4. Heavy-Duty Aluminum Half-Sheet Pan
A good rimmed half-sheet pan distributes heat evenly across the bottom of the loaf, preventing a soggy or undercooked base. It also gives the braided loaf plenty of room to spread and puff during the second rise. Lightweight or dark pans can cause uneven browning, so a light-colored, heavy-gauge aluminum pan is the ideal choice for this recipe.
You might also enjoy: Vasilopita Bread Recipe
Step-by-Step Instructions
1. Activate the Yeast
- Pour the warm milk into a small bowl. Use an instant-read thermometer to confirm the temperature is between 105°F and 115°F (40°C to 46°C). Milk that is too hot will kill the yeast; milk that is too cold will not activate it properly.
- Add 1 teaspoon of the measured granulated sugar to the warm milk and stir to dissolve.
- Sprinkle the active dry yeast over the surface of the milk mixture. Stir gently to combine.
- Set the bowl aside and let it rest for 5 to 10 minutes. The mixture should become foamy and fragrant, indicating the yeast is alive and active. If the mixture does not foam, your yeast may be expired or the milk temperature was off; discard it and start again with fresh yeast before proceeding.
2. Prepare the Mastic Resin (If Using)
- Place the mastic resin crystals in a small zip-lock bag and set it in the freezer for 10 to 15 minutes. This prevents the resin from becoming gummy and sticky when you try to grind it.
- Once frozen, transfer the mastic to a small mortar and pestle or spice grinder. Add a pinch of the measured granulated sugar to the grinder to help break the crystals down into a fine powder.
- Grind the mastic until it becomes a smooth, fine powder. Set it aside with your other pre-measured ingredients.
3. Combine the Dry Ingredients
- Add the flour to the bowl of your stand mixer (or a large mixing bowl if kneading by hand).
- Add the remaining sugar (minus the teaspoon used to activate the yeast), salt, ground mahlab, ground mastic (if using), and orange zest to the flour.
- Whisk the dry ingredients together briefly using a fork or a hand whisk. This ensures the mahlab and mastic are evenly distributed throughout the flour before any liquid is added, which prevents pockets of concentrated spice in the final bread.
4. Add the Eggs, Yeast Mixture, and Vanilla
- Crack the 3 room-temperature eggs directly into the flour mixture.
- Pour the activated yeast-milk mixture over the eggs and flour.
- Add the vanilla extract.
- Attach the dough hook to your stand mixer and mix on low speed (speed 2) for 3 to 4 minutes, until a rough, shaggy dough comes together. The dough will look uneven and slightly sticky at this stage, which is completely normal.
5. Incorporate the Butter
- With the mixer still running on low speed, begin adding the softened butter one tablespoon at a time. Add each piece only after the previous one is mostly absorbed into the dough. Rushing this step can cause the butter to sit on the surface of the dough rather than incorporating smoothly.
- Once all the butter is incorporated (this takes about 8 to 10 minutes), increase the speed to medium (speed 4) and knead for an additional 10 to 12 minutes. The dough should become smooth, glossy, and elastic, pulling away from the sides of the bowl cleanly. If kneading by hand, this will take 15 to 20 minutes of sustained kneading on a lightly floured or oiled surface.
- Perform the windowpane test to confirm the gluten is ready: pinch off a small piece of dough and gently stretch it between your fingers. If it stretches thin enough to let light through without tearing, the dough is ready. If it tears, knead for a few more minutes and test again.
6. First Rise (Bulk Fermentation)
- Lightly coat the inside of a large clean bowl with a neutral oil. Gather the dough into a smooth ball and place it into the bowl, seam side down.
- Cover the bowl tightly with plastic wrap or a clean damp kitchen towel to prevent the surface from drying out and forming a skin.
- Let the dough rise in a warm, draft-free location for 1.5 to 2 hours, or until it has doubled in size. An excellent spot is inside your oven with just the oven light on, which creates a gentle, consistent warmth of around 80°F (27°C) without using any actual heat.
7. Divide and Shape the Braid
- Once the dough has doubled, gently turn it out onto a lightly floured work surface. Press down gently to deflate the gas bubbles, but avoid punching or tearing the dough aggressively.
- Using a bench scraper or sharp knife, divide the dough into 3 equal pieces. Using a kitchen scale ensures the braids are uniform in size, with each piece weighing approximately 255g (about 9 oz).
- Working with one piece at a time, use your palms to roll each piece into a smooth rope about 18 to 20 inches (45 to 50cm) long. Keep the rope as even in thickness as possible from end to end. If the dough springs back and resists stretching, cover it and let it rest for 5 minutes before trying again; the gluten just needs a moment to relax.
- Once all three ropes are ready, pinch their ends together firmly at the top.
- Braid the three ropes from top to bottom using a simple three-strand braid: bring the right strand over the center, then the left strand over the center, and repeat. Keep the tension consistent throughout, not too tight and not too loose, to allow room for the dough to expand.
- When you reach the bottom, pinch the ends together firmly and tuck both ends underneath the loaf for a neat, professional finish.
- Carefully transfer the braided loaf to a baking sheet lined with parchment paper.
8. Second Rise
- Loosely cover the braided loaf with plastic wrap. Make sure the wrap isn’t pressed directly against the surface of the dough, as it will stick and potentially deflate the loaf when you remove it.
- Let the loaf rise in a warm spot for 45 to 60 minutes. It should puff noticeably and look pillowy, but it should not have doubled in size. Over-proofing during this stage causes the braid definition to disappear in the oven and can result in a collapsed loaf.
9. Preheat the Oven and Make the Egg Wash
- About 20 minutes before the loaf finishes its second rise, preheat your oven to 350°F (175°C). Place the oven rack in the center position.
- In a small bowl, whisk together 1 egg and 1 tablespoon of whole milk until fully combined and smooth. This egg wash will give the tsoureki its beautifully deep golden, glossy finish.
10. Apply Toppings and Bake
- Using a pastry brush, gently brush the entire surface of the braided loaf with the egg wash. Cover every visible surface including the sides of the braid, but use a light hand to avoid deflating the dough.
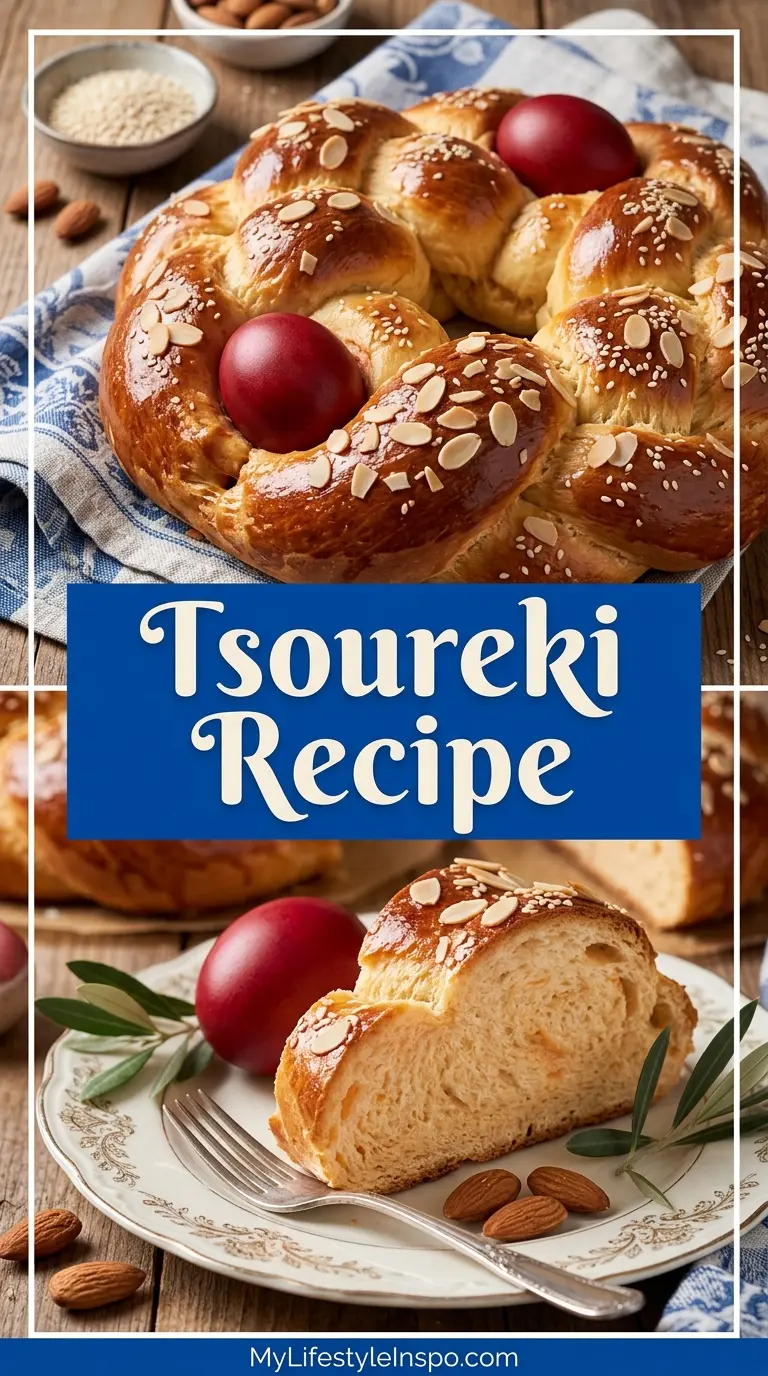
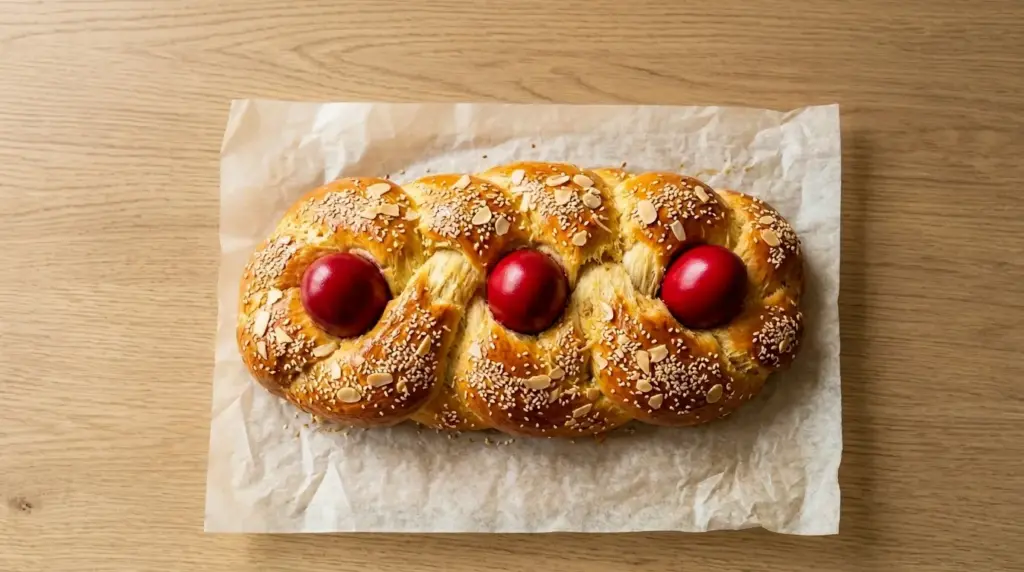
- If you’re making the traditional Easter version, gently press the red hard-boiled eggs into the braids now, nestling them in securely between the strands.
- If topping with sesame seeds or slivered almonds, sprinkle them evenly over the egg-washed surface now.
- Place the baking sheet on the center rack of the preheated oven.
- Bake for 30 to 35 minutes, until the bread reaches a deep, even golden brown. If the top is browning too quickly around the 20-minute mark, loosely tent it with a piece of aluminum foil for the remainder of the baking time.
- The tsoureki is fully baked when it sounds hollow when tapped firmly on the bottom, or when an instant-read thermometer inserted into the thickest part of the braid reads 190°F (88°C).
11. Cool the Bread
- Remove the tsoureki from the oven and let it rest on the baking sheet for 10 minutes. This brief rest helps the structure set before you move it.
- Transfer the loaf to a wire cooling rack and let it cool for at least 30 minutes before slicing. Cutting into a hot enriched bread compresses the soft crumb and can make it seem gummy or underbaked.
The same patient approach to enriched dough mastered here is what makes Hokkaido Milk Bread another compelling project for any bread lover.
Tips for Success
Getting tsoureki right comes down to understanding a handful of key principles that apply to any enriched bread dough. Once you know them, the process becomes second nature.
- Use room-temperature eggs and butter. Cold eggs and butter interfere with gluten development and make butter difficult to incorporate smoothly. Take them out of the fridge at least 1 hour before baking.
- Grind your mahlab fresh. Buy whole mahlab seeds and grind them just before use. Pre-ground mahlab loses its aroma within days and can go rancid over time, leaving the bread with a flat or bitter taste.
- Freeze the mastic before grinding. Without freezing, the resin becomes a sticky, gummy mess the moment it warms up. A few minutes in the freezer makes it brittle and easy to grind to a fine powder.
- Don’t skip the windowpane test. This is your most reliable indicator that the gluten is properly developed. Skipping this step is the most common reason tsoureki comes out dense rather than fluffy and stringy.
- Avoid over-proofing during the second rise. Watch the loaf carefully after shaping. It should puff and look full, but it should not have doubled or look overly rounded. Over-proofed dough loses its braid definition and may collapse in the oven.
- Tent with foil if the top browns too fast. The sugar and eggs in the dough make the crust color quickly. A loose foil tent placed over the loaf around the 20-minute mark preserves the golden color without burning.
- Let it cool fully before slicing. Give the crumb at least 30 minutes to set completely. Slicing too soon results in a squashed, gummy texture that does not represent the bread at its best.
Read Also: Panettone Recipe
Serving Suggestions
Tsoureki is wonderful in so many different contexts that you’ll find yourself reaching for it throughout the day. Its sweet, aromatic flavor pairs easily with both simple and elaborate accompaniments.
- With butter and honey. A thick slice spread with salted butter and a generous drizzle of Greek thyme honey is a classic, deeply satisfying way to enjoy tsoureki at breakfast.
- With Greek yogurt and sour cherry jam. Pair a slice with thick, strained Greek yogurt and a spoonful of sour cherry preserve for a contrast of textures and flavors that feels authentically Greek.
- Toasted with cream cheese. Day-old tsoureki toasts beautifully. Spread it with whipped cream cheese for a simple morning treat that highlights the orange and mahlab flavor.
- As French toast. Slightly stale tsoureki makes extraordinary French toast. The enriched dough soaks up egg custard perfectly, and the aromatic spices come through beautifully in every bite.
- On an Easter table. Serve alongside red Easter eggs, Kalamata olives, crumbled feta, and cured meats for a traditional Greek Easter mezze spread.
- With Greek coffee or strong tea. The slightly bitter edge of Greek coffee is a wonderful contrast to the sweetness of tsoureki, making it an ideal pairing at any time of day.
Use slightly stale slices to make these Brioche French Toast for an incredible morning treat that showcases everything wonderful about enriched bread.
Variations to Try
Once you’ve made the traditional version, here are some creative twists that keep the spirit of tsoureki while adding something new.
- Chocolate Tsoureki. Add 2 tablespoons of high-quality cocoa powder to the flour mixture and tuck strips of dark chocolate inside the braids before shaping for a swoon-worthy chocolate version.
- Nutella-Filled Tsoureki. Roll the dough into a flat sheet, spread a thin layer of chocolate hazelnut spread over the surface, then roll it up and braid as usual for a swirled, chocolate-filled loaf.
- Orange and Cardamom. Swap the mahlab for 1/2 teaspoon of ground cardamom and increase the orange zest to 2 oranges for a warm, spiced variation with a Middle Eastern influence.
- Raisin and Walnut Tsoureki. Fold in 1/2 cup golden raisins and 1/3 cup roughly chopped walnuts after the butter is fully incorporated for a fruitier, more textured loaf perfect for everyday snacking.
- Mini Individual Loaves. Divide the dough into 6 pieces and make two smaller loaves, or shape individual mini braids as single-serve portions. These are beautiful as holiday gifts.
- Sesame and Anise. Add 1/2 teaspoon of ground anise seed to the dry ingredients and top generously with sesame seeds before baking for a more savory-adjacent sweetness that pairs wonderfully with cheese.
For another extraordinary braided enriched bread worth exploring, you might also enjoy: Cinnamon Babka Recipe
Storage and Reheating
Tsoureki keeps exceptionally well thanks to its high butter and egg content, but proper storage is key to maintaining the soft, pillowy texture you worked hard to achieve.
- Room temperature. Wrap the completely cooled loaf tightly in plastic wrap or store it in a sealed zip-lock bag. It will stay soft and fresh for 3 to 4 days at room temperature.
- Refrigerator. Refrigerating bread speeds up the staling process, so it is not the recommended method. If you must refrigerate the bread, wrap it well and allow it to come fully to room temperature or warm it briefly before eating.
- Freezer (sliced). Tsoureki freezes beautifully. Slice the cooled loaf, arrange the slices on a baking sheet to freeze individually for about 1 hour, then transfer the frozen slices to a freezer-safe bag. This allows you to thaw only what you need.
- Freezer (whole loaf). If you’ve baked two loaves, wrap one entirely in plastic wrap and then a second layer of aluminum foil before placing it in the freezer. Freeze for up to 2 months, then thaw overnight at room temperature while still wrapped.
- Reheating. To revive a slightly stale tsoureki, wrap it in aluminum foil and warm it in a 300°F (150°C) oven for about 10 minutes. Individual slices can be refreshed in a toaster or toaster oven until just warmed through.
Sweet enriched breads like this one have similar storage needs, as you’ll see with this Pan Dulce Recipe, another delightful sweet bread worth having in your repertoire.
Nutritional Facts
The following values are approximate and based on one slice from a loaf cut into 12 equal portions. Values will vary based on the exact size of your loaf and any optional toppings used.
- Calories: 255
- Total Fat: 10g
- Saturated Fat: 6g
- Cholesterol: 75mg
- Sodium: 130mg
- Total Carbohydrates: 36g
- Dietary Fiber: 1g
- Total Sugars: 11g
- Protein: 6g
Read Also: Authentic German Stollen Recipe
Health Benefits of Key Ingredients
While tsoureki is absolutely a treat bread meant to be savored and shared, several of its core ingredients bring genuine nutritional value to each slice.
Eggs, butter, orange zest, and the two signature spices each contribute something meaningful beyond flavor, making tsoureki a more wholesome indulgence than most commercial sweet breads.
- Eggs. Rich in complete protein, vitamins B12 and D, and choline, eggs support brain function, immune health, and the structural integrity of the bread.
- Whole milk. Provides calcium, phosphorus, and riboflavin, which are important for bone health and energy metabolism. The fat in whole milk also carries fat-soluble vitamins and contributes to the tender, moist crumb.
- Orange zest. A concentrated source of vitamin C and flavonoids, orange zest supports immune function and offers antioxidant activity, all while adding brightness to the flavor.
- Mahlab. Derived from cherry pits, mahlab contains natural antioxidants and anti-inflammatory compounds. Its traditional use in Mediterranean baking stretches back centuries, prized for both flavor and wellness.
- Mastic resin. Research has demonstrated antibacterial and digestive health benefits attributed to mastic resin. It has been used medicinally throughout the Mediterranean region for thousands of years and is still studied today for its therapeutic properties.
- Butter. A natural source of fat-soluble vitamins A, D, E, and K2, quality butter (used in moderate amounts) contributes to the absorption of these nutrients and is far preferable to processed hydrogenated fats.
The same warming spices and wholesome ingredients found here also appear in this Cinnamon Raisin Bread Recipe for an everyday loaf that’s just as comforting.
Frequently Asked Questions
1. Can I make tsoureki without mahlab or mastic?
You can, but the flavor will be noticeably different. Mahlab is the defining spice of tsoureki, and omitting it produces a generic sweet enriched bread rather than a true tsoureki. If you cannot source mahlab, a possible substitute is 1/4 teaspoon of almond extract combined with a pinch of cardamom, though it won’t be an exact match. Mastic is more optional and can be skipped entirely without losing the fundamental character of the bread.
2. Can I make the dough the night before?
Yes, and this is actually one of the best approaches for developing deeper flavor. After combining all the ingredients and kneading the dough, cover the bowl tightly and refrigerate it overnight instead of doing the first rise at room temperature. The next morning, let the cold dough sit at room temperature for about an hour before shaping, then proceed with the second rise and bake as directed.
3. Why did my tsoureki come out dense?
A dense result usually points to one of three issues. The yeast may not have been properly activated (check that the milk temperature was between 105°F and 115°F), the gluten may not have been fully developed (perform the windowpane test to confirm), or the dough may have been over-proofed during the second rise. Address whichever of these steps may have been rushed, and the next loaf will be significantly better.
4. What does tsoureki taste like?
Tsoureki has a subtly sweet, buttery, and deeply aromatic flavor. The mahlab provides a faint bitter-almond and cherry note, the mastic adds a clean, piney warmth, and the orange zest contributes a bright citrus lift. The texture is soft and stringy, pulling apart in gorgeous, pillow-like layers, similar to brioche but with a much more complex and distinctive aromatic profile.
5. Can I use instant yeast instead of active dry yeast?
Yes. If using instant yeast, you can skip the activation step and add the yeast directly to the dry ingredients along with the flour, sugar, salt, mahlab, mastic, and orange zest. Use the same amount (2 1/4 teaspoons) and simply add the warm milk along with the eggs and vanilla in the next step. Rise times will typically be 15 to 20 minutes shorter with instant yeast, so keep an eye on the dough.
Another wonderful pull-apart sweet bread that makes an impressive centerpiece: Monkey Bread Recipe
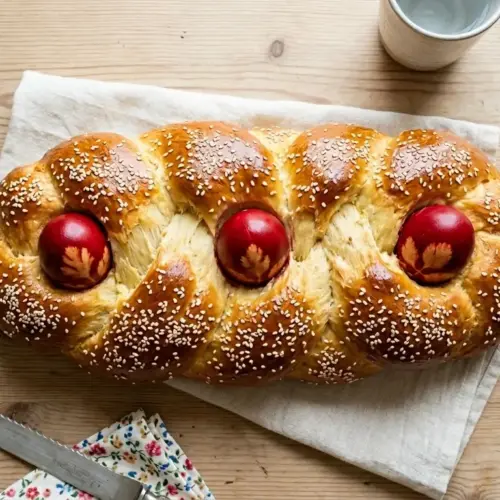
Tsoureki (Greek Easter Bread)

Equipment
- Stand mixer with dough hook attachment - Strongly recommended over kneading by hand
- Large mixing bowl
- Small bowl - For activating the yeast and preparing the egg wash
- Bench scraper - For dividing dough cleanly
- Half-sheet baking pan - Heavy-duty aluminum recommended for even heat distribution
- Parchment paper
- Plastic wrap - For covering dough during rising
- Clean kitchen towel - Alternative to plastic wrap
- Pastry brush
- Kitchen scale - For accurately dividing the dough into equal strands
- Instant-read thermometer - To verify milk temperature and baked doneness
- Wire cooling rack
- Mortar and pestle or spice grinder - For grinding mahlab and mastic (optional but recommended)
Ingredients
- 4 cups all-purpose flour - 500g, plus more for dusting
- 1 packet active dry yeast - 2¼ teaspoons or 7g
- ½ cup whole milk - 120ml, warmed to 110°F (43°C)
- ½ cup granulated sugar - 100g, divided (reserve 1 teaspoon for activating yeast)
- 3 large eggs - at room temperature
- ½ cup unsalted butter - 115g, softened to room temperature
- 1 teaspoon vanilla extract
- 1 teaspoon mahlab - 3g, finely ground
- ¼ teaspoon mastic resin - 1g, ground
- 1 large orange - zest of 1 orange
- ½ teaspoon salt
Egg Wash
- 1 large egg
- 1 tablespoon whole milk
Optional Toppings
- 2 tablespoons sesame seeds - or slivered almonds
- 3 red hard-boiled eggs - for traditional Easter presentation
Instructions
- Activate the yeast by combining warm milk (105-115°F) with 1 teaspoon sugar, sprinkle yeast over top, let stand 5-10 minutes until foamy.
- Prepare mastic by freezing crystals for 10-15 minutes, then grind with a pinch of sugar until fine powder forms.
- In stand mixer bowl, combine flour, remaining sugar, salt, ground mahlab, mastic, and orange zest. Whisk briefly to distribute evenly.
- Add room-temperature eggs, activated yeast mixture, and vanilla. Mix on low speed for 3-4 minutes until rough, shaggy dough forms.
- With mixer running on low, add softened butter one tablespoon at a time. Once incorporated, increase speed to medium and knead 10-12 minutes until smooth, glossy, and elastic. Perform windowpane test to confirm gluten development.
- Place dough in oiled bowl, cover, and let rise in warm spot for 1.5-2 hours until doubled in size.
- Turn dough onto lightly floured surface, gently deflate, and divide into 3 equal pieces (about 255g each). Roll each into an 18-20 inch rope.
- Pinch ends of ropes together and braid three-strand style from top to bottom. Tuck ends underneath, transfer to parchment-lined baking sheet.
- Cover loosely and let rise for 45-60 minutes until puffy but not doubled.
- Preheat oven to 350°F (175°C). Whisk together egg and milk for egg wash. Brush entire surface of risen loaf gently.
- Press red eggs into braids if using, sprinkle with sesame seeds or almonds. Bake for 30-35 minutes until deep golden brown. Tent with foil if browning too quickly.
- Let rest on baking sheet for 10 minutes, then transfer to wire rack to cool completely (at least 30 minutes) before slicing.
Notes
- Room temperature eggs and butter: Take them out of the fridge at least 1 hour before baking. Cold ingredients interfere with gluten development and make butter difficult to incorporate smoothly.
- Freshly ground mahlab: Buy whole seeds and grind just before use. Pre-ground mahlab loses its aroma quickly and can turn rancid, leaving the bread with a flat or bitter taste.
- Freeze mastic before grinding: Without freezing, the resin becomes sticky and gummy. A few minutes in the freezer makes it brittle and easy to grind to a fine powder.
- Don’t skip the windowpane test: This is the most reliable indicator that gluten is properly developed. Skipping this step is the most common reason tsoureki comes out dense rather than fluffy.
- Avoid over-proofing during the second rise: Watch the loaf carefully after shaping. It should puff and look full, but not double. Over-proofed dough loses braid definition and may collapse in the oven.
- Make-ahead option: After kneading, cover the bowl tightly and refrigerate overnight instead of doing the first rise at room temperature. The next morning, let it sit at room temperature for about an hour before shaping.
- Storage: Wrap the cooled loaf tightly in plastic wrap or store in a sealed bag. It will stay soft and fresh for 3-4 days at room temperature.
- Freezing: Tsoureki freezes beautifully. Slice the cooled loaf, freeze slices individually, then transfer to a freezer-safe bag. Thaw only what you need.
- Day-old use: Slightly stale tsoureki makes extraordinary French toast or can be toasted with butter and honey. Wrap in foil and warm at 300°F for 10 minutes to revive.
- Substitution without mastic: If you cannot source mastic, you can skip it entirely without losing the fundamental character of the bread. For mahlab, a possible substitute is 1/4 teaspoon almond extract combined with a pinch of cardamom.
Final Thoughts
If you’ve been looking for a bread project that is both deeply meaningful and genuinely extraordinary, this Tsoureki Recipe is exactly that. The process is meditative, the results are stunning, and the flavor is unlike anything you’ll find on a grocery store shelf.
Baking tsoureki for the first time is a special experience. The moment the mahlab hits the warm dough and the kitchen fills with that unmistakable cherry-almond fragrance, you’ll understand why this bread has been treasured in Greek homes for centuries.
Give it a try this season, and don’t be surprised if it becomes a permanent part of your baking rotation. If you make this recipe, leave a comment below to share how it went, or tag a photo on social media. It makes my day to see your beautiful braided loaves!
Recommended:
- Chocolate Babka Recipe
- Cinnamon Swirl Bread Recipe
- Pandesal Recipe
- Japanese Milk Bread Recipe
- Concha Recipe
- Artisan Bread Recipe
- Date Nut Bread Recipe
- Soft Dinner Rolls Recipe
- Cranberry Orange Bread Recipe
- Banana Bread Pudding Recipe



