
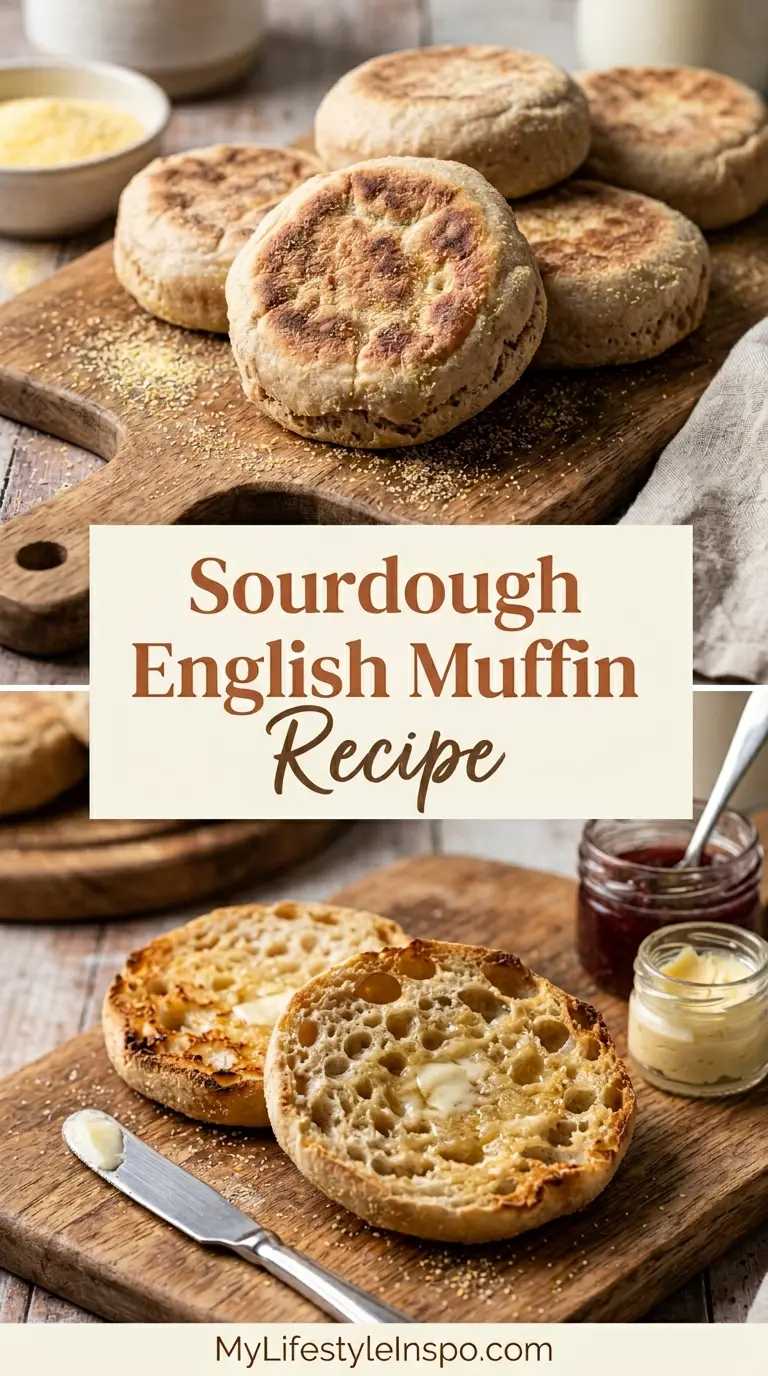
If you’ve ever pulled apart a warm, golden English muffin and watched butter melt into every little crevice, you already know the magic. Now imagine that same experience with a deep, tangy sourdough flavor that store-bought versions simply can’t match. This sourdough English muffin recipe delivers exactly that: a chewy, pillowy muffin with those iconic nooks and crannies, cooked right on your stovetop.
Making sourdough English muffins at home takes a little planning, but the process itself is straightforward. You mix a simple enriched dough with your active sourdough starter, let it ferment overnight for maximum flavor, then shape and cook the muffins on a cast iron skillet the next morning.
The result is something genuinely special. These muffins have a slightly crisp, cornmeal-dusted exterior, a soft and airy interior, and that unmistakable sourdough tang that turns a simple breakfast into something worth waking up early for.
If you prefer a quicker version that uses unfed starter, you’ll also want to check out this Sourdough Discard English Muffins Recipe for a great alternative with discard.

Why You’ll Love This Sourdough English Muffin Recipe
These muffins check every box for a truly satisfying homemade bread project.
The flavor is incredible. Long overnight fermentation develops a deep, complex tang that you simply cannot replicate with commercial yeast alone.
They toast beautifully. Split them with a fork, not a knife, and the jagged surface created by those nooks and crannies becomes perfectly golden and crisp in the toaster.
The recipe is surprisingly forgiving. As long as your sourdough starter is active and bubbly, the dough comes together easily and rises reliably.
They freeze well. Make a big batch on the weekend and you’ll have homemade sourdough English muffins ready to go all week long.
You only need pantry staples. No specialty flours, no complicated techniques, and no oven required.
- Deep, tangy sourdough flavor that develops through overnight fermentation
- That classic chewy, springy crumb texture loaded with nooks and crannies
- Cooked entirely on the stovetop, no oven needed
- Freezer-friendly for easy weekday breakfasts
- Made with simple, everyday ingredients
- A genuinely satisfying baking project for all skill levels
Another breakfast bread worth trying alongside these muffins is this Sourdough Discard Crumpets Recipe, which uses a similar stovetop cooking method.
Ingredients
For this recipe, you’ll need a bubbly, active sourdough starter that has been fed 4 to 8 hours before you plan to mix the dough. Using starter at its peak activity gives the muffins the best rise and the most developed flavor. The cornmeal or semolina dusting is essential for the classic texture and appearance of the exterior.
- 100g (3.5 oz / scant ½ cup) active sourdough starter, at peak activity
- 240ml (1 cup) whole milk, warmed to about 90°F (32°C)
- 60ml (¼ cup) warm water, around 90°F (32°C)
- 30g (2 tablespoons) unsalted butter, melted and cooled slightly
- 1 tablespoon (12g) granulated sugar
- 1 teaspoon (6g) fine sea salt
- 480g (4 cups / 17 oz) all-purpose flour, plus more for dusting
- Fine semolina or coarse yellow cornmeal for dusting
For more background on maintaining your starter, this Sourdough Starter Recipe covers everything you need to know from scratch.
Kitchen Equipment Needed
Having the right tools makes this recipe much easier to execute. A cast iron skillet or griddle is the most important piece of equipment here because it holds an even, steady temperature, which is critical for cooking the muffins all the way through without burning the exterior. A kitchen scale is highly recommended for accuracy.
- Cast iron skillet or cast iron griddle (10 to 12 inches)
- Digital kitchen scale
- Large mixing bowl
- Small saucepan (for warming the milk and melting butter)
- Wooden spoon or dough whisk
- Stand mixer with dough hook (optional, but helpful)
- 3-inch round biscuit or cookie cutter or a 3.5-inch (9cm) version
- Baking sheet or tray lined with parchment paper
- Plastic wrap or a damp kitchen towel
- Flat spatula or wide fish spatula for flipping
- Instant-read or probe thermometer (optional, for checking doneness)
- Cooling rack
If you enjoy stovetop sourdough baking, you might also like this Sourdough Sandwich Bread Recipe for another classic homemade loaf.
Recommended Products for This Recipe
These are products selected based on quality and performance, specifically for making sourdough English muffins at home.
1. Lodge 10.25-Inch Cast Iron Skillet
A cast iron skillet is truly the best pan for this recipe. It holds heat evenly and at a low, steady temperature, which is what you need to cook the muffins through without burning the outside. Lodge skillets are affordable, durable, and widely available.
2. Bob’s Red Mill Semolina Flour
Semolina gives the outside of your English muffins that slightly coarse, gritty texture that’s part of the authentic experience. Bob’s Red Mill semolina has a consistent grind that works perfectly for dusting the muffins before cooking.
3. OXO Good Grips 3-Inch Round Cookie Cutter
Cutting uniform rounds is much easier with a proper ring cutter. The OXO version has a comfortable grip and a clean, sharp cutting edge that gives you neat circles every time without dragging or distorting the dough.
4. Escali Primo Digital Kitchen Scale
Accurate measurements make a real difference in bread baking. This compact digital scale is affordable, precise to 1 gram, and easy to use, making it an essential tool for any sourdough baker.
5. KitchenAid Classic Stand Mixer
While you can absolutely knead this dough by hand, a stand mixer takes the effort out of the process completely. A dough hook on a stand mixer develops the gluten thoroughly in about 8 minutes, giving you a smooth, elastic dough with minimal effort.
Read Also: Easy Sourdough Bread Recipe
Step-by-Step Instructions
Step 1: Feed Your Sourdough Starter
- Feed your sourdough starter 4 to 8 hours before you plan to mix the dough. This is essential: the starter needs to be at its peak activity for the muffins to rise properly.
- To check if your starter is ready, do the float test. Drop a small spoonful into a glass of water. If it floats, it’s active and ready to use.
- You’ll need 100g (about scant ½ cup) of starter. Feed your starter with enough flour and water that you’ll have this amount available when it peaks.
- The ideal starter for this recipe is slightly domed or just beginning to show a dome at the top. A very bubbly, active starter that’s already peaked gives the best results.
Step 2: Warm the Milk and Melt the Butter
- Pour 240ml (1 cup) of whole milk into a small saucepan and place over low heat. Warm gently until it reaches about 90°F (32°C). It should feel warm but not hot to the touch. Milk that is too hot can damage the wild yeast in your starter.
- Add 30g (2 tablespoons) of unsalted butter directly to the warm milk and stir until it melts completely. Remove from heat and set aside.
- Add 60ml (¼ cup) of warm water to the milk and butter mixture. The combined temperature should be warm, not hot.
- Allow the mixture to cool slightly if it feels too hot. You want the final temperature to sit around 90°F (32°C) before mixing with the starter.
Step 3: Mix the Dough
- In a large mixing bowl, combine the 100g (3.5 oz) of active sourdough starter and 1 tablespoon (12g) of granulated sugar.
- Pour the warm milk, butter, and water mixture over the starter and sugar. Whisk together briefly until the starter is mostly dissolved into the liquid.
- Add 480g (4 cups) of all-purpose flour on top of the wet ingredients.
- Add 1 teaspoon (6g) of fine sea salt directly to the flour, not on top of the starter. Salt can slow fermentation if it sits directly on the starter for too long.
- Stir everything together with a wooden spoon or dough whisk until a shaggy dough forms and no dry flour remains.
- If using a stand mixer, switch to the dough hook at this point.
Step 4: Knead the Dough
- Turn the dough out onto a lightly floured surface and knead by hand for 8 to 10 minutes. The dough should go from rough and sticky to smooth and elastic. It will be soft and slightly tacky, but it should not stick aggressively to your hands.
- If using a stand mixer with a dough hook, mix on medium-low (speed 2) for about 8 minutes until the dough is smooth and pulls away cleanly from the sides of the bowl.
- To test if the dough is properly kneaded, stretch a small piece between your fingers. If it stretches thin enough to see light through it without tearing, the gluten is well-developed. This is called the windowpane test.
- If the dough feels overly sticky, add flour one tablespoon at a time. Resist the urge to add too much flour, as a slightly sticky dough produces fluffier muffins.
Step 5: First Rise (Bulk Fermentation)
- Shape the dough into a smooth ball and place it in a lightly oiled large mixing bowl. Turn the dough once to coat it with oil.
- Cover the bowl tightly with plastic wrap or a damp kitchen towel.
- Allow the dough to rise at room temperature (around 68-72°F / 20-22°C) for 8 to 12 hours, or until it has roughly doubled in size.
- For an overnight schedule, mix the dough in the evening and let it rise at room temperature overnight. If your kitchen is warmer than 72°F, the dough may be ready faster, so check it after 6 to 8 hours.
- Alternatively, let the dough bulk ferment at room temperature for 4 to 6 hours, then transfer the covered bowl to the refrigerator overnight. The cold ferment slows the activity and makes the dough easier to handle and shape in the morning.
Step 6: Shape the Muffins
- Lightly flour your work surface. Gently turn the risen dough out, being careful not to deflate it too aggressively. You want to preserve some of the gas bubbles that have built up during fermentation.
- Using your fingertips, gently press and stretch the dough out until it is about ¾ inch (2cm) thick. Do not use a rolling pin, as pressing with your fingers preserves more air in the dough.
- Use a 3 to 3.5-inch (7.5 to 9cm) round cutter to cut out circles from the dough. Press straight down without twisting, then lift straight up.
- Place the cut rounds onto a parchment-lined baking sheet that has been generously dusted with cornmeal or semolina. Dust the tops of the rounds with more cornmeal or semolina.
- Gather the dough scraps, gently press them together without overworking, and cut additional rounds until all the dough is used.
- You should get approximately 10 to 12 muffins from this batch.
Step 7: Second Rise (Proof)
- Cover the shaped muffins loosely with lightly oiled plastic wrap or a clean kitchen towel.
- Allow them to proof at room temperature for 45 minutes to 1.5 hours, until they look noticeably puffier. They should increase in size by about 50%, looking puffy and pillow-like.
- Do not rush this step. Under-proofed muffins will be dense and flat. If you press the dough lightly with your finger and the indentation springs back slowly, they’re ready.
- If the dough was cold-fermented overnight in the fridge, allow extra time for the proofing stage since the dough will need to warm up first, typically 1.5 to 2 hours at room temperature.
Step 8: Cook the Muffins on the Stovetop
- Place your cast iron skillet or griddle over medium-low heat. Allow it to heat up for at least 3 to 5 minutes before adding the muffins. The pan should be hot but not smoking. Test by flicking a few drops of water, they should sizzle gently and evaporate.
- Add a very thin layer of butter to the pan. You only need about half a teaspoon per batch. Too much butter causes uneven browning.
- Using a wide spatula, carefully pick up 2 to 3 muffins (without pressing down on them) and place them gently in the pan with a little space between them.
- Cook on the first side for 5 to 7 minutes, until the bottom is a deep golden brown. Resist the urge to increase the heat. Low and slow is the key to cooking the center through without burning the outside.
- Flip the muffins carefully and cook for another 5 to 7 minutes on the second side.
- After flipping, place a lid on the skillet or tent loosely with foil. This traps steam and helps the centers cook through completely.
- The muffins are fully cooked when they feel firm (not doughy) when pressed lightly on the sides, and an instant-read thermometer inserted into the side reads 200°F (93°C).
- Transfer cooked muffins to a wire cooling rack and repeat with the remaining muffins.
Step 9: Split and Serve
- Allow the muffins to cool for at least 5 to 10 minutes before splitting. Splitting a very hot muffin will result in a gummy, compressed interior.
- To split, insert the tines of a fork into the side of the muffin at 4 to 6 points around the circumference, then gently pull the two halves apart with your hands. This tearing method creates the signature jagged surface full of nooks and crannies that toasts so beautifully.
- Toast the split muffin halves in a toaster or under the broiler until golden and crisp.
- Serve immediately with your favorite toppings.
You might also enjoy these Sourdough Pancakes as another classic sourdough breakfast option.
Tips for Success
Getting sourdough English muffins just right comes down to a few key details. The most important is using a genuinely active starter and cooking over steady low heat. Read through these tips before you start and you’ll avoid the most common pitfalls.
- Use an active starter, not discard. For this recipe, you want starter that has been fed and is at or near its peak activity. Discard that hasn’t been fed recently won’t produce the right rise.
- Don’t skip the cornmeal or semolina dusting. It’s not just for looks. It prevents sticking and gives the muffins that characteristic slightly crunchy exterior.
- Cook on low to medium-low heat. This is the most common mistake. High heat burns the outside while leaving the inside raw and doughy.
- Use the lid when cooking. Placing a lid on the pan during the second half of cooking traps steam and ensures the centers cook through completely.
- Check the dough consistency. The dough should be soft and slightly tacky but manageable. A very sticky dough can be handled with lightly floured hands rather than adding lots of extra flour.
- Press the dough out with your fingers, not a rolling pin. Fingertip pressure preserves the air bubbles in the dough and leads to better nooks and crannies.
- Don’t rush the proofing. Under-proofed muffins are dense. Give them the full time they need to puff up before cooking.
- Split with a fork, not a knife. Cutting with a knife compresses the crumb and closes up those precious nooks. Fork-splitting creates the jagged, open texture that soaks up butter perfectly.
For more sourdough inspiration, this Sourdough Focaccia Recipe is another wonderful project using an active starter.
Serving Suggestions

Sourdough English muffins are one of the most versatile breakfast and brunch breads you can make. Their tangy, chewy crumb and crisp toasted surface make them an excellent base for both sweet and savory toppings.
A classic pat of salted butter and a drizzle of honey is hard to beat. But the real beauty of these muffins is how well they hold up to more substantial toppings.
For a proper brunch, use them as the base for Eggs Benedict with Hollandaise Sauce poured over crispy Canadian bacon and perfectly poached eggs.
- Classic butter and jam: The tangy sourdough flavor pairs beautifully with sweet fruit preserves, especially strawberry or raspberry jam.
- Eggs Benedict: Split, toasted sourdough English muffins are the traditional and best base for this brunch classic.
- Breakfast sandwich: Layer a fried egg, sharp cheddar, and crispy bacon or sausage for a homemade version of your favorite fast-food breakfast sandwich.
- Avocado Toast: Mashed avocado with a squeeze of lemon, chili flakes, and flaky salt on a toasted sourdough English muffin is a fantastic light breakfast.
- Mini pizzas: Top with pizza sauce, shredded mozzarella, and your favorite toppings, then broil for a few minutes for quick homemade English muffin pizzas.
- Smoked salmon and cream cheese: Spread with whipped cream cheese, layer with smoked salmon, capers, and thin red onion slices for a sophisticated brunch option.
- Peanut butter and banana: A layer of creamy peanut butter with fresh banana slices and a drizzle of honey makes a satisfying and energizing breakfast.
- Cinnamon butter: Mix softened butter with a pinch of cinnamon and sugar, then spread generously over a warm toasted muffin for a simple but deeply satisfying treat.
Variations to Try
Once you’ve nailed the basic sourdough English muffin recipe, there are a few wonderful variations worth exploring. Each one uses the same core dough as a base, with small adjustments to create a different flavor profile.
- Cinnamon raisin sourdough English muffins: After the first rise, gently knead in 1 teaspoon of cinnamon and 80g (½ cup) of raisins. These are incredible toasted with cream cheese.
- Whole wheat sourdough English muffins: Replace up to half of the all-purpose flour with whole wheat flour. The muffins will be slightly denser but have a lovely nutty, earthy flavor. Increase the water by about 20ml (1½ tablespoons) to account for the extra absorption.
- Honey whole grain muffins: Swap the granulated sugar for a tablespoon of honey and use a mix of all-purpose and spelt flour for a subtly sweet, hearty muffin.
- Seeded sourdough English muffins: Press sesame seeds, poppy seeds, or Everything Bagel seasoning into the surface of the shaped rounds before the second proof for an extra layer of flavor and texture.
- Cheese and herb English muffins: Mix in 60g (½ cup) of finely grated sharp cheddar and 1 tablespoon of fresh chopped chives or rosemary into the dough just before the first rise.
- Discard version: If you’re looking to use unfed starter, check out this Sourdough Discard Cinnamon Rolls Recipe and apply the same discard principles to the muffin dough with a small addition of commercial yeast for reliable rise.
Storage and Reheating
Sourdough English muffins store and reheat exceptionally well, which makes a big batch well worth the effort. Proper storage keeps them tasting fresh for several days.
- Room temperature: Store completely cooled muffins in an airtight container or zip-lock bag at room temperature for up to 3 days.
- Refrigerator: Refrigerate in an airtight container for up to 7 days. The cool temperature may firm them up slightly, but toasting brings them right back.
- Freezer: Freeze for up to 3 months. Split them before freezing so you can pull out individual halves and pop them straight into the toaster from frozen. Wrap each muffin in plastic wrap, then place in a freezer bag.
- Reheating from room temperature: Toast in a toaster or toaster oven for 1 to 2 minutes until the surface is crisp and golden.
- Reheating from frozen: Place frozen halves directly in the toaster on a medium setting. No thawing required. They come out perfectly crisp and warm in under 3 minutes.
- Oven reheating: If reheating multiple muffins at once, place split halves cut-side up on a baking sheet and bake at 350°F (175°C) for 5 to 7 minutes until warmed through and lightly toasted.
Read Also: Sourdough Discard Bread Recipe
Nutritional Facts
The following is an approximate nutritional breakdown per muffin, based on a batch yielding 12 muffins. Exact values will vary depending on the specific ingredients used.
| Nutrient | Per Muffin (approx.) |
|---|---|
| Calories | 185 kcal |
| Total Fat | 3.5g |
| Saturated Fat | 2g |
| Cholesterol | 8mg |
| Sodium | 195mg |
| Total Carbohydrates | 33g |
| Dietary Fiber | 1.2g |
| Sugars | 2g |
| Protein | 5.5g |
These are naturally lower in fat than commercial English muffins, which often contain added oils and preservatives. The long fermentation process also reduces the glycemic impact compared to standard yeasted breads.
You might also enjoy experimenting with this Sourdough Discard Muffins Recipe for another way to use your sourdough starter in a baked treat.
Health Benefits of Key Ingredients
Beyond the great flavor, sourdough English muffins made from scratch offer some genuine nutritional advantages over their store-bought counterparts. The ingredients in this recipe each bring something meaningful to the table.
The sourdough fermentation process is the biggest health differentiator here. During the long fermentation, wild yeast and lactic acid bacteria break down phytic acid, an antinutrient found in wheat that can inhibit the absorption of minerals like iron, zinc, and magnesium.
This means the nutrients in your flour become more bioavailable when the dough is properly fermented.
- Sourdough starter: The lactic acid produced during fermentation gives sourdough its characteristic tang and also acts as a natural preservative. Long fermentation improves digestibility and may benefit gut health.
- Whole milk: Provides calcium, phosphorus, and fat-soluble vitamins. The fat in whole milk helps create a tender, enriched crumb with a satisfying texture and mouthfeel.
- All-purpose flour: A good source of carbohydrates for energy. When combined with sourdough fermentation, the resulting bread has a lower glycemic response than bread made with commercial yeast.
- Butter: Adds richness and helps with browning on the skillet. Real butter contains fat-soluble vitamins A, D, E, and K, as well as conjugated linoleic acid (CLA).
- Sea salt: Used in modest amounts, salt is essential for flavor development and also helps control the fermentation rate, giving the dough a more predictable rise.
Another great way to enjoy the benefits of sourdough fermentation at breakfast time is this Sourdough Discard Waffles Recipe.
Frequently Asked Questions
1. Can I make this recipe without a sourdough starter?
You can substitute the sourdough starter with a combination of commercial yeast and a small amount of plain yogurt or buttermilk to approximate the tang. Use 1 teaspoon of instant yeast and reduce the bulk fermentation to 1 to 2 hours at room temperature. The flavor won’t have the same depth as a properly fermented sourdough version, but the technique and results are otherwise similar.
2. Why are my English muffins doughy in the middle?
The most common cause of undercooked centers is cooking over too high a heat. When the heat is too high, the outside browns quickly while the center stays raw. Lower your heat to medium-low and cover the pan with a lid after flipping. Cooking covered traps steam and helps the interior reach the proper temperature without burning the crust.
3. How do I know if my sourdough starter is active enough?
Your starter should have visibly doubled in size within 4 to 8 hours of feeding and have plenty of bubbles throughout. Do the float test: drop a small spoonful into a glass of water. If it floats, it’s ready to use. A starter that sinks to the bottom hasn’t peaked yet and needs more time.
4. Can I skip the overnight rise and make these the same day?
You can do a same-day rise, but the flavor will be noticeably less complex. For a faster same-day version, allow the dough to rise at a warm room temperature (around 75 to 78°F / 24 to 25°C) until doubled, which may take 4 to 6 hours with an active starter, then proceed with shaping and proofing as normal. The muffins will still be good, just milder in flavor.
5. Can I cook these in a regular non-stick pan instead of cast iron?
Yes, a non-stick pan will work. The key difference is heat retention. Cast iron holds a steady, even heat that’s ideal for cooking English muffins all the way through at a consistent temperature. A non-stick pan can work, but you may find the heat less even, so watch the first batch carefully and adjust as needed. Avoid coated or ceramic pans with a very high heat coating, as these can cause uneven browning.
Another wonderful sourdough breakfast recipe to try is these Sourdough Discard Pancakes, which are fluffy, tangy, and come together in no time.
Final Thoughts
Homemade sourdough English muffins are one of those recipes that genuinely rewards the effort you put into them. The overnight process is mostly hands-off, and the actual cooking time on the stovetop goes quickly once you get the hang of the heat level.
The first time you split one open and see those gorgeous nooks and crannies, with butter already melting in, you’ll understand exactly why making them from scratch is worth it.
Give this sourdough English muffin recipe a try and let me know how it goes in the comments below. Did you go classic with butter and jam, or build a breakfast sandwich? I’d love to hear what you topped yours with!
Recommended:
- Sourdough Discard Cornbread Recipe
- Sourdough Discard Dumplings Recipe
- Sourdough Discard Bagels Recipe
- Sourdough Discard Dinner Rolls Recipe
- Sourdough Discard Naan Recipe
- Sourdough Discard Flatbread Recipe
- Sourdough Discard Pita Bread Recipe
- Sourdough Discard Biscuits Recipe
- Sourdough Discard Crepes Recipe
- Sweet Sourdough Bread Recipe


