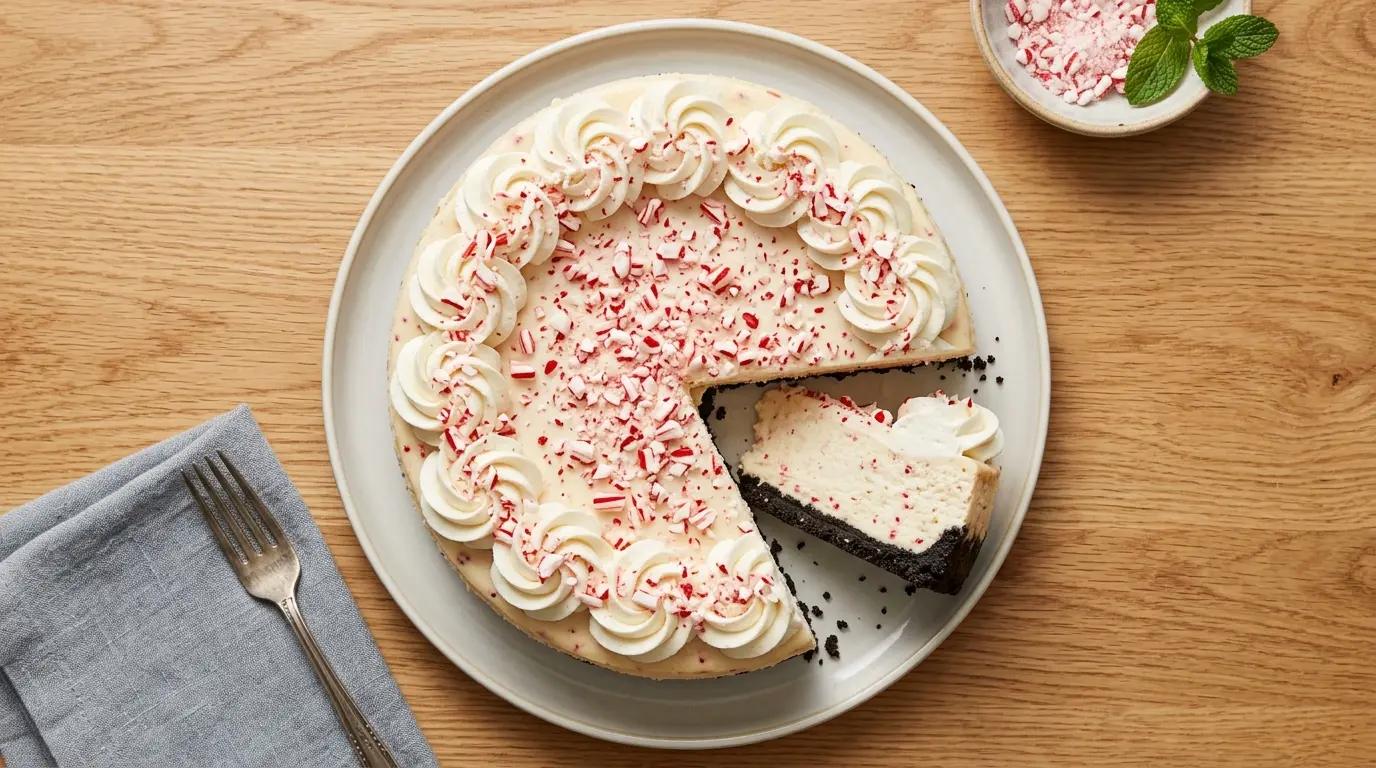
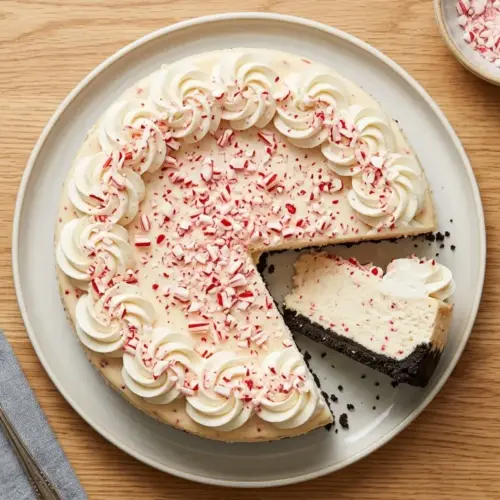
If you’ve been searching for the perfect peppermint cheesecake recipe, your holiday dessert table is about to get a serious upgrade. This classic baked cheesecake features a crunchy Oreo cookie crust, a rich and creamy peppermint-scented filling, and a cloud of whipped cream piled on top with crushed candy canes for that irresistible festive crunch.
Peppermint and cream cheese are one of those combinations that just works. The cool, bright flavor of peppermint extract cuts through the richness of the cream cheese filling in the best possible way, making every bite feel refreshing and indulgent at the same time.
This is a baked cheesecake, which means the texture is dense, smooth, and ultra-creamy. It’s the kind of dessert that gets oohs and ahhs the moment it hits the table.
It does take some patience (you’ll need to plan for chilling time), but every single step is straightforward and beginner-friendly. Follow along and you’ll have a show-stopping holiday cheesecake that everyone will ask about.
You might also enjoy: Oreo Cheesecake Recipe
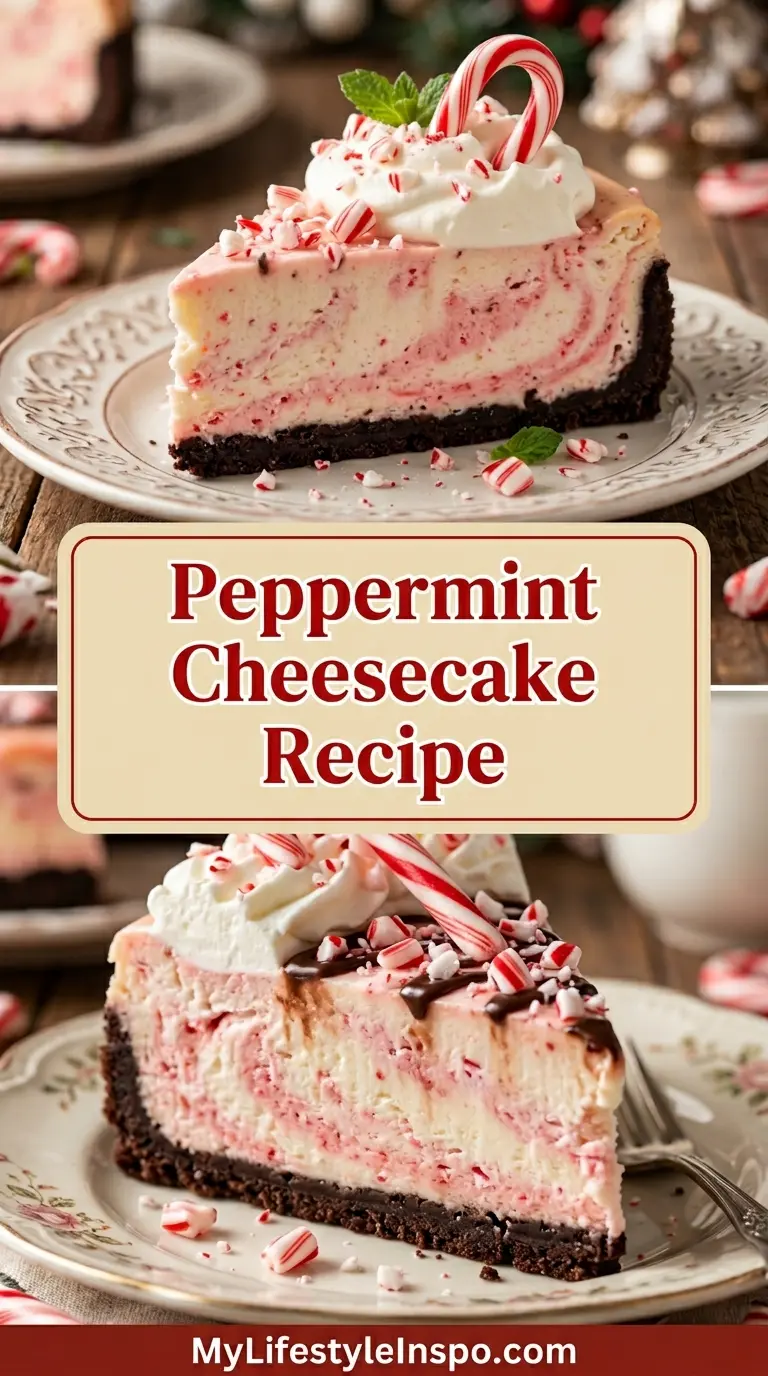
Why You’ll Love This Peppermint Cheesecake Recipe
This cheesecake is genuinely one of the best holiday desserts you can make from scratch, and here’s why it works so well.
The Oreo crust brings a deep chocolate flavor that pairs beautifully with the mint filling. It’s a natural combination, like peppermint bark in cheesecake form.
The filling uses full-fat cream cheese and sour cream together. The sour cream adds a subtle tang and makes the texture smoother and creamier than cream cheese alone.
Peppermint extract is the key to getting bold, genuine mint flavor throughout the cheesecake. A little goes a long way, and it perfumes the whole filling without being overpowering.
Baking the cheesecake in a water bath (bain-marie) prevents cracks and ensures the most even, silky texture possible. It’s the technique that takes this from good to great.
- Makes an impressive holiday centerpiece with minimal fuss
- The Oreo crust takes just minutes to press together
- No fancy decorating skills required
- Feeds a crowd (makes 12 generous slices)
- Can be made a full day ahead, which is ideal for holiday planning
- The candy cane garnish adds a festive crunch that contrasts beautifully with the creamy filling
Read Also: No Bake Cheesecake Recipe
Ingredients
You’ll need a handful of simple, easy-to-find ingredients. Full-fat versions of the dairy products are essential here since lower-fat alternatives contain more water and can make the filling too soft or watery after baking.
- For the Oreo Crust:
- 24 Oreo cookies (about 2 cups / 240g when crushed, filling included)
- 4 tablespoons (57g) unsalted butter, melted
- For the Peppermint Cheesecake Filling:
- 32 oz (900g) full-fat cream cheese, softened to room temperature (4 standard 8 oz blocks)
- 1 cup (200g) granulated sugar
- 1 cup (240g) full-fat sour cream, room temperature
- 4 large eggs, room temperature
- 1 1/2 teaspoons pure peppermint extract
- 1 teaspoon pure vanilla extract
- 2 tablespoons (16g) all-purpose flour
- For the Topping:
- 1 1/2 cups (360ml) heavy whipping cream
- 3 tablespoons (22g) powdered sugar
- 1/4 teaspoon peppermint extract
- 1/3 cup (about 45g) crushed candy canes or peppermint hard candies
Another reader favorite: Chocolate Cheesecake Recipe
Kitchen Equipment Needed
Most of the tools here are standard baking equipment. The springform pan and roasting pan are the two key items specific to this recipe.
- 9-inch springform pan (non-negotiable for cheesecake, essential for easy release)
- Large roasting pan or deep baking dish (must be large enough to hold the springform pan for the water bath)
- Stand mixer or hand electric mixer
- Food processor or zip-top bag and rolling pin (for crushing Oreos)
- Large mixing bowls
- Rubber spatula
- Measuring cups and measuring spoons
- Kitchen scale (recommended for accuracy)
- Heavy-duty aluminum foil (for wrapping the springform pan)
- Kettle or pot for boiling water (for the water bath)
- Whisk
- Wire cooling rack
Read Also: Best Cheesecake Recipe
Recommended Products for This Recipe
These are handpicked products that genuinely make a difference when baking this cheesecake.
1. Fat Daddio’s 9-Inch Springform Pan
A quality springform pan with a tight seal makes all the difference when using a water bath. Cheaper pans can let water seep into the crust, ruining the texture. Fat Daddio’s is a trusted brand used in professional bakeries, with a reliable latch and anodized aluminum for even heat distribution. It’s the pan cheesecake lovers swear by.
2. Nielsen-Massey Pure Peppermint Extract
The quality of your peppermint extract matters enormously in this recipe. Nielsen-Massey uses cold extraction to preserve the bright, clean flavor of real peppermint, rather than the sharp, medicinal taste some cheaper brands can have. A small bottle goes a long way and makes your cheesecake taste like a professional baker made it.
3. OXO Good Grips Springform Pan Leakproof Cover
This silicone cover wraps around the base of your springform pan and eliminates the need for multiple layers of foil. It creates a truly watertight seal so no water can sneak into your crust during the water bath. It’s reusable, easy to clean, and saves you foil every time you bake cheesecake.
4. Wilton Cake Decorating Piping Bags and Tips Set
For a polished whipped cream topping, a piping bag with a large star tip gives you those beautiful rosettes you see in bakery cheesecakes. It takes about two minutes to pipe and immediately elevates the presentation. This set includes multiple tips so you can experiment with different decorative finishes.
For a fun twist on this classic, try the Creme Brulee Cheesecake Recipe
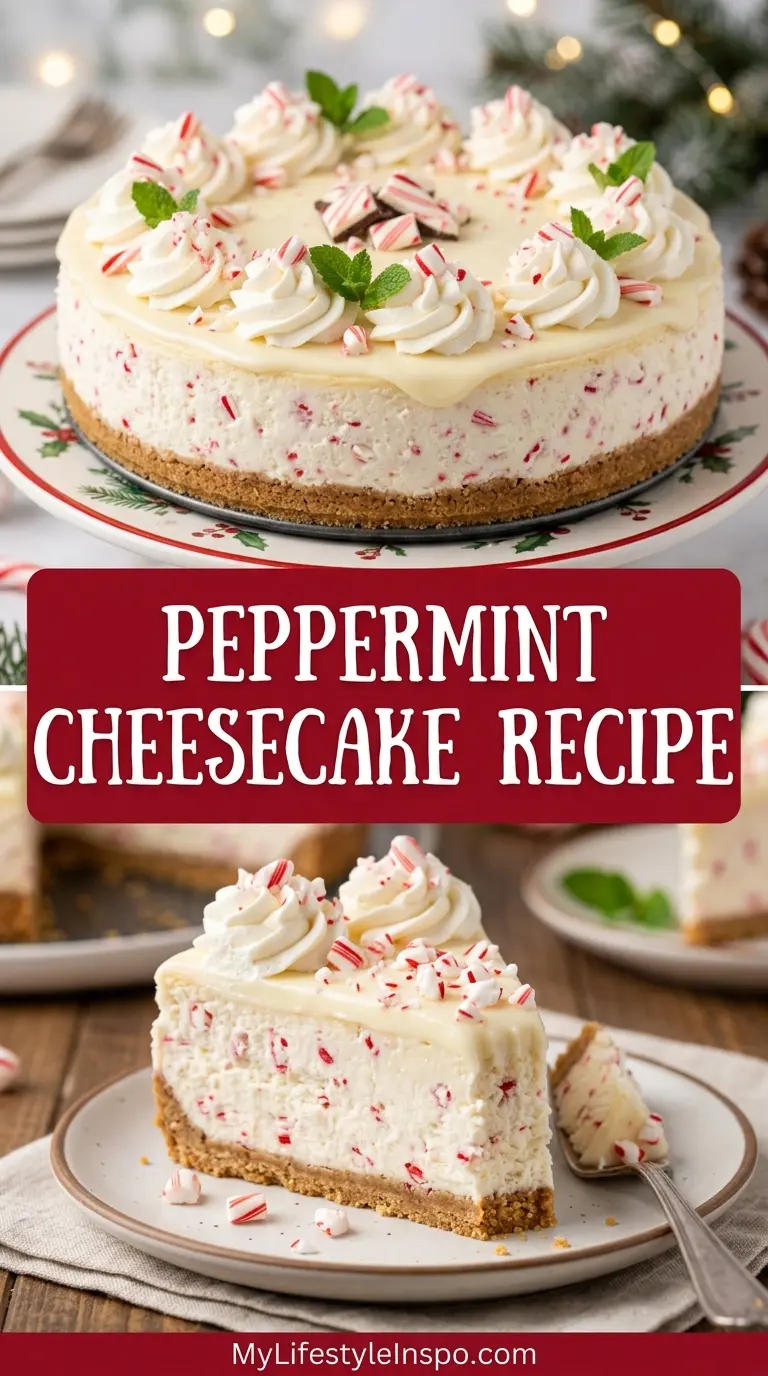
Step-by-Step Instructions
Step 1: Prepare Your Pan and Preheat the Oven
- Preheat your oven to 325°F (165°C). Position a rack in the center of the oven.
- Lightly grease the inside of your 9-inch springform pan with a thin layer of butter or non-stick cooking spray.
- Wrap the outside bottom and sides of the springform pan in two to three tight layers of heavy-duty aluminum foil. The foil should come up at least 3 inches (7.5 cm) on all sides. This watertight barrier prevents water from the bain-marie from seeping into the crust. If you have a silicone springform cover, use that instead.
- Set the wrapped pan aside.
Step 2: Make the Oreo Crust
- Place 24 Oreo cookies (filling and all) into a food processor. Pulse until you have fine, uniform crumbs. No large chunks should remain. Alternatively, seal the cookies in a zip-top bag and crush with a rolling pin.
- Transfer the crumbs to a bowl and pour in the 4 tablespoons of melted unsalted butter. Stir until every crumb is evenly moistened. The mixture should hold together when squeezed between your fingers, like wet sand.
- Pour the crumb mixture into the prepared springform pan.
- Using the flat bottom of a measuring cup or a smooth glass, press the crumbs firmly and evenly across the bottom of the pan and about 1 inch (2.5 cm) up the sides. Press firmly so the crust is compact and won’t crumble when sliced.
- Place the crust in the freezer for 10 minutes to firm up while you make the filling.
Step 3: Beat the Cream Cheese Until Smooth
- Make sure your cream cheese, sour cream, and eggs are all at room temperature before you start. Cold cream cheese creates lumps that are nearly impossible to beat out, and lumpy batter produces a denser, uneven cheesecake.
- Add the 32 oz of softened cream cheese to the bowl of your stand mixer fitted with the paddle attachment (or use a large bowl with a hand mixer).
- Beat on medium speed for about 2 to 3 minutes, until the cream cheese is perfectly smooth, light, and fluffy. Scrape down the sides and bottom of the bowl with a rubber spatula at least twice during this process.
- Add the 1 cup of granulated sugar and beat on medium speed for another 2 minutes until well combined and creamy.
Step 4: Add the Remaining Filling Ingredients
- Add the 2 tablespoons of all-purpose flour to the cream cheese mixture. Mix on low speed until just combined. The flour acts as a light stabilizer to help the filling set properly.
- Add the 1 cup of sour cream and mix on low to medium speed until fully incorporated. Scrape down the bowl.
- Add the 1 1/2 teaspoons of peppermint extract and 1 teaspoon of vanilla extract. Mix on low speed until evenly distributed throughout the batter.
- Add the 4 room-temperature eggs one at a time, mixing on low speed after each addition just until the yolk disappears into the batter. Do not overmix at this stage. Overmixing after the eggs are added incorporates too much air, which causes the cheesecake to rise and fall dramatically, leading to cracks.
- Give the batter a final scrape and gentle stir with your rubber spatula to make sure everything is uniform and no streaks remain.
Step 5: Set Up the Water Bath and Bake
- Remove the crust from the freezer and place the foil-wrapped springform pan inside your large roasting pan.
- Pour the peppermint cheesecake filling over the Oreo crust. Use a rubber spatula to spread it evenly and smooth the top surface.
- Place the roasting pan (with the springform pan inside) on the center rack of your preheated oven.
- Carefully pour enough boiling or very hot water into the roasting pan to reach about 1 inch (2.5 cm) up the outside of the springform pan. Do this slowly and avoid splashing water onto the cheesecake.
- Bake for 60 to 70 minutes, until the edges of the cheesecake are set and the center still has a slight jiggle, like gelatin. The center should wobble gently as a single mass, not slosh like liquid. It will firm up during cooling.
- Do not open the oven door during the first 50 minutes of baking.
Step 6: Cool the Cheesecake Gradually
- Turn the oven off when baking is complete. Crack the oven door open about 1 inch using a wooden spoon propped in the door.
- Leave the cheesecake inside the oven for 1 hour. This gradual cooling step is essential. Sudden temperature changes cause the filling to contract rapidly, leading to cracks across the surface.
- After 1 hour, remove the cheesecake from the water bath and place it on a wire cooling rack.
- Carefully peel away the foil from the outside of the pan.
- Let the cheesecake cool completely at room temperature for another 1 to 2 hours.
- Once fully cooled, cover loosely with plastic wrap or aluminum foil and refrigerate for a minimum of 6 hours. Overnight chilling produces the best texture and flavor, and is strongly recommended.
Step 7: Make the Whipped Cream Topping
- Just before serving (or up to a few hours ahead), pour the 1 1/2 cups of cold heavy whipping cream into a chilled mixing bowl.
- Beat on medium-high speed until soft peaks form (the cream holds its shape but the tips curl over softly).
- Add the 3 tablespoons of powdered sugar and 1/4 teaspoon of peppermint extract.
- Continue beating until stiff peaks form (the cream holds firm, pointed peaks). Do not over-beat or it will become grainy and butter-like.
Step 8: Garnish and Serve
- Run a thin knife or offset spatula around the inside edge of the springform pan before releasing the latch. This prevents the cheesecake from sticking and tearing.
- Carefully release and remove the springform ring.
- Spread or pipe the peppermint whipped cream over the top of the chilled cheesecake. Use the back of a spoon for a rustic swirl, or a piping bag with a star tip for decorative rosettes.
- Sprinkle the 1/3 cup of crushed candy canes or peppermint candies evenly over the whipped cream topping just before serving. Add them at the last moment since candy canes will begin to dissolve and weep color if left on too long.
- Slice with a sharp knife dipped in hot water and wiped clean between cuts for the cleanest presentation.
This technique works beautifully in other creamy desserts, too. Check out this New York Cheesecake Recipe for another classic worth mastering.
Tips for Success
These practical tips address the most common cheesecake pitfalls and will help you get perfect results every time.
- Room temperature ingredients are non-negotiable. Cold cream cheese and eggs are the leading cause of lumpy, uneven cheesecake batter. Pull everything out of the refrigerator at least 1 to 2 hours before you begin.
- Don’t rush the mixing at the end. Once the eggs go in, mix on low and stop as soon as each egg is incorporated. Overbeating after this point adds too much air, causing the cheesecake to puff, sink, and crack.
- Seal your foil extremely well. A single small tear in the foil wrap is enough for water to seep into your crust during the water bath. Use thick, wide, heavy-duty foil and double-layer it, or use a silicone springform cover.
- Don’t skip the gradual cooling. Moving a hot cheesecake from the oven to the countertop immediately will almost always cause it to crack. The slow cool inside the turned-off oven is the most important crack-prevention technique.
- Chill overnight whenever possible. Cheesecake tastes significantly better the next day. The peppermint flavor deepens, the texture firms up beautifully, and every slice comes out cleaner.
- Add candy canes at the last minute. Crushed peppermint candies will start to dissolve and bleed red color into the whipped cream within a couple of hours. Top the cheesecake right before it hits the table.
You might also love: Pumpkin Cheesecake Recipe
Serving Suggestions
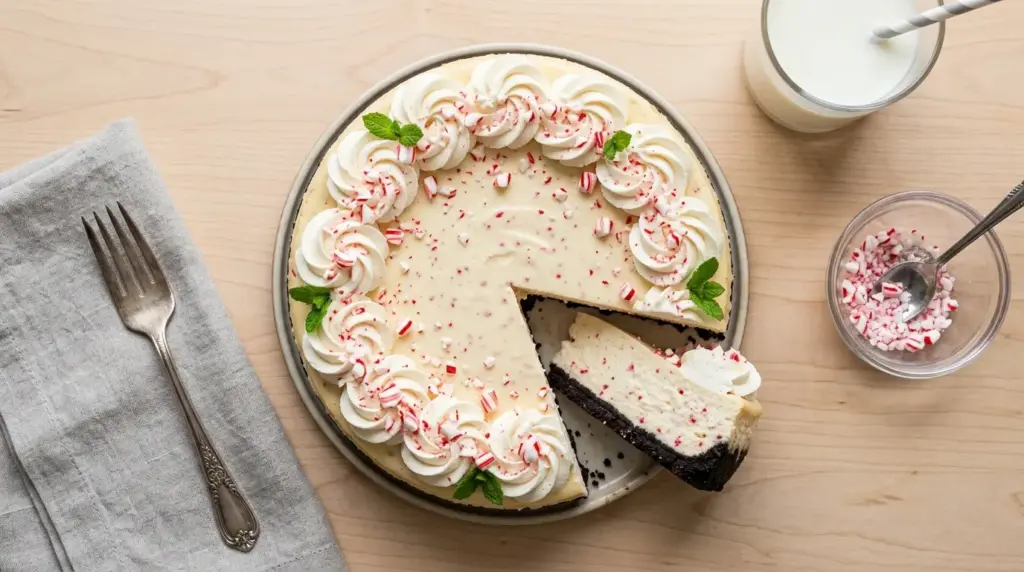
This peppermint cheesecake is rich, so you don’t need much else alongside it. A few simple accompaniments can elevate the experience without competing with the flavors.
A drizzle of chocolate ganache over the top of each slice adds a beautiful contrast of dark, bittersweet chocolate against the pale, cool mint filling. It’s a flavor pairing that feels elegant and intentional.
- Serve alongside a mug of hot chocolate for a fully festive, cozy holiday experience
- A small scoop of vanilla bean ice cream on the side adds an extra layer of creaminess that pairs wonderfully
- Fresh raspberries or a simple raspberry sauce offer a bright, tart counterpoint that cuts through the richness of the filling
- Serve chilled, straight from the refrigerator, for the best texture and cleanest slices
- A light dusting of powdered sugar just before presenting adds a soft, elegant finish
Read Also: Lemon Cheesecake Recipe
Variations to Try
Once you have the base recipe down, there are plenty of delicious directions you can take it. These are all tested and reliable variations.
- Graham cracker crust: Swap the Oreos for 1 1/2 cups (180g) of graham cracker crumbs mixed with 4 tablespoons melted butter and 2 tablespoons sugar. This gives a lighter, more traditional base flavor if you prefer less chocolate.
- Chocolate peppermint swirl: Reserve about half a cup of plain cheesecake batter, stir in 2 tablespoons of cocoa powder, then drop spoonfuls of the chocolate batter over the peppermint filling and swirl with a skewer for a pretty marbled effect.
- White chocolate peppermint: Melt 4 oz of good-quality white chocolate, let it cool slightly, then fold it into the filling along with the peppermint extract for a sweeter, richer flavor profile.
- Mini peppermint cheesecakes: Divide the crust and filling between a standard 12-cup muffin tin lined with cupcake liners. Bake at 325°F (165°C) for 20 to 22 minutes. These are perfect for parties and require no slicing.
- No-bake version: For a lighter, mousse-like texture, skip the eggs and bake entirely. Fold whipped cream into the cream cheese mixture and refrigerate for 6 hours. The texture won’t be as dense, but it’s a great shortcut.
- Add a candy cane swirl: Stir 2 tablespoons of crushed candy cane directly into the filling before pouring it over the crust for peppermint texture throughout every slice.
Another festive option to try: Churro Cheesecake Recipe
Storage and Reheating
Cheesecake stores exceptionally well, which makes it an ideal make-ahead holiday dessert.
- Refrigerator: Cover the cheesecake tightly with plastic wrap or store slices in an airtight container. It keeps well in the refrigerator for up to 5 days. The flavor actually improves after the first day.
- Freezer: You can freeze the cheesecake without the whipped cream topping. Wrap it tightly in plastic wrap, then a layer of aluminum foil, and freeze for up to 2 months. Thaw overnight in the refrigerator before topping and serving.
- Candy canes: If you know you’ll have leftovers, wait to add the crushed candy canes until each slice is plated. This prevents them from dissolving into the whipped cream during storage.
- Whipped cream: Make the whipped cream topping fresh within a few hours of serving for the best texture and appearance. Pre-made whipped cream can be refrigerated for up to 24 hours before it starts to weep.
- Reheating: Cheesecake is served cold and does not need reheating. For the best flavor, let refrigerated slices sit at room temperature for 10 to 15 minutes before serving so the filling softens very slightly.
Read Also: Philadelphia No Bake Cheesecake Recipe
Nutritional Facts
These are approximate values per slice, based on 12 servings. Values will vary based on specific brands used.
| Nutrient | Per Slice (1/12 of cake) |
|---|---|
| Calories | ~520 kcal |
| Total Fat | 36g |
| Saturated Fat | 20g |
| Cholesterol | 155mg |
| Sodium | 360mg |
| Total Carbohydrates | 42g |
| Sugars | 31g |
| Protein | 8g |
| Calcium | 110mg |
This cheesecake is an indulgent holiday dessert. Nutritional values are estimates only.
For a lighter option, take a look at this Low Calorie Cheesecake Recipe
Health Benefits of Key Ingredients
While this is certainly a treat, a few key ingredients bring genuine nutritional value to the table.
Cream cheese, made from pasteurized milk and cream, provides a solid source of fat-soluble vitamins including vitamin A, which supports eye health and immune function. Full-fat dairy products also deliver conjugated linoleic acid (CLA), a naturally occurring fatty acid that has been studied for its potential metabolic benefits.
- Eggs are one of the most nutrient-dense whole foods available, delivering complete protein, vitamin D, choline (essential for brain health), selenium, and B vitamins, all of which support energy metabolism and cognitive function
- Peppermint contains menthol, which has been studied for its ability to soothe digestive discomfort. It also has antimicrobial properties and may help with mental clarity and alertness
- Sour cream contributes gut-friendly probiotics (in small amounts), calcium for bone health, and phosphorus
- Dark chocolate Oreos provide small amounts of flavonoids from the cocoa content, which are antioxidants linked to heart health
Another reader favorite: Protein Cheesecake Recipe
Frequently Asked Questions
1. Why did my cheesecake crack on top?
Cracking is the most common cheesecake problem, and it usually comes down to one of three causes. The most frequent culprit is overmixing the batter after the eggs are added, which incorporates too much air. The second cause is skipping the gradual cooling step inside the turned-off oven. The third is overbaking; remove the cheesecake while the center still jiggles gently.
2. Can I make this cheesecake without a water bath?
You can bake it without a water bath, but there’s a higher risk of cracks and slightly drier edges. If you choose to skip it, place a separate shallow pan of hot water on the lower oven rack as a compromise. The steam will help regulate the temperature somewhat, though not as effectively as a full bain-marie.
3. How far in advance can I make this peppermint cheesecake?
This cheesecake is ideal for making 1 to 2 days ahead of serving. The flavor and texture both improve after at least one night in the refrigerator. Hold off on adding the whipped cream and candy cane garnish until just before serving for the freshest presentation.
4. Can I use mint extract instead of peppermint extract?
Peppermint extract and mint extract taste quite different. Peppermint extract has a sharp, bright, candy-cane flavor, while regular mint extract is often a blend of spearmint and peppermint and has a softer, grassier flavor. For this recipe, peppermint extract is the correct choice and gives the most authentic holiday candy cane flavor.
5. How do I crush candy canes without making a huge mess?
The easiest method is to seal the unwrapped candy canes in a sturdy zip-top freezer bag, press out the air, and crush them with a rolling pin or the bottom of a heavy pan. Alternatively, pulse them briefly in a food processor. Make sure the candy canes are at room temperature (not straight from a cold environment) to prevent them from shattering into very fine dust rather than rough, rustic pieces.
Read Also: Keto Cheesecake Recipe
Peppermint Cheesecake

Equipment
- 9-inch springform pan - Non-negotiable for cheesecake, essential for easy release
- Large roasting pan - Large enough to hold the springform pan for the water bath
- Stand mixer or hand electric mixer
- Food processor - Alternative: zip-top bag and rolling pin for crushing Oreos
- Large mixing bowls
- Rubber spatula
- Measuring cups
- Measuring spoons
- Kitchen scale - Recommended for accuracy
- Heavy-duty aluminum foil - For wrapping the springform pan securely to prevent water seepage
- Kettle or Pot - For boiling water for the water bath
- Whisk
- Wire cooling rack
- Piping Bag with Large Star Tip - Optional, for decorating with whipped cream rosettes
Ingredients
For the Oreo Crust
- 24 cookies Oreo cookies - about 2 cups or 240g when crushed, filling included
- 4 tablespoons unsalted butter - 57g, melted
For the Peppermint Cheesecake Filling
- 32 oz full-fat cream cheese - 900g, 4 standard 8 oz blocks, softened to room temperature
- 1 cup granulated sugar - 200g
- 1 cup full-fat sour cream - 240g, room temperature
- 4 large eggs - room temperature
- 1 1/2 teaspoons pure peppermint extract
- 1 teaspoon pure vanilla extract
- 2 tablespoons all-purpose flour - 16g
For the Topping
- 1 1/2 cups heavy whipping cream - 360ml
- 3 tablespoons powdered sugar - 22g
- 1/4 teaspoon peppermint extract
- 1/3 cup crushed candy canes - about 45g, or peppermint hard candies, for garnish
Instructions
- Preheat oven to 325°F (165°C) with rack in center. Grease a 9-inch springform pan and wrap the outside bottom and sides tightly with 2-3 layers of heavy-duty aluminum foil, coming up at least 3 inches.
- Pulse 24 Oreo cookies in a food processor until fine crumbs form. Mix with 4 tablespoons melted butter until evenly moistened. Press firmly into the bottom and about 1 inch up the sides of the prepared pan, then freeze for 10 minutes.
- Beat 32 oz softened cream cheese in a stand mixer fitted with paddle attachment on medium speed for 2-3 minutes until smooth. Add 1 cup sugar and beat for another 2 minutes until creamy.
- Add 2 tablespoons flour and mix until just combined. Add 1 cup sour cream and mix until incorporated. Stir in 1 1/2 teaspoons peppermint extract and 1 teaspoon vanilla extract.
- Add 4 room-temperature eggs one at a time, mixing on low speed after each addition just until the yolk disappears. Do not overmix. Pour the filling over the crust and smooth the top.
- Place the foil-wrapped pan in a large roasting pan. Carefully pour boiling water into the roasting pan to reach about 1 inch up the outside of the springform pan. Bake for 60-70 minutes until edges are set and center has a slight jiggle.
- Turn off the oven and prop the door open about 1 inch with a wooden spoon. Leave the cheesecake inside for 1 hour to cool gradually.
- Remove the cheesecake from the water bath and pan, peel away the foil, and let cool completely at room temperature for 1-2 hours. Refrigerate for a minimum of 6 hours, preferably overnight.
- Beat 1 1/2 cups cold heavy whipping cream on medium-high speed until soft peaks form. Add 3 tablespoons powdered sugar and 1/4 teaspoon peppermint extract and beat until stiff peaks form.
- Run a knife around the edge of the pan, release the springform ring, and spread or pipe the whipped cream over the chilled cheesecake. Sprinkle with crushed candy canes just before serving.
Notes
- Room temperature is essential: Cold cream cheese and eggs will result in a lumpy batter. Pull everything out of the refrigerator at least 1-2 hours before you begin.
- Don’t overmix after adding eggs: Overbeating incorporates too much air, causing the cheesecake to puff, sink, and crack. Mix on low and stop as soon as each egg is incorporated.
- Seal the foil well: A single small tear can let water seep into your crust. Use thick, heavy-duty foil, double-layer it, or use a silicone springform cover for a watertight seal.
- Don’t skip the gradual cooling: Moving a hot cheesecake to the countertop immediately will almost always cause cracks. The slow cool inside the turned-off oven is the most important crack-prevention technique.
- Chill overnight when possible: Cheesecake tastes significantly better the next day. The flavor deepens, the texture firms up, and every slice comes out cleaner.
- Add candy canes at the last minute: Crushed peppermint candies will start to dissolve and bleed red color into the whipped cream within a couple of hours. Top the cheesecake right before it hits the table.
- Graham cracker crust variation: Swap the Oreos for 1 1/2 cups (180g) of graham cracker crumbs mixed with 4 tablespoons melted butter and 2 tablespoons sugar for a lighter base.
- Chocolate peppermint swirl: Reserve half a cup of plain batter, stir in 2 tablespoons of cocoa powder, drop spoonfuls over the filling, and swirl with a skewer for a marbled effect.
- Storage: Cover tightly and refrigerate for up to 5 days. Freeze without topping for up to 2 months, wrapped in plastic and foil. Thaw overnight in the refrigerator.
- For clean slices: Dip a sharp knife in hot water and wipe it clean between cuts for the neatest presentation.
Final Thoughts
This peppermint cheesecake recipe really is one of those holiday desserts that earns a permanent spot on your rotation. It’s rich and creamy, boldly flavored without being overwhelming, and absolutely beautiful on a holiday table.
The combination of the chocolate Oreo crust, silky peppermint filling, and cool whipped cream topping with that crunch of candy cane on top is simply hard to beat. Once you try it, it’ll be your go-to for Christmas gatherings, holiday parties, and any occasion that calls for a dessert with a little extra wow factor.
Give this peppermint cheesecake a try this holiday season, and when you do, come back and share how it turned out in the comments below. Did you add a swirl? Try the white chocolate variation? Tell us about it! And if you loved it, share the recipe with a friend who loves a good holiday dessert.
Recommended:
- Strawberry Cheesecake Recipe
- Blueberry Cheesecake Recipe
- Red Velvet Cheesecake Recipe
- Key Lime Cheesecake Recipe
- Salted Caramel Cheesecake Recipe
- Turtle Cheesecake Recipe
- Biscoff Cheesecake Recipe
- Japanese Cheesecake Recipe
- Basque Cheesecake Recipe
- Cheesecake Ice Cream Cake Recipe



