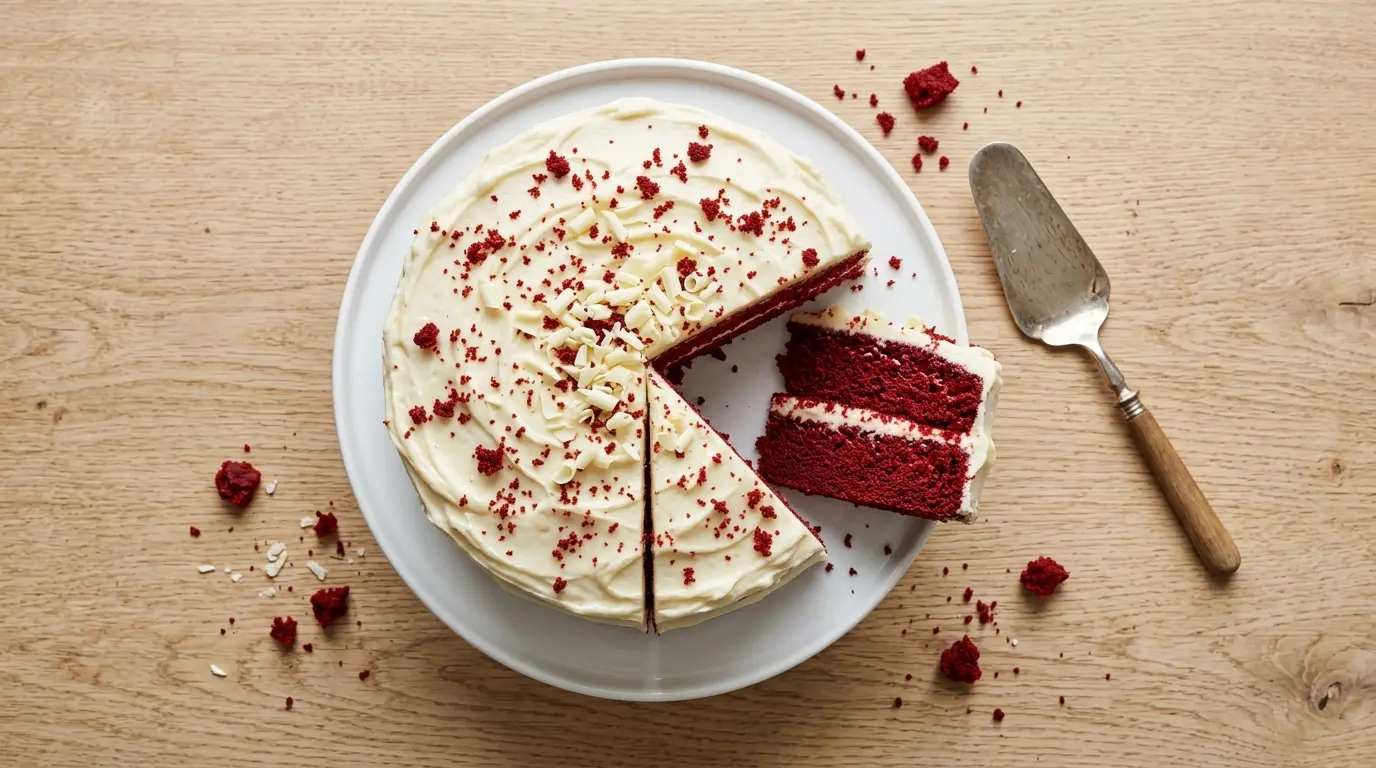
This red velvet cake recipe with cake mix is here to prove that you do not need to spend hours in the kitchen to bake something truly stunning.
Box mix is not cheating. It is a shortcut that, when done right, gives you a moist, deeply flavored, gorgeous cake that tastes every bit as good as anything made from scratch.
The secret is in how you doctor the mix. A few smart additions like sour cream, melted butter, and an extra egg transform a standard box into something rich, velvety, and bakery-worthy.
You get that iconic crimson color, that subtle cocoa flavor, a tender crumb, and of course, the tangy cream cheese frosting that makes red velvet cake what it is.
If you have been searching for a reliable, foolproof recipe that delivers beautiful results every single time, this is it.
You might also enjoy: Red Velvet Cake
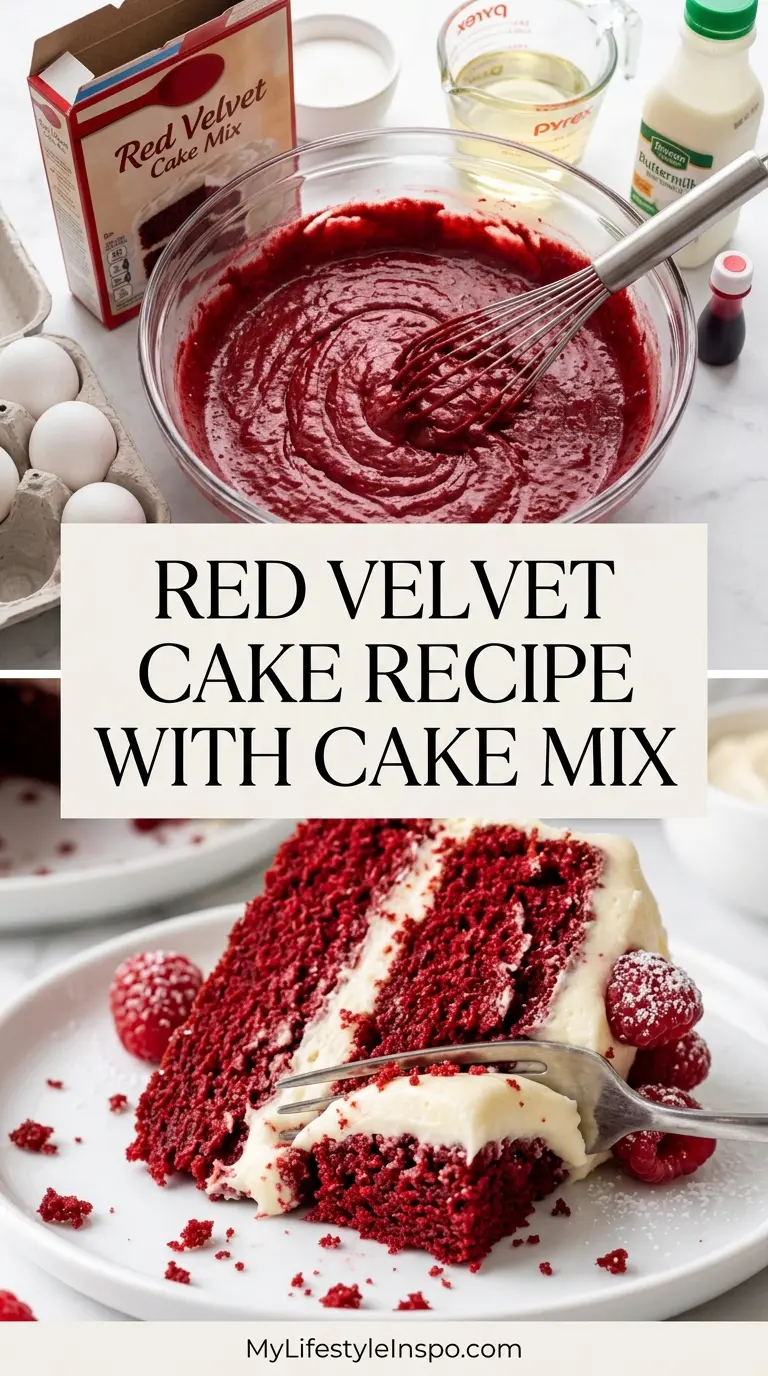
Why You’ll Love This Red Velvet Cake Recipe with Cake Mix
Making a red velvet cake from a box mix comes with so many advantages, especially when you dress it up the right way.
The doctored mix method consistently produces a moist, tender crumb that is genuinely hard to achieve even with scratch recipes.
You save serious time without sacrificing flavor, making this perfect for birthdays, holidays, or whenever the craving hits.
The vibrant red layers look dramatic and impressive between swirls of cream cheese frosting.
- Beginner-friendly: No complicated techniques needed. If you can stir, you can bake this cake.
- Incredibly moist: Sour cream and melted butter work together to keep every bite soft and rich.
- Stunning presentation: That bold red color against the white frosting is simply showstopping.
- Versatile: Bake it as a two-layer round cake, a sheet cake, or even cupcakes.
- Crowd-pleaser: Red velvet is universally loved. It disappears fast at every gathering.
- Customizable frosting: Cream cheese frosting is classic, but vanilla buttercream works beautifully too.
For another crowd-pleasing layer cake, check out this Carrot Cake with Cream Cheese Frosting.
Ingredients
You only need a handful of simple additions on top of your cake mix to take this recipe to the next level. The sour cream replaces some of the liquid and adds fat, creating a denser, more luxurious crumb. Melted butter instead of oil adds a richer flavor that vegetable oil simply cannot match.
For the Cake:
- 1 box (15.25 oz / 432g) red velvet cake mix (Duncan Hines or Betty Crocker recommended)
- 3 large eggs (room temperature)
- 1/2 cup (113g / 4 oz) unsalted butter, melted and cooled slightly
- 1 cup (240ml / 8 fl oz) full-fat sour cream
- 1/2 cup (120ml / 4 fl oz) whole milk
- 1 teaspoon (5ml) pure vanilla extract
- 1 tablespoon (15ml) white vinegar
- 1 tablespoon (7g) unsweetened cocoa powder
- 1 ounce (30ml) red gel food coloring (optional, for a deeper color)
For the Cream Cheese Frosting:
- 16 oz (450g) full-fat block cream cheese, softened to room temperature
- 1/2 cup (113g / 4 oz) unsalted butter, softened to room temperature
- 4 cups (480g / 1 lb) powdered sugar, sifted
- 2 teaspoons (10ml) pure vanilla extract
- Pinch of salt
Read Also: Cream Cheese Frosting Recipe
Kitchen Equipment Needed
Having the right tools makes the process smooth and stress-free. You do not need anything fancy, just the basics that every home baker should have on hand.
- Two 9-inch round cake pans
- Stand mixer or hand mixer
- Large mixing bowl
- Medium mixing bowl
- Rubber spatula
- Offset spatula (for frosting)
- Parchment paper
- Cake turntable (optional but very helpful for frosting)
- Wire cooling racks
- Measuring cups and spoons
- Sifter or fine mesh strainer (for powdered sugar)
- Toothpick or cake tester
This pairs well with tips from the Pudding Cake Recipe with Cake Mix post if you love doctoring box mixes.
Recommended Products for This Recipe
These are products that genuinely make a difference in how this cake turns out, chosen based on quality and real baking performance.
1. Duncan Hines Red Velvet Cake Mix
Duncan Hines is consistently rated as one of the best red velvet cake mixes for flavor, color, and texture. It has a stronger cocoa note than some competitors and produces a rich, vibrant red batter right out of the box. Starting with a good mix is the single most important step.
2. Wilton 2-Inch Cake Strips
Wet cake strips are wrapped around your pans before baking to ensure perfectly level cake layers with no domed tops. This means less waste and no awkward leveling required before frosting. They make professional-looking layers effortless.
3. Ateco Offset Spatula Set
A good offset spatula is essential for spreading cream cheese frosting smoothly and evenly. This set includes two sizes, which gives you the flexibility to frost between layers and cover the outside of the cake with ease. The angled blade keeps your hands out of the frosting.
4. AmeriColor Soft Gel Paste Food Color in Red Red
If you want an intense, true red cake, gel food coloring is the way to go. Liquid food coloring can thin out your batter, while gel gives you deep color with just a small amount. AmeriColor’s “Red Red” shade is a favorite among bakers for its vivid, stable results.
5. Rotating Cake Turntable
Frosting a two-layer cake without a turntable is frustrating. With one, you can spin the cake smoothly as you apply and spread the cream cheese frosting, creating a clean, professional finish in half the time. It is one of those tools you wonder how you ever baked without.
Another fun cake-mix bake worth trying is this Rum Cake Recipe with Cake Mix.
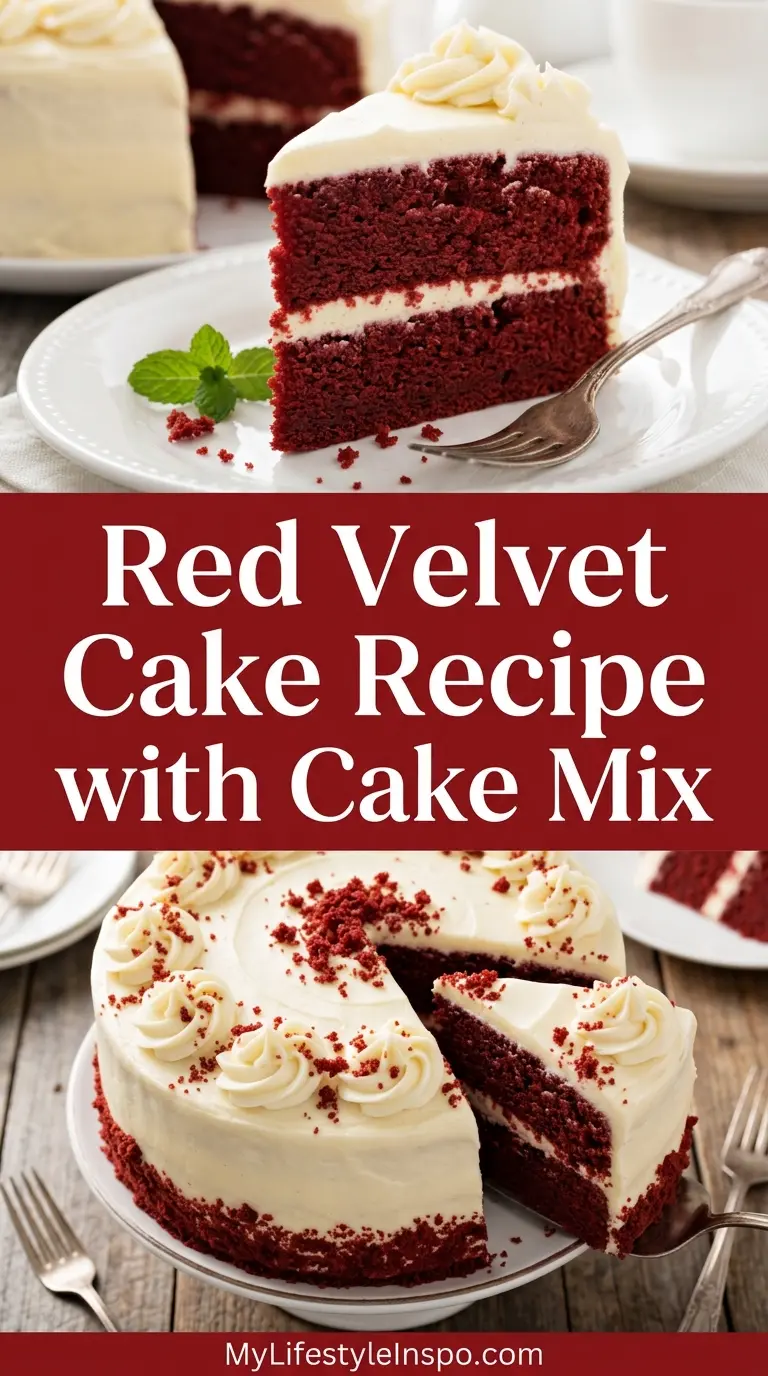
Step-by-Step Instructions
1. Prepare Your Pans and Preheat the Oven
- Preheat your oven to 350°F (175°C). Make sure the rack is positioned in the center of the oven for even heat distribution.
- Grease two 9-inch (23cm) round cake pans generously with butter or non-stick baking spray.
- Cut two circles of parchment paper to fit the bottom of each pan and press them in. Grease the parchment paper as well.
- Lightly dust the greased pans with a small amount of cocoa powder (not flour), tapping out any excess. Using cocoa prevents a white film on the cake’s red exterior.
- If using cake strips, wet them with cold water, wring them out slightly, and wrap them snugly around the outside of each pan. Secure them with the attached pins or clips.
2. Mix the Dry Ingredients
- Pour the red velvet cake mix into a large mixing bowl.
- Add 1 tablespoon (7g) of unsweetened cocoa powder directly to the mix.
- Whisk the two dry ingredients together briefly to combine them evenly. This extra cocoa deepens the chocolate flavor without making the cake taste like a chocolate cake.
3. Combine the Wet Ingredients
- In a separate medium bowl, add 3 large room-temperature eggs. Room-temperature eggs incorporate more smoothly and produce a more even batter.
- Add 1/2 cup (113g) of melted and slightly cooled unsalted butter. It should be liquid but not steaming hot, as hot butter can scramble the eggs.
- Add 1 cup (240ml) of full-fat sour cream and 1/2 cup (120ml) of whole milk.
- Add 1 teaspoon (5ml) of pure vanilla extract.
- Add 1 tablespoon (15ml) of white vinegar. This activates the leavening agents in the mix and adds the faint tang that makes red velvet distinctive.
- If desired, add 1 ounce (30ml) of red gel food coloring for a deeper, more vibrant red. The mix already contains red coloring, but adding more gives you that bold, dramatic cake-shop color.
- Whisk all the wet ingredients together until fully combined and smooth.
4. Make the Batter
- Pour the wet ingredients into the bowl of dry ingredients.
- Using a stand mixer with the paddle attachment (or a hand mixer), beat on low speed for about 30 seconds until the ingredients start to come together.
- Scrape down the sides and bottom of the bowl with a rubber spatula to make sure no dry mix is hiding at the bottom.
- Increase the speed to medium and beat for 2 full minutes. The batter should look smooth, glossy, and a deep, vivid red. Avoid over-mixing beyond this point, as it can develop the gluten in the mix and lead to a tougher texture.
- The batter will be thicker than standard cake mix batter due to the sour cream. This is completely normal and desirable.
5. Divide the Batter and Bake
- Divide the batter evenly between the two prepared cake pans. For precision, use a kitchen scale to weigh the batter in each pan. Each pan should hold approximately half the total batter weight.
- Smooth the tops of the batter with an offset spatula or the back of a spoon.
- Place both pans on the center rack of the oven. If your oven has hot spots, rotate the pans once at the halfway point of baking.
- Bake at 350°F (175°C) for 28 to 34 minutes. Start checking at the 28-minute mark.
- The cake is done when a toothpick inserted into the center comes out clean or with just a few moist crumbs attached. The edges will begin to pull away slightly from the sides of the pans.
- Avoid opening the oven door before 25 minutes, as the rush of cool air can cause the center to sink.
6. Cool the Cakes
- Remove the pans from the oven and place them on a wire cooling rack.
- Allow the cakes to cool in the pans for exactly 10 to 15 minutes. This resting period helps them firm up enough to release cleanly.
- Run a thin knife or offset spatula around the edge of each pan to loosen the cake.
- Invert each pan onto the wire cooling rack, remove the pan, and gently peel away the parchment paper circles.
- Let the cakes cool completely to room temperature before frosting, at least 1 to 2 hours. Frosting a warm cake will cause the cream cheese frosting to slide and melt. For best results, refrigerate the cooled layers for 30 minutes to firm them up further before frosting.
7. Make the Cream Cheese Frosting
- In the bowl of a stand mixer (or using a hand mixer), beat 16 oz (450g) of softened full-fat block cream cheese and 1/2 cup (113g) of softened butter together on medium-high speed for 3 to 4 full minutes.
- The mixture should become very light, smooth, and fluffy. This is an important step. Under-beaten cream cheese frosting can be dense and slightly grainy.
- Reduce the mixer speed to low and add the sifted powdered sugar in three additions, mixing briefly between each addition to prevent a powdered sugar cloud.
- Once all the powdered sugar is added, add 2 teaspoons (10ml) of vanilla extract and a pinch of salt.
- Increase the mixer speed to medium-high and beat for another 2 minutes until the frosting is light and creamy.
- Taste and adjust sweetness as needed. If the frosting is too thick, add 1 tablespoon of milk at a time. If too thin, add a small amount of additional sifted powdered sugar.
8. Assemble and Frost the Cake
- Place one cooled cake layer on a cake board or serving plate, flat side down.
- Add a generous amount of cream cheese frosting to the top of the first layer and spread it into an even layer using an offset spatula. Use approximately one third of the frosting here.
- Place the second cake layer on top, flat side up. Having the flat bottom facing up gives you a perfectly level top surface to frost.
- Apply a thin layer of frosting all over the top and sides of the cake. This is your crumb coat, which seals in any loose crumbs.
- Refrigerate the crumb-coated cake for 20 to 30 minutes to firm it up.
- Apply the remaining frosting over the top and sides of the cake, smoothing it as you go. Use a bench scraper and the turntable (if you have one) to create smooth, clean sides.
- For decoration, press cake crumbs or red velvet crumbles around the base or top edge of the cake.
This technique works just as beautifully on a Checkerboard Cake if you ever want to get creative with layered designs.
Tips for Success
Small details make a big difference when baking a layered cake. These tips will help you avoid the most common mistakes and get the best possible result every time.
- Use room-temperature dairy: Cold eggs, sour cream, or milk can cause the batter to curdle. Pull them out of the refrigerator 30 to 45 minutes before you start.
- Do not skip the crumb coat: It may feel like an extra step, but it prevents red crumbs from bleeding into your white frosting layer and gives the finished cake a polished look.
- Level your layers if needed: If one layer has a dome, use a serrated knife to carefully trim it flat before assembling. This gives you a more even, stable cake.
- Cool completely before frosting: Rushing this step is the most common reason cakes look messy. Cream cheese frosting will melt on a warm cake.
- Measure with a scale: Volume measuring cups can be inaccurate. A kitchen scale ensures your two layers are exactly the same size.
- Beat the frosting long enough: Under-beaten cream cheese frosting is dense. Beat it until it is visibly lighter and fluffy before adding the powdered sugar.
Read Also: Vanilla Buttercream Frosting Recipe
Serving Suggestions
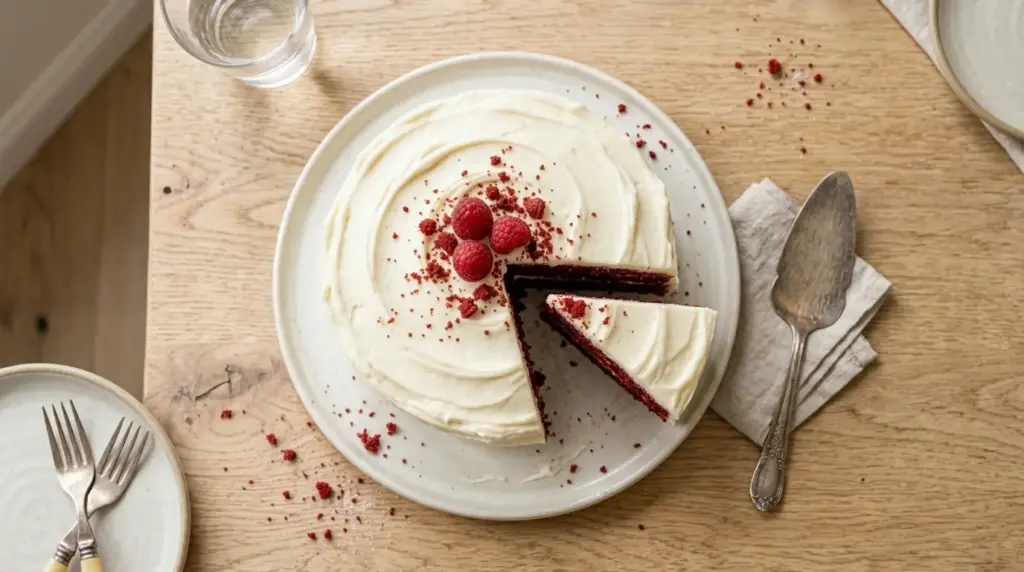
Red velvet cake is a special-occasion showstopper, but it is honestly so easy to make that it does not need to wait for a big event.
Serve it at birthdays, Valentine’s Day dinners, holiday gatherings, or simply as a weekend treat with coffee or tea. The cream cheese frosting is rich and tangy, which means a smaller slice goes a long way.
- Serve slices slightly chilled, straight from the refrigerator, for a firmer, denser bite.
- Let slices sit at room temperature for 15 to 20 minutes before serving for a softer, more tender texture.
- Pair with a hot cup of coffee or a cold glass of whole milk.
- Top individual slices with a handful of fresh strawberries or raspberries for a pop of fruit alongside the richness.
- Serve alongside a small scoop of Vanilla Bean Ice Cream for a decadent dessert plate.
- Dust finished slices lightly with cocoa powder or powdered sugar for an elegant presentation.
For another stunning dessert to round out a celebration spread, try this Red Velvet Cheesecake.
Variations to Try
Once you have the base recipe down, the possibilities are genuinely endless. Red velvet cake mix is a versatile starting point for all kinds of baked goods.
- Red Velvet Cupcakes: Divide the batter into a lined cupcake pan and bake at 350°F (175°C) for 18 to 22 minutes. Frost with the same cream cheese frosting for individually sized treats.
- Red Velvet Sheet Cake: Pour the entire batter into a greased 9×13-inch (23x33cm) pan and bake for 35 to 40 minutes. Frost directly in the pan for an easy party dessert.
- Red Velvet Bundt Cake: Pour the batter into a well-greased and cocoa-dusted Bundt pan. Bake at 325°F (163°C) for 50 to 60 minutes. Finish with a drizzle of cream cheese glaze instead of thick frosting.
- Chocolate Cream Cheese Frosting: Swap regular cream cheese frosting for a chocolate version by beating in 3 tablespoons of sifted cocoa powder or 2 oz of melted dark chocolate for a double-chocolate twist.
- White Velvet Version: Use a white cake mix and skip the red food coloring entirely. The sour cream and butter additions still produce an incredibly moist, velvety crumb. Try the dedicated White Velvet Cake for a specific guide.
- Lemon Cream Cheese Frosting: Add 1 tablespoon of fresh lemon juice and 1 teaspoon of lemon zest to the frosting for a bright, citrusy contrast to the cake.
You might also love this Lemon Velvet Cake for another stunning velvet-style layer cake.
Storage and Reheating
Cream cheese frosting contains dairy and must be stored properly to keep both the frosting and the cake at their best.
- Refrigerator: Store the frosted cake covered with a cake dome or loosely wrapped in plastic wrap in the refrigerator for up to 5 days. The cold actually helps the frosting set and the flavors meld together beautifully.
- Freezer: Freeze unfrosted cake layers individually by wrapping each tightly in two layers of plastic wrap and one layer of aluminum foil. Store in the freezer for up to 3 months. Thaw overnight in the refrigerator before frosting.
- Frosted cake: A frosted cake can also be frozen. Place uncovered in the freezer until the frosting is firm, then wrap carefully. Thaw overnight in the refrigerator.
- Room temperature: Because of the cream cheese frosting, do not leave the assembled cake at room temperature for more than 2 hours.
- Reheating: Individual slices can be microwaved for 8 to 10 seconds if you prefer a slightly warmer, softer texture.
Read Also: Pink Velvet Cake Recipe
Nutritional Facts
The values below are estimates based on 1 slice (1/12 of the whole cake including frosting) and will vary depending on the specific cake mix brand and exact measurements used.
| Nutrient | Per Slice (Approx.) |
|---|---|
| Calories | 480 kcal |
| Total Fat | 24g |
| Saturated Fat | 14g |
| Cholesterol | 95mg |
| Sodium | 420mg |
| Total Carbohydrates | 63g |
| Dietary Fiber | 0.5g |
| Sugars | 48g |
| Protein | 5g |
These values are approximate and should be used as a general guide rather than a precise nutritional reference.
Another delicious cake in a similar richness range is the Coconut Cake, which is equally indulgent and crowd-pleasing.
Health Benefits of Key Ingredients
Red velvet cake is undeniably an indulgent treat, but some of the core ingredients do bring a few nutritional notes worth mentioning.
Enjoy it in moderation as part of a balanced diet, and appreciate that a few of the supporting ingredients are doing more than just adding flavor.
- Eggs: Eggs are an excellent source of high-quality protein and provide essential vitamins including B12, B2, and D. They also contribute to the structure, moisture, and rise of the cake layers.
- Sour cream: Full-fat sour cream adds a small amount of calcium and probiotics, which support gut health. From a baking perspective, its fat content is what keeps this cake remarkably moist.
- Cocoa powder: Unsweetened cocoa powder contains flavonoids, a type of antioxidant linked to heart health. It also provides a small amount of iron and magnesium.
- Butter: Real butter from quality sources provides fat-soluble vitamins including A, D, E, and K. It also contributes to the richness and flavor depth of both the cake and frosting.
- Cream cheese: While rich in fat, cream cheese is also a source of protein and calcium. Using full-fat block cream cheese produces the best texture and the most satisfying, tangy frosting.
- Vanilla extract: Pure vanilla extract contains small amounts of antioxidants and adds genuine depth of flavor that artificial vanilla simply cannot replicate.
Another frosting option for this cake is Chocolate Buttercream Frosting if you want a richer, less tangy finish.
Frequently Asked Questions
1. Can I use a different brand of red velvet cake mix?
Yes, absolutely. Duncan Hines and Betty Crocker are the most popular options and both work well with this recipe. Pillsbury red velvet mix is also a reliable choice. The key additions (sour cream, butter, extra cocoa) will improve whichever brand you use. That said, avoid generic store-brand mixes if possible, as the flavor base is usually noticeably weaker.
2. Do I have to add red food coloring if the cake mix already has it?
No, you do not have to. The box mix already contains enough red coloring to give you a recognizably red cake. The optional extra food coloring simply deepens and intensifies the color for a more dramatic, vibrant result. Gel food coloring is strongly preferred over liquid for this step, as it gives richer color without thinning the batter.
3. Why is sour cream used instead of water in this recipe?
Most box mix instructions call for water, which does the bare minimum to hydrate the mix. Sour cream replaces part of that liquid and brings fat, moisture, and a very slight tang along with it. The fat in the sour cream coats the flour proteins, resulting in a softer, more tender crumb that stays moist for days longer than a standard box mix cake.
4. Can I make this as a single-layer cake or cupcakes instead?
Yes on both counts. For a single-layer 9×13-inch (23x33cm) sheet cake, pour all the batter into one greased and lined pan and bake at 350°F (175°C) for 35 to 40 minutes. For cupcakes, line two standard muffin tins with paper liners, fill each cup about two-thirds full, and bake at 350°F (175°C) for 18 to 22 minutes. The same cream cheese frosting recipe will frost the sheet cake or about 22 to 24 cupcakes.
5. How far in advance can I make this cake?
The cake layers can be baked up to 2 days in advance. Wrap each cooled layer tightly in plastic wrap and store at room temperature (if assembling within 24 hours) or in the refrigerator. The cream cheese frosting can be made 3 to 4 days in advance and stored in an airtight container in the refrigerator. Re-whip it briefly with a mixer before using. The fully assembled and frosted cake keeps well in the refrigerator for up to 5 days.
For more cake-mix magic, try this Easy Carrot Cake Recipe with Cake Mix.
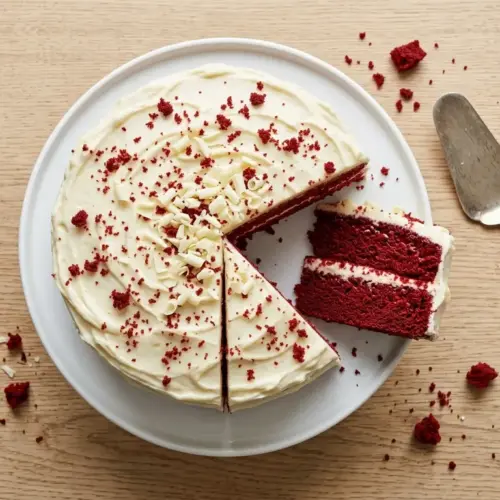
Red Velvet Cake with Cake Mix

Equipment
- Two 9-inch round cake pans
- Stand mixer or hand mixer
- Large mixing bowl
- Medium mixing bowl
- Rubber spatula
- Offset spatula - for frosting
- Parchment paper
- cake turntable - optional but very helpful for frosting
- Wire cooling racks
- Measuring cups and spoons
- Sifter or fine mesh strainer - for powdered sugar
- Toothpick or cake tester
- Wet cake strips - optional, for level layers
- Kitchen scale - optional, for precision
- Serrated knife - for leveling layers if needed
- Bench scraper - for smoothing frosting
- Cake board or serving plate
Ingredients
- 1 box red velvet cake mix - 15.25 oz / 432g, Duncan Hines or Betty Crocker recommended
- 3 large eggs - room temperature
- 1/2 cup unsalted butter - 113g / 4 oz, melted and cooled slightly
- 1 cup full-fat sour cream - 240ml / 8 fl oz
- 1/2 cup whole milk - 120ml / 4 fl oz
- 1 teaspoon pure vanilla extract - 5ml
- 1 tablespoon white vinegar - 15ml
- 1 tablespoon unsweetened cocoa powder - 7g
- 1 ounce red gel food coloring - 30ml, optional for a deeper color
For the Cream Cheese Frosting
- 16 oz full-fat block cream cheese - 450g, softened to room temperature
- 1/2 cup unsalted butter - 113g / 4 oz, softened to room temperature
- 4 cups powdered sugar - 480g / 1 lb, sifted
- 2 teaspoons pure vanilla extract - 10ml
- salt - a pinch
Instructions
- Preheat oven to 350°F (175°C). Grease two 9-inch round cake pans, line bottoms with parchment, grease parchment, and dust with cocoa powder. If using cake strips, wrap wet strips around the pans.
- In a large bowl, combine the red velvet cake mix and extra cocoa powder. Whisk to combine.
- In a medium bowl, whisk together eggs, melted butter, sour cream, whole milk, vanilla, vinegar, and gel food coloring (if using).
- Pour wet ingredients into dry. Beat on low until combined, scrape bowl, then beat on medium for 2 minutes. Batter will be thick.
- Divide batter evenly between prepared pans. Bake 28-34 minutes until a toothpick comes out clean. Cool in pans 10-15 minutes, then invert onto wire racks to cool completely.
- Beat softened cream cheese and butter on medium-high for 3-4 minutes until light and fluffy. Reduce speed, add sifted powdered sugar in three additions. Add vanilla and salt. Beat 2 more minutes until creamy.
- Place one cooled layer on a serving plate. Spread a generous layer of frosting (about 1/3 of total). Top with second layer. Apply a thin crumb coat over entire cake, refrigerate 20-30 minutes, then frost with remaining frosting.
Notes
- Room temperature dairy: Pull eggs, sour cream, and milk out 30-45 minutes before starting to prevent curdling.
- Crumb coat is essential: Don’t skip this step—it prevents red crumbs from bleeding into the white frosting and gives a polished finish.
- Cool completely before frosting: Cream cheese frosting will melt on a warm cake. Refrigerate cooled layers for 30 minutes to firm them up.
- Gel vs. liquid food coloring: Gel food coloring gives richer color without thinning the batter. AmeriColor’s “Red Red” is a baker’s favorite.
- Level your layers: If layers have domed tops, use a serrated knife to trim them flat before assembling for a stable, even cake.
- Beat the frosting long enough: Under-beaten cream cheese frosting is dense. Beat until visibly lighter and fluffy before adding powdered sugar.
- Storage: Store frosted cake covered in the refrigerator for up to 5 days. Unfrosted layers can be frozen for up to 3 months.
- Cupcake variation: Divide batter into lined muffin tins and bake at 350°F (175°C) for 18-22 minutes.
- Sheet cake option: Pour all batter into a greased 9×13-inch pan and bake for 35-40 minutes. Frost directly in the pan.
- Make ahead: Cake layers can be baked 2 days ahead and wrapped tightly at room temperature. Frosting can be made 3-4 days ahead and refrigerated.
Final Thoughts
This red velvet cake recipe with cake mix truly hits every note you want from a homemade cake: gorgeous layers, deep color, a moist and tender crumb, and that signature tangy cream cheese frosting.
It is the kind of recipe that impresses guests without overwhelming you.
Starting with a box mix takes the guesswork out of the chemistry, while the simple additions bring the whole thing to life in a way that tastes genuinely from-scratch.
Baking it for a birthday, a holiday, or just a random Tuesday that calls for something special, this cake always delivers.
Go ahead and give it a try. We would love to hear how yours turned out, what you changed, or how your family reacted when they saw that first dramatic slice. Drop a comment below and share your experience!
Recommended:
- White Velvet Cake Recipe
- Purple Velvet Cake Recipe
- Orange Velvet Cake Recipe
- Marble Cake Recipe
- Funfetti Cake Recipe
- Strawberry Cake Recipe
- Lemon Cake Recipe
- Italian Cream Cake Recipe
- Coffee Cake Recipe Using Cake Mix
- Coconut Cake with Cream of Coconut Recipe



