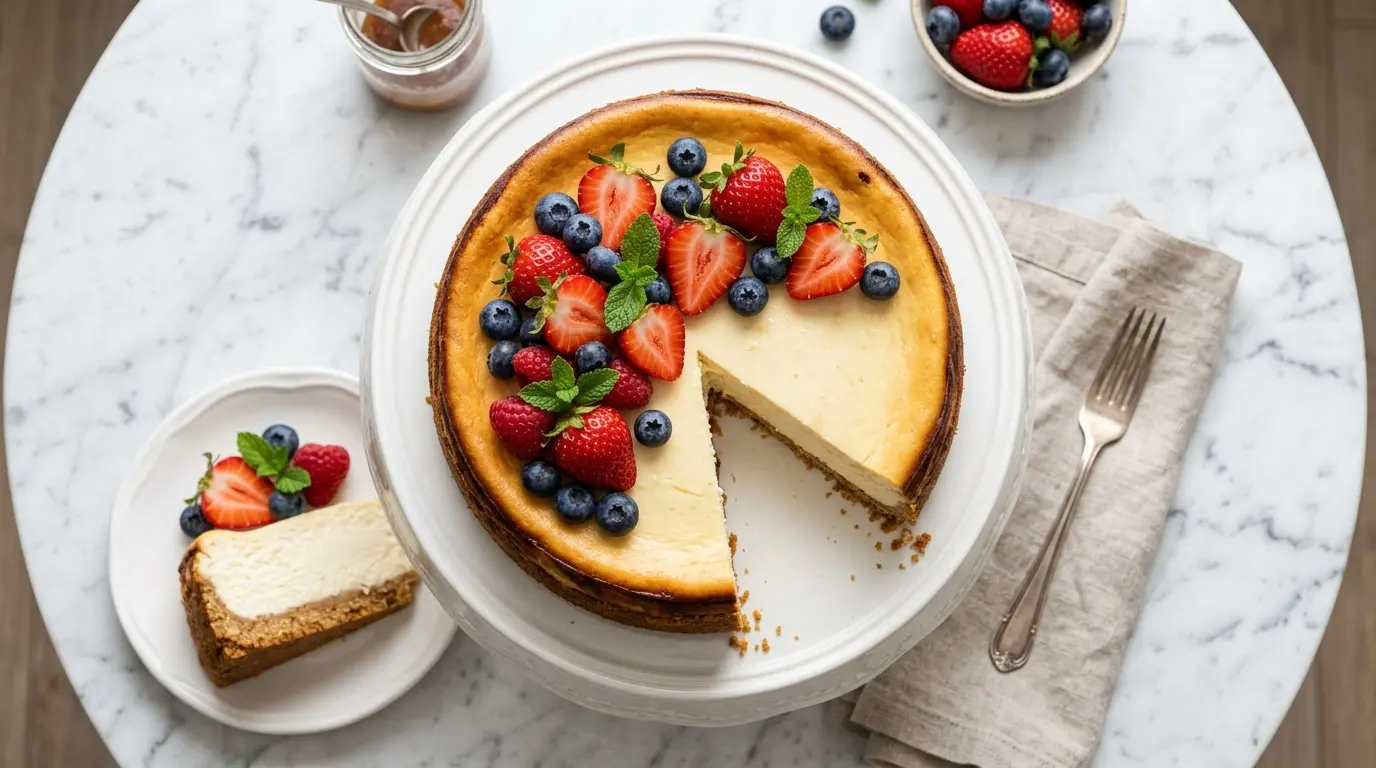
If you’ve been searching for the perfect baked cheesecake recipe, your hunt ends right here.
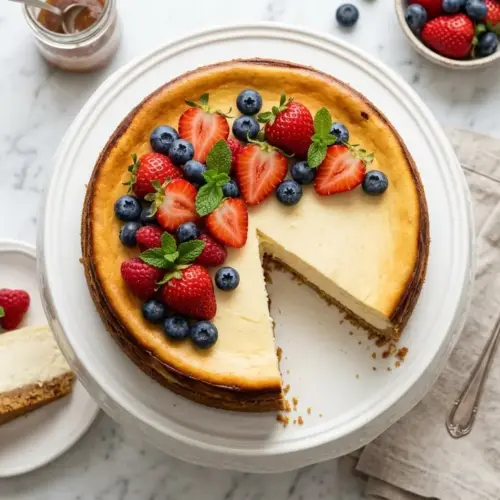
This is the classic version, the kind with a buttery graham cracker crust and a rich, silky cream cheese filling that bakes up smooth every single time.
It’s the cheesecake you picture when someone says “cheesecake.” No fancy techniques, no unusual ingredients. Just pure, satisfying comfort in every slice.
What makes a great baked cheesecake stand out from the crowd is all in the details: room-temperature ingredients for a lump-free batter, a low and slow bake for that signature creamy texture, and a proper chill in the fridge before slicing.
Follow this guide from start to finish and you’ll have a cheesecake that rivals anything from a bakery.
If you love a no-bake version too, check out this No Bake Cheesecake for a lighter, fuss-free alternative.
Why You’ll Love This Baked Cheesecake Recipe
This recipe hits every mark you want in a great cheesecake.
The texture is that perfect in-between: rich and creamy, but not so dense it feels heavy. The graham cracker crust adds just enough buttery crunch to contrast the smooth filling without overpowering it.
It’s surprisingly straightforward to pull off at home, even for beginner bakers.
You don’t need a water bath (though the option is explained in the tips), and the ingredients are simple pantry staples you likely already have.
- Crowd-pleasing flavor: Classic vanilla-kissed cream cheese filling that everyone loves
- Foolproof technique: Step-by-step instructions with beginner-friendly guidance
- Make-ahead friendly: The cheesecake actually tastes better after an overnight chill
- Versatile base: Dress it up with fruit, sauces, or toppings to suit any occasion
- No water bath required: A low oven temperature and proper cooling does all the work
You might also enjoy: New York Cheesecake
Ingredients
Every ingredient in this recipe plays a specific role in the final texture and flavor, so don’t make shortcuts. Using full-fat, brick-style cream cheese is non-negotiable for the right consistency.
- Graham cracker crust:
- 2 cups (200g) graham cracker crumbs (about 14–16 full crackers)
- 3 tablespoons (38g) granulated sugar
- 6 tablespoons (85g) unsalted butter, melted
- Cheesecake filling:
- 4 blocks (32 oz / 900g) full-fat brick cream cheese, at room temperature
- 1 cup (200g) granulated sugar
- 1 cup (240g) full-fat sour cream, at room temperature
- 1 teaspoon pure vanilla extract
- 2 teaspoons fresh lemon juice
- 3 large eggs, at room temperature
Another favorite: Philadelphia Cheesecake
Kitchen Equipment Needed
Having the right tools makes the whole process much smoother and helps you avoid common pitfalls like a soggy crust or uneven baking.
- 9-inch springform pan
- Stand mixer or hand electric mixer
- Large mixing bowl
- Measuring cups and spoons
- Rubber spatula
- Parchment paper
- Roasting pan (optional, for water bath)
- Aluminum foil (if using water bath)
- Wire cooling rack
- Sharp knife (for slicing)
Read Also: Strawberry Cheesecake Recipe
Recommended Products for This Recipe
These are products I genuinely recommend based on quality and performance. They make a real difference in getting your cheesecake right.
1. USA Pan 9-Inch Springform Pan
A quality springform pan with a leak-resistant seal is the single most important tool for this recipe. A loose or flimsy pan can result in a soggy or misshapen crust. This pan’s non-stick coating also helps the cheesecake release cleanly without cracking the sides.
2. KitchenAid Stand Mixer
Beating cream cheese to a smooth, lump-free consistency is much easier with a stand mixer. The paddle attachment is ideal for cheesecake batter because it creams the cheese thoroughly without incorporating too much air. Less air means fewer cracks.
3. Philadelphia Full-Fat Brick Cream Cheese (Pack of 4)
Most bakers agree that Philadelphia cream cheese gives the most consistent, creamy texture compared to store brands. It has higher fat content and a smoother consistency that translates directly to a better cheesecake.
4. OXO Good Grips Silicone Spatula
A flexible silicone spatula lets you scrape every bit of batter from the bowl and smooth the top of the cheesecake before baking. Clean sides and a smooth surface help the cheesecake bake evenly.
5. Nielsen-Massey Pure Vanilla Extract
Using a high-quality vanilla extract (not imitation) makes a noticeable difference in the flavor of a simple cheesecake. Since vanilla is one of the primary flavor notes, it’s worth using the good stuff.
The same smooth cream cheese filling technique used here also works beautifully in a Basque Cheesecake if you want to try a rustic, caramelized-top variation next.
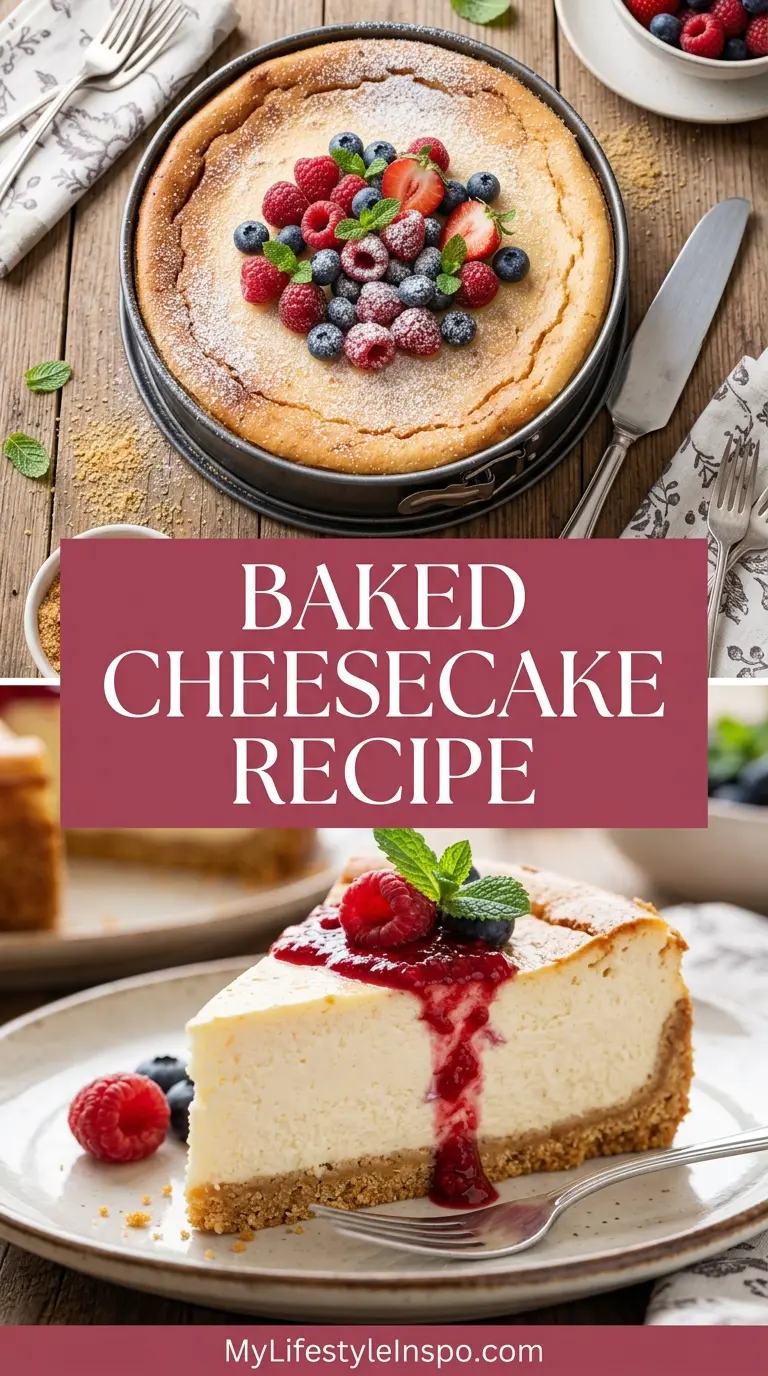
Step-by-Step Instructions
1. Prepare Your Ingredients and Equipment
- Take all refrigerated ingredients (cream cheese, sour cream, and eggs) out of the fridge at least 1–2 hours before you begin. Room-temperature ingredients blend together more smoothly and result in a lump-free, creamy batter.
- Preheat your oven to 325°F (163°C). Position the rack in the center of the oven for the most even heat distribution.
- Lightly grease the inside of your 9-inch springform pan with butter or non-stick spray.
- Cut a circle of parchment paper to fit the base of the pan and press it into the bottom. Then cut a long strip of parchment to line the sides. This is the single most effective way to prevent cracking as the cheesecake cools and shrinks.
- If you plan to use a water bath, wrap the outside of the springform pan tightly in two layers of heavy-duty aluminum foil, pressing it all the way up to the rim so no water can seep in.
2. Make the Graham Cracker Crust
- Place your graham crackers in a zip-lock bag and crush them with a rolling pin until you have fine, even crumbs. Alternatively, pulse them in a food processor. You need 2 cups (200g) of crumbs.
- In a medium mixing bowl, combine the graham cracker crumbs, 3 tablespoons (38g) of granulated sugar, and 6 tablespoons (85g) of melted butter. Stir everything together until the crumbs are evenly moistened. The mixture should look like wet sand and hold together when you press a small amount between your fingers.
- Pour the crumb mixture into your prepared springform pan.
- Using the flat bottom of a measuring cup or a glass, press the crumbs firmly and evenly across the bottom of the pan. Press a little up the sides if you prefer a full crust, but at minimum ensure the base is compact and uniform. A firmly pressed crust won’t crumble when you slice the cheesecake.
- Bake the crust in the preheated oven for 10 minutes until lightly golden and fragrant. Remove it from the oven and let it cool completely while you prepare the filling. Do not skip pre-baking the crust — it keeps it crisp under the filling.
3. Make the Cream Cheese Filling
- In the bowl of your stand mixer fitted with the paddle attachment (or using a hand mixer), beat the 4 blocks (32 oz / 900g) of room-temperature cream cheese on medium speed for 2–3 minutes until it is completely smooth, soft, and free of lumps. Scrape down the sides of the bowl often.
- Add 1 cup (200g) of granulated sugar and beat on medium speed for another 1–2 minutes until fully combined and creamy. Scrape down the sides and bottom of the bowl to make sure everything is evenly mixed.
- Add 1 cup (240g) of room-temperature sour cream, 1 teaspoon of pure vanilla extract, and 2 teaspoons of fresh lemon juice. Beat on low speed until just combined. The sour cream adds a slight tang that balances the richness of the cream cheese, while the lemon juice brightens the overall flavor.
- Add the 3 large room-temperature eggs one at a time, beating on the lowest speed after each addition just until the yolk disappears. Do not over-beat the eggs. Over-mixing at this stage whips in excess air, which causes the cheesecake to puff in the oven and then collapse and crack as it cools.
- Scrape down the sides of the bowl one final time with a rubber spatula and give the batter a gentle fold by hand to make sure there are no streaks.
- Your filling should be smooth, thick, and creamy with a pourable consistency. If you see any lumps, the cream cheese was not fully at room temperature. You can press the batter through a fine mesh sieve to remove lumps before pouring.
4. Assemble and Bake the Cheesecake
- Pour the cream cheese filling over the cooled crust in the springform pan. Use a rubber spatula to smooth the top into an even layer.
- Gently tap the pan on the counter a few times to release any large air bubbles. You can also run a toothpick or skewer through the top a few times to pop visible bubbles.
- Optional water bath method: Place the foil-wrapped springform pan inside a large roasting pan. Pour hot water into the roasting pan until it reaches about 1 inch (2.5 cm) up the sides of the springform pan. Carefully transfer the whole setup to the oven. The water bath creates a humid, gentle environment that promotes even baking and reduces cracking.
- Without water bath: Simply place the springform pan directly on the center oven rack.
- Bake at 325°F (163°C) for 55–70 minutes. The cheesecake is done when the edges are set and slightly puffed, but the center (about a 2-inch / 5 cm circle) still has a slight jiggle when you gently nudge the pan. It will continue to cook from residual heat as it cools. Do not wait until the entire surface looks firm, or you will overbake it.
5. Cool the Cheesecake Properly
- Once the baking time is up, turn the oven off completely. Leave the cheesecake inside with the oven door cracked open about 1 inch. Let it cool this way for 1 full hour. This slow, gradual temperature change is one of the most effective crack-prevention methods.
- After an hour in the oven, remove the cheesecake and run a thin butter knife or offset spatula around the edge to gently loosen it from the pan sides. This prevents the filling from clinging to the pan and tearing as it contracts.
- Let the cheesecake cool fully at room temperature on a wire rack for another 1–2 hours until it reaches room temperature.
- Once at room temperature, cover the top loosely with plastic wrap and transfer the cheesecake (still in the springform pan) to the refrigerator. Chill for at least 6 hours, but overnight is best. The cheesecake needs this time to fully set and develop its flavor.
6. Unmold and Slice
- Remove the cheesecake from the refrigerator. Run a thin knife around the inside edge of the pan one more time to ensure nothing is sticking.
- Gently release and remove the sides of the springform pan.
- Carefully peel away the parchment paper from the sides if it’s still attached.
- For clean, sharp slices, use a long, sharp knife. Dip the blade in a glass of warm water and wipe it dry between each cut. This prevents the filling from dragging.
- Serve chilled or allow it to sit at room temperature for 15–20 minutes for an even creamier texture.
Read Also: Blueberry Cheesecake Recipe
Tips for Success
Small adjustments at key moments can completely transform your results. These tips come straight from common cheesecake mistakes and how to avoid every one of them.
- Always use room-temperature ingredients. Cold cream cheese will not blend smoothly and you’ll end up with lumps in your filling. Pull everything from the fridge 1–2 hours early.
- Do not over-mix the eggs. Beat each egg in on the lowest speed and stop as soon as it’s combined. Extra air from mixing causes puffing and cracking.
- Pre-bake the crust. Skipping this step results in a soggy, soft crust that won’t hold up when sliced.
- Don’t open the oven door during baking. A sudden drop in temperature causes the cheesecake to crack. Resist the urge to check until you’re near the end of the bake time.
- Cool gradually. The slow oven-door-cracked cooling method is just as effective as a water bath for crack prevention.
- Chill overnight. The texture and flavor improve dramatically after a full overnight rest in the fridge.
- Use a sharp knife for slicing. Warm it in hot water and dry between cuts for bakery-style slices.
The same rule about room-temperature ingredients applies when making Lemon Cheesecake, too — it’s the key to a perfectly smooth filling every time.
Serving Suggestions
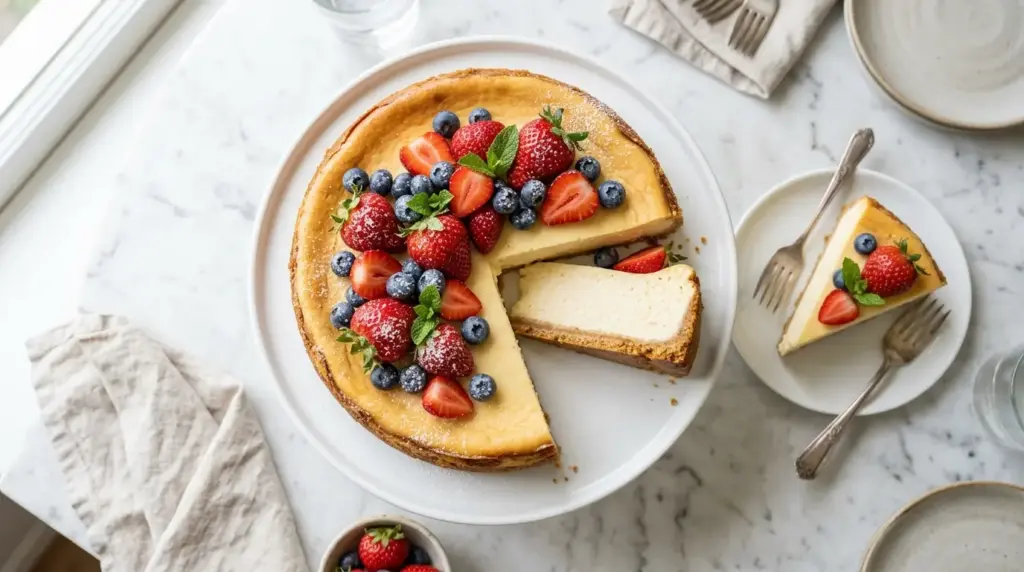
This baked cheesecake is stunning on its own, but a thoughtful topping takes it to the next level.
The plain cheesecake is the perfect canvas for both classic and creative accompaniments. A spoonful of Fresh Strawberry Sauce adds brilliant color and bright fruit flavor that cuts through the richness beautifully.
- Fresh mixed berries (strawberries, blueberries, raspberries)
- Homemade Caramel Sauce drizzled over the top
- Lemon Curd for a zesty, tangy contrast
- Chocolate Ganache poured over the top and allowed to set
- Vanilla Bean Ice Cream served alongside each slice
- Whipped cream piped around the edges
- A dusting of powdered sugar for an understated, elegant finish
Variations to Try
Once you’ve mastered the base baked cheesecake recipe, there are so many delicious directions you can take it. These are the most popular variations worth exploring.
- Oreo Cheesecake — swap the graham cracker crust for crushed Oreo cookies and fold crushed Oreos into the filling
- Pumpkin Cheesecake — blend pumpkin puree and warm spices into the filling for a fall-ready dessert
- Japanese Cheesecake — a lighter, cotton-soft version that uses whipped egg whites for an airy texture
- Mini Cheesecakes — bake the same filling in a muffin tin with cupcake liners for individual servings
- Churro Cheesecake — press crescent roll dough into the pan and coat the top with cinnamon sugar for a churro-inspired twist
- Lemon Cheesecake — add extra lemon zest and lemon curd to the filling for a bright, citrusy flavor
- Basque Cheesecake — intentionally bake at high heat for a deeply caramelized, crustless cheesecake
Read Also: Philadelphia No Bake Cheesecake Recipe
Storage and Reheating
Cheesecake stores beautifully and actually improves with a day or two of rest in the fridge, making it an ideal make-ahead dessert for gatherings.
- Refrigerator: Store the cheesecake covered in the springform pan or transferred to an airtight container for up to 5 days. Cover it tightly with plastic wrap to prevent it from absorbing fridge odors.
- Freezer: Cheesecake freezes exceptionally well for up to 3 months. Freeze it whole or in individual slices. To freeze, chill the cheesecake completely first, then wrap each slice (or the whole cheesecake) tightly in plastic wrap followed by a layer of aluminum foil.
- Thawing: Transfer the frozen cheesecake from the freezer to the refrigerator and let it thaw overnight. Do not thaw at room temperature, as this can make the texture watery.
- Reheating: Cheesecake is best served cold or at room temperature. To take the chill off, let it sit at room temperature for 20–30 minutes before serving. Do not microwave it, as this can alter the texture.
This cheesecake also freezes just as well as a Cheesecake Ice Cream Cake, making it a great option for prepping ahead for special occasions.
Nutritional Facts
The following values are approximate per serving, based on 12 slices.
| Nutrient | Per Serving |
|---|---|
| Calories | 420 kcal |
| Total Fat | 30g |
| Saturated Fat | 17g |
| Cholesterol | 125mg |
| Sodium | 310mg |
| Total Carbohydrates | 30g |
| Dietary Fiber | 0.5g |
| Total Sugars | 22g |
| Protein | 7g |
Nutritional values are estimates and will vary based on specific ingredients and portion sizes used.
Another dessert worth trying for a lighter option: Easy Crème Brûlée
Health Benefits of Key Ingredients
While cheesecake is an indulgent dessert, a few of its key ingredients do offer real nutritional value when enjoyed as part of a balanced diet.
Cream cheese provides a good source of fat-soluble vitamins A, D, E, and K, along with small amounts of calcium and protein that support bone health.
- Cream cheese: Contains riboflavin (B2) and vitamin A, which support healthy skin and immune function
- Eggs: One of the most nutrient-dense foods available, eggs deliver high-quality complete protein, choline for brain health, and vitamins B12 and D
- Sour cream: Provides live cultures in some brands that support gut health, along with calcium and vitamin B12
- Lemon juice: A small but meaningful source of vitamin C, which supports immune function and helps the body absorb iron
- Graham crackers: Provide small amounts of whole grain fiber, depending on the brand, which supports digestive health
For another elegant dessert that uses similarly simple ingredients, the Fruit Tart is a beautiful option packed with fresh fruit nutrition.
Frequently Asked Questions
1. Why did my cheesecake crack on top?
Cracking is almost always caused by one of three things: over-mixing the batter (especially the eggs), baking at too high a temperature, or cooling it too quickly.
To prevent cracks, beat the eggs in on the lowest speed and only until combined, bake at 325°F (163°C) or lower, and let the cheesecake cool gradually with the oven door cracked before moving it to room temperature.
2. How do I know when the cheesecake is done baking?
The cheesecake is done when the outer 2 inches of the filling are set and firm, but the very center (roughly a 2-inch / 5 cm circle) still jiggles slightly when you gently shake the pan.
It will look underdone in the center, but it will continue to cook from residual heat as it cools. If the entire surface is set and firm in the oven, it is overbaked.
3. Do I need a water bath for this recipe?
No, a water bath is not required for this recipe. Baking at a low temperature (325°F / 163°C) and cooling the cheesecake slowly in the oven with the door cracked achieves very similar results.
If you want extra insurance against cracking, especially for a very important occasion, a water bath is a worthwhile extra step. But it is entirely optional here.
4. Can I make this cheesecake ahead of time?
Absolutely. This cheesecake is ideal for making one or even two days ahead.
In fact, the flavor and texture both improve significantly after 24 hours in the refrigerator as everything firms up and the flavors meld together. Simply cover the chilled cheesecake and keep it refrigerated until ready to serve.
5. Can I use low-fat cream cheese?
Full-fat brick-style cream cheese is strongly recommended for this recipe. Low-fat or fat-free cream cheese contains more moisture and less fat, which results in a looser, wetter filling that may not set properly.
If you want a lighter version, explore a No Bake Cheesecake made with Greek yogurt or whipped cream instead.
Read Also: Best Cheesecake Recipe
Classic Baked Cheesecake

Equipment
- 9-inch springform pan
- Stand mixer - Or hand electric mixer
- Large mixing bowl
- Measuring cups
- Measuring spoons
- Rubber spatula
- Parchment paper
- Rolling Pin
- Zip-lock bag - For crushing graham crackers
- Roasting pan - Optional, for water bath
- Aluminum foil - Optional, if using water bath
- Wire cooling rack
- Sharp knife - For slicing
Ingredients
- 2 cups graham cracker crumbs - 200g, about 14–16 full crackers
- 3 tablespoons granulated sugar - 38g
- 6 tablespoons unsalted butter - 85g, melted
Cheesecake Filling
- 4 blocks full-fat brick cream cheese - 32 oz / 900g total, at room temperature
- 1 cup granulated sugar - 200g
- 1 cup full-fat sour cream - 240g, at room temperature
- 1 teaspoon pure vanilla extract
- 2 teaspoons fresh lemon juice
- 3 large eggs - At room temperature
Instructions
- Remove cream cheese, sour cream, and eggs from the fridge 1–2 hours before starting. Preheat oven to 325°F (163°C) and position rack in the center. Grease a 9-inch springform pan and line the bottom and sides with parchment paper.
- Crush graham crackers into fine crumbs using a rolling pin or food processor. In a bowl, combine crumbs with sugar and melted butter until it resembles wet sand. Press firmly into the bottom and slightly up the sides of the prepared pan.
- Bake the crust for 10 minutes until lightly golden. Remove and let cool completely while you prepare the filling.
- In a stand mixer with the paddle attachment, beat room-temperature cream cheese on medium speed for 2–3 minutes until smooth and free of lumps. Add sugar and beat for another 1–2 minutes until creamy.
- Add sour cream, vanilla extract, and lemon juice. Beat on low speed until just combined. Add eggs one at a time, beating on the lowest speed after each addition just until the yolk disappears. Do not over-mix.
- Pour the filling over the cooled crust and smooth the top. Gently tap the pan on the counter to release air bubbles. If using a water bath, wrap the pan in foil and place in a roasting pan with hot water.
- Bake at 325°F (163°C) for 55–70 minutes. The cheesecake is done when the edges are set but the center still has a slight jiggle. Turn off the oven and let it cool inside with the door cracked for 1 hour.
- Remove the cheesecake from the oven and run a knife around the edge to loosen it. Let it cool completely on a wire rack for 1–2 hours. Cover and refrigerate for at least 6 hours, preferably overnight.
- Release and remove the springform pan sides. For clean slices, dip a sharp knife in warm water and wipe it dry between each cut. Serve chilled or at room temperature for 15–20 minutes.
Notes
- Always use room-temperature ingredients. Cold cream cheese will not blend smoothly and you’ll end up with lumps in your filling. Pull everything from the fridge 1–2 hours early.
- Do not over-mix the eggs. Beat each egg in on the lowest speed and stop as soon as it’s combined. Extra air from mixing causes puffing and cracking.
- Pre-bake the crust. Skipping this step results in a soggy, soft crust that won’t hold up when sliced.
- Don’t open the oven door during baking. A sudden drop in temperature causes the cheesecake to crack. Resist the urge to check until you’re near the end of the bake time.
- Cool gradually. The slow oven-door-cracked cooling method is just as effective as a water bath for crack prevention.
- Chill overnight. The texture and flavor improve dramatically after a full overnight rest in the fridge.
- Use a sharp knife for slicing. Warm it in hot water and dry between cuts for bakery-style slices.
- Store cheesecake covered in the refrigerator for up to 5 days or freeze for up to 3 months.
- To freeze, chill the cheesecake completely first, then wrap tightly in plastic wrap followed by aluminum foil. Thaw overnight in the refrigerator.
Final Thoughts
A classic baked cheesecake recipe is one of those dishes that rewards patience and attention to detail.
When you follow the steps carefully, use quality ingredients, and give it enough time to chill, the result is genuinely spectacular: a silky, rich filling on a buttery, crisp crust that slices cleanly and tastes like something from a professional bakery.
This is the kind of recipe people ask for repeatedly. It’s the one that earns you compliments at every gathering.
Give this baked cheesecake recipe a try and I’d love to hear how it turned out for you. Drop a comment below with your topping choices or any tweaks you made. And if you loved it, share it with someone who deserves a really good slice of cheesecake.
Recommended:
- Strawberry Cheesecake
- Oreo Cheesecake
- Pumpkin Cheesecake
- Mini Cheesecake
- Japanese Cheesecake
- Churro Cheesecake
- Lemon Cheesecake
- Cheesecake Ice Cream Cake
- Cream Cheese Frosting
- Vanilla Bean Ice Cream



