Few desserts capture the warmth and sweetness of summer quite like a homemade peach pie recipe made with fresh, ripe peaches. That golden, bubbling filling nestled inside a flaky double crust is pure comfort on a plate, and once you make it from scratch, store-bought versions simply won’t compare.
This recipe walks you through the most classic, time-tested version of peach pie: a juicy, cinnamon-spiced filling made with real peaches, tucked inside a buttery double pie crust, and baked until golden brown and gloriously bubbly.
Fresh peaches make all the difference here. When peaches are at peak ripeness, their natural sugars intensify during baking, creating a deep, honeyed flavor that no canned fruit can replicate.
That said, if fresh peaches are out of season, frozen peaches work beautifully too. Just thaw and drain them well before using.
This is the kind of pie that fills your kitchen with an incredible aroma, earns requests for seconds, and genuinely feels like something you’d find cooling on a grandmother’s windowsill.
You might also enjoy: Peach Cobbler
Why You’ll Love This Peach Pie Recipe
This recipe is all about simplicity and flavor. There are no complicated techniques, no hard-to-find ingredients, and no guesswork.
The filling strikes a perfect balance of sweet and tart, with just enough sugar to enhance the peaches without masking them. A touch of cinnamon and lemon juice rounds everything out beautifully.
The double crust locks in all that juicy goodness while baking, so every slice is loaded with filling rather than falling apart. You also get that satisfying crunch from the golden, sugar-dusted top crust that makes each bite extra special.
It’s a dessert that works for every occasion, from a casual weeknight to a summer cookout to a holiday dinner table.
- Bursting with fresh peach flavor. Real peaches bake down into a jammy, intensely fruity filling that tastes unmistakably like summer.
- Perfectly thickened filling. The combination of cornstarch and letting the filling rest before baking ensures clean, sliceable slices every time.
- Flaky, buttery double crust. The crust is rich, golden, and holds together beautifully around that juicy filling.
- Beginner-friendly. Despite the homemade crust, this recipe is straightforward and forgiving, even for first-time pie makers.
- Make-ahead friendly. You can prep the dough and filling the day before, making it a low-stress dessert for entertaining.
- Versatile. Works with fresh, frozen, or even canned peaches, so you can make it year-round.
Read Also: Classic Apple Pie Recipe
Ingredients
Everything in this peach pie comes together from pantry staples and fresh fruit. The key is using ripe, fragrant peaches for maximum flavor. Here’s a quick tip: if your peaches smell sweet and floral at the stem end, they’re ready.
- 6 cups (about 1 kg / 2.2 lbs) fresh peaches, peeled and sliced into ½-inch wedges (about 6-7 medium peaches)
- ¾ cup (150 g) granulated white sugar
- 3 tablespoons (24 g) cornstarch (for thickening)
- 1 tablespoon (15 ml) fresh lemon juice
- ½ teaspoon ground cinnamon
- ¼ teaspoon ground nutmeg
- ¼ teaspoon fine salt
- 2 tablespoons (28 g) unsalted butter, cut into small cubes
- 2 premade or homemade pie crusts (for a 9-inch / 23 cm double-crust pie)
- 1 large egg
- 1 tablespoon (15 ml) whole milk (for egg wash)
- 1 tablespoon (12 g) coarse sugar or raw sugar (for topping, optional)
For a homemade crust, try the Flaky Pie Crust Recipe on the blog, which produces a beautifully tender, buttery shell perfect for this pie.
Kitchen Equipment Needed
You don’t need any special gadgets to pull off this pie. Most of these tools are likely already in your kitchen, but a few quality items really do make a difference. A proper 9-inch deep-dish pie plate, for example, ensures the filling has enough room without overflowing.
- 9-inch deep-dish pie plate
- Large mixing bowl
- Paring knife or peach peeler
- Rolling pin
- Pastry brush
- Wooden spoon or rubber spatula
- Measuring cups and measuring spoons
- Baking sheet (to catch any drips in the oven)
- Pie crust shield or strips of foil (to prevent over-browning the edges)
- Wire cooling rack
- Sharp knife or pastry wheel (for lattice top, optional)
Read Also: Easy Pie Crust Recipe
Recommended Products for This Recipe
These are products that will genuinely improve your pie-making experience, chosen based on quality and performance.
1. Emile Henry Ceramic Pie Dish
A quality ceramic pie dish distributes heat evenly, helping the bottom crust bake through completely without burning the edges. The deep dish size is ideal for a filling-loaded peach pie, and it goes beautifully from oven to table.
2. OXO Good Grips Pie Server
Once your peach pie is perfectly baked and cooled, a sturdy, wide pie server makes lifting those slices clean and effortless. It’s a small tool that makes a big difference in presentation.
3. Nordic Ware Pie Crust Shield
A silicone pie crust shield is one of the best investments for any pie baker. It sits around the edges during baking to prevent over-browning, so your crust comes out golden all over rather than burned at the rim.
4. USA Pan 9-Inch Deep Dish Pie Pan
This pan has a non-stick coating with a corrugated surface that promotes airflow under the crust, helping the bottom bake up crisp and golden rather than soggy, which is a common issue with fruit pies.
5. Prepara Peach Peeler
Peeling peaches by hand can be slippery and time-consuming. A dedicated fruit peeler with a serrated edge grips the skin cleanly, making prep much faster and less frustrating, especially when working with super ripe peaches.
Another delicious fruit dessert to try: Cherry Pie Recipe
Step-by-Step Instructions
1. Prepare the Peaches
- Start by bringing a large pot of water to a boil. While it heats up, fill a large bowl with ice water and set it nearby.
- Score a small “X” into the bottom of each peach using a paring knife, cutting just through the skin.
- Drop 2-3 peaches at a time into the boiling water and let them sit for 30-45 seconds, until the skin starts to loosen around the scored cuts.
- Use a slotted spoon to transfer the peaches immediately into the ice water bath. Let them sit for 1-2 minutes.
- Once cooled, peel the skins off by hand. They should slip right off with minimal effort.
- Pit each peach and slice into ½-inch (about 1.2 cm) wedges. Try to keep the slices uniform so they cook evenly.
- Place the sliced peaches into a large mixing bowl.
2. Make the Peach Filling
- Add the ¾ cup (150 g) granulated sugar, 3 tablespoons (24 g) cornstarch, 1 tablespoon (15 ml) lemon juice, ½ teaspoon cinnamon, ¼ teaspoon nutmeg, and ¼ teaspoon salt to the bowl of peaches.
- Gently toss everything together using a rubber spatula or wooden spoon until the peaches are evenly coated. Be gentle to avoid breaking up the peach slices.
- Let the filling sit at room temperature for 20-30 minutes, stirring once or twice. This draws out the natural peach juices and helps the cornstarch start dissolving into the liquid, which means a better-thickened filling once baked.
- While the filling rests, move on to preparing the crust.
3. Prepare the Pie Crusts
- If using store-bought refrigerated pie crusts, remove them from the refrigerator about 15 minutes before rolling so they’re pliable but still cold.
- If using homemade dough, take one disc out of the refrigerator. Lightly flour your work surface and your rolling pin.
- Roll the first disc into a circle about 12 inches (30 cm) in diameter and about ⅛ inch (3 mm) thick. Rotate the dough as you roll to keep it from sticking, and lift it occasionally to dust more flour underneath if needed.
- Carefully drape the rolled dough over your rolling pin, then gently lower it into the 9-inch (23 cm) pie plate. Press it gently into the bottom and sides, making sure there are no air pockets.
- Trim any excess dough hanging over the edge to about ½ inch (1.2 cm) beyond the rim. Don’t trim too close, as you’ll need some dough to seal and crimp the edges.
- Place the lined pie plate in the refrigerator while you prepare the top crust.
- Roll out the second disc of dough in the same way to a 12-inch circle. Set it aside on a lightly floured sheet of parchment paper.
4. Assemble the Pie
- Preheat your oven to 400°F (205°C). Place a baking sheet on the middle rack to preheat at the same time. The hot baking sheet under the pie will help the bottom crust cook through properly.
- Remove the pie plate from the refrigerator. Pour the rested peach filling into the bottom crust, spreading it into an even layer. Do not mound the filling too high in the center, as it won’t fully cook down during baking.
- Scatter the 2 tablespoons (28 g) of cold butter cubes evenly over the top of the filling. This adds richness and helps create a glossy, luscious sauce as the pie bakes.
- Carefully lay the second round of dough over the top of the filled pie.
- Press the edges of the top and bottom crust together to seal, then crimp the edges by pinching with your fingers or pressing down with a fork for a classic look.
- Use a sharp knife to cut 4-5 small slits or a decorative pattern into the top crust to allow steam to escape during baking. Without these vents, steam pressure can cause the crust to crack or burst.
5. Apply the Egg Wash and Sugar
- In a small bowl, whisk together the 1 large egg and 1 tablespoon (15 ml) of milk until fully combined.
- Using a pastry brush, lightly brush the egg wash over the entire surface of the top crust and along the crimped edges. This creates that beautiful golden-brown color as it bakes.
- Sprinkle 1 tablespoon (12 g) of coarse or raw sugar evenly over the top for a sparkling, slightly crunchy finish. This step is optional but highly recommended.
- If you have a pie crust shield or strips of aluminum foil, loosely cover just the outer crimped edges of the pie to prevent them from over-browning before the rest of the crust is done.
6. Bake the Pie
- Place the assembled pie directly onto the preheated baking sheet in the oven. The hot surface underneath helps ensure the bottom crust bakes through and doesn’t stay pale or soggy.
- Bake at 400°F (205°C) for 20 minutes. This initial high heat helps set the crust quickly.
- After 20 minutes, reduce the oven temperature to 375°F (190°C).
- Continue baking for an additional 30-35 minutes, until the crust is a deep golden brown and the filling is visibly bubbling through the slits. The filling needs to reach a full boil inside the pie for the cornstarch to activate and thicken properly.
- If the crust edges start browning too quickly before the filling is done, place a pie shield or foil strips over just the edges.
- Total baking time is typically 50-55 minutes. Every oven is slightly different, so keep an eye on it during the last 15 minutes.
7. Cool the Pie Completely
- Remove the pie from the oven and place it on a wire cooling rack.
- This is the hardest step: resist the urge to cut into it right away. Let the pie cool at room temperature for at least 2-3 hours before slicing. The filling continues to set as it cools, and cutting into a hot pie will result in a runny, soupy filling.
- For the cleanest slices, you can even let the pie cool completely, refrigerate it overnight, and then let it come back to room temperature before serving the next day.
This pie pairs wonderfully with a classic Caramel Sauce drizzled over each slice right before serving.
Tips for Success
A few key techniques make the difference between a good peach pie and a truly exceptional one. Paying attention to these details will save you from the most common problems, like a soggy bottom crust or a filling that pours out like soup when you slice it.
- Use ripe but firm peaches. Overripe, mushy peaches will break down too much and make the filling watery. Look for peaches that give slightly when pressed but still hold their shape.
- Don’t skip the resting period. Letting the filling sit for 20-30 minutes allows the peaches to release their juices, which then combine with the cornstarch to form a natural thickener. Skipping this step often results in a runny pie.
- Keep your pie crust cold. Cold fat in the dough creates steam during baking, which is what makes crusts flaky. If your dough gets too warm and soft while you’re working with it, pop it back in the fridge for 10-15 minutes before continuing.
- Bake on a preheated baking sheet. This is a professional trick that helps conduct direct heat to the bottom of the pie, ensuring the bottom crust bakes through completely.
- Cool completely before slicing. Cutting into a warm fruit pie will always give you a runny filling. Patience here is genuinely the biggest secret to a beautiful, sliceable pie.
- Add a pinch of nutmeg. Nutmeg in the filling adds a subtle warmth that complements peaches beautifully without overpowering them.
- Brush the crust with egg wash. It creates a shiny, golden finish. Using whole milk in the egg wash (rather than water) gives a slightly richer color.
You might also enjoy: Blueberry Pie Recipe
Serving Suggestions
Peach pie is spectacular on its own, but a few simple accompaniments can take it from delicious to absolutely memorable. Serve it at room temperature or ever so slightly warm for the best flavor and texture.
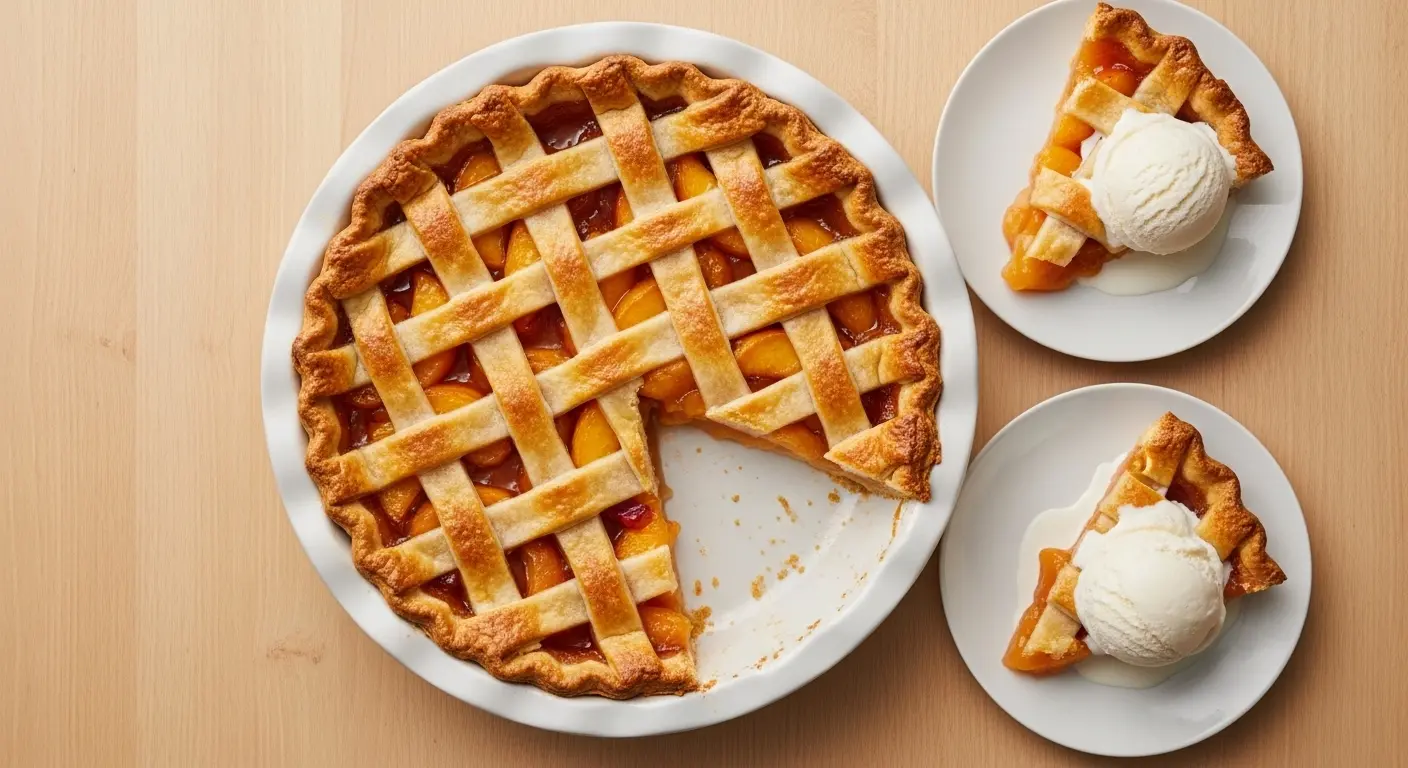
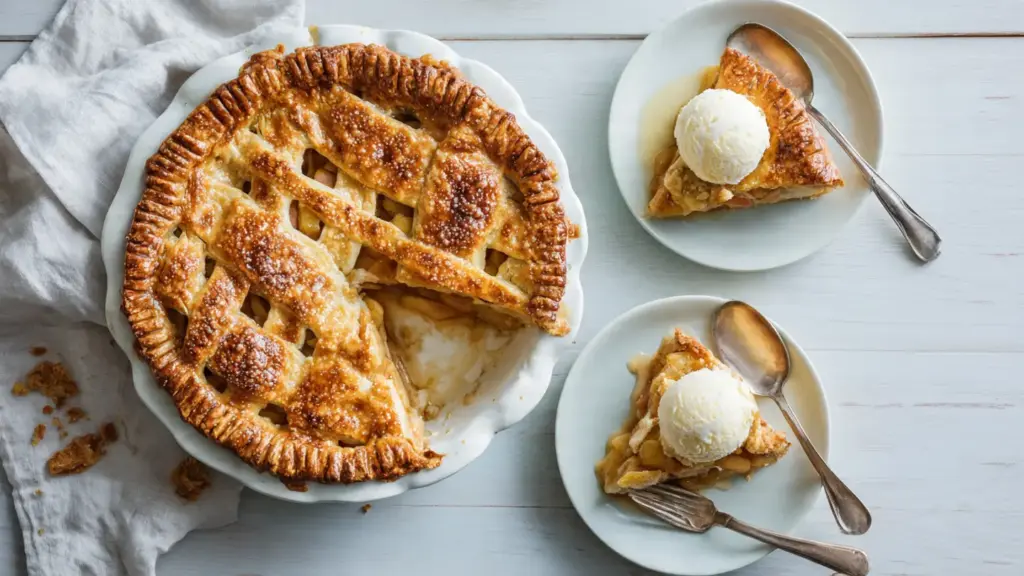
- A generous scoop of vanilla ice cream on the side is the classic pairing, and for good reason. The cold creaminess against the warm, spiced filling is simply unbeatable.
- Fresh whipped cream is another wonderful option, especially if you want something lighter. A dollop of lightly sweetened cream balances the sweetness of the filling beautifully.
- A drizzle of warm caramel sauce over each slice adds a rich, buttery note that takes the dessert to another level entirely.
- Pair slices with a refreshing Peach Smoothie with Yogurt for a full peach-themed dessert experience.
- For a Southern-style presentation, serve alongside a scoop of peach ice cream to double down on the star ingredient.
- A small sprinkle of flaky sea salt over the top of each slice before serving enhances all the sweet flavors beautifully.
- Offer a small pitcher of heavy cream on the side for guests to pour over their slice, a classic old-fashioned touch that works wonderfully.
Variations to Try
Once you’ve mastered the classic peach pie, there are plenty of delicious ways to put your own spin on it. These variations keep the spirit of the original but introduce new flavors or textures that are equally crowd-pleasing.
- Peach Raspberry Pie. Add 1 cup (125 g) of fresh raspberries to the filling along with the peaches. The raspberries add a bright, tart contrast that balances the sweetness of the peaches perfectly.
- Peach Blueberry Pie. Substitute 1-2 cups (150-300 g) of fresh blueberries for a portion of the peaches. The two fruits bake beautifully together and create a stunning purple-tinted filling.
- Brown Sugar Peach Pie. Replace the white sugar with light brown sugar for a deeper, more caramelized flavor in the filling. It gives the pie an almost toffee-like richness.
- Ginger Peach Pie. Add 1 teaspoon of freshly grated ginger to the filling. Fresh ginger adds a warm, slightly spicy note that pairs exceptionally well with ripe peaches.
- Peach Crumble Pie. Skip the top crust entirely and replace it with a buttery streusel topping made from flour, brown sugar, oats, and butter. This variation is quicker to assemble and gives you a crispy, crumbly contrast to the soft filling.
- Lattice Crust Peach Pie. Instead of a solid top crust, cut strips of dough and weave them into a classic lattice pattern. It’s visually stunning and also allows you to see when the filling is bubbling, which is the best indicator that the pie is done.
For another irresistible peach dessert, check out Peach Cobbler with Cake Mix
Storage and Reheating
Peach pie stores well and actually tastes even better the next day, once the filling has fully set and the flavors have had a chance to meld together. Here’s how to keep it fresh.
- Room temperature: Loosely cover the pie with plastic wrap or foil and store at room temperature for up to 2 days. This works best in cooler kitchen environments.
- Refrigerator: For longer storage, cover the pie tightly and refrigerate for up to 5-7 days. Bring it back to room temperature or warm briefly before serving for the best flavor and texture.
- Freezer: Peach pie freezes beautifully either before or after baking. To freeze unbaked, assemble the pie completely, wrap tightly in plastic wrap and then foil, and freeze for up to 3 months. Bake directly from frozen at 375°F (190°C) for 60-75 minutes. To freeze baked pie, cool completely first, then wrap and freeze for up to 2 months. Thaw overnight in the refrigerator before serving.
- Reheating: To warm a refrigerated or thawed slice, place it on a baking sheet in a 300°F (150°C) oven for 10-15 minutes. You can also microwave individual slices for 30-45 seconds, though the crust won’t be as crisp.
Read Also: Dutch Apple Pie Recipe
Nutritional Facts
Approximate values per serving, based on 8 slices per pie.
| Nutrient | Amount |
|---|---|
| Calories | ~340 kcal |
| Total Fat | 14 g |
| Saturated Fat | 5 g |
| Cholesterol | 35 mg |
| Sodium | 190 mg |
| Total Carbohydrates | 51 g |
| Dietary Fiber | 2.5 g |
| Total Sugars | 28 g |
| Protein | 3.5 g |
| Vitamin C | 8 mg |
| Potassium | 230 mg |
Note: Nutritional values are estimates and will vary depending on the pie crust used and exact serving size.
For another classic Southern-style pie, try the Sweet Potato Pie Recipe
Health Benefits of Key Ingredients
Peach pie is, of course, a dessert, but the star ingredient brings some genuine nutritional value to the table. It’s not health food, but it’s not entirely without merit either.
Fresh peaches are a good source of vitamin C, potassium, and dietary fiber. Vitamin C supports immune function and skin health, while potassium plays a role in heart health and blood pressure regulation. The fiber in peaches also supports healthy digestion and helps you feel satisfied.
Peaches also contain beta-carotene, which the body converts into vitamin A. Vitamin A supports vision, immune function, and skin integrity.
- Fresh peaches provide vitamin C, potassium, and beta-carotene, contributing to immune health, heart health, and skin vitality.
- Lemon juice adds a small dose of additional vitamin C and also helps prevent the peaches from oxidizing and browning before the pie bakes.
- Cinnamon contains anti-inflammatory compounds and has been studied for its potential role in supporting healthy blood sugar levels.
- Eggs (in the egg wash) contribute a small amount of protein, and the choline in eggs supports brain and liver health.
- Butter (in the filling) provides fat-soluble vitamins A, D, E, and K, which are necessary for many bodily functions and which help the body absorb nutrients from the fruit.
Another wonderful fruit dessert to explore: Fruit Tart Recipe
Frequently Asked Questions
1. Can I use canned or frozen peaches instead of fresh?
Yes, both work well when fresh peaches aren’t available. For frozen peaches, thaw them completely and drain off as much liquid as possible before mixing with the other filling ingredients. For canned peaches, use varieties packed in water or juice rather than heavy syrup, and drain them thoroughly. You may also want to reduce the added sugar slightly since canned peaches tend to be sweeter than fresh. The texture of the filling will be slightly softer than with fresh fruit, but the flavor is still wonderful.
2. Why did my peach pie filling turn out runny?
There are a few common culprits here. The most frequent reason is that the pie wasn’t allowed to cool completely before slicing. The filling continues to thicken as it cools, and cutting into a warm pie will always cause it to run. Another cause is not using enough cornstarch or not giving the filling time to rest and macerate before baking, which allows the juices to start combining with the thickener. Making sure the filling is bubbling vigorously through the vents before removing the pie from the oven is also key, as this signals the cornstarch has fully activated.
3. How do I keep the bottom crust from getting soggy?
There are several techniques that help. Baking on a preheated baking sheet puts direct heat under the pie and gets the bottom crust cooking immediately. Some bakers also brush the bottom crust with a thin layer of egg white before adding the filling, which creates a moisture barrier. Avoiding overly ripe, super juicy peaches also helps. Making sure the filling has had time to rest and expel excess moisture before going into the crust is another simple but effective step.
4. Can I make this peach pie ahead of time?
Absolutely. In fact, peach pie is an excellent make-ahead dessert because the filling sets beautifully overnight. You can bake the pie the day before serving, let it cool completely, cover it, and refrigerate it overnight. The next day, let it come to room temperature for about an hour before slicing and serving, or warm individual slices in the oven if you prefer it slightly warm.
5. Do I need to peel the peaches for peach pie?
While it is technically possible to leave the skins on, peeling is strongly recommended for a classic peach pie. The peach skins have a slightly tough, chewy texture that doesn’t break down completely during baking, which can create an unpleasant contrast in the otherwise smooth, tender filling. Blanching the peaches in boiling water for 30-45 seconds before peeling makes the process extremely quick and easy, and gives you a far more refined final texture in the filling.
For another beloved classic dessert, try the Easy Pecan Pie Recipe
Final Thoughts
A great peach pie recipe doesn’t need to be complicated. It just needs good fruit, a solid technique, and a little patience while it cools.
This recipe is exactly that: straightforward, deeply flavorful, and rooted in the kind of classic baking that never goes out of style. Every time a slice is served, it disappears fast.
Give this recipe a try the next time fresh peaches are in season, and you’ll see exactly why homemade peach pie holds such a beloved place in baking tradition. It’s one of those recipes you’ll come back to every single summer.
If you make this peach pie, please leave a comment below sharing how it turned out. Feel free to share your photos and any creative variations you tried as well!
Recommended:
- Peach Cobbler Recipe
- Classic Apple Crisp Recipe
- Blueberry Pie Recipe
- Classic Pumpkin Pie Recipe
- Banana Cream Pie Recipe
- Lemon Meringue Pie Recipe
- Key Lime Pie Recipe
- From Scratch Pumpkin Pie Recipe
- Classic Pecan Pie Recipe
- Fruit Salad Recipe


