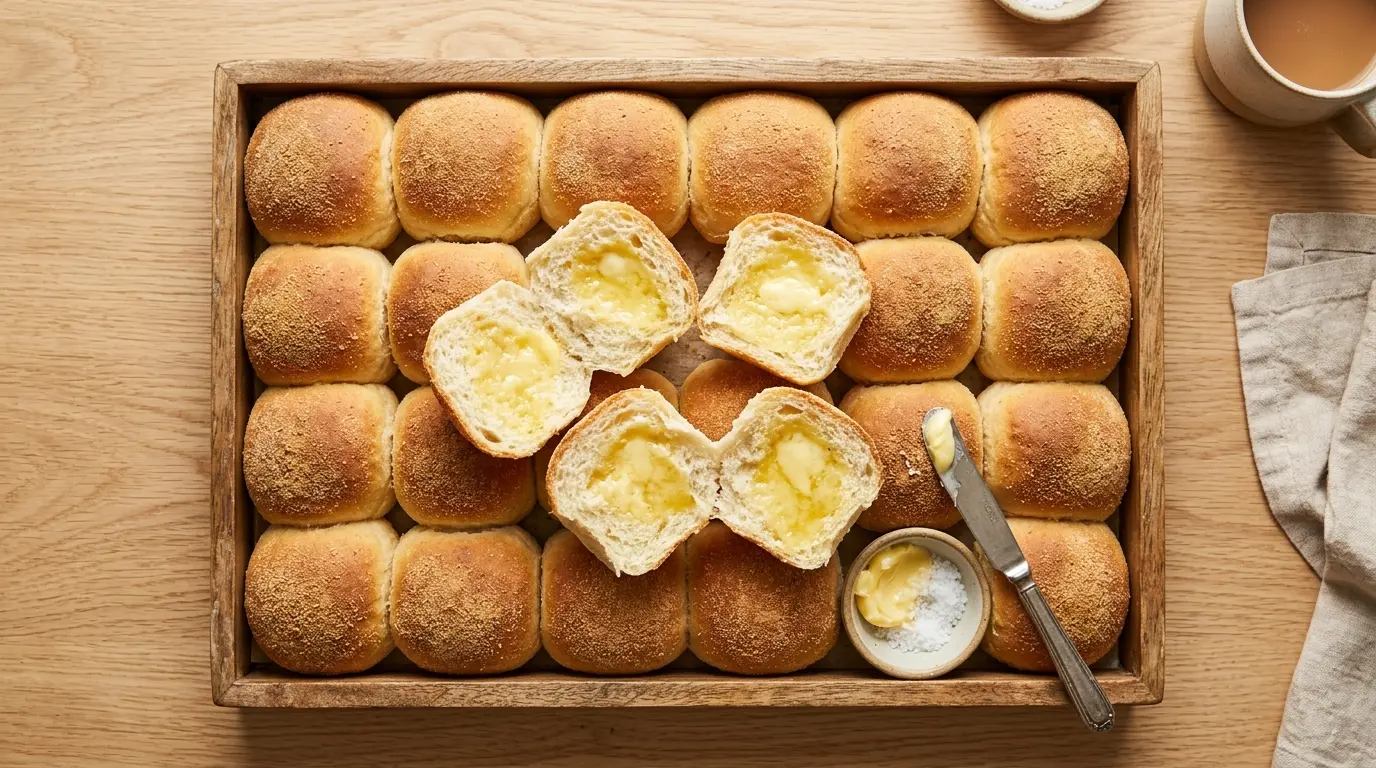
If you’ve ever walked past a Filipino bakery early in the morning and caught that warm, yeasty scent drifting out the door, you already know what pandesal is all about. This pandesal recipe brings that same comforting bakehouse magic straight to your kitchen, no special equipment required.
Pandesal, which literally translates to “salt bread” from Spanish, is actually a slightly sweet, impossibly soft bread roll coated in fine breadcrumbs. It is the most beloved breakfast staple in the Philippines, eaten by millions every single day.
This recipe uses a combination of all-purpose flour and bread flour, which is the secret behind that perfect balance of soft, pillowy interior with a delicate, toasted crust. The bread flour adds just enough chew and structure, while the all-purpose flour keeps it light and tender.
Making these at home takes a bit of time because of the rising stages, but the hands-on effort is genuinely minimal. Once you pull a tray of golden pandesal from the oven, you’ll understand why Filipinos consider this their ultimate comfort bread.
This recipe makes about 16 to 20 rolls, depending on how you size them. They are perfect for breakfast, merienda (afternoon snack), or any time you want something soft, warm, and satisfying.
If you love soft, milk-enriched bread rolls, you’ll also enjoy this Japanese Milk Bread Recipe for another pillowy loaf worth bookmarking.

Why You’ll Love This Pandesal Recipe
Making pandesal at home gives you a freshness that even the best bakery can’t always match.
These rolls are soft, lightly sweet, and endlessly versatile. You can eat them plain, stuff them with cheese, slather them with butter, or dip them in hot coffee or chocolate.
The ingredient list is short and uses pantry staples you likely already have. No exotic ingredients, no complicated techniques.
Both beginner bakers and seasoned bread makers will find this recipe easy to follow and reliably delicious.
The rolls reheat beautifully, so you can make a big batch on Sunday and enjoy them throughout the week.
There is something deeply nostalgic about the smell of pandesal baking. Even if you did not grow up in the Philippines, this bread has a way of feeling like home the moment you take a bite.
You might also enjoy: Soft Dinner Rolls Recipe
Ingredients
You only need a handful of everyday baking ingredients for this recipe. The combination of two flour types is what gives authentic pandesal its signature texture.
- 2 cups (250g) all-purpose flour, plus more for kneading
- 2 cups (250g) bread flour
- 2 1/4 teaspoons (7g / 1 packet) instant dry yeast
- 1/2 cup (100g) granulated white sugar
- 1 teaspoon salt
- 1 teaspoon baking powder
- 1 1/4 cups (300ml) warm whole milk (about 110°F / 43°C)
- 1 large egg, room temperature
- 5 tablespoons (70g) unsalted butter, melted
- 1 tablespoon neutral cooking oil (vegetable or canola)
- 1/2 cup (50g) plain fine breadcrumbs, for coating
Read Also: Hokkaido Milk Bread Recipe
Kitchen Equipment Needed
You don’t need anything fancy for this recipe. Here is what you will want to have on hand before you start.
- Large mixing bowl
- Stand mixer with dough hook attachment (or strong hands for kneading)
- Measuring cups and spoons
- Kitchen scale (recommended for accuracy)
- Small bowl (for activating yeast or mixing wet ingredients)
- Wooden spoon or spatula
- Plastic wrap or clean kitchen towel
- Rimmed baking sheet
- Parchment paper or silicone baking mat
- Wire cooling rack
- Pastry brush (optional, for brushing tops)
- Bench scraper or sharp knife (for dividing dough)
Another favorite: Dinner Rolls Recipe
Recommended Products for This Recipe
These are products I genuinely recommend based on quality and performance. They can make a real difference in how your pandesal turns out.
1. KitchenAid Artisan Stand Mixer
A stand mixer with a dough hook takes the effort out of kneading and ensures your dough gets properly developed every time. Using one means you will get consistent, evenly kneaded dough without tiring out your arms. It is one of those kitchen investments that pays off every single time you bake bread.
2. King Arthur Bread Flour
The quality of your bread flour matters more than you might think. King Arthur Bread Flour has a consistently high protein content that gives your pandesal that ideal chewy, springy texture on the inside. It is the flour many professional bakers trust, and it makes a noticeable difference in the final roll.
3. Nordic Ware Natural Aluminum Baker’s Half Sheet
An even, heavy-gauge baking sheet distributes heat uniformly so your pandesal bakes evenly without dark bottoms or undercooked centers. Nordic Ware’s aluminum half-sheet is a favorite among home bakers for exactly this reason. Pair it with parchment paper and you have the ideal setup for baking a perfect tray of rolls.
4. OXO Good Grips Bench Scraper
Dividing your dough into even pieces is much easier with a proper bench scraper. It lets you cut the dough cleanly without stretching or tearing it, which helps keep the rolls uniform in size for even baking. It doubles as a helpful tool for gathering up flour and dough scraps from your work surface too.
This recipe pairs wonderfully with a classic Brioche Recipe if you want to explore more enriched dough baking.

Step-by-Step Instructions
Step 1: Activate the Yeast
- Pour the warm milk into a small bowl. It should feel comfortably warm on your wrist, around 110°F (43°C). Too hot will kill the yeast; too cold and it won’t activate.
- Add 1 tablespoon of the measured sugar and the instant dry yeast to the warm milk.
- Stir gently until the yeast and sugar dissolve into the milk.
- Set the bowl aside for 5 to 10 minutes. You are looking for the mixture to become frothy and slightly foamy on top. This tells you the yeast is active and alive.
- If no foam appears after 10 minutes, your yeast may be old or your milk was too hot. Start over with fresh yeast before proceeding.
Step 2: Combine the Dry Ingredients
- In the bowl of your stand mixer (or a large mixing bowl if kneading by hand), add the all-purpose flour and bread flour.
- Add the remaining sugar (the rest of the 1/2 cup minus the 1 tablespoon used in Step 1), the salt, and the baking powder.
- Whisk or stir the dry ingredients together with a wooden spoon until evenly combined. Make a small well in the center of the flour mixture to prepare for adding the wet ingredients.
Step 3: Form the Dough
- Pour the frothy yeast-milk mixture into the well of the dry ingredients.
- Add the egg, the melted butter, and the tablespoon of cooking oil into the same bowl.
- If using a stand mixer, attach the dough hook and mix on low speed (speed 2) until the ingredients begin to come together, about 2 minutes.
- Scrape down the sides of the bowl as needed to incorporate any dry flour clinging to the edges.
- Once the dough starts to come together, increase to medium speed (speed 4) and mix for 8 to 10 minutes. The dough should become smooth, elastic, and slightly tacky but not sticky.
- If mixing by hand, stir with a wooden spoon until a shaggy dough forms, then turn it out onto a lightly floured surface and knead for 10 to 12 minutes by hand.
Step 4: Windowpane Test
- To check if the dough is properly kneaded, pinch off a small piece (about the size of a golf ball).
- Gently stretch it between your fingers into a thin, flat sheet.
- If the dough stretches into a translucent “windowpane” without tearing, the gluten is developed enough and you are ready to move on.
- If the dough tears immediately, knead for another 2 to 3 minutes and test again.
Step 5: First Rise
- Lightly coat a large clean bowl with a thin layer of cooking oil or cooking spray.
- Shape the dough into a smooth ball and place it in the oiled bowl, turning it once so all sides are coated.
- Cover the bowl tightly with plastic wrap or a clean kitchen towel.
- Place the bowl in a warm spot in your kitchen, ideally around 75°F to 85°F (24°C to 29°C).
- Let the dough rise for 1 to 1.5 hours, or until it has doubled in size. If your kitchen is cool, you can place the covered bowl in an oven with just the light on (not the heat) to create a slightly warmer environment.
Step 6: Divide and Shape the Rolls
- Once the dough has doubled, punch it down gently with your fist to release the gas.
- Turn the dough out onto a lightly floured surface.
- Using a bench scraper or sharp knife, divide the dough into 2 equal portions.
- Roll one portion into a smooth log shape, about 8 to 10 inches long and roughly 3 to 4 inches in diameter.
- Using the bench scraper or knife, cut the log into 8 to 10 equal pieces. Repeat with the second portion so you have 16 to 20 pieces total.
- For the traditional pandesal shape, lightly roll each cut piece into a smooth oval or short cylinder, keeping it compact and tight. Do not over-handle the dough or it will become tough.
Step 7: Coat with Breadcrumbs and Arrange
- Pour the fine breadcrumbs into a shallow bowl or plate.
- Roll each shaped piece of dough in the breadcrumbs, pressing gently so the crumbs adhere to all sides.
- Line one or two rimmed baking sheets with parchment paper.
- Arrange the breadcrumb-coated rolls on the prepared baking sheets with the cut side up, spacing them about 1/2 inch (1.25 cm) apart. They should be touching or nearly touching, which helps them keep their shape as they rise and gives them that classic pandesal look.
Step 8: Second Rise
- Cover the trays loosely with plastic wrap or a clean kitchen towel.
- Let the shaped rolls proof for another 45 minutes to 1 hour at room temperature, until they puff up noticeably and look pillowy.
- While the rolls are on their second rise, preheat your oven to 375°F (190°C). Make sure your oven is fully preheated before you put the rolls in.
Step 9: Bake
- Once the oven is preheated and the rolls have finished their second rise, place the baking sheets in the oven.
- Bake for 13 to 16 minutes, or until the tops and sides of the pandesal are a light golden brown.
- The rolls should sound hollow when tapped gently on the bottom. Avoid overbaking as this will dry out the soft interior.
- Remove the trays from the oven and allow the pandesal to cool on the baking sheet for 5 minutes before transferring to a wire rack.
- Pandesal is best served warm, ideally straight from the oven. Eat as is, or slice open and fill with your favorite ingredients.
The soft, pillowy texture in this recipe is also what makes Chicken Adobo Recipe such a natural pairing, as the bread is perfect for soaking up that rich, savory sauce.
Tips for Success
Getting consistently great pandesal comes down to a few key habits that make a real difference, especially for first-time bread bakers.
- Use warm, not hot, milk. Milk above 120°F (49°C) will kill the yeast. Aim for 105°F to 110°F (40°C to 43°C). If you don’t have a thermometer, it should feel comfortably warm when you dip a finger in, not scalding.
- Do not skip the windowpane test. Under-kneaded dough leads to dense, heavy rolls. Proper gluten development is what gives pandesal its signature soft, stretchy bite.
- Measure flour by weight when possible. Too much flour is the most common reason pandesal turns out dry and dense. A kitchen scale takes the guesswork out completely.
- Give the dough enough rise time. Rushing the rise produces flat, tight rolls. If your kitchen is cool, allow extra time. The dough is ready when it has visibly doubled, not just puffed a little.
- Use fine breadcrumbs for coating. Coarse crumbs will not adhere well and can create an unpleasant texture. Look for Japanese-style panko or pulse plain crackers in a food processor if fine crumbs are unavailable.
- Bake rolls close together. Traditional pandesal baked side by side rises upward rather than outward, producing taller, fluffier rolls with soft pull-apart sides.
- Don’t overbake. Pull the rolls from the oven as soon as they turn light golden. The crust should be toasted but not crisp, and the inside should stay moist and soft.
This technique of working with enriched doughs is also very useful when making a Challah Recipe, another beautiful yeast bread worth exploring.
Serving Suggestions
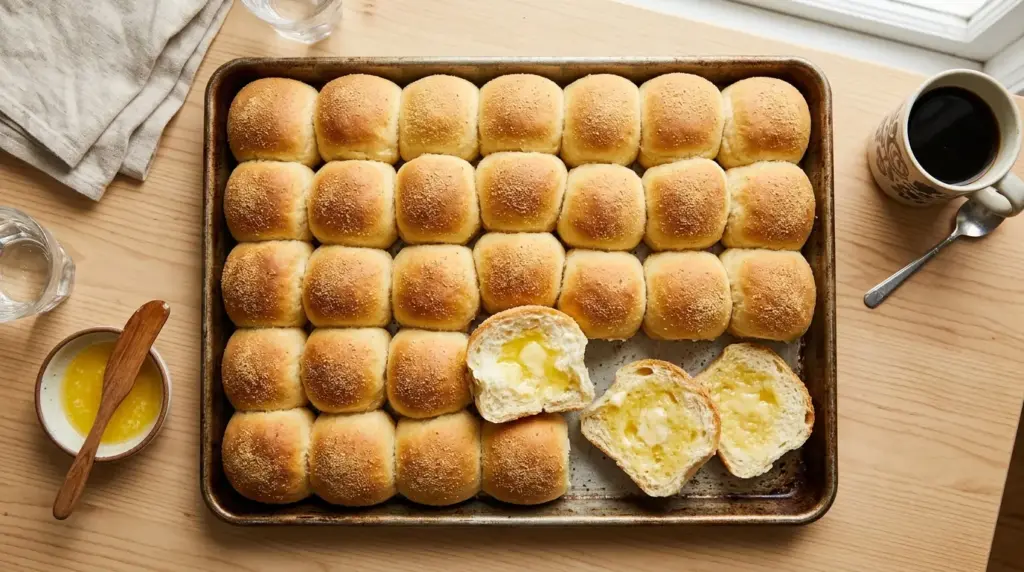
Pandesal is one of those rare breads that works equally well as a standalone snack and as the perfect accompaniment to a full meal.
In Filipino households, the most classic way to enjoy fresh pandesal is with a cup of hot coffee or hot chocolate for dipping. The slightly sweet, soft roll absorbs the liquid beautifully without falling apart.
You can also slice the rolls open and fill them with all kinds of things. Popular Filipino fillings include processed cheese (like Cheez Whiz), peanut butter, coconut jam (macapuno), scrambled eggs, or leftover meat. For a simple but satisfying morning, a warm pandesal stuffed with butter and a slice of sharp cheddar is hard to beat.
- Sliced open and filled with Scrambled Eggs and cheese for a Filipino-style breakfast sandwich
- Served alongside a bowl of Chicken Tinola for a comforting Filipino lunch
- Spread with Honey Butter for an indulgent, simple treat
- Dipped into a hot cup of coffee or dark hot chocolate in the traditional Filipino style
- Stuffed with leftover braised meat, like shredded adobo chicken or flaked tuna
Variations to Try
Once you have mastered the classic version, there are plenty of fun ways to put a new spin on this recipe.
- Ube Pandesal: Add 2 to 3 tablespoons of ube halaya (purple yam jam) and a few drops of ube extract to the dough for a vibrant purple color and subtly sweet, earthy flavor.
- Pandan Pandesal: Replace 2 to 3 tablespoons of the milk with pandan extract or pandan juice for a beautiful pale green color and a fragrant, vanilla-like aroma.
- Cheese-Stuffed Pandesal: Before shaping, flatten each portion of dough and place a small cube of sharp cheddar or cream cheese in the center, then seal and roll closed. The cheese melts inside as it bakes.
- Malunggay (Moringa) Pandesal: Add 2 tablespoons of powdered moringa leaves to the flour mixture for a nutritious, slightly earthy green variation popular in many Philippine bakeries.
- Whole Wheat Pandesal: Substitute 1 cup of the all-purpose flour with whole wheat flour for a heartier texture and nuttier flavor. The rolls will be slightly denser but still delicious.
- Chocolate Pandesal: Mix in 3 tablespoons of cocoa powder to the dry ingredients and a handful of chocolate chips for a sweeter, dessert-style variation.
You might also enjoy: Filipino Hot Cake Recipe
Storage and Reheating
Pandesal is best eaten fresh and warm on the day it is made, but it stores and reheats quite well with a little care.
- Room temperature: Place completely cooled pandesal in an airtight container or zip-lock bag. Store at room temperature for up to 2 to 3 days.
- Refrigerator: You can refrigerate pandesal in an airtight container for up to 5 days, though the texture will be firmer. Always reheat before eating.
- Freezer: Allow the rolls to cool completely, then transfer to a freezer-safe zip-lock bag, removing as much air as possible. Freeze for up to 1 month.
- Reheating in the microwave: Wrap the roll in a slightly damp paper towel and microwave on high for 20 to 30 seconds. This restores the softness beautifully.
- Reheating in the oven: Place rolls on a baking sheet and warm in a 325°F (165°C) oven for 5 to 8 minutes until heated through and the crust crisps up slightly.
- Reheating from frozen: Thaw overnight in the refrigerator or at room temperature for 1 to 2 hours, then reheat as above.
Read Also: Sweet Dinner Rolls Recipe
Nutritional Facts
The following values are approximate per roll, based on a batch of 18 rolls.
| Nutrient | Per Roll (approx.) |
|---|---|
| Calories | 185 kcal |
| Carbohydrates | 32g |
| Protein | 5g |
| Fat | 4g |
| Saturated Fat | 2g |
| Cholesterol | 20mg |
| Sodium | 180mg |
| Fiber | 1g |
| Sugar | 8g |
| Calcium | 40mg |
| Iron | 1.5mg |
Note that nutritional values will vary depending on the exact brands used, roll size, and any optional fillings or toppings added.
This recipe uses Whole Wheat Bread Recipe principles for those looking to explore healthier bread alternatives alongside this classic.
Health Benefits of Key Ingredients
While pandesal is a treat bread meant to be enjoyed, several of its core ingredients do bring some real nutritional value to the table.
The combination of whole milk, eggs, and butter in this recipe makes it a moderately good source of protein, fat-soluble vitamins, and calcium. Here is a closer look at what each key ingredient contributes.
- Bread flour and all-purpose flour provide carbohydrates for sustained energy, along with plant-based protein and a small amount of iron and B vitamins. Using a combination of the two creates a more balanced texture than using only one type.
- Eggs are one of the most nutrient-dense ingredients in baking. They supply complete protein, choline (which supports brain health), vitamin D, and riboflavin. The egg also helps the dough rise higher and stay moist longer.
- Whole milk adds calcium for bone health, potassium, vitamin B12, and fat that contributes to the soft, rich texture of the rolls. It also helps the yeast perform optimally during fermentation.
- Butter provides fat-soluble vitamins A, D, E, and K2 in small amounts. The fat in butter is also what makes the crumb in pandesal so tender and the flavor so satisfying.
- Yeast is not just a leavening agent. Active yeast is a natural source of B vitamins, including folate and B6, and it produces compounds during fermentation that may improve the digestibility of the bread.
Read Also: Multigrain Bread Recipe
Frequently Asked Questions
1. Why is my pandesal dense and heavy instead of soft and fluffy?
The most common causes are not kneading the dough long enough, using too much flour, or not giving it enough time to rise.
Make sure your dough passes the windowpane test before the first rise. Also, measure flour by weight if possible, as too much flour is the single biggest reason pandesal turns out brick-like.
2. Can I use active dry yeast instead of instant yeast?
Yes, you can. Active dry yeast simply needs to be proofed in warm liquid first, which you can do by letting it sit in the warm milk with a pinch of sugar for 5 to 10 minutes until it foams.
Use the same amount (2 1/4 teaspoons), and proceed with the recipe as written once the yeast is active.
3. What breadcrumbs should I use for coating pandesal?
Use fine plain breadcrumbs for the most authentic result. Some Filipino bakers use crushed cream crackers or Marie biscuits for a slightly sweeter coating.
Panko (Japanese breadcrumbs) can work in a pinch, but they are coarser and won’t cling as evenly to the dough surface.
4. Can I make pandesal dough the night before?
Absolutely. After the first rise, punch down the dough, shape the rolls, coat them in breadcrumbs, and arrange them on the baking sheet.
Cover tightly with plastic wrap and refrigerate overnight. In the morning, take them out and let them sit at room temperature for 30 to 45 minutes before baking as directed.
5. Why does my pandesal get hard the next day?
Pandesal dries out quickly at room temperature if left uncovered. Always store rolls in an airtight container or sealed bag.
Reheating with a damp paper towel in the microwave is the fastest and most effective way to bring them back to their original softness.
This recipe complements a batch of Potato Rolls Recipe perfectly if you enjoy soft, tender bread rolls with different flavor profiles.
Pandesal

Equipment
- Large mixing bowl
- Stand mixer with dough hook attachment - or use strong hands for kneading
- Measuring cups and spoons
- Kitchen scale - recommended for accuracy
- Wooden spoon or spatula
- Plastic wrap or clean kitchen towel
- Rimmed Baking Sheet - or two baking sheets
- Parchment paper or silicone baking mat
- Wire cooling rack
- Pastry brush - optional, for brushing tops
- Bench scraper or sharp knife - for dividing dough
Ingredients
- 2 cups all-purpose flour - 250g, plus more for kneading
- 2 cups bread flour - 250g
- 2.25 teaspoons instant dry yeast - 7g / 1 packet
- 0.5 cup granulated white sugar - 100g
- 1 teaspoon salt
- 1 teaspoon baking powder
- 1.25 cups warm whole milk - 300ml, about 110°F / 43°C
- 1 large egg - room temperature
- 5 tablespoons unsalted butter - 70g, melted
- 1 tablespoon neutral cooking oil - vegetable or canola
- 0.5 cup fine breadcrumbs - 50g, plain
Instructions
- Pour warm milk into a bowl and add 1 tablespoon sugar and yeast. Stir gently and let stand for 5-10 minutes until frothy and foamy on top.
- In the bowl of a stand mixer, combine all-purpose flour, bread flour, remaining sugar, salt, and baking powder. Whisk to combine and make a well in the center.
- Pour the yeast mixture into the well along with the egg, melted butter, and oil. Mix on low speed for 2 minutes, then increase to medium and knead 8-10 minutes until smooth and elastic.
- Test a small piece of dough by stretching it thin. If it forms a translucent windowpane without tearing, the gluten is developed. If not, knead 2-3 minutes more.
- Shape dough into a smooth ball and place in an oiled bowl, turning to coat. Cover and let rise in a warm spot for 1-1.5 hours until doubled in size.
- Punch down the dough and divide it into 2 equal portions. Roll each into a log about 8-10 inches long, then cut each log into 8-10 equal pieces.
- Roll each piece in breadcrumbs, pressing gently to coat all sides. Arrange on parchment-lined baking sheets with the cut side up, spacing them about 1/2 inch apart.
- Cover loosely and let proof for 45 minutes to 1 hour until puffed and pillowy. Meanwhile, preheat oven to 375°F (190°C).
- Bake for 13-16 minutes until light golden brown and rolls sound hollow when tapped on the bottom. Cool on the baking sheet for 5 minutes before transferring to a wire rack.
Notes
- Temperature matters: Milk should be between 105°F-110°F (40°C-43°C). Anything over 120°F will kill the yeast.
- Measure by weight: Using a kitchen scale for flour ensures the right texture—too much flour makes dry, dense rolls.
- Don’t rush the rise: The dough must double in size during the first rise. If your kitchen is cool, place it in the oven with just the light on for a warm environment.
- Use fine breadcrumbs: Coarse crumbs won’t adhere properly. For best results, use Japanese-style panko or pulse plain crackers in a food processor.
- Bake rolls close together: Traditional pandesal are arranged touching or nearly touching so they rise upward, creating taller, fluffier rolls with soft sides.
- Avoid overbaking: Pull them when light golden—overbaking dries out the soft interior. The bottoms should sound hollow when tapped.
- Make ahead: After shaping and coating, you can refrigerate the rolls overnight. Let them sit at room temperature for 30-45 minutes before baking.
- Storage: Keep in an airtight container at room temperature for 2-3 days. Reheat in the microwave wrapped in a damp paper towel for 20-30 seconds to restore softness.
- Freezing: Cool completely, then transfer to a freezer-safe bag and freeze for up to 1 month. Thaw at room temperature before reheating.
- Fillings: For a traditional Filipino breakfast, split warm pandesal and fill with butter, cheese, scrambled eggs, or your favorite spread.
Final Thoughts
Pandesal is one of those recipes that once you make it from scratch, you will never want to go back to store-bought again.
It is the kind of bread that fills your kitchen with the best smell imaginable, and the moment you pull that golden tray from the oven, every minute of waiting feels completely worth it.
This recipe is approachable for beginners, reliable for experienced bakers, and endlessly adaptable for anyone who wants to try different flavors or fillings.
Give this pandesal recipe a try and let your kitchen smell like a proper Filipino panaderia, even just for a morning.
If you make it, share your experience in the comments below. What filling did you choose? Did you try a variation? We’d love to hear all about it!
Recommended:
- Homemade Burger Buns Recipe
- Chicken Sopas Recipe
- Breakfast Casserole Recipe
- Artisan Bread Recipe
- Congee Recipe
- Fruit Salad Recipe
- Avocado Toast Recipe
- Sandwich Bread Recipe
- Sweet Sourdough Bread Recipe
- Cinnamon Swirl Bread Recipe



