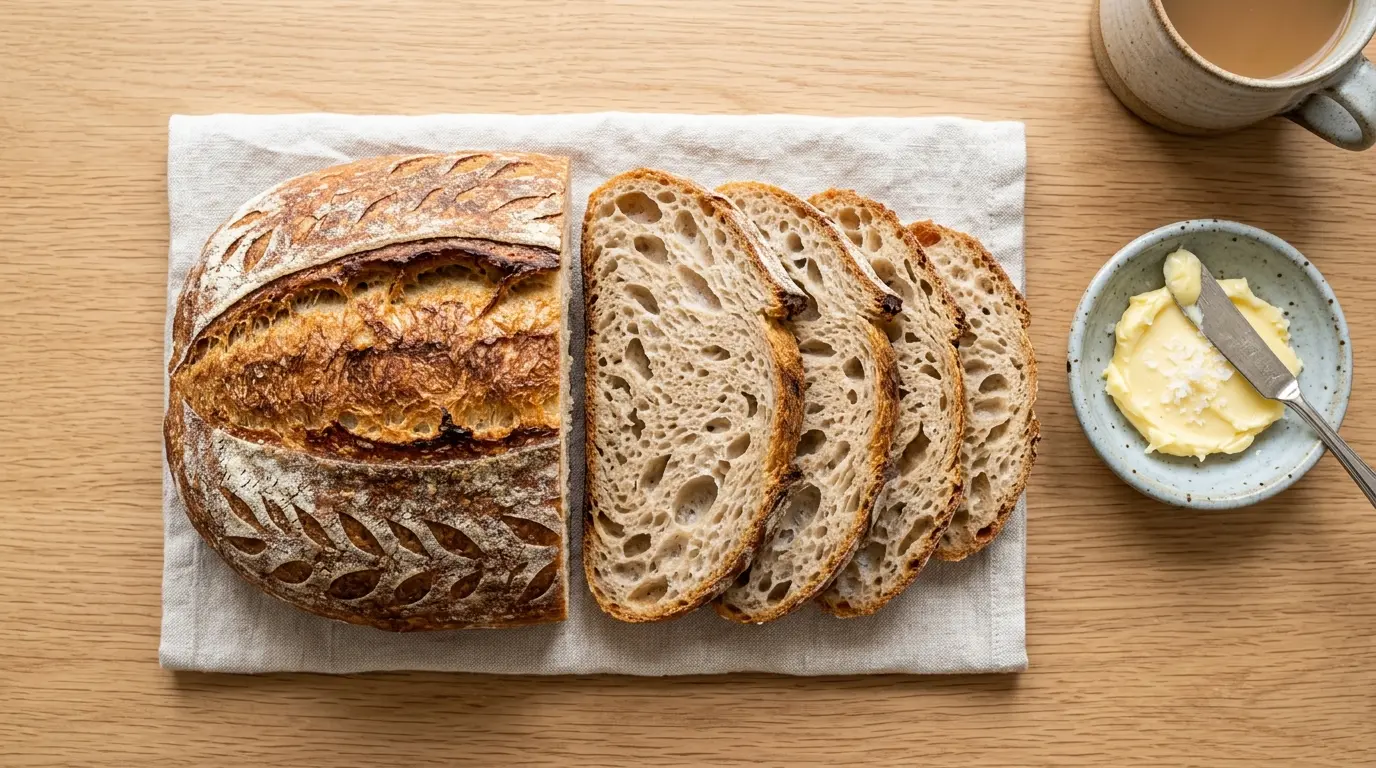
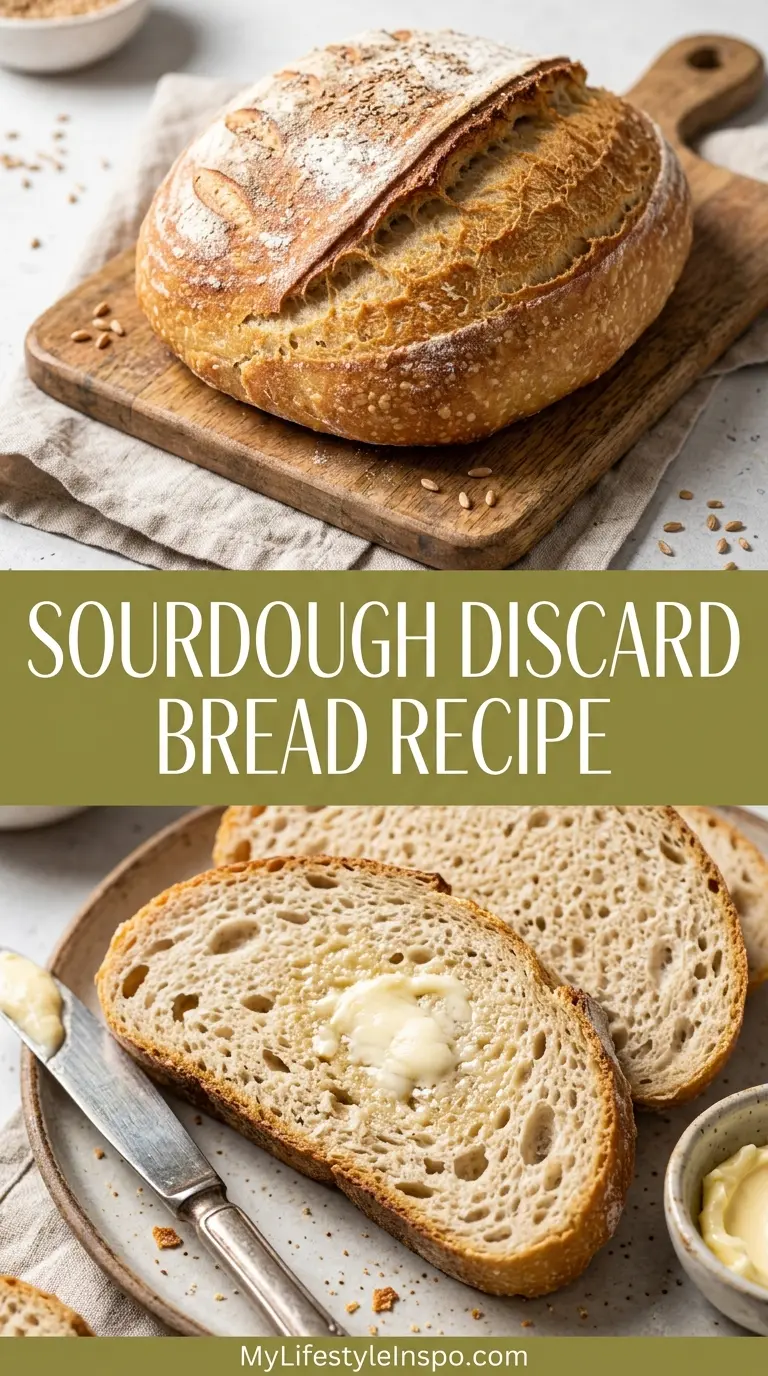
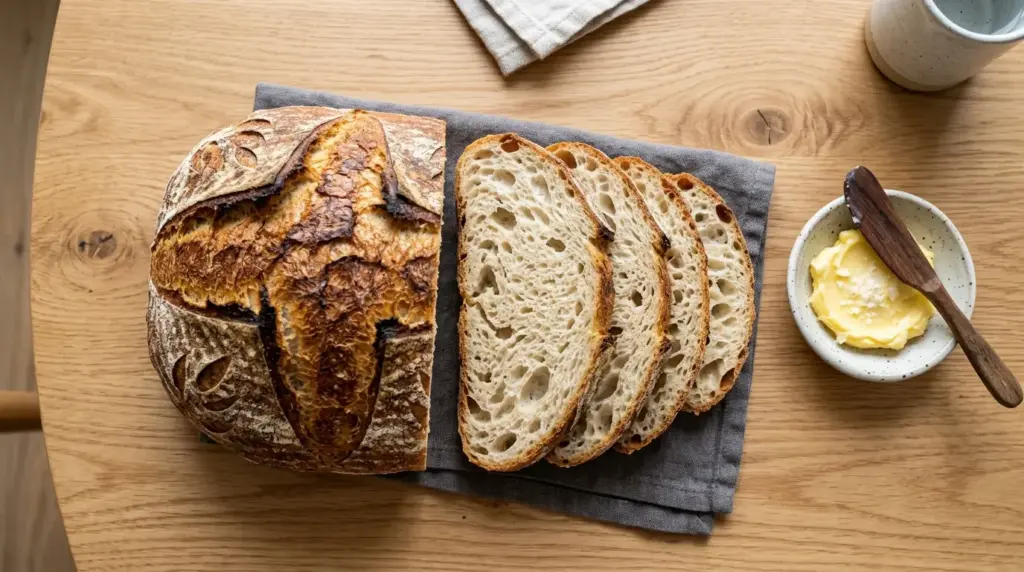
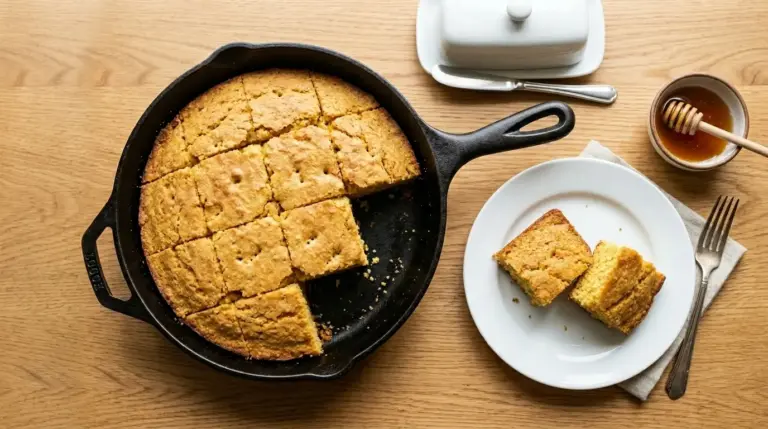
If you have a jar of sourdough discard sitting in your fridge, this sourdough discard bread recipe is exactly what you need right now. It uses up that leftover starter to make a beautiful, golden-crusted loaf with a soft, chewy interior, and it comes together in just a few hours with minimal hands-on effort.
The secret to why this loaf works so well is the combination of your discard and a small amount of instant yeast. The yeast handles the rise so you don’t need to wait for a long fermentation, while the discard brings that mild tangy flavor and tender crumb that makes sourdough bread so satisfying.
You don’t need any fancy equipment or experience with traditional sourdough to pull this off. A large mixing bowl, a Dutch oven, and a bit of patience are all it takes.
Whether you’re still building your starter or simply have more discard than you know what to use, this recipe is one of the most rewarding ways to put it to work. It’s the kind of bread that makes your whole kitchen smell incredible and disappears fast once it hits the table.
You might also enjoy: Sourdough Discard Pancakes
Why You’ll Love This Sourdough Discard Bread Recipe
This is the kind of recipe that surprises people the first time they make it.
It looks and tastes like serious artisan bread, but the process is genuinely approachable for bakers at any skill level.
Here is what makes it so good:
- Zero waste – That discard you would have thrown out becomes a delicious loaf of bread instead.
- No kneading required – The long rest time does all the work for you, developing the gluten without any effort.
- Same-day baking – Thanks to instant yeast, you can have a finished loaf in around 3 hours, no overnight process needed.
- Incredible crust – Baking in a Dutch oven traps steam, which is what gives this bread its signature crackly, golden crust.
- Soft, chewy interior – The crumb is light and open, perfect for slicing and toasting.
- Flexible discard age – Fresh discard gives a milder flavor, while older discard adds more tang. Both work beautifully.
If you love the idea of easy homemade bread, check out this Easy Sourdough Bread Recipe for another beginner-friendly option.
Ingredients
You only need a handful of pantry staples to make this loaf, plus your sourdough discard. The simplicity of the ingredient list is part of what makes this recipe so approachable.
- 3 cups (360g) bread flour, plus more for dusting
- 1 cup (240g) sourdough discard, at room temperature
- 1 cup (240ml) warm water (around 100°F / 38°C)
- 2 teaspoons (6g) instant yeast
- 1.5 teaspoons (9g) fine sea salt
- 1 teaspoon (4g) granulated sugar
A note on the flour: Bread flour is strongly recommended here over all-purpose flour. It has a higher protein content, which gives the bread better structure, a chewier crumb, and a more satisfying crust. If you only have all-purpose flour on hand, use about 2 tablespoons less water to compensate for the lower absorption.
A note on the discard: Use discard that is at room temperature for the best results. Cold discard straight from the fridge can slow down the rise time noticeably.
For more creative ways to use your discard, try this Sourdough Discard Pizza Dough Recipe.
Kitchen Equipment Needed
You don’t need a professional bread setup for this recipe. These are the basics that will set you up for success.
- Large mixing bowl (at least 4 quarts)
- Dutch oven with lid (5 to 7 quart, cast iron or enameled cast iron)
- Bench scraper or spatula
- Kitchen scale (for accurate measurements)
- Bread lame or sharp knife (for scoring the dough)
- Proofing basket or banneton (optional but helpful for shaping)
- Digital kitchen thermometer (to check water temperature and internal bread temperature)
- Parchment paper
- Wire cooling rack
Read Also: Sourdough Starter Recipe
Recommended Products for This Recipe
These are products that genuinely make a difference when baking this loaf, chosen for quality and performance.
1. Lodge Enameled Cast Iron Dutch Oven
A cast iron Dutch oven is the single most important piece of equipment for this bread. It traps steam during the first half of baking, which mimics a professional steam-injected oven and gives the loaf its signature crackly, blistered crust. Enameled versions are easy to clean and won’t react with the acidity of the discard dough.
2. King Arthur Bread Flour
The protein content in bread flour is noticeably higher than all-purpose flour, and that extra gluten makes a real difference in the texture of the finished loaf. You get better rise, a more satisfying chew, and a sturdier crumb that holds up beautifully when sliced. King Arthur is a reliably consistent brand that delivers excellent results every time.
3. Banneton Proofing Basket Set
A banneton gives the shaped dough something to hold against during the final proof, which results in a better-defined loaf shape and that beautiful spiral pattern on the crust. It also helps wick away excess moisture from the surface, which contributes to a crispier exterior. A linen liner is worth getting if it isn’t included.
4. Bread Lame Scoring Tool
Scoring the dough before it goes into the oven is not just for looks. It controls where the bread expands during baking and prevents the crust from cracking in random places. A proper lame with a curved blade is much easier to use than a knife and gives you cleaner, more consistent scores.
You might also enjoy: Sourdough Focaccia Recipe

Step-by-Step Instructions
Step 1: Mix the Dough
- In a large mixing bowl, combine the bread flour and fine sea salt. Whisk them together briefly so the salt is evenly distributed throughout the flour before any liquid is added. This prevents the salt from coming into direct contact with the yeast early on, which can inhibit the yeast’s activity.
- Add the instant yeast and granulated sugar to the flour mixture and stir again to combine.
- Add the sourdough discard and the warm water to the bowl.
- Mix everything together using a wooden spoon or your hand until no dry flour remains. The dough will look rough and shaggy at this stage, which is perfectly normal. Do not worry about making it smooth yet.
- Once all the ingredients are combined, cover the bowl with plastic wrap or a damp kitchen towel.
Step 2: First Rise (Bulk Fermentation)
- Let the covered dough rest at room temperature for 1 to 1.5 hours. You are looking for the dough to roughly double in size. The timing will vary depending on how warm your kitchen is. A warmer kitchen (above 75°F / 24°C) will produce a faster rise.
- Resist the urge to rush this step. This is when the yeast is working and the flavor from your sourdough discard is developing throughout the dough.
- If your kitchen is on the cooler side (below 68°F / 20°C), the rise may take up to 2 hours. Place the bowl somewhere warm, such as inside your oven with just the light on, to speed things along.
Step 3: Shape the Dough
- Once the dough has doubled, lightly flour a clean work surface. Turn the dough out onto the floured surface.
- Using a bench scraper or your hands, gently fold the edges of the dough toward the center, working your way around the entire piece of dough. This is called a coil fold and it builds surface tension.
- Flip the dough over so the seam side is facing down. Using your hands, gently drag the dough toward you on the work surface to tighten its surface further. You should feel the dough getting smoother and more taut with each pass.
- If you are using a proofing basket, dust it generously with flour (rice flour works especially well here to prevent sticking). Place the shaped dough into the basket seam-side up.
- If you do not have a proofing basket, dust a bowl with flour and line it with a clean kitchen towel that has also been dusted generously with flour. Place the dough seam-side up into the lined bowl.
Step 4: Second Rise (Proofing)
- Cover the shaped dough loosely with plastic wrap or a damp towel and let it rest for 30 to 45 minutes at room temperature. The dough should look slightly puffed and feel soft and airy when you gently poke it.
- While the dough is proofing, place your Dutch oven (with its lid) into the oven and preheat both the oven and the Dutch oven together to 475°F (245°C). Preheating the Dutch oven is important because placing the dough into a blazing hot pot is what creates the initial burst of steam that helps the loaf spring up and develop that crackly crust.
- Allow the oven and Dutch oven to preheat for at least 30 minutes to ensure the pot is truly scorching hot before the dough goes in.
Step 5: Score and Bake
- Cut a piece of parchment paper slightly larger than the base of your Dutch oven. Place it on your work surface.
- Carefully flip the proofed dough out of the basket or bowl onto the parchment paper so the smooth side is now facing up.
- Using a sharp bread lame or the tip of a sharp knife, score the top of the dough with a swift, decisive cut. A single slash about 1/2 inch (1.25 cm) deep, made at a slight angle, is the most reliable approach. Scoring allows the bread to expand in a controlled way during baking and prevents the crust from cracking unpredictably.
- Carefully and quickly remove the preheated Dutch oven from the oven (use heavy oven mitts as it will be extremely hot). Remove the lid and set it aside.
- Using the edges of the parchment paper as handles, carefully lower the dough into the Dutch oven. The parchment paper will sit underneath the dough inside the pot.
- Place the lid back on the Dutch oven and return it to the oven.
- Bake covered for 20 minutes. This covered phase is when the steam from the dough creates the ideal environment for a dramatic rise and blistered crust.
- After 20 minutes, carefully remove the lid from the Dutch oven. The bread should have risen significantly and will be pale with a few golden patches.
- Continue baking uncovered for another 20 to 25 minutes, until the crust is deep golden brown all over. For a reliable way to check doneness, insert a digital thermometer into the center of the loaf through the bottom. It should read at least 200°F (93°C).
Step 6: Cool the Bread
- Using oven mitts, carefully lift the bread out of the Dutch oven using the parchment paper and place it on a wire cooling rack.
- This step is non-negotiable: allow the bread to cool for at least 45 to 60 minutes before slicing. The interior of the bread is still cooking from residual heat as it cools, and cutting into it too soon will give you a gummy, underdeveloped crumb.
- You will hear the crust crackling and singing as it cools, which is one of the most satisfying sounds in home baking.
Read Also: Same Day Sourdough Bread Recipe
Tips for Success
A few simple adjustments can make the difference between a good loaf and a great one.
- Use a kitchen scale. Measuring by weight rather than volume, especially for flour, gives you far more consistent results. A difference of even 20 grams of flour can noticeably affect the dough texture.
- Temperature matters. Your warm water should be around 100°F (38°C), similar to a warm bath. Water that is too hot (above 110°F / 43°C) can kill the yeast before it gets to work.
- Don’t skip the preheat. A cold Dutch oven won’t give you the steam environment needed for a good oven spring. Plan for at least 30 full minutes of preheating.
- Score confidently. A hesitant, shallow score can cause the crust to tear irregularly. Make your scoring cut quickly and decisively with a swift single motion.
- Let it cool completely. Slicing a warm loaf is tempting, but a full cool gives the crumb its proper structure. If you slice too soon, the inside can seem dense or gummy even when it’s perfectly baked.
- Adjust for discard age. Older discard (1 to 2 weeks in the fridge) produces a tangier, more complex flavor. Fresh discard from a recent feeding gives a milder, more neutral taste.
You might also enjoy: Sourdough Discard English Muffins Recipe
Serving Suggestions
A freshly baked loaf of sourdough discard bread is endlessly versatile. It shines at breakfast, lunch, and dinner alike.
Thick slices with salted butter are the classic starting point, and for good reason. The tang of the bread and the richness of the butter are a perfect combination.
Here are some of our favorite ways to enjoy it:
- Toasted with Cinnamon Butter for a simple and incredibly comforting breakfast
- Alongside a big bowl of Chicken Noodle Soup for a cozy weeknight dinner
- Sliced for sandwiches, particularly with deli meats, cheeses, and a smear of mustard
- Topped with Avocado Toast for a quick and satisfying lunch
- Cut into thick chunks and served alongside Minestrone Soup for dunking
- Used as a base for Classic Bruschetta, lightly toasted and topped with tomatoes
Read Also: Sourdough Discard Crackers Recipe
Variations to Try
Once you’ve mastered the basic recipe, the options for customizing this loaf are nearly endless.
- Whole wheat version: Replace up to one third of the bread flour with whole wheat flour. Add 1 to 2 extra tablespoons of water to compensate, as whole wheat flour absorbs more liquid.
- Seeded loaf: Mix 2 tablespoons each of sesame seeds, sunflower seeds, or poppy seeds directly into the dough. You can also brush the shaped dough lightly with water and roll it in seeds before the second proof.
- Rosemary and olive oil: Add 2 tablespoons of olive oil to the dough along with 1 tablespoon of finely chopped fresh rosemary. This gives the bread a subtle herbal flavor and an even more tender crumb.
- Garlic herb loaf: Mix in 1 teaspoon of garlic powder and 1 teaspoon of Italian seasoning for a savory loaf that’s excellent alongside pasta dishes.
- Cheese bread: Fold 1 cup (100g) of shredded sharp cheddar or gruyere into the dough after the first rise before shaping. The cheese melts into pockets throughout the crumb.
- Discard-only (no commercial yeast): If you want to make this completely yeast-free, use 1.5 cups of active, well-fed sourdough starter instead of discard plus yeast. The rise time will be significantly longer (8 to 12 hours) and the flavor will be more developed.
For another great discard variation, try these Sourdough Discard Cinnamon Rolls.
Storage and Reheating
Proper storage keeps this bread fresh longer and maintains that satisfying crust and crumb.
- Room temperature: Wrap the completely cooled loaf in a clean kitchen towel or store it cut-side down on a cutting board. It will stay fresh at room temperature for 2 to 3 days. Avoid storing it in a plastic bag, as this softens the crust and can make it go stale faster.
- Longer storage options:
- Slice the entire loaf and place the slices in a zip-top freezer bag. Press out the air and freeze for up to 3 months.
- Individual frozen slices can go directly from the freezer into a toaster with no thawing needed.
- To freeze the whole loaf, wrap it tightly in plastic wrap and then in foil. Thaw at room temperature for 4 to 6 hours before serving.
- Reheating a whole loaf: Preheat your oven to 350°F (175°C). Place the bread directly on the oven rack (unwrapped) for 10 minutes. This revives the crust beautifully.
- Refreshing a stale slice: Place the slice under a broiler for 1 to 2 minutes per side, or pop it in the toaster for a perfectly crispy result.
Read Also: Sweet Sourdough Bread Recipe
Nutritional Facts
Per serving (1 slice, based on 12 slices per loaf):
| Nutrient | Amount |
|---|---|
| Calories | 137 kcal |
| Carbohydrates | 27g |
| Protein | 5g |
| Fat | 0.5g |
| Saturated Fat | 0.1g |
| Fiber | 1g |
| Sodium | 290mg |
| Sugar | 0.5g |
Note: Nutritional values are estimates and will vary based on specific ingredients used and slice size.
You might also enjoy: Easy Sourdough Bread Recipe
Health Benefits of Key Ingredients
Sourdough discard bread offers more than just great flavor. The ingredients in this loaf bring some meaningful nutritional advantages.
The sourdough discard itself is where much of the benefit lies. Because sourdough involves a fermentation process, some of the phytic acid in the flour breaks down during fermentation. Phytic acid can bind to minerals like iron and zinc and reduce their absorption, so its reduction means your body may be able to absorb those minerals more efficiently from sourdough bread compared to standard yeast bread.
Here are the key nutritional highlights of this recipe’s main ingredients:
- Bread flour is a good source of complex carbohydrates, which provide sustained energy. It also contains B vitamins, iron, and selenium, nutrients that support energy metabolism and immune function.
- Sourdough discard contains beneficial organic acids, including lactic and acetic acid, which are produced during fermentation. These acids give sourdough its distinctive tang and also contribute to a lower glycemic response compared to non-fermented bread.
- Instant yeast is a source of B vitamins, particularly thiamine and folate, which support nervous system health and cell production.
- Sea salt in moderate amounts provides essential minerals including sodium, which is necessary for fluid balance and nerve function.
For another wholesome bread option, check out this 4 Ingredient Gluten Free Bread Recipe.
Frequently Asked Questions
1. Can I use all-purpose flour instead of bread flour?
Yes, all-purpose flour will work in this recipe, though the texture will be slightly different. Bread flour has a higher protein content (around 12 to 13%) compared to all-purpose flour (around 10 to 11%), which means it develops more gluten. The result with all-purpose flour will still be delicious, but the crumb may be a little less chewy and the loaf may not rise quite as high. If you make the swap, reduce the water by about 2 tablespoons to account for the lower absorption rate of all-purpose flour.
2. Do I have to use a Dutch oven?
A Dutch oven produces the best results by far because the enclosed environment traps steam from the dough, which keeps the surface of the bread soft long enough for it to expand fully before the crust sets. That steam is what gives you the crackly, blistered crust. If you don’t own one, you can bake the bread on a preheated baking sheet or pizza stone and place a small oven-safe pan of boiling water on the rack below to create some steam. The crust may be thicker and the oven spring slightly less dramatic, but the loaf will still be good.
3. How old can my sourdough discard be?
For this recipe, discard that has been stored in the fridge for up to 2 weeks generally works well. The older the discard, the more acidic and tangy it will be, which can be a great thing if you enjoy a more pronounced sourdough flavor. If the discard has developed a pink or orange tint, smells unpleasant (beyond normal sour), or has visible mold, discard it and don’t use it. A healthy discard should smell pleasantly sour, similar to yogurt or beer.
4. My dough feels very sticky. Is that normal?
A slightly sticky, wet dough is completely normal for this recipe and is actually a sign that the hydration level is correct. Resist the urge to add more flour during mixing, as this can make the bread dense. When you shape the dough, use lightly floured hands and work confidently. If the dough is sticking excessively to the bowl even after rising, you can lightly oil your hands or the bowl before working with it.
5. Can I make this bread without yeast?
Yes, but the process will be much longer. To make a fully discard-leavened loaf with no commercial yeast, you will need to use 1.5 cups (360g) of active, recently fed sourdough starter that has doubled in size and is at peak activity. The flavor will be more complex and tangy, but the rise time will be anywhere from 8 to 18 hours depending on your kitchen temperature. If your goal is a same-day loaf, the instant yeast version in this recipe is the way to go.
Read Also: Sourdough Discard Biscuits Recipe
Final Thoughts
This sourdough discard bread recipe is proof that incredible homemade bread doesn’t require days of planning, advanced technique, or a shelf full of specialty equipment. With just a few simple ingredients and a reliable Dutch oven, you can turn that jar of discard in your fridge into a gorgeous, artisan-quality loaf that your whole household will be reaching for.
Give this recipe a try the next time you’re about to feed your starter, and see just how satisfying it is to pull that golden loaf out of the oven. If you make it, leave a comment below and let us know how it turned out, or share a photo on social media and tag us. We love seeing your bakes!
Recommended:
- Sourdough Discard Chocolate Chip Cookies Recipe
- Sourdough Discard Pizza Dough Recipe
- Sourdough Sandwich Bread Recipe
- Sourdough Pancake Recipe
- Everything Bagel Recipe
- Dinner Rolls Recipe
- Homemade Biscuit Recipe
- Garlic Naan Bread Recipe
- Homemade Bagel Recipe
- Buttermilk Biscuit Recipe
