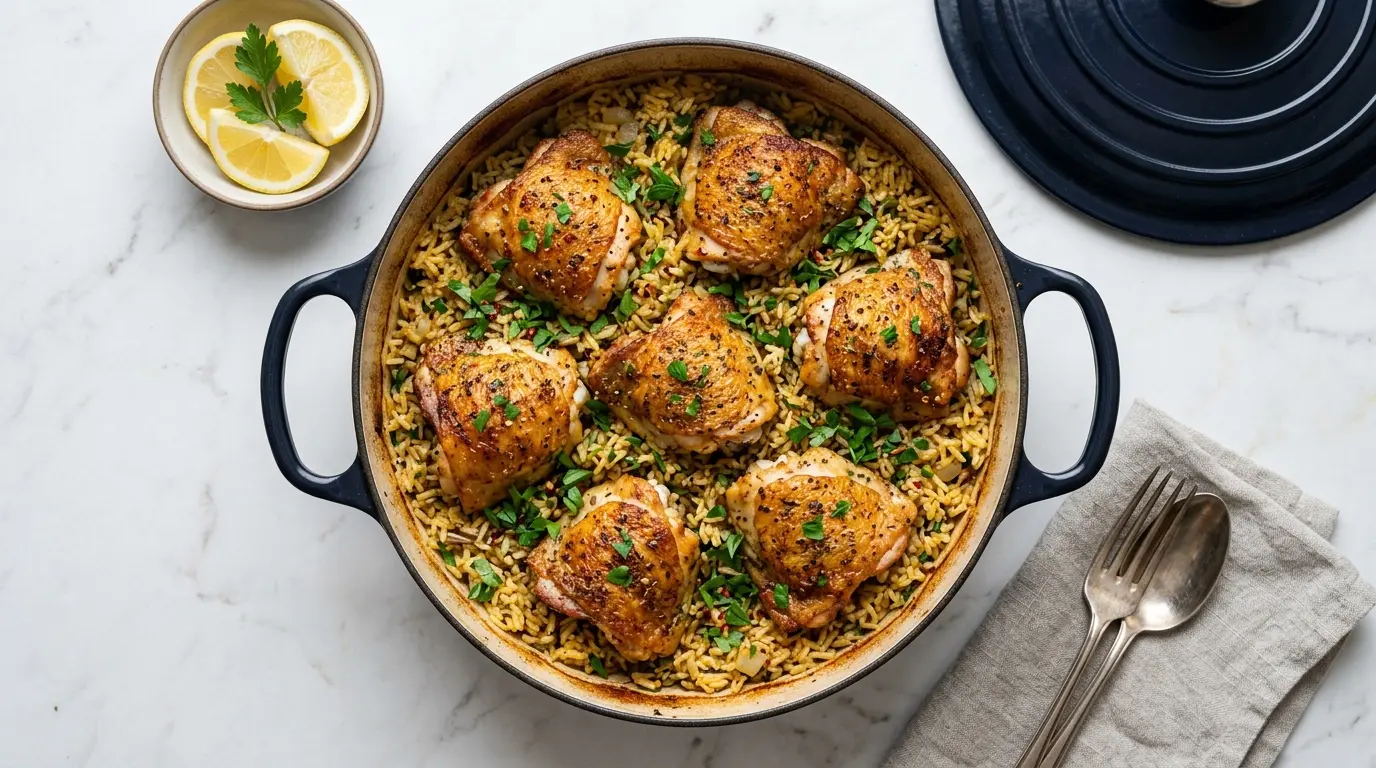
If you have been searching for a weeknight dinner that practically makes itself and still manages to taste like you spent all day in the kitchen, this One-Pot Crispy Chicken and Rice Recipe is exactly what you need.
Everything cooks together in a single pot: golden-seared chicken thighs nestled right into fluffy, well-seasoned rice, finished on the stovetop until the bottom layer of rice turns irresistibly crispy and the chicken skin shatters at the touch of a fork.
It is the kind of meal that hits every note — savory, satisfying, and deeply comforting — using simple pantry staples.
What makes this version stand out is the method. Searing the chicken thighs skin-side down in the same pot before adding the rice creates a double layer of flavor: rich, rendered chicken fat that seasons the rice from the inside out, and that signature crispy skin on top that everyone always fights over.
The chicken fat left behind in the pan is what toasts the aromatics and gives the rice a beautifully golden, nutty base flavor that plain water or plain broth just cannot replicate.
This recipe has been tested to give you perfectly cooked, non-mushy rice every single time — long-grain rice is key, and we will explain exactly why below.
If you love easy one-pot meals, you will also want to check out this Chicken Rice Soup for another comforting chicken-and-rice classic.
Why You’ll Love This One-Pot Crispy Chicken and Rice Recipe
This dish earns a permanent spot in your weekly dinner rotation for so many reasons.
It is truly a one-pot meal — from searing the chicken to cooking the rice, everything happens in the same vessel, which means fewer dishes and less cleanup.
The texture contrast is incredible. You get fluffy, flavorful rice on top, a golden crispy layer at the bottom (the socarrat, as the Spanish call it), and juicy, tender chicken with crackling skin on top.
The flavor depth is remarkable for such a short ingredient list. Rendered chicken fat, toasted garlic, and chicken broth make the rice taste like it simmered for hours.
Here is why readers love making this dish:
- Ready in under an hour from start to finish, including prep time
- Budget-friendly — chicken thighs are one of the most affordable cuts, and rice is a pantry staple
- Crowd-pleasing flavors that even picky eaters enjoy
- Versatile — easy to adapt with vegetables, different spice blends, or alternative proteins
- Meal-prep friendly — stores beautifully and reheats like a dream
Another favorite: One-Pan Orecchiette Pasta
Ingredients
The ingredient list is intentionally short — this recipe relies on quality over quantity. Use good chicken broth, properly seasoned chicken, and long-grain white rice, and the dish will deliver every time.
Here is what you will need:
- 6 bone-in, skin-on chicken thighs (about 3 lbs / 1.4 kg total)
- 1 1/2 cups (285 g) long-grain white rice (jasmine or basmati recommended)
- 2 1/2 cups (600 ml) low-sodium chicken broth
- 1 medium yellow onion, finely diced
- 5 cloves garlic, minced
- 2 tbsp (30 ml) olive oil (or neutral oil with a high smoke point)
- 1 tsp smoked paprika
- 1 tsp garlic powder
- 1 tsp onion powder
- 1/2 tsp dried thyme
- 1/2 tsp dried oregano
- 1 tsp kosher salt, plus more to taste
- 1/2 tsp black pepper
- 1/4 tsp cayenne pepper (optional, for a mild kick)
- 2 tbsp (30 ml) fresh lemon juice
- 2 tbsp fresh flat-leaf parsley, chopped, for garnish
- Lemon wedges, for serving
For a delicious rice side dish with a different flavor profile, take a look at this Cilantro Lime Rice.
Kitchen Equipment Needed
This recipe only requires a few pieces of equipment, but the right pot makes a real difference. A heavy-bottomed Dutch oven or deep skillet with a tight-fitting lid is the key to even cooking and that coveted crispy bottom layer.
Here is what you need:
- Large Dutch oven or deep skillet with a lid (at least 5-quart / 4.7-liter capacity)
- Cutting board
- Chef’s knife
- Measuring cups and spoons
- Paper towels (for patting the chicken dry)
- Tongs (for searing and turning chicken)
- Fine mesh strainer (for rinsing the rice)
- Wooden spoon or silicone spatula
Recommended Products for This Recipe
These are products recommended based on quality and performance — they can genuinely make a difference in how this dish turns out.
1. Le Creuset Enameled Cast Iron Dutch Oven
A heavy enameled Dutch oven distributes heat evenly from bottom to sides, which is exactly what you need to get that golden crispy rice bottom without burning. The tight-fitting lid traps steam perfectly for fluffy, evenly cooked rice. It is a long-term kitchen investment that pays for itself dish after dish.
2. Instant Read Meat Thermometer
Taking the guesswork out of chicken doneness is a game-changer for food safety and texture. An instant-read thermometer lets you confirm the chicken has reached 165°F (74°C) internally without cutting into it and losing juices. It is an inexpensive tool that every home cook should own.
3. Lundberg Farms Organic Jasmine Rice
The quality of your rice matters enormously in this recipe. A high-quality jasmine rice like Lundberg Farms absorbs broth evenly, holds its shape, and delivers a slightly floral aroma that elevates the finished dish. Avoid instant rice, which turns mushy and cannot develop the crispy bottom layer.
4. Smoked Paprika (Premium Quality)
This recipe depends heavily on smoked paprika for its warm, slightly earthy flavor. A high-quality smoked paprika — the kind that is deep red and fragrant when you open the tin — makes a noticeable difference compared to generic grocery store versions. It is one of the few spices worth the upgrade.
5. Lodge Pre-Seasoned Cast Iron Skillet (12-Inch)
If you do not have a Dutch oven, a 12-inch cast iron skillet with a lid (or a sheet of aluminum foil) is an excellent alternative. Cast iron retains heat exceptionally well and gives you a beautiful, even sear on the chicken skin. It also transitions from stovetop to oven seamlessly if you want to finish the dish in the oven.
Read Also: Blackened Ranch Pan Fried Chicken Thighs Recipe
Step-by-Step Instructions
1. Prepare and Season the Chicken
- Remove the chicken thighs from the refrigerator and place them on a clean cutting board.
- Use paper towels to pat every surface of the chicken thighs completely dry — this step is non-negotiable for achieving crispy skin. Any moisture left on the skin will cause it to steam rather than sear.
- In a small bowl, combine the smoked paprika, garlic powder, onion powder, dried thyme, dried oregano, kosher salt, black pepper, and cayenne pepper (if using). Stir until evenly blended.
- Rub the seasoning mix generously over every surface of each chicken thigh, including under the skin where possible. A good coating on the skin side is especially important.
- Set the seasoned chicken aside and allow it to rest at room temperature for 10 to 15 minutes while you prep the other ingredients.
2. Rinse the Rice
- Place the long-grain white rice in a fine mesh strainer set over the sink.
- Rinse the rice under cold running water, stirring gently with your fingers, until the water runs mostly clear. This process removes excess surface starch that would otherwise make the rice gummy and clumped.
- Shake the strainer gently to remove as much water as possible, then set the rinsed rice aside.
3. Sear the Chicken Thighs
- Place your Dutch oven or deep skillet over medium-high heat and allow it to heat for 1 to 2 minutes until it is very hot before adding any oil.
- Add the olive oil to the hot pot and swirl to coat the bottom evenly.
- Place the chicken thighs skin-side down into the hot oil in a single layer. Do not crowd them — if necessary, sear in two batches. Crowding the pot lowers the temperature and causes the chicken to steam instead of sear.
- Cook the chicken, undisturbed, for 6 to 8 minutes until the skin is deep golden brown and releases easily from the pot without sticking. Resist the urge to move or press the chicken during this time.
- Flip the chicken thighs and sear the flesh side for 3 to 4 minutes until lightly browned.
- Transfer the seared chicken thighs to a clean plate. The chicken will not be cooked through at this point — that is expected, as it will finish cooking with the rice.
- Pour off all but about 2 tablespoons of the rendered chicken fat from the pot. Keep those 2 tablespoons in the pot for cooking the aromatics — this is where a huge amount of flavor comes from.
4. Sauté the Aromatics
- Reduce the heat to medium and add the finely diced onion to the pot with the reserved chicken fat.
- Sauté the onion for 4 to 5 minutes, stirring frequently and scraping up any browned bits (fond) stuck to the bottom of the pot. Those browned bits are deeply flavorful and should be fully incorporated into the dish.
- Add the minced garlic to the softened onion and cook for 1 minute more, stirring constantly, until fragrant. Watch the heat carefully — garlic can go from golden to burnt very quickly.
5. Toast the Rice
- Add the rinsed and drained rice to the pot with the onion and garlic.
- Stir the rice continuously for 1 to 2 minutes, coating every grain in the chicken fat and mixing it with the aromatics. This toasting step adds a subtle nuttiness to the finished rice and helps it absorb broth more evenly.
- The rice will turn slightly opaque and begin to smell fragrant and nutty — that is the signal that it is properly toasted and ready for the liquid.
6. Add the Broth and Bring to a Simmer
- Pour the chicken broth into the pot with the toasted rice and aromatics.
- Add the fresh lemon juice and stir everything together, scraping up any remaining bits from the bottom of the pot.
- Increase the heat to medium-high and bring the broth to a vigorous boil, stirring once or twice.
- Taste the broth and adjust seasoning with additional salt if needed. This is your last chance to season the rice before it absorbs all the liquid.
7. Nestle the Chicken and Simmer
- Once the broth is boiling, use tongs to nestle the seared chicken thighs back into the pot, skin-side up. Place them on top of the rice, pressing down slightly so the bottoms of the thighs are submerged in the liquid but the skin is above the surface.
- Reduce the heat to low and place the lid on the pot, covering tightly.
- Cook on low heat for 20 to 22 minutes, without lifting the lid during this time. Each time you lift the lid, steam escapes and the cooking time is disrupted. Trust the process.
- After 20 minutes, check the rice by lifting the lid briefly — the rice should be tender and all the liquid should be absorbed.
8. Crisp the Bottom and Check the Chicken
- With the chicken thighs still on top of the rice, remove the lid and increase the heat to medium-high.
- Cook uncovered for 3 to 5 minutes. This step drives off any remaining moisture and allows the bottom layer of rice to develop a golden, crispy crust.
- You will begin to hear a gentle crackling and sizzling sound from the bottom of the pot — that is the socarrat forming, and it is a very good sign.
- To check for doneness, insert an instant-read thermometer into the thickest part of a chicken thigh without touching the bone. It should register 165°F (74°C) or higher.
9. Rest and Serve
- Remove the pot from the heat and allow the dish to rest, uncovered, for 5 minutes. This resting period lets the juices redistribute throughout the chicken and allows the crispy rice bottom to firm up slightly.
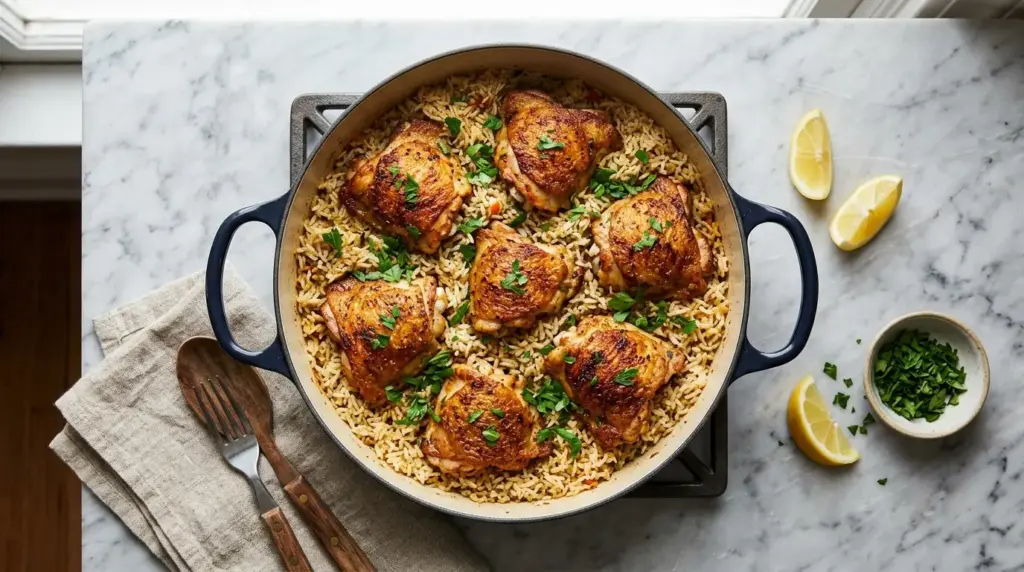
- Sprinkle the chopped fresh parsley over the top of the finished dish.
- Serve directly from the pot by scooping the fluffy rice and chicken together, making sure to scrape up some of the crispy bottom crust with each serving.
- Serve with lemon wedges on the side for a bright, fresh squeeze of citrus right before eating.
For more comforting one-pot chicken dishes, try this Chicken Stew Recipe.
Tips for Success
A few small tweaks and techniques make the difference between a good version of this dish and a genuinely outstanding one. Keep these tips in mind before you start cooking.
Here are the most important tips to guarantee success:
- Dry your chicken thoroughly. Moisture on the skin is the number one enemy of crispy skin. Use paper towels and press firmly against every surface before seasoning.
- Do not skip the sear. Searing the chicken skin-side down first is what renders the fat and builds flavor throughout the entire dish. Without this step, the rice will lack its rich, savory depth.
- Use the right rice. Long-grain white rice (jasmine or basmati) is the only type that works well here. Short-grain rice, brown rice, and instant rice all have different water ratios and cooking times that will not give you the right results.
- Keep the lid on. Lifting the lid while the rice cooks releases steam and disrupts the ratio of liquid to rice. Only lift it once, after 20 minutes, to check.
- Do not stir the rice. Unlike risotto, this rice should not be stirred once the lid goes on. Stirring breaks down the starch and results in a gummy, sticky texture.
- Adjust liquid based on your pot. If you have a very wide pot that allows more evaporation, you may need to add 2 to 4 tablespoons of extra broth. A tighter lid or narrower pot retains more steam.
- Let it rest. The five-minute rest period at the end is not optional. It gives the chicken time to reabsorb its juices and gives the crispy rice layer a chance to set up properly.
You might also enjoy: Chicken Fried Rice
Serving Suggestions
This one-pot crispy chicken and rice is a complete meal on its own, but pairing it with a bright vegetable side or a fresh salad rounds it out beautifully. The dish is rich and savory, so lighter, acidic, or fresh sides balance it perfectly.
Aim for sides that complement without overpowering:
- Roasted Broccoli — the slightly charred, nutty flavor of roasted broccoli is a natural partner for the savory chicken and rice
- Green Beans — simply sautéed or blanched green beans with a squeeze of lemon keep things light
- Collard Greens — slow-cooked collard greens add a Southern soul food element that complements the crispy chicken beautifully
- Corn on the Cob — buttery grilled or boiled corn is a crowd-pleasing summer side
- A simple cucumber and tomato salad dressed with olive oil and red wine vinegar adds a refreshing contrast
- Classic Deviled Eggs — a great appetizer or party-style starter alongside this dish
Read Also: Chicken Broccoli Rice Casserole Recipe
Variations to Try
Once you have mastered the base recipe, there are countless ways to tweak it to suit different tastes, dietary needs, or what you happen to have on hand. These variations all work beautifully with the same core method.
Try one of these fun spins on the classic:
- Lemon Herb Version: Add the zest of one lemon along with fresh rosemary and fresh thyme to the broth for a bright, Mediterranean flavor profile.
- Spicy Harissa Version: Replace the smoked paprika with 2 tablespoons of harissa paste stirred into the broth for a bold North African twist.
- Coconut Milk Version: Swap out 1 cup of the chicken broth for full-fat coconut milk and add a teaspoon of turmeric for a mildly sweet, golden rice.
- Vegetable-Loaded Version: Add 1 cup of frozen peas, diced carrots, and sliced mushrooms to the pot just before adding the broth. The vegetables cook alongside the rice and absorb all the savory flavors.
- Chicken Breast Version: Bone-in, skin-on chicken breasts can be substituted, but reduce the final simmering time to 18 minutes and check for doneness early since breasts cook faster and can dry out.
- Oven-Finish Version: After placing the chicken back into the pot, instead of simmering on the stovetop, transfer the covered pot to a 375°F (190°C) oven for 25 minutes, then uncover for the last 5 minutes to crisp the skin.
For another bold one-pot chicken dinner, check out this Chicken Casserole Recipe.
Storage and Reheating
Leftovers of this dish store well and are arguably even more delicious the next day once all the flavors have melded together overnight. Proper storage keeps it fresh for several days.
Follow these guidelines for the best results:
- Refrigerator: Transfer cooled leftovers to an airtight container and refrigerate for up to 4 days.
- Freezer: Portion cooled leftovers into freezer-safe containers or zip-top bags and freeze for up to 3 months. Freeze the chicken and rice together for convenience.
- Stovetop Reheating: Add the leftovers to a skillet with 2 to 3 tablespoons of chicken broth or water over medium-low heat. Cover and heat for 5 to 8 minutes, stirring occasionally, until heated through.
- Microwave Reheating: Place leftovers in a microwave-safe bowl, splash with a tablespoon of water, cover loosely, and microwave in 60-second intervals, stirring between each, until heated evenly.
- Avoid reheating in the oven uncovered, as this tends to dry out the rice significantly before the chicken is warmed through.
- Thawing from frozen: Transfer the container from the freezer to the refrigerator the night before and allow it to thaw overnight before reheating.
Another comforting meal to add to your rotation: Chicken Soup Recipe
Nutritional Facts
The following nutrition information is estimated per serving based on this recipe serving 6 people, using bone-in skin-on chicken thighs cooked in olive oil with low-sodium chicken broth.
| Nutrient | Amount Per Serving |
|---|---|
| Calories | ~480 kcal |
| Total Fat | 22g |
| Saturated Fat | 6g |
| Cholesterol | 130mg |
| Sodium | 580mg |
| Total Carbohydrates | 37g |
| Dietary Fiber | 1g |
| Sugars | 1g |
| Protein | 32g |
| Iron | 2mg |
| Potassium | 410mg |
Please note these values are estimates and will vary based on specific brands, exact portion sizes, and any ingredient substitutions you make. To lower the calorie count, you can remove the skin before eating — the skin-on cooking method still delivers all the flavor benefits to the rice even if you choose not to eat it.
For a lighter chicken dish with a completely different flavor direction, try this Lemon Chicken Recipe.
Health Benefits of Key Ingredients
This recipe may feel indulgent, but many of its core ingredients offer solid nutritional value alongside their great flavor.
Here is a closer look at what the key ingredients bring to the table nutritionally:
- Chicken thighs are an excellent source of complete protein, providing all essential amino acids needed for muscle repair and maintenance. They also contain a meaningful amount of iron, zinc, and B vitamins, particularly B6 and B12, which support energy metabolism and immune function.
- Long-grain white rice provides a quick-digesting source of carbohydrates for sustained energy. While it is lower in fiber than brown rice, it is easily digestible and pairs well with the protein and fat in this dish for a balanced macronutrient profile.
- Garlic contains allicin, a sulfur compound that has been studied for its potential anti-inflammatory and immune-supportive properties. Using fresh minced garlic rather than dried maximizes these beneficial compounds.
- Smoked paprika is made from dried red peppers and contains capsaicin and carotenoids, including beta-carotene, which the body converts to vitamin A. It adds color, flavor, and a modest antioxidant boost.
- Olive oil is the predominant fat used in searing and is rich in monounsaturated fatty acids, which support heart health when used in place of saturated fats. It also contains vitamin E and polyphenol antioxidants.
- Lemon juice adds bright flavor without calories and contributes vitamin C, which supports immune function and helps the body absorb the iron from the chicken more efficiently.
Read Also: Chicken Stir Fry Recipe
Frequently Asked Questions
1. Can I use boneless, skinless chicken thighs instead of bone-in, skin-on?
Yes, you absolutely can use boneless, skinless chicken thighs, though the flavor and texture of the dish will be somewhat different.
The skin is what renders fat into the pot and creates the richest-tasting rice, and the bone adds depth during the cooking process. If using boneless, skinless thighs, reduce the final simmering time to 15 to 18 minutes and check for doneness at the 15-minute mark.
2. Why is my rice mushy or undercooked?
Mushy rice is almost always the result of too much liquid or too much heat.
Make sure you are using the 2 1/2 cup (600 ml) measurement of broth exactly and that your pot is covered tightly to prevent excess evaporation. Undercooked rice usually means the heat was too low or the lid was not sealed well — if the rice is still firm after 22 minutes, add 2 tablespoons of broth, re-cover, and cook for 5 more minutes on low.
3. How do I know when the rice is crispy at the bottom?
You will hear it before you see it — a gentle crackling and sizzling sound coming from the bottom of the pot is the most reliable indicator.
After removing the lid and cranking the heat to medium-high for those final 3 to 5 minutes, press a wooden spoon gently against the side of the pot near the bottom. If it feels set and you hear a light sizzle, the crust is forming. Avoid the temptation to scrape the bottom with a spoon during this stage, as the crust needs uninterrupted contact with the heat to develop properly.
4. Can I make this recipe in a regular stainless steel pan?
Yes, a heavy-bottomed stainless steel skillet or saucepan with a tight-fitting lid works well for this recipe.
The main thing to watch is heat distribution — stainless steel can have hot spots, so medium-low heat during the rice cooking phase is important. A cast iron pan or enameled Dutch oven will give you more even results, but stainless steel works fine with a little attention to heat control.
5. Can I add vegetables directly to the pot?
Absolutely. The best vegetables to add to this dish are those that cook in roughly the same time as the rice.
Frozen peas, diced carrots, and sliced mushrooms all work beautifully. Add them to the pot after the aromatics step and before adding the rice, giving heartier vegetables like carrots a 2-minute head start before adding everything else. Avoid watery vegetables like zucchini or spinach, as they can release too much liquid and affect the rice-to-broth ratio.
For another satisfying skillet meal to add to your rotation, explore this Taco Skillet Recipe.
Final Thoughts
This One-Pot Crispy Chicken and Rice Recipe is the kind of dish that earns its place on the regular dinner rotation almost immediately.
It is simple enough to make on a busy Tuesday night but satisfying and impressive enough to serve when you have guests over.
The combination of juicy, golden-skinned chicken thighs and deeply flavored, perfectly cooked rice with that irresistible crispy bottom crust is truly hard to beat.
Once you make this recipe for the first time, you will understand why the one-pot method is so beloved — minimal effort, maximum reward, and hardly any dishes to wash.
Give it a try this week and let us know in the comments how it turned out! Did you add any vegetables, try a different spice blend, or discover a variation of your own? We would love to hear about it.
Recommended:
- Basmati Rice Recipe
- Baked Chicken Breast Recipe
- Chicken Skillet Recipe
- Mexican Beef and Rice Skillet Recipe
- Chicken and Dumplings Recipe
- Baked Honey Mustard Chicken Recipe
- Chicken Marsala Recipe
- Salmon Skillet Recipe
- Classic Red Beans and Rice Recipe
- Jeera Rice Recipe


