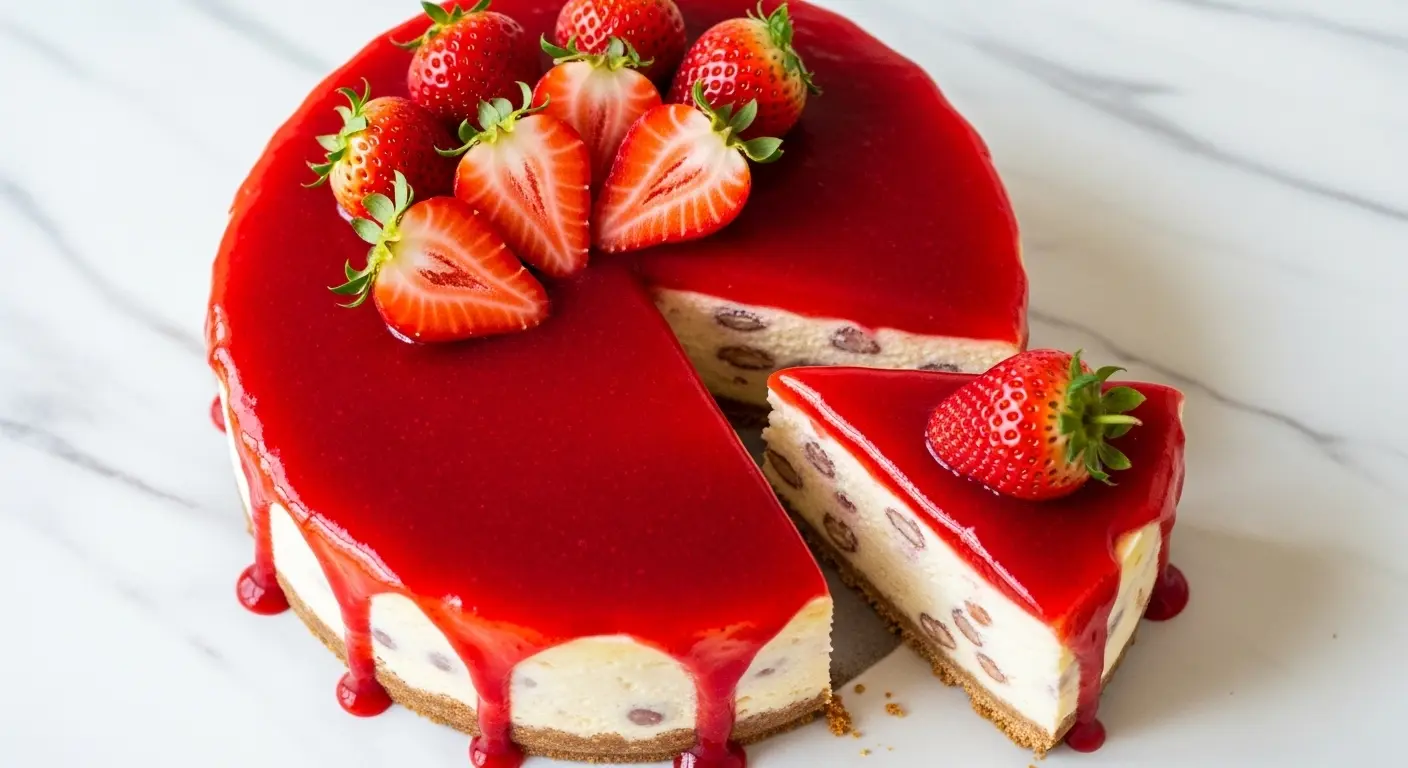
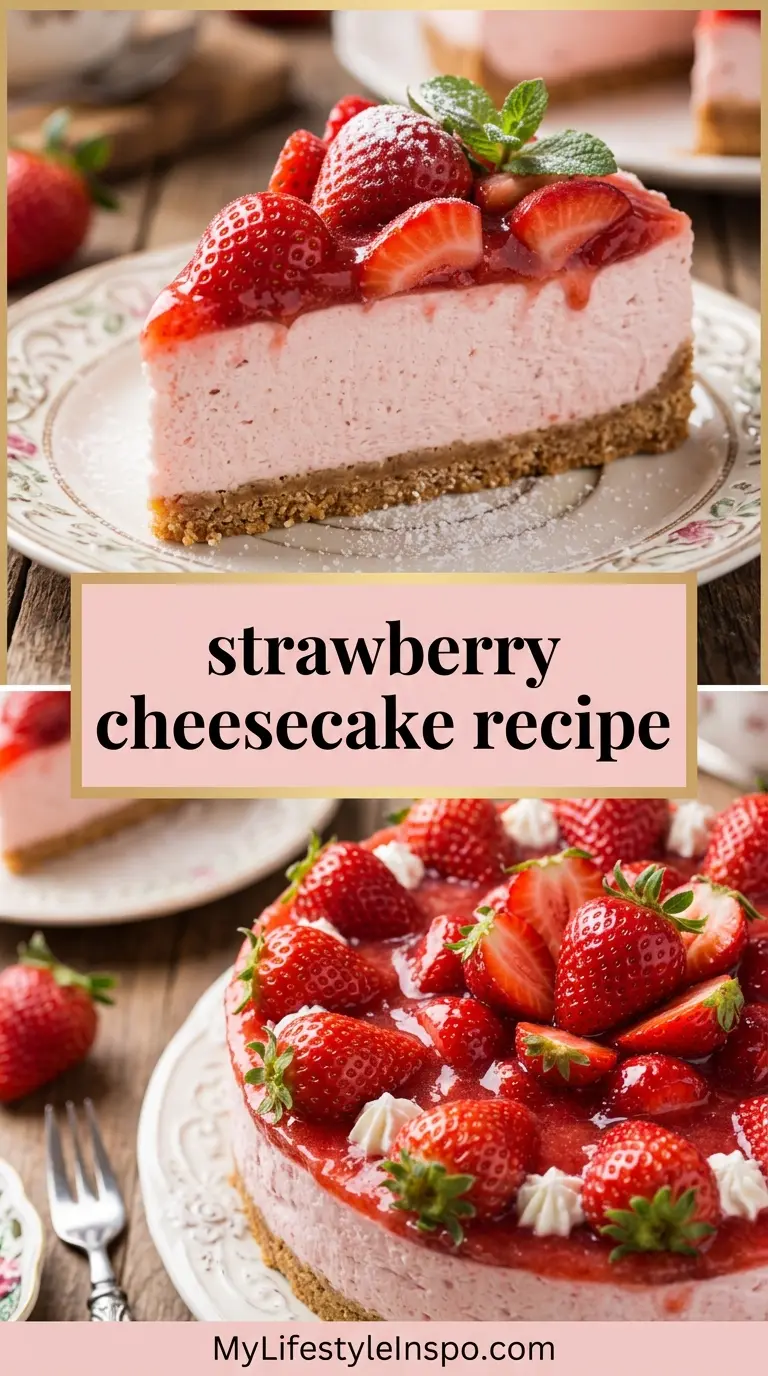
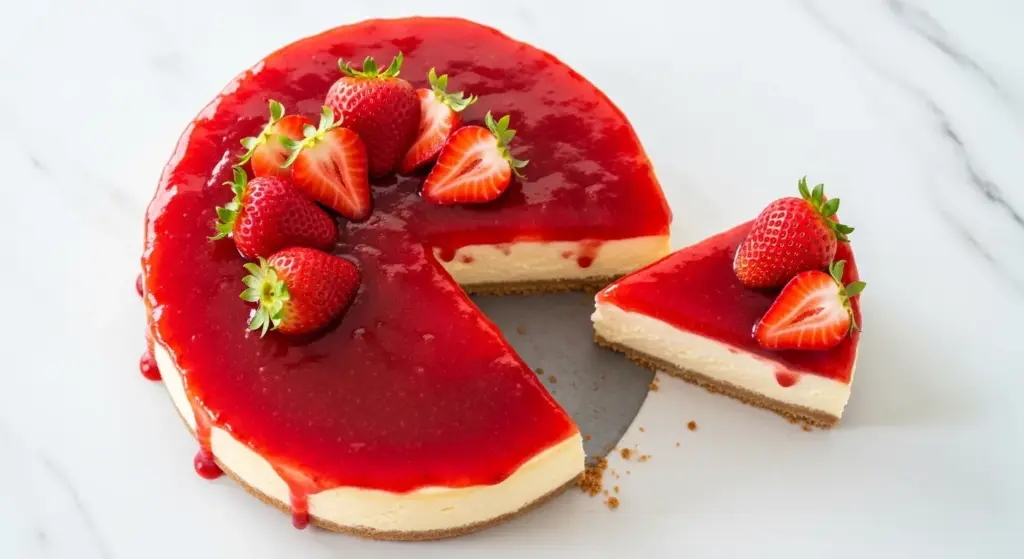
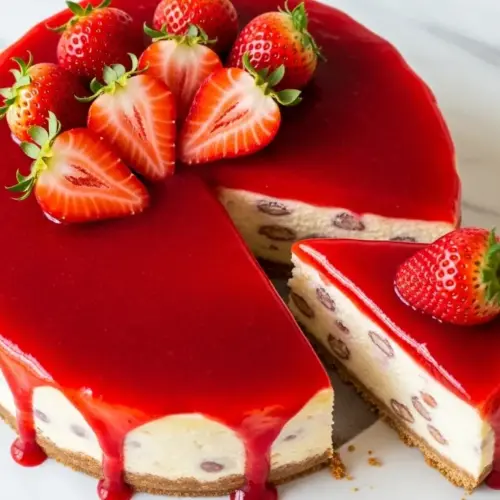
If you’ve been looking for the ultimate strawberry cheesecake recipe, this is the one you’ll come back to again and again.
This classic baked cheesecake has everything you want: a buttery, golden graham cracker crust, a silky-smooth cream cheese filling made luscious with sour cream, and a jewel-bright homemade strawberry topping that’s equal parts gorgeous and delicious.
What makes this recipe special is that every component is made from scratch, and it’s built around trusted, time-tested techniques that actually work.
The cream cheese filling strikes the perfect balance between rich and creamy without being heavy or dense. The sour cream plays a key role here, lightening the texture while adding that subtle tang that makes cheesecake taste like cheesecake.
Whether you’re making this for a birthday, a summer gathering, or just because you deserve something spectacular on a Tuesday, this recipe walks you through each step in detail so you can pull it off with confidence.
You might also enjoy this Blueberry Cheesecake if you love a fruity topped cheesecake.

Why You’ll Love This Strawberry Cheesecake Recipe
This recipe hits all the marks that make a cheesecake truly worth making.
The filling is velvety and smooth, with a rich vanilla flavor that pairs beautifully with the bright, slightly tart strawberry topping.
The graham cracker crust provides the perfect textural contrast, buttery and crisp against the creamy filling.
The strawberry topping is made with real strawberries cooked down into a glossy, syrupy sauce that makes every bite pop.
It’s a showstopper dessert that looks impressive but is very approachable for home bakers.
The recipe doesn’t require any overly fussy techniques, and you’ll find all the ingredients at any grocery store.
It’s also incredibly versatile. Swap in blueberries, raspberries, or a mix of berries for the topping and you have a whole new dessert.
And perhaps best of all: this is the kind of dessert that earns you serious compliments at the table.
For more gorgeous cheesecake ideas, check out this Lemon Cheesecake that’s just as stunning.
Ingredients
This recipe uses simple, widely available ingredients. Full-fat versions of the dairy ingredients are strongly recommended because they produce a noticeably creamier, richer result than low-fat alternatives.
For the Graham Cracker Crust:
- 2 cups (200g) graham cracker crumbs (about 15 full graham crackers)
- 3 tablespoons (38g) granulated sugar
- 6 tablespoons (85g) unsalted butter, melted
For the Cheesecake Filling:
- 32 oz (907g) full-fat block-style cream cheese, softened to room temperature (4 x 8 oz blocks)
- 1 cup (200g) granulated sugar
- 1 cup (240g) full-fat sour cream, at room temperature
- 1 tablespoon pure vanilla extract
- 4 large eggs, at room temperature
- 1 tablespoon fresh lemon juice
- Pinch of salt
For the Strawberry Topping:
- 1 lb (450g) fresh or frozen strawberries (about 3 cups)
- ⅓ cup (67g) granulated sugar
- 2 tablespoons fresh lemon juice
- 1 tablespoon cornstarch
- 2 tablespoons water
Read Also: No Bake Cheesecake Recipe
Kitchen Equipment Needed
Having the right tools makes this process smooth and stress-free. The most important piece of equipment is a springform pan, which allows you to release the cheesecake cleanly after baking.
- 9-inch springform pan
- Stand mixer or electric hand mixer
- Large mixing bowl
- Food processor (for making graham cracker crumbs)
- Medium saucepan
- Rubber spatula
- Parchment paper
- Heavy-duty aluminum foil
- Large roasting pan (for the water bath)
- Wire cooling rack
- Measuring cups and spoons
Read Also: Best Cheesecake Recipe
Recommended Products for This Recipe
These are products that can genuinely elevate your strawberry cheesecake experience, chosen for quality and performance.
1. 9-Inch Springform Pan (Non-Stick)
A high-quality springform pan is the single most important tool for cheesecake baking. A good non-stick springform pan releases the cheesecake cleanly without tearing or sticking, and it prevents leaks during water bath baking. Look for one with a tight seal and a heavy base for even heat distribution.
2. KitchenAid Stand Mixer
A stand mixer makes beating the cream cheese filling effortless and ensures a perfectly smooth, lump-free batter. The paddle attachment is ideal for cheesecake because it thoroughly incorporates the cream cheese without over-aerating the batter, which is key to avoiding cracks.
3. Parchment Paper Rounds
Pre-cut parchment rounds sized for a 9-inch pan make removing the cheesecake from the pan base much easier. They prevent any sticking and keep your presentation clean, especially when transferring the cheesecake to a serving plate.
4. Oven Thermometer
Home ovens can run hotter or cooler than their dials indicate, and cheesecakes are particularly sensitive to temperature. An oven thermometer lets you verify the actual temperature so your cheesecake bakes gently and evenly every time.
5. Heavy-Duty Aluminum Foil
When using a water bath, wrapping the springform pan tightly in heavy-duty foil prevents water from seeping into the crust. Standard foil is too thin for this and can tear. Heavy-duty foil gives you that secure seal.
Another cheesecake worth bookmarking: Oreo Cheesecake Recipe
Step-by-Step Instructions
1. Prep Your Pan and Preheat the Oven
- Preheat your oven to 350°F (175°C).
- Cut a circle of parchment paper to fit the bottom of your 9-inch springform pan and press it in.
- Lightly grease the sides of the pan with butter or non-stick spray.
- Wrap the outside of the pan snugly with two layers of heavy-duty aluminum foil, bringing it all the way up the sides. This prevents water from getting in during the water bath step.
- Set the prepared pan aside.
2. Make the Graham Cracker Crust
- If starting with whole graham crackers, break them into chunks and process in a food processor until finely ground. You need 2 cups (200g) of crumbs.
- Transfer the crumbs to a large bowl and add 3 tablespoons (38g) of granulated sugar. Stir to combine.
- Pour in the 6 tablespoons (85g) of melted butter and mix well until the crumbs look like damp sand and hold together when you press a small amount between your fingers.
- Pour the crumb mixture into the prepared springform pan.
- Using your fingers or the flat bottom of a measuring cup, press the crumbs firmly and evenly across the bottom and about 1 inch up the sides of the pan. The more firmly you pack it, the better it will hold after baking.
- Bake the crust at 350°F (175°C) for 10 minutes, until it just starts to look golden and smells fragrant.
- Remove from the oven and let it cool completely on a wire rack before adding the filling. Reduce oven temperature to 325°F (163°C).
3. Prepare the Cheesecake Filling
- Make sure all filling ingredients (cream cheese, sour cream, and eggs) are at room temperature before you begin. Cold cream cheese leads to lumps that are very difficult to smooth out.
- In the bowl of your stand mixer (or a large bowl with an electric hand mixer), beat the 32 oz (907g) of softened cream cheese on medium speed for about 2-3 minutes, stopping to scrape down the sides of the bowl with a rubber spatula, until it is completely smooth with no lumps.
- Add the 1 cup (200g) of granulated sugar and beat on medium speed for another 1-2 minutes until fully incorporated and fluffy.
- Add the 1 cup (240g) of sour cream, 1 tablespoon of vanilla extract, 1 tablespoon of lemon juice, and a pinch of salt. Mix on low speed until just combined, scraping the bowl as needed.
- Add the 4 large eggs one at a time, mixing on low speed after each addition until just incorporated. Do not overmix after adding the eggs. Overmixing at this stage incorporates too much air, which can cause cracks and a puffy-then-sunken texture.
- Use a rubber spatula to give the batter a final fold by hand, making sure nothing is stuck on the bottom of the bowl.
4. Bake the Cheesecake in a Water Bath
- Pour the prepared filling over the cooled graham cracker crust and smooth the top with a rubber spatula.
- Tap the pan gently on the counter 3-4 times to release any air bubbles trapped in the batter.
- Place the foil-wrapped springform pan inside a large roasting pan.
- Pour hot water (not boiling, just very hot tap water) into the roasting pan until it reaches about 1 inch (2.5 cm) up the side of the springform pan. This creates a gentle, humid baking environment that prevents the cheesecake from cracking and drying out.
- Carefully slide the roasting pan into the center of your preheated 325°F (163°C) oven.
- Bake for 60 to 75 minutes. The cheesecake is done when the edges are set and look firm, but the center (about a 2-3 inch circle in the middle) still jiggles gently when you give the pan a very slight shake. It should not be liquid, but it should wobble like set Jello. It will continue to firm up as it cools.
5. Cool the Cheesecake Slowly
- Turn off the oven when baking is complete. Do not open the door.
- Leave the cheesecake inside the closed oven for 1 hour. This gradual temperature drop is crucial for preventing cracks. Sudden temperature changes shock the filling and cause it to crack.
- After 1 hour, open the oven door just slightly (prop it open with the handle of a wooden spoon) and let the cheesecake sit for another 30 minutes.
- Remove the cheesecake from the roasting pan, carefully peel away the foil, and set it on a wire rack to cool completely to room temperature. This will take about 1-2 more hours.
- Once at room temperature, run a thin knife or offset spatula around the edge of the pan to loosen the crust from the sides. Do not remove the ring yet.
- Cover the top loosely with plastic wrap and refrigerate for at least 6 hours, or overnight for best results. This chilling period allows the filling to fully set and the flavor to develop.
6. Make the Strawberry Topping
- Hull and slice the fresh strawberries into halves or quarters. If using frozen strawberries, you do not need to thaw them first.
- Separate about one-third of the strawberries and set aside. These will be added at the end to keep some texture in the topping.
- Place the remaining two-thirds of the strawberries into a medium saucepan along with the ⅓ cup (67g) of sugar and 2 tablespoons of lemon juice.
- Cook over medium heat, stirring occasionally, until the strawberries break down and release their juices, about 8-10 minutes.
- In a small bowl, whisk together the 1 tablespoon of cornstarch and 2 tablespoons of water to form a slurry.
- Pour the cornstarch slurry into the saucepan while stirring. Cook for another 2-3 minutes until the sauce thickens and turns glossy.
- Remove from heat and stir in the reserved fresh or sliced strawberries. These soften slightly in the warm sauce and give the topping great texture.
- Allow the topping to cool completely to room temperature before using. If making ahead, store it in a covered jar in the refrigerator for up to 3 days.
7. Assemble and Serve
- Once the cheesecake has chilled for at least 6 hours, unlatch and carefully remove the outer ring of the springform pan.
- If you used a parchment round, you can slide the cheesecake onto a serving plate or cake stand. If not, it’s perfectly fine to serve directly on the metal base.
- Spoon the cooled strawberry topping generously over the top of the cheesecake just before serving, letting some of the sauce drip beautifully over the edges.
- Use a sharp knife dipped in hot water (and wiped dry between cuts) to slice clean, neat pieces.
- Serve immediately after topping, and enjoy!
For a lighter dessert option, you might love this Fruit Tart Recipe made with fresh seasonal fruit.
Tips for Success
Getting a cheesecake right is all about details. These key pointers will help you nail it on the first try.
- Use room temperature ingredients. This is the single most important tip for a smooth, lump-free filling. Cold cream cheese does not mix smoothly, no matter how long you beat it. Take your cream cheese, sour cream, and eggs out of the fridge at least 1 hour before you start.
- Don’t skip the water bath. The steam from the water bath creates a gentle, moist baking environment that promotes even cooking and significantly reduces the risk of cracking. Two snug layers of heavy-duty foil prevent water from leaking in.
- Don’t overmix the eggs. Once you add the eggs, mix only until just combined. Over-beating at this stage traps air bubbles that cause the cheesecake to puff up during baking and sink or crack as it cools.
- Cool it slowly. Turning the oven off and leaving the cheesecake inside for at least an hour before removing it is key. Sudden temperature changes cause cracks.
- Chill overnight for the best texture. While 6 hours is the minimum, overnight chilling produces a firmer, more sliceable cheesecake with a much better flavor. The patience is worth it.
- Add the strawberry topping right before serving. Adding the topping too early can make the crust soggy. Keep the cheesecake plain in the fridge and top it just before bringing it to the table.
You might also love this Carrot Cake with Cream Cheese Frosting if you enjoy cream-cheese-based desserts.
Serving Suggestions
This strawberry cheesecake is stunning on its own, but here are a few ideas for making the dessert spread even more special.
Serve each slice with a dollop of freshly whipped cream and a whole fresh strawberry on the side for an elegant presentation.
Pair slices alongside a platter of fresh seasonal fruits for a light and colorful dessert table.
- Serve with extra warmed strawberry sauce on the side for guests who want more topping
- Pair alongside a slice of Best Carrot Cake for a mixed dessert spread at parties
- Offer a scoop of vanilla ice cream on the side for a warm-meets-cold pairing
- Garnish with fresh mint leaves for a pop of color
- Serve with a cup of hot coffee or cold brew for a perfect after-dinner treat
Variations to Try
Once you’ve mastered the classic version, it’s easy to get creative. This base recipe is incredibly versatile.
- No-Bake Version. Skip the oven entirely and use a no-bake cheesecake filling made with whipped cream cheese and whipped heavy cream. Refrigerate for 6 hours or until fully set.
- Strawberry Swirl Cheesecake. Blend a small amount of strawberry puree into half the filling, then swirl it with the plain filling before baking for a beautiful marbled effect.
- Oreo Crust. Swap the graham cracker crust for a crushed Oreo crust. Use about 25 Oreos (filling included) blended with 5 tablespoons of melted butter. It adds a chocolate-strawberry twist.
- Mixed Berry Topping. Replace the strawberry topping with a mix of blueberries, raspberries, and blackberries for a stunning multi-berry version.
- Mini Cheesecakes. Divide the crust and filling between a lined muffin tin for individual serving-size cheesecakes. Reduce baking time to about 20-25 minutes. Check out the Mini Cheesecake Recipe for a detailed guide.
- Lemon Strawberry Cheesecake. Add 2 teaspoons of lemon zest directly to the filling for a bright citrus note that plays beautifully against the strawberries.
Read Also: New York Cheesecake Recipe
Storage and Reheating
Proper storage keeps your cheesecake tasting fresh and delicious for several days after baking.
- Refrigerator: Store leftover cheesecake covered tightly in plastic wrap or in an airtight container in the fridge. It keeps well for up to 5 days.
- Freezer: Cheesecake freezes beautifully. Slice the cheesecake (without the strawberry topping) into individual portions and wrap each slice tightly in plastic wrap, then in aluminum foil. Store in a freezer-safe container for up to 2 months.
- To Thaw: Move frozen slices to the refrigerator and let them thaw overnight. Never thaw at room temperature as this can affect texture.
- Do not freeze with the topping. The strawberry topping does not freeze well because it becomes watery when thawed. Always add it fresh after thawing.
- Reheating: Cheesecake is best enjoyed cold and does not need to be reheated. If you prefer a slightly warmer texture, let refrigerated slices sit at room temperature for 20-30 minutes before eating.
For another great make-ahead dessert, try this Classic Tiramisu that also benefits from overnight chilling.
Nutritional Facts
The following values are approximate and based on one slice of cheesecake (recipe cut into 12 slices), including a proportional amount of strawberry topping. Values will vary based on exact ingredients used.
| Nutrient | Per Serving (1 Slice) |
|---|---|
| Calories | ~430 kcal |
| Total Fat | 28g |
| Saturated Fat | 16g |
| Cholesterol | 135mg |
| Sodium | 310mg |
| Total Carbohydrates | 38g |
| Dietary Fiber | 1g |
| Total Sugars | 28g |
| Protein | 8g |
| Calcium | 120mg |
| Vitamin C | 18mg |
This cheesecake is a rich dessert best enjoyed in moderation as part of a balanced diet.
Read Also: Pumpkin Cheesecake Recipe
Health Benefits of Key Ingredients
While this is certainly an indulgent dessert, some of the core ingredients do offer genuine nutritional value.
Enjoy this treat mindfully knowing that a few of its star ingredients bring more than just flavor to the table.
- Strawberries are loaded with vitamin C, folate, and powerful antioxidants like anthocyanins that support heart health and help fight oxidative stress. Fresh strawberries are also a good source of dietary fiber and manganese.
- Cream cheese provides a source of calcium and fat-soluble vitamins like vitamin A. While it is calorie-dense, it also contains some protein and is made from real dairy, which contributes to bone health.
- Eggs are one of the most nutrient-dense foods available, providing high-quality complete protein, choline (essential for brain function), and vitamins D, B12, and selenium.
- Sour cream adds gut-friendly probiotics as well as calcium and vitamin B12. The fat in sour cream also helps the body absorb fat-soluble nutrients from the other ingredients.
- Lemon juice contributes vitamin C and acts as a natural preservative in the strawberry topping, while its acidity brightens the overall flavor of both the filling and the sauce.
Another dessert where fresh fruit shines: Fruit Salad Recipe
Frequently Asked Questions
1. Why did my cheesecake crack?
Cracking is usually caused by one of a few common issues: overmixing the batter (which traps air), baking at too high a temperature, or cooling the cheesecake too quickly.
Using a water bath, not overmixing after adding the eggs, and cooling the cheesecake slowly in the oven are the three most effective ways to prevent cracks. If your cheesecake does crack, don’t worry. The strawberry topping covers everything beautifully.
2. Do I really need a water bath?
A water bath is strongly recommended for this recipe because it produces a more even, creamy bake and significantly reduces cracking.
If you prefer to skip it, you can place a pan of hot water on the rack below the cheesecake to add some humidity to the oven. The result may not be quite as smooth, but it’s a workable alternative.
3. Can I use low-fat cream cheese or sour cream?
You can, but the results will be noticeably different. Full-fat cream cheese and sour cream produce the rich, creamy texture that a classic cheesecake is known for.
Low-fat versions contain more water, which can make the filling less stable, more prone to cracking, and not as luxuriously smooth.
4. How do I know when the cheesecake is done baking?
The edges of the cheesecake should look set and not shiny, while the center should still have a gentle jiggle when you slightly shake the pan. Think of it like a set Jello that wobbles as one cohesive unit rather than rippling like liquid.
The internal temperature of a properly baked cheesecake is around 150°F (65°C) if you want to use an instant-read thermometer for precision.
5. Can I make this cheesecake the day before?
Absolutely, and in fact making it the day before is highly recommended. Overnight chilling allows the filling to fully set, the flavors to deepen, and the cheesecake to become much easier to slice cleanly.
Just store it covered in the fridge without the topping, and add the strawberry sauce right before serving.
Read Also: Churro Cheesecake Recipe
Strawberry Cheesecake
Equipment
- 9-inch springform pan - Non-stick with a tight seal and heavy base for even heat distribution
- Stand mixer or electric hand mixer - Stand mixer with paddle attachment is ideal for smooth filling without over-aerating
- Large mixing bowl
- Food processor - For making graham cracker crumbs
- Medium saucepan
- Rubber spatula
- Parchment paper - Pre-cut rounds are convenient
- Heavy-duty aluminum foil - Two layers for water bath protection
- Large roasting pan - For water bath
- Wire cooling rack
- Measuring cups and spoons
- Oven thermometer - (optional) Verifies actual oven temperature
- Instant-read thermometer - (optional) For checking internal temperature of cheesecake
Ingredients
For the Graham Cracker Crust
- 2 cups graham cracker crumbs - 200g, about 15 full graham crackers
- 3 tablespoons granulated sugar - 38g
- 6 tablespoons unsalted butter - 85g, melted
For the Cheesecake Filling
- 32 oz cream cheese - 907g, full-fat, block-style, softened to room temperature (4 x 8 oz blocks)
- 1 cup granulated sugar - 200g
- 1 cup sour cream - 240g, full-fat, at room temperature
- 1 tablespoon pure vanilla extract
- 4 large eggs - at room temperature
- 1 tablespoon fresh lemon juice
- salt - pinch
For the Strawberry Topping
- 1 lb strawberries - 450g, about 3 cups, fresh or frozen
- ⅓ cup granulated sugar - 67g
- 2 tablespoons fresh lemon juice
- 1 tablespoon cornstarch
- 2 tablespoons water
Instructions
- Preheat oven to 350°F (175°C). Line the bottom of a 9-inch springform pan with parchment paper, grease the sides, and wrap the outside snugly with two layers of heavy-duty foil.
- Process graham crackers into fine crumbs. Combine with sugar and melted butter until mixture resembles damp sand. Press firmly into the bottom and 1 inch up the sides of the pan.
- Bake the crust at 350°F (175°C) for 10 minutes until golden and fragrant. Cool completely on a wire rack, then reduce oven temperature to 325°F (163°C).
- Beat softened cream cheese on medium speed for 2-3 minutes until completely smooth. Add sugar and beat until fluffy. Mix in sour cream, vanilla, lemon juice, and salt on low speed.
- Add eggs one at a time, mixing on low after each addition just until incorporated. Do not overmix. Fold the batter by hand to catch anything at the bottom of the bowl.
- Pour the filling over the cooled crust and smooth the top. Tap the pan on the counter 3-4 times to release air bubbles.
- Place the foil-wrapped pan in a roasting pan and add hot water until it reaches 1 inch up the side of the springform pan. Bake at 325°F (163°C) for 60-75 minutes.
- Turn off the oven and leave the cheesecake inside with the door closed for 1 hour. Then prop the door open slightly for 30 more minutes before removing to cool completely.
- Remove the cheesecake from the roasting pan and foil. Cool completely on a wire rack, then run a knife around the edges and refrigerate for at least 6 hours or overnight.
- Cook two-thirds of the strawberries with sugar and lemon juice until broken down. Stir in cornstarch slurry and cook until thickened. Remove from heat and stir in the reserved strawberries. Cool completely.
- Remove the cheesecake from the springform pan. Spoon the topping over the top just before serving, allowing some sauce to drip over the edges. Slice with a sharp knife dipped in hot water.
Notes
- Room temperature ingredients: Take cream cheese, sour cream, and eggs out of the fridge at least 1 hour before starting. Cold cream cheese will result in a lumpy filling that is difficult to smooth out.
- Don’t skip the water bath: The steam creates a gentle, moist baking environment that prevents cracking. Two snug layers of heavy-duty foil are essential to prevent water from leaking into the pan.
- Don’t overmix the eggs: Once you add the eggs, mix only until just combined. Over-beating traps air bubbles that cause the cheesecake to puff up during baking and sink or crack as it cools.
- Cool it slowly: Turning the oven off and leaving the cheesecake inside for at least an hour before removing it is key to preventing cracks from sudden temperature changes.
- Chill overnight: While 6 hours is the minimum, overnight chilling produces a firmer, more sliceable cheesecake with a much better flavor.
- Add topping before serving: Adding the strawberry topping too early can make the crust soggy. Keep the cheesecake plain in the fridge and top it just before bringing it to the table.
- Storage: Store leftover cheesecake covered in the fridge for up to 5 days. Freeze individual slices (without topping) wrapped in plastic and foil for up to 2 months.
- Variations: Swap the graham cracker crust for crushed Oreos, use a mix of berries for the topping, or add lemon zest to the filling for a bright citrus note.
- No-bake version: For a no-bake option, use a no-bake filling made with whipped cream cheese and whipped cream, then refrigerate for 6 hours until set.
- Serving suggestion: Serve each slice with a dollop of freshly whipped cream and a whole fresh strawberry on the side for an elegant presentation.
Final Thoughts
This classic strawberry cheesecake recipe is the kind of dessert that earns its place at every celebration and works just as well as a simple weekend treat.
It’s creamy, perfectly sweet with a touch of tang, and that homemade strawberry topping is truly the finishing touch that takes it from good to unforgettable.
If you give this recipe a try, please leave a comment below and let me know how it turned out for you. Did you make the classic version, or did you put your own spin on it?
Sharing your photos in the comments or tagging us on social media always makes our day. We’d love to see your beautiful cheesecakes.
Recommended:
- Cheesecake Ice Cream Cake Recipe
- Basque Cheesecake Recipe
- Japanese Cheesecake Recipe
- Strawberry Bruschetta Recipe
- Strawberry Sauce Recipe
- Strawberry Shortbread Cookies Recipe
- Easy Creme Brulee Recipe
- Banana Pudding Recipe
- Boston Cream Pie Recipe
- Easy Tiramisu Recipe


