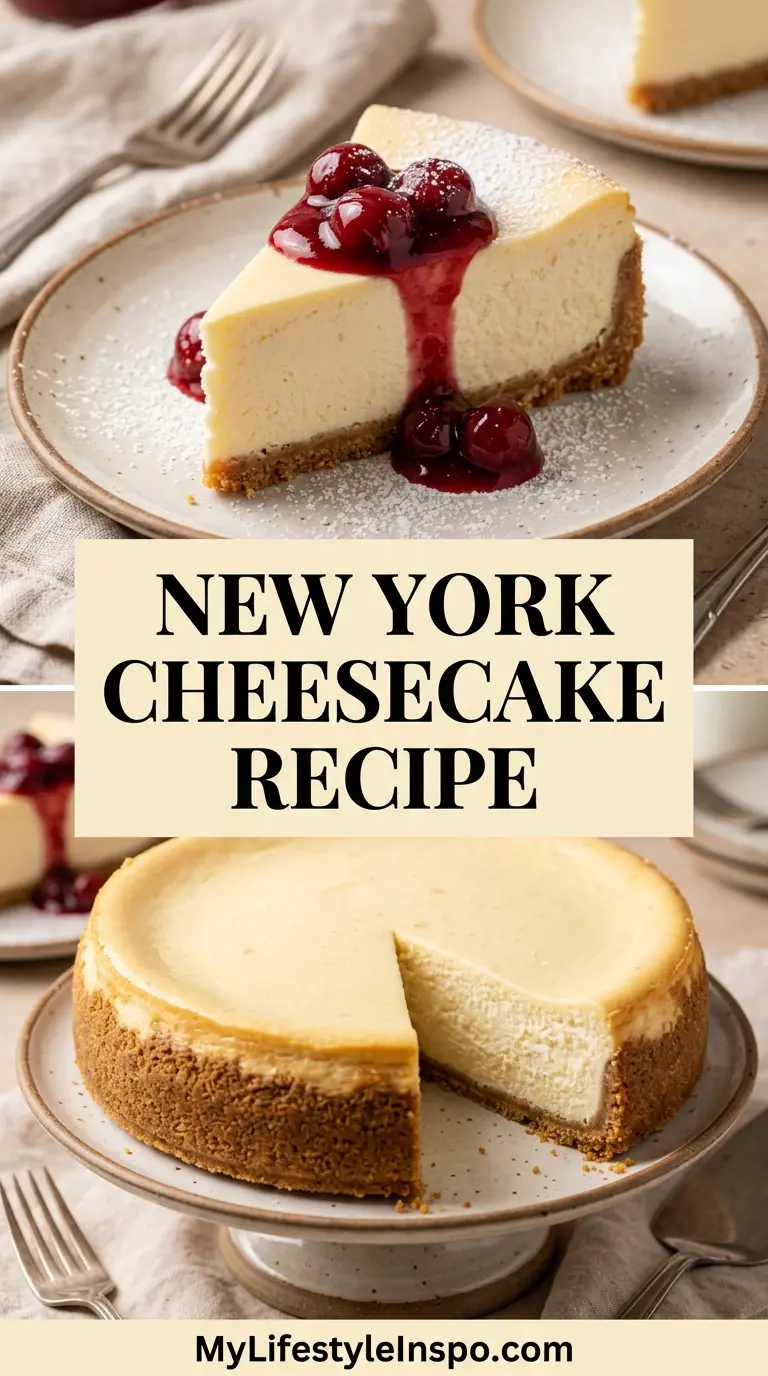
Few desserts have earned the kind of legendary status that a classic New York cheesecake recipe has. It’s dense, velvety, slightly tangy, and unmistakably rich in a way that no other cheesecake variety can quite replicate. This is the one baked in deep springform pans in Manhattan delis, the one people travel blocks out of their way to get a slice of.
What sets New York cheesecake apart from regular cheesecake is the high ratio of full-fat cream cheese in the filling. Where other styles rely heavily on heavy cream or ricotta for a silkier, lighter texture, the New York version leans hard into cream cheese, giving it that famously dense and firm bite.
The good news? You absolutely can recreate this at home. The technique is straightforward once you know the rules: use room-temperature ingredients, don’t overmix, and let the cheesecake cool slowly and patiently. Follow those three principles and you will have a bakery-worthy cheesecake every single time.
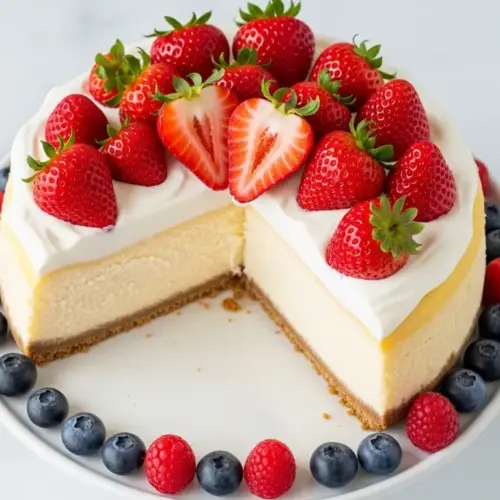
This recipe uses a classic graham cracker crust, a rich cream cheese filling with sour cream and a hint of lemon, and a baked sour cream topping that gives it that iconic, polished finish. It makes 12 generous slices and is perfect for celebrations, holidays, or any occasion that deserves something truly special.
If you love exploring cheesecake variations, you’ll also want to check out this Oreo Cheesecake Recipe for a chocolate-lover’s twist on the classic.
Why You’ll Love This New York Cheesecake Recipe
This cheesecake is the kind of recipe that becomes a permanent fixture in your dessert rotation.
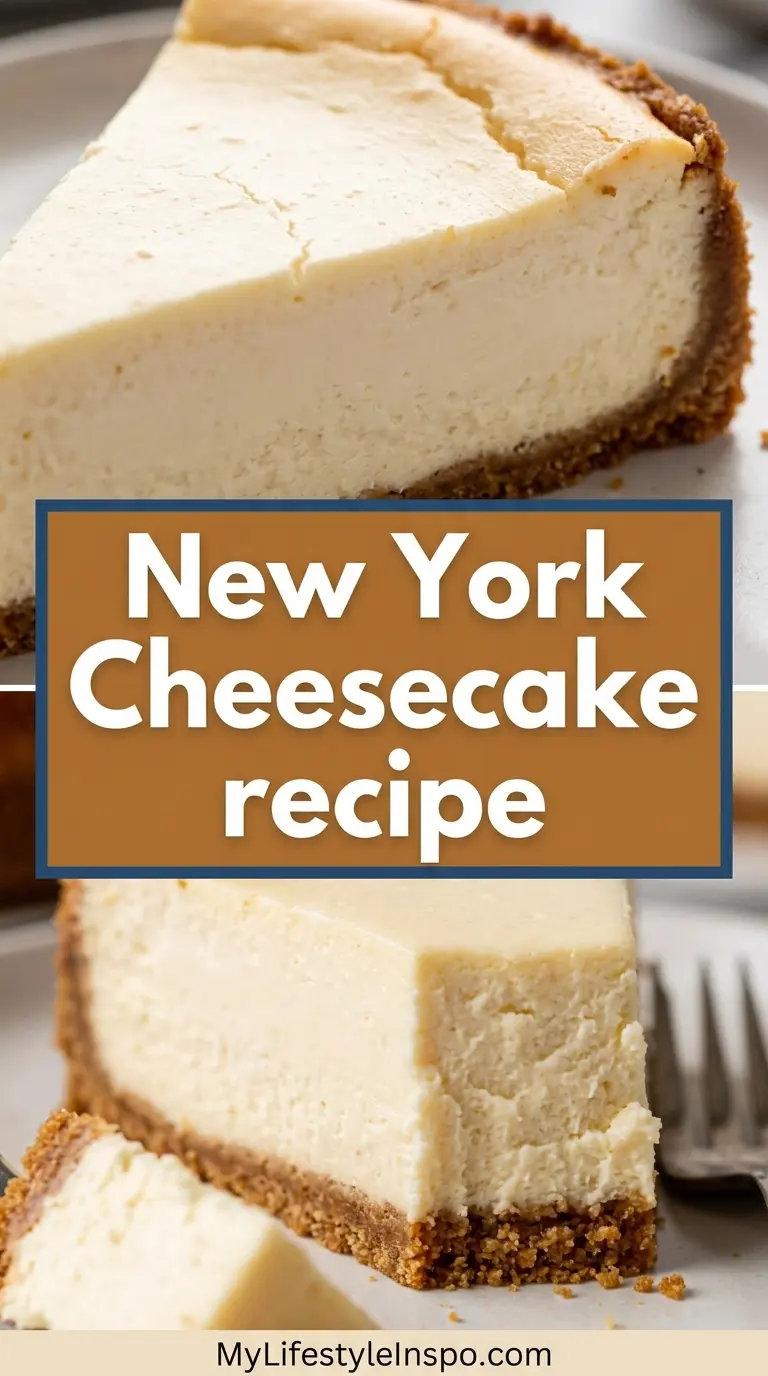
It delivers the real deal: a thick, buttery graham cracker crust with just the right amount of crunch, and a filling that is creamy, dense, and deeply satisfying. No shortcuts, no gelatin, no box mixes.
The sour cream topping does double duty. It covers any surface cracks that might appear during baking and adds a subtle tang that balances all that richness beautifully.
It is also remarkably make-ahead friendly. You bake it the day before serving, let it chill overnight, and the texture is actually better the next day once everything has had time to set properly.
This recipe is genuinely beginner-accessible as long as you follow the steps. Cheesecake has a reputation for being fussy, but when you understand why each step matters, the whole process becomes intuitive.
Here’s why this recipe stands out:
- Thick, buttery crust that holds its shape when sliced
- Ultra-creamy, dense filling with the signature New York texture
- Sour cream topping for a flawless, polished finish
- No water bath required when you follow the slow, gradual cooling method
- Make-ahead friendly and stores beautifully for several days
- Only 9 ingredients for the complete cheesecake
For another classic baked dessert you will love, try this Lemon Cheesecake Recipe for a bright, citrusy variation.
Ingredients
Here is everything you need to make this New York cheesecake from scratch. Use full-fat ingredients throughout for the best possible texture and flavor.
For the Graham Cracker Crust:
- 2 cups (200g) graham cracker crumbs (about 14 full sheets, finely crushed)
- 1/4 cup (50g) granulated sugar
- 1/2 cup (115g) unsalted butter, melted
For the Cheesecake Filling:
- 32 oz (900g) full-fat Philadelphia cream cheese, softened to room temperature
- 1 1/4 cups (250g) granulated sugar
- 1/4 cup (60g) full-fat sour cream, at room temperature
- 2 teaspoons pure vanilla extract
- 1 tablespoon fresh lemon juice
- 1 teaspoon lemon zest
- 2 tablespoons all-purpose flour
- 4 large eggs, at room temperature
For the Sour Cream Topping:
- 1 1/2 cups (360g) full-fat sour cream
- 3 tablespoons granulated sugar
- 1 teaspoon pure vanilla extract
The flour in the filling is the secret ingredient that most beginners don’t expect. It stabilizes the proteins in the eggs during baking, which dramatically reduces the chance of cracking and gives the cheesecake a lighter, more consistent texture throughout.
For a fruity variation on this classic, this Strawberry Cheesecake Recipe is a gorgeous next step.
Kitchen Equipment Needed
You don’t need a professional kitchen to pull this off, but a few key tools will make the process much smoother.
- 9-inch springform pan (a quality, leak-proof pan is essential)
- Stand mixer or hand mixer with paddle attachment
- Large mixing bowls
- Offset spatula
- Rubber spatula
- Measuring cups and spoons
- Kitchen scale (for accurate measurements)
- Food processor or zip-lock bag and rolling pin (for crushing graham crackers)
- Roasting pan or large baking dish (for the water bath)
- Aluminum foil
- Instant-read thermometer (optional but helpful)
- Cooling rack
The springform pan is non-negotiable here. The removable sides allow you to release the cheesecake cleanly without any damage to the sides of the cake.
Read Also: Mini Cheesecake Recipe
Recommended Products for This Recipe
These are products I genuinely recommend based on quality and performance. Using the right tools and ingredients makes a real difference with a recipe like this.
1. Philadelphia Full-Fat Cream Cheese Blocks
Philadelphia is widely considered the gold standard for New York cheesecake, and for good reason. The brick-style blocks have a firmer, drier consistency than tub-style cream cheese, which gives the filling that signature dense texture. Using a lower-fat or spreadable version will result in a looser, less stable filling.
2. Fat Daddio’s 9-Inch Springform Pan
A quality springform pan that doesn’t leak is the single most important piece of equipment in this recipe. Fat Daddio’s anodized aluminum pans heat evenly and have a secure latch that prevents water from seeping in during the water bath. The straight, tall sides also give the cheesecake that classic New York look.
3. KitchenAid Hand Mixer
Getting the cream cheese perfectly smooth before adding the eggs is critical. A powerful hand mixer or stand mixer does this in minutes without you having to worry about lumps. The key is to beat the cream cheese on its own first before adding anything else.
4. Nielsen-Massey Pure Vanilla Extract
Real vanilla extract is worth it in a recipe this simple, where every flavor is front and center. Nielsen-Massey is a favorite among professional bakers for its clean, complex vanilla flavor that doesn’t taste harsh or synthetic.
5. OXO Digital Kitchen Scale
Baking by weight is far more reliable than baking by volume, especially for something as precision-dependent as cheesecake. An OXO digital scale is accurate, easy to read, and makes prep much faster since you can measure directly into your mixing bowl.
Another favorite: Blueberry Cheesecake Recipe
Step-by-Step Instructions
1. Prepare Your Ingredients and Equipment
- Take your cream cheese, eggs, and sour cream out of the refrigerator at least 2 hours before you begin baking. Room-temperature ingredients blend together smoothly and evenly; cold cream cheese will not fully incorporate and will leave lumps in the batter.
- Preheat your oven to 350°F (175°C).
- Grease the inside of your 9-inch springform pan with softened butter, coating the bottom and sides thoroughly.
- Cut a circle of parchment paper to fit the bottom of the pan and press it into place. This makes it much easier to remove the finished cheesecake.
- Wrap the outside of the springform pan tightly with 2 to 3 large sheets of heavy-duty aluminum foil, covering the bottom and coming up the sides. This waterproofing step is essential if you use a water bath; it prevents any water from seeping into the crust.
- Fill a large pot or kettle with water and set it on the stove to heat while you prepare the crust and filling.
2. Make the Graham Cracker Crust
- If using whole graham crackers, place them in a food processor and pulse until they become fine, even crumbs. Alternatively, place the crackers in a large zip-lock bag and crush them with a rolling pin until very fine with no large chunks remaining.
- In a medium mixing bowl, combine 2 cups (200g) of graham cracker crumbs and 1/4 cup (50g) of granulated sugar. Stir together until evenly mixed.
- Pour 1/2 cup (115g) of melted unsalted butter over the crumb mixture. Stir with a fork until all the crumbs are evenly moistened and the mixture holds together when pressed between your fingers.
- Pour the crumb mixture into the prepared springform pan. Use the flat bottom of a measuring cup or glass to press the crumbs firmly and evenly across the bottom of the pan. You can press them about 1 inch up the sides as well for a slightly taller crust, but a flat bottom crust also works beautifully.
- Bake the crust in the preheated oven for 10 minutes, until it is lightly golden and fragrant. Remove from the oven and set aside to cool slightly. Leave the oven on at 350°F (175°C).
3. Make the Cheesecake Filling
- In the bowl of your stand mixer fitted with the paddle attachment, or using a large bowl and hand mixer, beat the 32 oz (900g) of softened cream cheese on medium speed for 3 to 4 minutes, stopping to scrape down the sides and bottom of the bowl frequently. The cream cheese should be completely smooth, fluffy, and free of any lumps before you add anything else.
- Reduce the mixer speed to low and add 1 1/4 cups (250g) of granulated sugar in a slow, steady stream. Mix on medium speed for another 2 minutes until the sugar is fully incorporated and the mixture is light and creamy.
- Add 1/4 cup (60g) of full-fat sour cream, 2 teaspoons of pure vanilla extract, 1 tablespoon of fresh lemon juice, and 1 teaspoon of lemon zest. Mix on low speed just until combined, about 30 seconds.
- Add 2 tablespoons of all-purpose flour and mix on low speed until just incorporated. Scrape down the sides of the bowl.
- This is the most critical step: reduce the mixer to the lowest speed possible and add the 4 room-temperature eggs one at a time. Allow each egg to fully incorporate before adding the next. Mix only until each egg disappears into the batter. Do not overmix at this stage. Overbeating the eggs incorporates too much air, which causes the cheesecake to puff up in the oven and then crack as it deflates during cooling.
- Scrape the sides and bottom of the bowl one final time with a rubber spatula and give the batter a few gentle folds by hand to make sure everything is evenly combined.
4. Bake the Cheesecake
- Pour the cheesecake batter into the cooled graham cracker crust and smooth the top with an offset spatula.
- Place the foil-wrapped springform pan inside a large roasting pan or baking dish. Pour the hot water you heated earlier into the roasting pan until it reaches about 1 inch (2.5 cm) up the sides of the springform pan. This water bath surrounds the cheesecake with gentle, moist heat, which helps it bake evenly and prevents the top from drying out and cracking.
- Carefully transfer the roasting pan to the oven. Bake at 350°F (175°C) for 55 to 65 minutes. The cheesecake is done when the edges are set and firm but the center 2 to 3 inches still has a slight jiggle when you gently shake the pan. The center will continue to set as it cools.
- Do not overbake. An overbaked cheesecake will have a grainy, dry texture and is far more prone to cracking.
5. Prepare and Apply the Sour Cream Topping
- While the cheesecake is in its final 10 minutes of baking, stir together 1 1/2 cups (360g) of full-fat sour cream, 3 tablespoons of granulated sugar, and 1 teaspoon of pure vanilla extract in a small bowl. Mix until smooth.
- When the cheesecake comes out of the oven, gently spread the sour cream topping over the top of the warm cheesecake using an offset spatula. Work from the center outward with gentle, even strokes.
- Return the cheesecake (still in the water bath) to the oven for an additional 10 minutes. This sets the sour cream topping into a smooth, slightly glossy layer.
6. Cool the Cheesecake Slowly
- After the final 10 minutes, turn off the oven completely. Leave the cheesecake inside with the oven door propped open by about 1 to 2 inches. Allow it to rest this way for 1 hour. This gradual cooling process is one of the most important steps for preventing cracks; rapid temperature changes cause the filling to contract too quickly.
- After 1 hour in the oven, remove the cheesecake from the water bath and carefully peel the foil from the outside of the pan. Place the cheesecake on a wire cooling rack and allow it to cool to room temperature completely, about 1 to 2 more hours.
- Once fully cooled, run a thin knife or offset spatula gently around the edge of the cheesecake to loosen it from the sides of the pan. Do not remove the pan ring yet.
- Cover loosely with plastic wrap and refrigerate for a minimum of 6 hours, though overnight is strongly preferred. The texture improves significantly as it chills.
7. Unmold and Serve
- Remove the chilled cheesecake from the refrigerator at least 20 minutes before serving to take the chill off slightly.
- Release the springform pan latch and carefully lift the ring straight up and away. If the cheesecake sticks at any point, use a thin knife to gently release it.
- Slide the cheesecake off the pan base (using a large spatula or cake lifter) and onto a serving plate, or serve it directly on the springform base.
- Slice with a sharp knife wiped clean with a damp cloth between each cut for the cleanest slices possible.
Read Also: Pumpkin Cheesecake Recipe
Tips for Success
Small adjustments in technique make an enormous difference in the final result of this recipe. Here are the most important ones to keep in mind.
- Room temperature is everything. Cold cream cheese creates lumpy, uneven batter no matter how long you mix it. Set everything out at least 2 hours ahead, or up to 4 hours for best results.
- Do not overmix after the eggs go in. Beat on the lowest speed setting and stop as soon as each egg disappears. Overbeating introduces air bubbles that expand in the oven and then collapse, causing cracks.
- Use a water bath. The steam from the hot water keeps the oven environment moist and helps the cheesecake bake gently and evenly from edge to center.
- The jiggle test is your best doneness indicator. The center 2 to 3 inches of the cheesecake should still wobble slightly when the pan is gently shaken. It will continue to cook through residual heat during cooling.
- Never skip the slow cooling step. Going from hot oven to cold counter in one step almost guarantees cracking. The gradual oven cool-down prevents this entirely.
- Chill overnight if possible. A cheesecake that has rested in the refrigerator for 12 hours or more has a noticeably better texture than one served after only a few hours.
- Warm your knife for cleaner slices. Run the knife blade under hot water, wipe it dry, and then cut. Clean the knife between each slice for picture-perfect portions.
This technique works brilliantly with other baked cheesecake styles too, like this Basque Cheesecake Recipe.
Serving Suggestions
A classic New York cheesecake is stunning on its own, but a few simple toppings and pairings take it over the top.
The most traditional way to serve it is plain, letting the flavors of the cream cheese filling and buttery crust speak for themselves. A light dusting of powdered sugar is a nice touch for presentation without adding much sweetness.
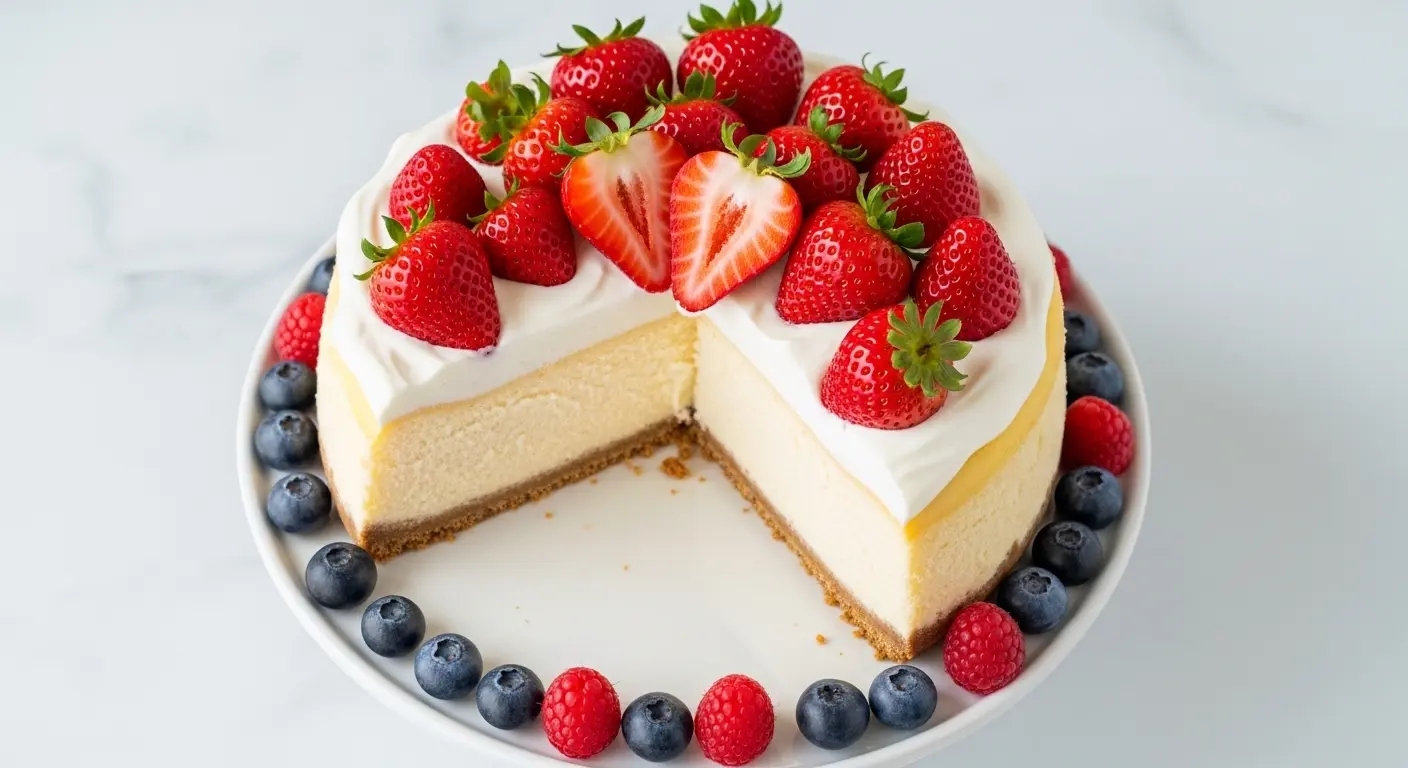
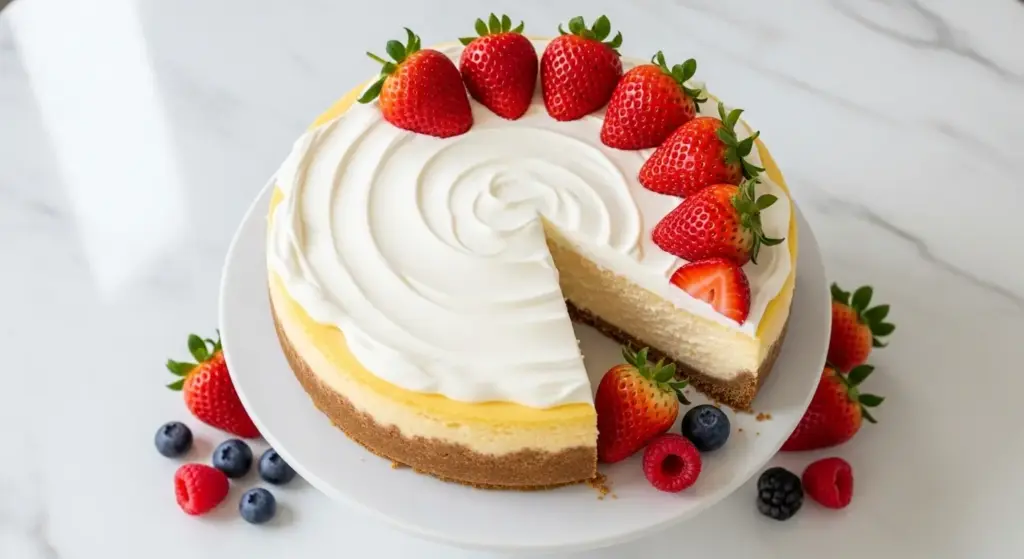
Fresh strawberry sauce is arguably the most classic topping for a reason: the bright, tart flavor of the berries cuts through the richness of the filling in the most satisfying way. Blueberry compote, cherry sauce, or lemon curd work equally well.
For a more indulgent dessert spread, serve slices alongside a dollop of lightly sweetened whipped cream and a drizzle of caramel sauce or hot fudge. It also pairs beautifully with a strong cup of coffee or espresso to balance the sweetness.
Here are some great ideas for rounding out a dessert table:
- Fresh strawberries, blueberries, or raspberries on the side
- Fruit Tart as a complementary dessert option
- A scoop of vanilla ice cream alongside each slice
- A simple blueberry or cherry compote spooned over the top
- Caramel sauce drizzled across the surface just before serving
- Classic Deviled Eggs as a savory starter before a dessert-centered gathering
Variations to Try
Once you’ve mastered this base recipe, the variations are almost endless. The creamy filling and buttery crust work as a perfect canvas for so many different flavors and toppings.
- Strawberry Cheesecake: Top with a homemade strawberry compote or fresh sliced strawberries in a light glaze for the quintessential cheesecake presentation.
- Blueberry Cheesecake: Spoon a thick blueberry topping over the chilled cheesecake for a gorgeous, jewel-toned finish.
- Oreo Crust: Replace the graham cracker crust with crushed Oreo cookies mixed with melted butter for a cookies-and-cream twist.
- Lemon Cheesecake: Double the lemon zest and juice in the filling and add a lemon curd topping for a brighter, more citrus-forward cheesecake.
- Pumpkin Swirl: Blend 1/2 cup of canned pumpkin with cinnamon and nutmeg and swirl it through the top of the batter before baking for a seasonal variation.
- Chocolate Marble: Melt 4 oz of dark chocolate and drizzle it over the top of the batter, then swirl with a toothpick or skewer before baking.
- Mini Cheesecakes: Use a standard muffin tin lined with paper liners, fill each 3/4 full, and reduce the baking time to about 20 to 25 minutes for individual servings.
For a no-oven option, the No Bake Cheesecake Recipe is a fantastic alternative that delivers great flavor with much less effort.
Storage and Reheating
New York cheesecake stores beautifully, which makes it a perfect make-ahead dessert for parties and gatherings.
Keep these storage guidelines in mind to preserve both the flavor and texture of your cheesecake.
- Refrigerator: Store the cheesecake covered loosely with plastic wrap or in an airtight container in the refrigerator for up to 5 days. The flavor actually improves after the first day, making it a genuinely better dessert when made ahead.
- Freezer: New York cheesecake freezes exceptionally well for up to 2 months. Freeze the whole cheesecake or individual slices. Wrap tightly in two layers of plastic wrap followed by a layer of aluminum foil to prevent freezer burn. Thaw overnight in the refrigerator before serving.
- Serving from cold: Remove the cheesecake from the refrigerator about 20 to 30 minutes before serving for the best texture and flavor.
- Reheating: This cheesecake is intended to be served cold or at room temperature. Do not microwave individual slices or attempt to warm the cheesecake; heating ruins the texture and structure of the filling.
- Add toppings at serving: If you plan to use fresh fruit toppings or whipped cream, add these just before serving rather than storing them on the cheesecake to prevent sogginess.
Read Also: Churro Cheesecake Recipe
Nutritional Facts
The following are approximate values per slice, based on 12 slices per cheesecake.
| Nutrient | Per Serving |
|---|---|
| Calories | 490 kcal |
| Total Fat | 35g |
| Saturated Fat | 20g |
| Cholesterol | 165mg |
| Sodium | 320mg |
| Total Carbohydrates | 36g |
| Dietary Fiber | 0.5g |
| Sugars | 28g |
| Protein | 8g |
| Calcium | 110mg |
These figures are estimates only and will vary depending on specific brands and ingredient quantities used.
You might also enjoy: Japanese Cheesecake Recipe
Health Benefits of Key Ingredients
While New York cheesecake is absolutely a treat and should be enjoyed in moderation, several of its core ingredients do offer genuine nutritional value.
This is not a diet food, but it is made from real, whole ingredients, and there are some worthwhile nutrients tucked inside every slice.
- Cream cheese is a source of calcium and phosphorus, both essential for bone health. It also contains fat-soluble vitamins A and K2, which support immune function and cardiovascular health respectively.
- Eggs are one of the most complete protein sources available. They contain all nine essential amino acids, along with choline (vital for brain and liver health), vitamin D, and B vitamins including B12 and riboflavin.
- Sour cream provides calcium and phosphorus for bone strength, as well as probiotics in live-culture versions that can support gut health.
- Lemon juice and zest bring vitamin C and flavonoids to the filling. Vitamin C supports immune function and aids in collagen production, while the zest contains antioxidants from the lemon’s essential oils.
- Graham crackers (crust) provide a modest amount of dietary fiber and whole grain nutrients when made with whole wheat varieties, along with a small amount of iron and B vitamins from the flour.
Here are the key nutritional highlights to be aware of:
- High in calcium from cream cheese, sour cream, and eggs
- Good source of complete protein from the eggs
- Contains B vitamins including B12, riboflavin, and pantothenic acid
- Provides fat-soluble vitamins A and K from the cream cheese
- Lemon contributes vitamin C and beneficial plant compounds
- Butter and cream cheese provide conjugated linoleic acid (CLA), a naturally occurring fatty acid linked to certain health benefits
Another classic dessert worth exploring: Best Cheesecake Recipe
Frequently Asked Questions
1. Why did my New York cheesecake crack on top?
Cracks are almost always caused by one of three things: overmixing (which incorporates too much air), overbaking (which causes the filling to dry out and contract), or cooling too quickly (which shocks the filling and causes it to split).
To avoid this in the future, use the lowest mixer speed when adding eggs, remove the cheesecake from the oven when the center is still slightly wobbly, and always cool gradually with the oven door slightly open before moving it to a rack.
2. Do I have to use a water bath for this recipe?
A water bath is not strictly required, but it is strongly recommended. The steam from the hot water helps the cheesecake bake more gently and evenly, which significantly reduces the chance of cracking and results in a smoother, creamier texture throughout.
If you prefer to skip it, bake the cheesecake at a lower temperature (around 300°F/150°C) and place a separate pan of hot water on the rack below. The result will be good, though not quite as flawless.
3. Can I make this cheesecake the day before serving?
Absolutely, and this is actually the recommended approach. Cheesecake needs at least 6 hours to chill and set properly, and the texture and flavor improve noticeably after 12 to 24 hours in the refrigerator.
Bake it the evening before you plan to serve it, let it cool completely, and refrigerate it overnight. Add any toppings just before serving for the freshest presentation.
4. Why is it important to use full-fat cream cheese?
Full-fat cream cheese has a much firmer, denser consistency than reduced-fat or spreadable varieties. This is what gives New York cheesecake its characteristic dense, rich texture.
Low-fat cream cheese contains more water and less fat, which results in a looser, less stable filling that doesn’t set properly. Stick with full-fat block-style cream cheese (like Philadelphia) for the best results.
5. How do I know when the cheesecake is properly baked?
The most reliable way is to look for the jiggle: the outer 2 to 3 inches of the cheesecake should be set and firm when the pan is gently shaken, but the center should still have a noticeable wobble, similar to gelatin.
If you have an instant-read thermometer, the internal temperature at the center should read around 150°F (65°C) at this stage. Pull it from the oven at this point; residual heat will carry the temperature up slightly during cooling.
Read Also: Cheesecake Ice Cream Cake Recipe
Classic New York Cheesecake
Equipment
- 9-inch springform pan - leak-proof
- Stand mixer or hand mixer - with paddle attachment
- Large mixing bowls
- Offset spatula
- Rubber spatula
- Measuring cups and spoons
- Kitchen scale - for accurate measurements
- Food processor or zip-lock bag - for crushing graham crackers
- Rolling Pin - if not using food processor
- Roasting pan or large baking dish - for water bath
- Aluminum foil - heavy-duty
- Instant-read thermometer - optional but helpful
- Cooling rack
Ingredients
- 2 cups graham cracker crumbs - 200g, about 14 full sheets
- 1/4 cup granulated sugar - 50g
- 1/2 cup unsalted butter - 115g, melted
For the Cheesecake Filling
- 32 oz full-fat cream cheese - 900g, softened to room temperature (4 blocks)
- 1 1/4 cups granulated sugar - 250g
- 1/4 cup full-fat sour cream - 60g, at room temperature
- 2 teaspoons pure vanilla extract
- 1 tablespoon fresh lemon juice
- 1 teaspoon lemon zest
- 2 tablespoons all-purpose flour
- 4 large eggs - at room temperature
For the Sour Cream Topping
- 1 1/2 cups full-fat sour cream - 360g
- 3 tablespoons granulated sugar
- 1 teaspoon pure vanilla extract
Instructions
- Remove cream cheese, eggs, and sour cream from refrigerator 2 hours before baking. Preheat oven to 350°F (175°C). Grease springform pan, line with parchment paper, and wrap exterior with heavy-duty foil.
- Combine graham cracker crumbs, sugar, and melted butter in a bowl. Press mixture firmly into bottom of prepared pan. Bake for 10 minutes and cool slightly.
- Beat cream cheese on medium speed for 3-4 minutes until smooth. Add sugar and mix for 2 minutes. Add sour cream, vanilla, lemon juice, and zest. Mix in flour. Add eggs one at a time on low speed, mixing just until combined.
- Pour filling into cooled crust and smooth top. Place springform pan in a roasting pan and add hot water to reach 1 inch up the sides. Bake at 350°F for 55-65 minutes until edges are set and center jiggles slightly.
- While cheesecake bakes, stir together sour cream, sugar, and vanilla for topping. When cheesecake is done, spread topping over the surface and return to oven for 10 minutes.
- Turn off oven and prop door open 1-2 inches. Leave cheesecake inside for 1 hour. Remove from water bath and cool completely on a wire rack for 1-2 hours.
- Run a thin knife around the edge, cover loosely with plastic wrap, and refrigerate for at least 6 hours or overnight. Remove from pan, slice with a warm knife, and serve.
Notes
- Room temperature is critical: Cold cream cheese creates lumps. Set all dairy out at least 2 hours ahead, up to 4 hours for best results.
- Don’t overmix after adding eggs: Beat on lowest speed and stop as soon as each egg disappears. Overbeating creates air bubbles that cause cracking.
- The jiggle test: The center 2-3 inches should still wobble slightly when done. It will continue to set during cooling.
- Slow cooling prevents cracks: Never skip the 1-hour oven cool-down or the 1-2 hour room temperature cooling.
- Chill overnight: The texture improves significantly after 12-24 hours in the refrigerator. Always make this ahead.
- For clean slices: Run your knife under hot water, wipe dry, and cut. Clean the knife between each slice.
- Substitutions: For an Oreo crust, replace graham crackers with crushed Oreos. For a lemon version, double the lemon zest and juice.
- Storage: Refrigerate covered for up to 5 days. Freeze whole or sliced for up to 2 months, wrapped tightly in plastic and foil.
Final Thoughts
A great New York cheesecake recipe is one of those things worth learning properly, because once you get it right, you’ll never need another version.
This one delivers everything the classic should: a thick, firm, beautifully flavored filling, a buttery and crisp crust, and that smooth sour cream top that makes it look as impressive as anything from a Manhattan bakery.
Give yourself the time to let the ingredients come to room temperature, take the cooling process slowly, and chill it overnight. These are not optional extras; they are the steps that separate a good cheesecake from a truly exceptional one.
If you make this recipe, we’d absolutely love to hear how it turned out! Drop a comment below, share a photo, or tag us on social media. And if you have a favorite topping or variation you love to use, share it with us too. Happy baking!
Recommended:
- Blueberry Cheesecake Recipe
- Basque Cheesecake Recipe
- Mini Cheesecake Recipe
- Best Chocolate Chip Cookies Recipe
- Classic Tiramisu Recipe
- Easy Creme Brulee Recipe
- Fruit Salad Recipe
- Classic Apple Pie Recipe
- Boston Cream Pie Recipe
- Best Carrot Cake Recipe


