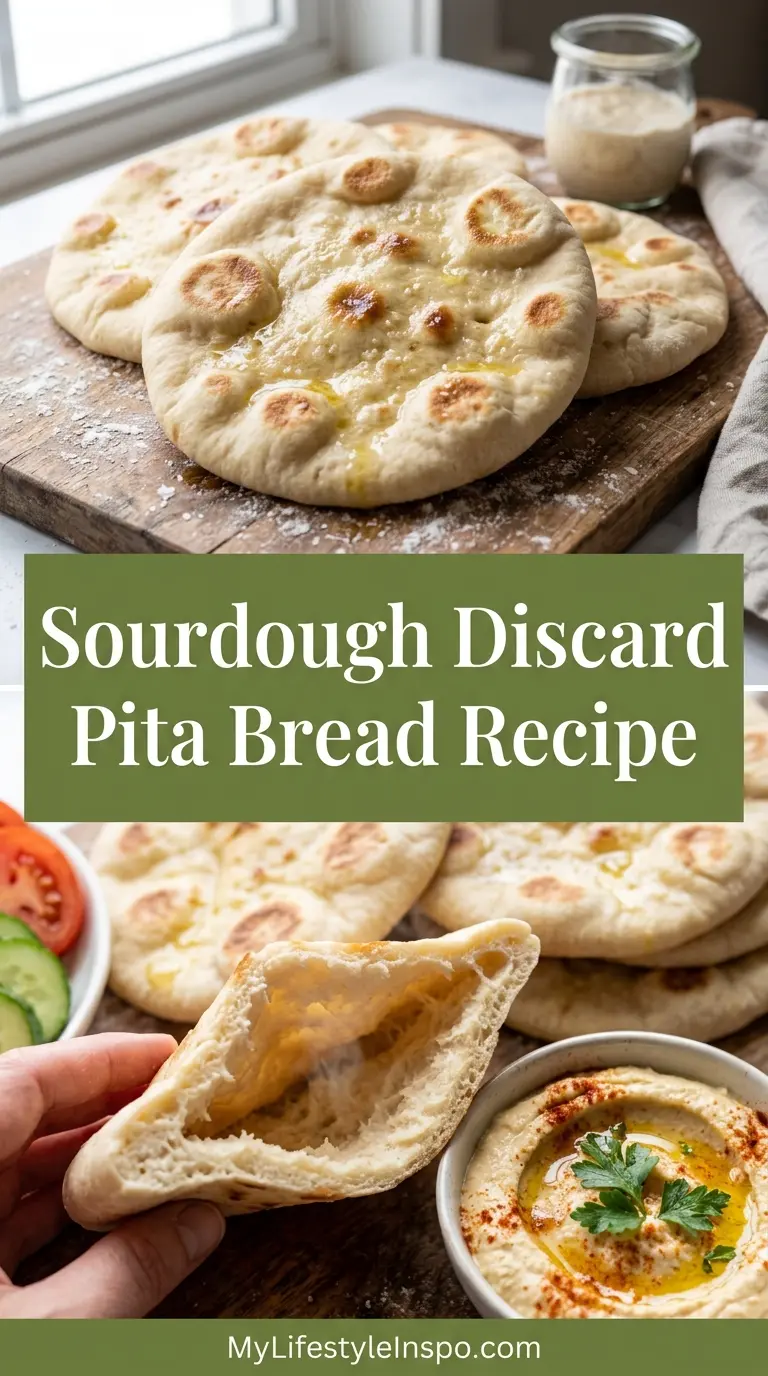
If you’ve been looking for a way to use up that jar of sourdough discard sitting in your fridge, this sourdough discard pita bread recipe is exactly what you need. These homemade pitas are soft, slightly chewy, and wonderfully pillowy, with just a hint of tang that makes them taste so much more interesting than anything you’d buy at the store.
The magic of using discard here is twofold. First, it adds a subtle depth of flavor that you simply can’t get from a standard yeast-only dough. Second, it helps reduce waste from your regular sourdough feeding schedule. Since the discard alone doesn’t have enough leavening power to lift the dough on its own, this recipe pairs it with a small amount of instant yeast to guarantee that beautiful puff every single time.
Pita bread is traditionally baked in a very hot oven or on a scorching hot skillet. That extreme heat is what produces the steam inside the dough, forcing the layers to separate and create that iconic hollow pocket. This recipe works beautifully on a stovetop cast iron skillet, making it accessible even if you don’t have a pizza stone.
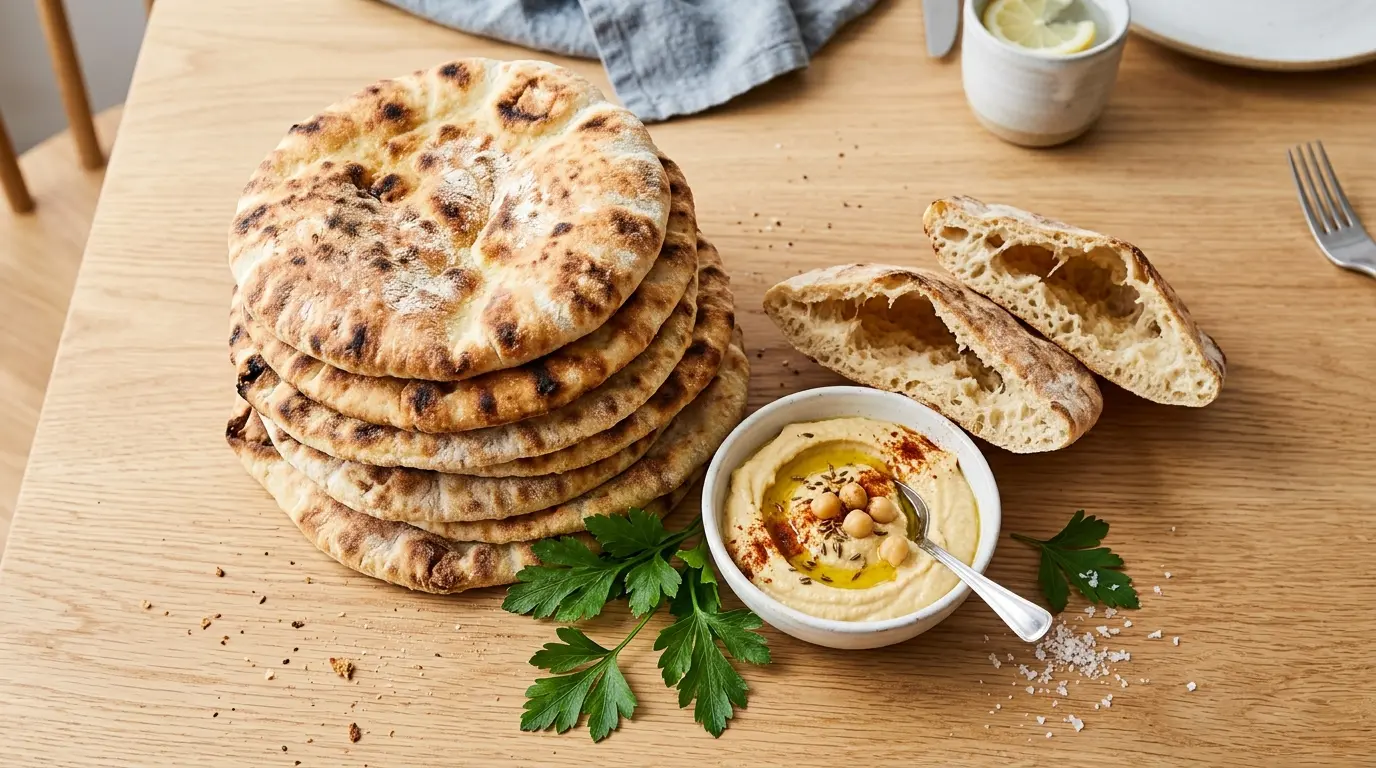
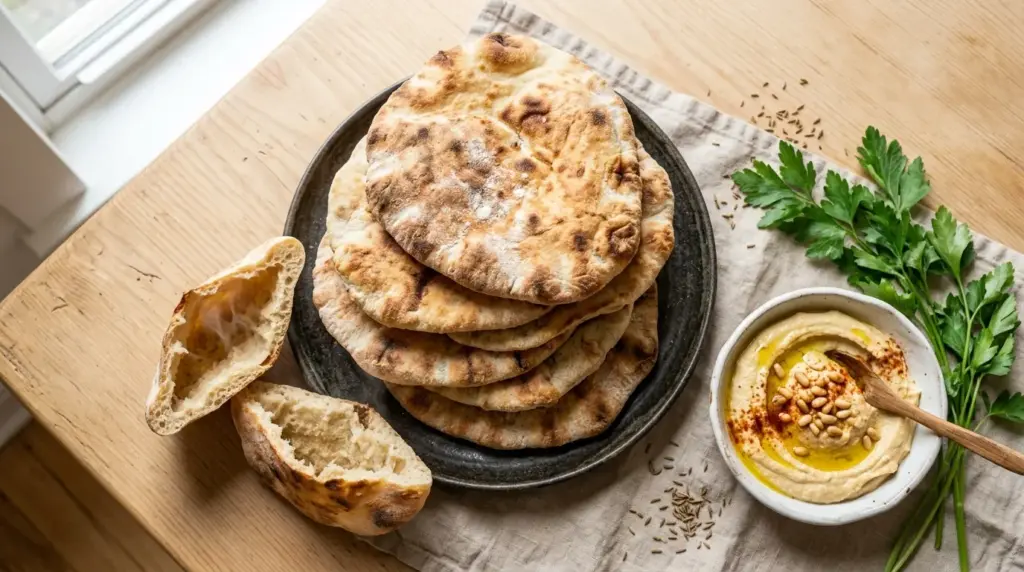
You’ll love tearing into these warm, fresh pitas straight from the pan. Pair them with hummus, stuff them with shawarma, or just eat them plain with a pat of butter. Once you try homemade sourdough discard pita, you won’t go back.
You might also enjoy: Sourdough Discard Flatbread
Why You’ll Love This Sourdough Discard Pita Bread Recipe
This recipe is genuinely one of the most rewarding things you can make with your sourdough discard.
You get soft, pillowy pitas with that beautiful hollow pocket, all from pantry staples you likely already have on hand.
The discard adds a gentle tang and complexity that elevates these far beyond plain flatbread, without making them taste overly sour.
They come together in just a few hours, including rise time, which makes this a very realistic same-day bake.
The technique is straightforward enough for beginner bread bakers, and forgiving enough that even imperfect pitas still taste delicious.
Here’s a quick summary of why this recipe works so well:
- Uses up sourdough discard so nothing goes to waste
- Instant yeast provides reliable lift even when using unfed discard
- Hot cast iron cooking method creates the signature pocket without a pizza oven
- Simple, clean ingredients with no artificial additives
- Ready in about 2-3 hours from start to finish
- Versatile as a wrap, dipper, sandwich base, or snack
Read Also: Sourdough Discard Bagels Recipe
Ingredients
You’ll need just a handful of everyday ingredients to pull these together. Make sure your discard is at 100% hydration (equal parts flour and water by weight) for the best results. If your discard is thicker or looser, you’ll need to adjust the flour slightly.
- 1 cup (240g) sourdough discard, at room temperature
- 2 teaspoons (7g) instant yeast
- 3/4 cup (180ml) warm water (about 100°F / 38°C)
- 1 teaspoon (6g) salt
- 1 teaspoon (4g) granulated sugar
- 2 tablespoons (28ml) olive oil
- 2 1/2 to 3 cups (300–360g) all-purpose flour, plus more for dusting
Read Also: Sourdough Discard Bread Recipe
Kitchen Equipment Needed
You don’t need any specialized bread equipment for this recipe. A large mixing bowl and a reliable cast iron skillet are really the two essentials here.
- Large mixing bowl
- Wooden spoon or dough whisk
- Stand mixer with dough hook (optional, can knead by hand)
- Kitchen scale (recommended for accuracy)
- Clean work surface for kneading
- Cast iron skillet or heavy-bottomed pan
- Rolling pin
- Plastic wrap or damp tea towel
- Tongs
- Wire cooling rack or towel-lined basket
This recipe pairs beautifully with a good-quality pizza stone if you prefer baking the pitas in the oven instead of on the stovetop.
Another favorite: Sourdough Discard Pizza Dough Recipe
Recommended Products for This Recipe
These are products I genuinely recommend based on quality and performance for making this recipe as easy and successful as possible.
1. Lodge Cast Iron Skillet
A quality cast iron skillet retains heat extremely well, which is critical for getting that hot, even surface that makes pita bread puff up into perfect little pillows. The Lodge 10-inch or 12-inch skillet is a classic choice that heats quickly and maintains steady high temperatures throughout cooking. It’s also incredibly durable and will last a lifetime with basic care.
2. KitchenAid Stand Mixer
While this dough can absolutely be kneaded by hand, a stand mixer makes the process effortless, especially if you’re baking a double batch. The dough hook attachment does all the work in about 7 minutes, giving you a perfectly smooth, elastic dough with minimal effort.
3. Digital Kitchen Scale
Baking by weight rather than volume is the single best thing you can do for consistent results, particularly with a sourdough-based dough where hydration matters. A compact digital scale makes measuring your discard, flour, and water accurate every single time.
4. OXO Good Grips Rolling Pin
A smooth, non-tapered rolling pin makes it easy to roll your pita rounds to an even, consistent thickness, which is key for getting a good pocket. Rolling them too thick is one of the most common reasons pitas fail to puff up.
The same technique used for rolling pita dough is also useful when you try this Sourdough Discard Crackers Recipe for your next snack board.
Step-by-Step Instructions
1. Bring the Discard to Room Temperature
- Remove your sourdough discard from the refrigerator at least 1 hour before you plan to make the dough.
- Cold discard will slow the yeast activity significantly and result in a slower, less predictable rise.
- Give the discard a gentle stir to smooth it out before using it.
- Check that it is at 100% hydration. If it appears very thick (thicker than pancake batter), add a teaspoon or two of water and stir.
- If it appears quite loose or watery, you’ll want to start with slightly less water in the recipe and add from there.
2. Activate the Yeast
- In a large mixing bowl (or the bowl of a stand mixer), combine the warm water and sugar. The water should feel warm but not hot to the touch, around 100°F (38°C). Water that is too hot will kill the yeast.
- Sprinkle the instant yeast over the top and give it a quick stir.
- Let it sit for 5 minutes. You should see it become slightly foamy or bubbly, which indicates the yeast is active and ready.
- If nothing happens after 5-7 minutes, your water may have been too hot or your yeast may be expired. Discard and start again with fresh yeast.
3. Combine the Wet Ingredients
- Add the sourdough discard to the yeast mixture and stir well to combine. The mixture will look slightly shaggy and uneven at this point, which is perfectly normal.
- Add the olive oil and salt, stirring until everything is incorporated.
- The olive oil is important here. It coats the gluten strands as the dough is kneaded, giving the final pitas a softer, more pliable texture that doesn’t crack when folded or stuffed.
4. Add the Flour
- Add 2 cups (240g) of all-purpose flour to the wet mixture. Stir well with a wooden spoon or dough whisk until a shaggy dough forms.
- Continue adding flour, a quarter cup (30g) at a time, mixing after each addition.
- Stop adding flour once the dough comes together into a ball that pulls away from the sides of the bowl. It should feel soft and slightly tacky but not sticky enough to cling to your hands.
- You may not use all the flour listed. The exact amount depends on the hydration of your discard and the humidity in your kitchen.
5. Knead the Dough
- By hand: Turn the dough out onto a lightly floured surface. Knead by pushing the dough away from you with the heel of your hand, folding it back toward you, and rotating it a quarter turn. Repeat for about 8-10 minutes until the dough is smooth, elastic, and springs back when you poke it.
- Stand mixer: Fit the mixer with a dough hook and knead on medium speed (speed 4 on a KitchenAid) for 6-8 minutes until the dough is smooth and pulls cleanly away from the sides of the bowl.
- A well-kneaded dough is essential for a good pocket. Under-kneaded dough will tear and lose steam rather than puffing up.
6. First Rise (Bulk Fermentation)
- Lightly grease the mixing bowl with a small amount of olive oil. Place the dough in the bowl and turn it once so it is coated on all sides.
- Cover the bowl tightly with plastic wrap or a damp tea towel.
- Let the dough rise at room temperature for 1 to 1.5 hours, or until it has doubled in size.
- If your kitchen is cool (below 68°F / 20°C), place the bowl in your oven with just the oven light on to create a gentle warmth.
7. Divide the Dough
- Once the dough has doubled, gently press it down to release the gas. Turn it out onto a lightly floured surface.
- Use a bench scraper or sharp knife to divide the dough into 8 equal pieces. Each piece will weigh approximately 90-100g.
- Roll each piece gently into a ball by cupping your hand over it and rolling in a circular motion against the counter. This creates surface tension that helps the pita hold its shape.
- Cover all the dough balls loosely with a damp towel and let them rest for 10-15 minutes. This short rest relaxes the gluten, making them much easier to roll out without springing back.
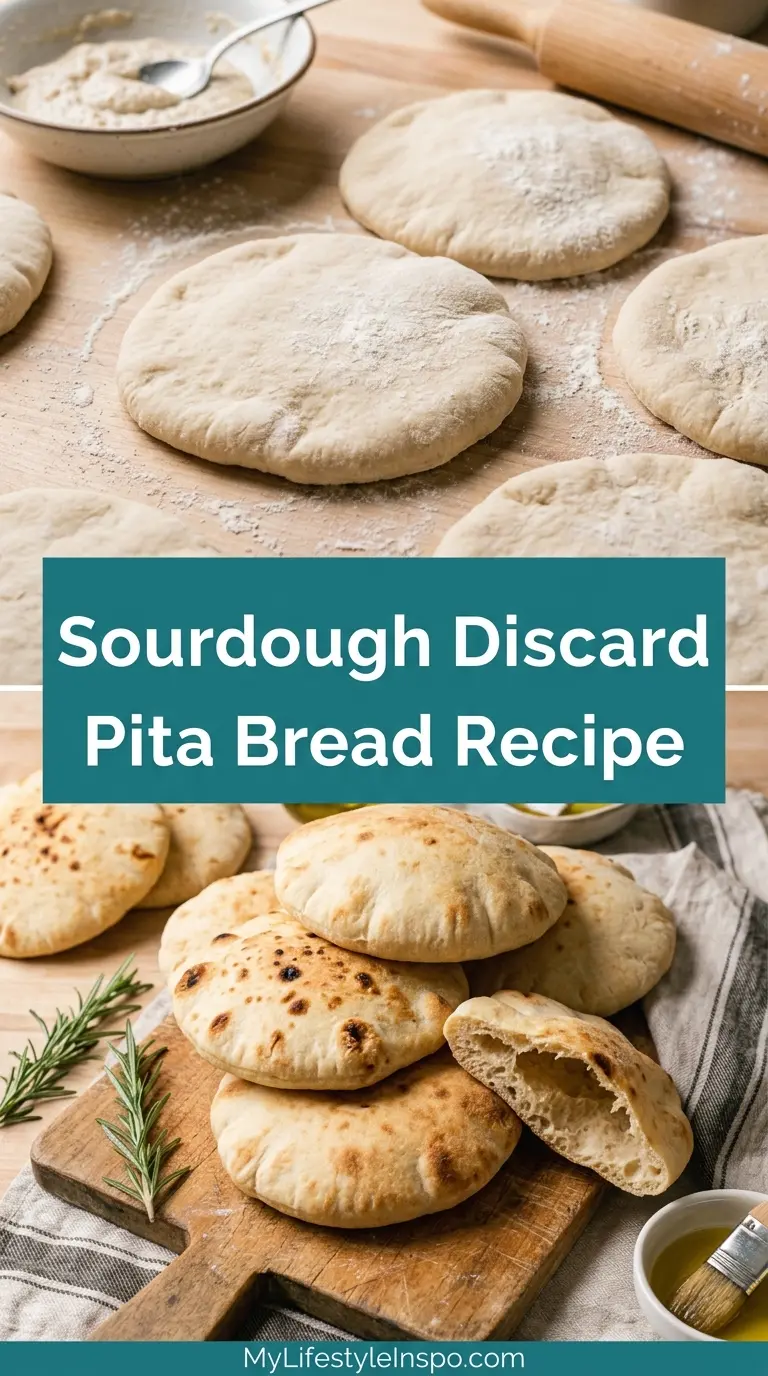
8. Roll Out the Pitas
- Working one dough ball at a time (keep the others covered), use a rolling pin to roll the dough out on a lightly floured surface into a circle about 6-7 inches (15-18cm) in diameter.
- Aim for a thickness of about 1/8 inch (3mm). This thinness is critical for a good pocket. If the dough is too thick, the steam cannot build enough pressure to separate the layers.
- Don’t worry about perfect circles. Slightly uneven edges are totally fine.
- If the dough keeps springing back, let it rest a couple more minutes and try again.
9. Cook the Pitas
- Heat a dry cast iron skillet over medium-high heat for a good 5 minutes before cooking. The pan needs to be very hot. You can test it by flicking a small drop of water onto the surface. If it immediately sizzles and evaporates, the pan is ready.
- Carefully place one rolled-out pita disk into the pan. Do not add any oil.
- Cook for about 1.5-2 minutes on the first side. You’ll see bubbles forming across the surface, which is the steam beginning to work. Some of those bubbles will grow large and the entire pita will begin to puff up.
- Flip the pita using tongs and cook for another 1-1.5 minutes on the second side.
- For a more even puff, you can flip one more time and cook for 30 seconds on the first side again.
- Remove the pita from the pan and immediately place it in a towel-lined basket or on a plate covered with a clean kitchen towel. Wrapping them while hot traps steam and keeps them soft and pliable.
- Repeat with the remaining dough, keeping the pan at consistent high heat between batches.
Read Also: Sourdough Discard English Muffins Recipe
Tips for Success
Getting perfectly puffed pita bread is all about technique, and a few small adjustments make a big difference. Keep these points in mind as you bake.
- Use room temperature discard. Cold discard slows yeast activity and can lead to a dense, flat pita. Always let it warm up before mixing.
- Don’t skip kneading. Pita bread relies on a well-developed gluten structure to trap steam. Under-kneading is one of the most common reasons pitas won’t puff.
- Roll thin. Aim for 1/8 inch thick. Thicker pitas don’t generate enough internal steam pressure to form a proper pocket.
- Preheat your skillet thoroughly. A hot pan is non-negotiable. If the surface isn’t hot enough, the pita will cook through before the steam has time to build and puff.
- Cook one at a time. Crowding the pan drops the temperature and leads to steaming rather than the quick, hot cooking you need.
- Wrap pitas immediately. As soon as a pita comes off the heat, wrap it in a towel. This step keeps the pockets soft and prevents them from drying out and becoming stiff.
This technique of wrapping hot bread right away is also useful when making Sourdough Discard Biscuits.
Serving Suggestions
Fresh sourdough discard pita bread is endlessly versatile and works beautifully with so many different foods.
Serve it warm with a generous bowl of Classic Hummus and Tzatziki Sauce for an easy mezze spread that everyone loves.
Here are some of the best ways to enjoy these pitas:
- Stuffed with Chicken Shawarma and a drizzle of tahini sauce
- Used as a scoop for Easy Hummus, baba ganoush, or roasted red pepper dip
- As a pizza base topped with marinara, mozzarella, and your favorite toppings, then baked until bubbly
- Torn and toasted in olive oil and garlic as homemade pita chips for dipping
- Filled with falafel, lettuce, tomatoes, and cucumber raita for a quick vegetarian wrap
- Alongside scrambled eggs and avocado for a satisfying breakfast
Variations to Try
Once you’ve made the base recipe, there are so many fun ways to customize your sourdough discard pita bread.
Experiment with the flour blend, herbs, and cooking method to create completely new flavor profiles from the same basic dough.
- Whole wheat version: Replace up to half of the all-purpose flour with whole wheat flour for a nuttier, more fiber-rich pita. You may need a tablespoon or two of extra water since whole wheat absorbs more liquid.
- Herbed pita: Add 1 teaspoon each of dried oregano and garlic powder to the dough for a Mediterranean-flavored pita that pairs perfectly with grilled meats.
- No-yeast version: If you have a very active, recently fed sourdough starter, you can skip the instant yeast and allow the dough to ferment overnight for 8-12 hours. The rise will be slower but the flavor will be exceptional.
- Oven-baked pita: Preheat your oven to 500°F (260°C) with a pizza stone or cast iron on the middle rack. Bake the rolled pitas directly on the hot surface for 3-4 minutes until puffed and lightly golden. This method gives a slightly crispier exterior.
- Sesame pita: Brush each rolled pita with a very light coating of water and press sesame seeds onto both sides before cooking.
If you enjoy working with sourdough discard in different baked goods, the Sourdough Discard Focaccia Recipe is another incredible recipe to try next.
Storage and Reheating
Homemade pita bread stores well and can be kept fresh for several days with the right technique.
Keep these simple storage tips in mind to make sure your pitas stay soft and pliable.
- Room temperature: Place cooled pitas in a zip-lock bag or airtight container at room temperature. They will stay soft for up to 2 days.
- Refrigerator: Store in an airtight bag in the refrigerator for up to 5 days. Note that refrigeration can make them slightly stiffer.
- Freezer: Pitas freeze beautifully. Place a small piece of parchment paper between each pita to prevent sticking, then seal in a freezer bag. They keep well for up to 3 months.
- Reheating on the stovetop: Warm a dry skillet over medium heat and heat each pita for about 30-45 seconds per side until warm and pliable.
- Reheating in the oven: Wrap pitas in foil and warm at 350°F (175°C) for about 8-10 minutes.
- Microwave: Wrap a pita in a slightly damp paper towel and microwave for 15-20 seconds. This is the quickest method and works well for a single pita.
Read Also: Sourdough Discard Cinnamon Rolls Recipe
Nutritional Facts
The following values are approximate and based on one pita (1/8 of the recipe) made with all-purpose flour and 2 tablespoons of olive oil in the total dough.
| Nutrient | Per Pita (approx.) |
|---|---|
| Calories | 195 kcal |
| Carbohydrates | 36g |
| Protein | 5g |
| Fat | 4g |
| Saturated Fat | 0.5g |
| Fiber | 1.5g |
| Sugar | 0.5g |
| Sodium | 295mg |
Please note that nutritional values will vary based on the exact amount of flour used, the hydration of your discard, and any variations to the recipe.
Read Also: Sourdough Discard Pancakes Recipe
Health Benefits of Key Ingredients
Sourdough discard pita bread offers some nutritional advantages over commercially made bread, particularly because of the fermentation process involved.
The natural acids produced during fermentation may help improve digestibility and reduce the glycemic response compared to standard white bread, making these pitas a more balanced option.
Here’s a look at the key ingredients and what they bring to the table:
- Sourdough discard: Contains naturally occurring beneficial bacteria and wild yeasts from the fermentation process. The organic acids produced during fermentation help break down phytic acid in the flour, which can improve mineral absorption.
- All-purpose flour: Provides complex carbohydrates for sustained energy, along with iron and B vitamins including niacin and folate.
- Olive oil: A source of heart-healthy monounsaturated fats and antioxidants. Just the small amount used in this dough contributes to a softer texture while providing mild anti-inflammatory properties.
- Instant yeast: Adds B vitamins, particularly B1 (thiamin), B2 (riboflavin), B3 (niacin), and folate, plus a small amount of protein and trace minerals.
- Salt: While sodium should be consumed in moderation, the amount per pita is quite modest and helps activate the gluten structure as well as enhance flavor.
You might also enjoy: Easy Sourdough Bread Recipe
Frequently Asked Questions
1. Why didn’t my pita bread puff up?
The most common reasons pita bread fails to puff are: rolling the dough too thick, using a pan that isn’t hot enough, or dough that was under-kneaded. Make sure your skillet is very hot before adding the first pita, aim for 1/8 inch thickness when rolling, and ensure you kneaded the dough until it was smooth and elastic. A well-developed gluten network is what holds the steam inside and forces the pocket to form.
2. Can I use active starter instead of sourdough discard?
Yes, you can. If using a recently fed and active starter, you can reduce the instant yeast to just 1 teaspoon since the active starter has more leavening power. The rise time may also be slightly shorter, so keep an eye on the dough.
3. How long does sourdough discard pita bread last?
Stored at room temperature in an airtight bag, these pitas stay fresh for up to 2 days. In the refrigerator, they last up to 5 days. For longer storage, freeze them with parchment paper between each pita for up to 3 months.
4. Can I make the dough ahead of time?
Absolutely. After the first rise, you can tightly cover the dough and refrigerate it for up to 24 hours. The cold fermentation will actually deepen the flavor. Remove the dough from the refrigerator about 30 minutes before dividing, rolling, and cooking to let it relax.
5. Can I bake these in the oven instead of cooking on the stovetop?
Yes. Preheat your oven to its highest temperature, usually 500°F (260°C), with a pizza stone or inverted cast iron pan on the middle rack for at least 30 minutes. Slide the rolled pitas directly onto the hot surface and bake for 3-4 minutes. They will puff up quickly, similar to the stovetop method.
This same high-heat baking principle is also used in the Sourdough Discard Pizza Dough Recipe for a crispy, bubbly crust.
Final Thoughts
Homemade sourdough discard pita bread is one of those recipes that feels a little magical every single time, especially that moment when the pita starts to puff up in the pan.
If you’ve never made pita bread from scratch before, this is the recipe to start with. The ingredient list is short, the technique is learnable, and the results are genuinely impressive.
Give this sourdough discard pita bread recipe a try the next time you’re due for a sourdough feeding. Drop a comment below and let me know how yours turned out, and feel free to share any stuffing or serving ideas you love!
Recommended:
- Sourdough Discard Flatbread Recipe
- Sourdough Discard Focaccia Recipe
- Sourdough Discard Bagels Recipe
- Sourdough Discard Biscuits Recipe
- Sourdough Discard English Muffins Recipe
- Sourdough Discard Cinnamon Rolls Recipe
- Sourdough Discard Chocolate Chip Cookies Recipe
- Sourdough Discard Crackers Recipe
- Sourdough Starter Recipe
- Garlic Naan Bread Recipe