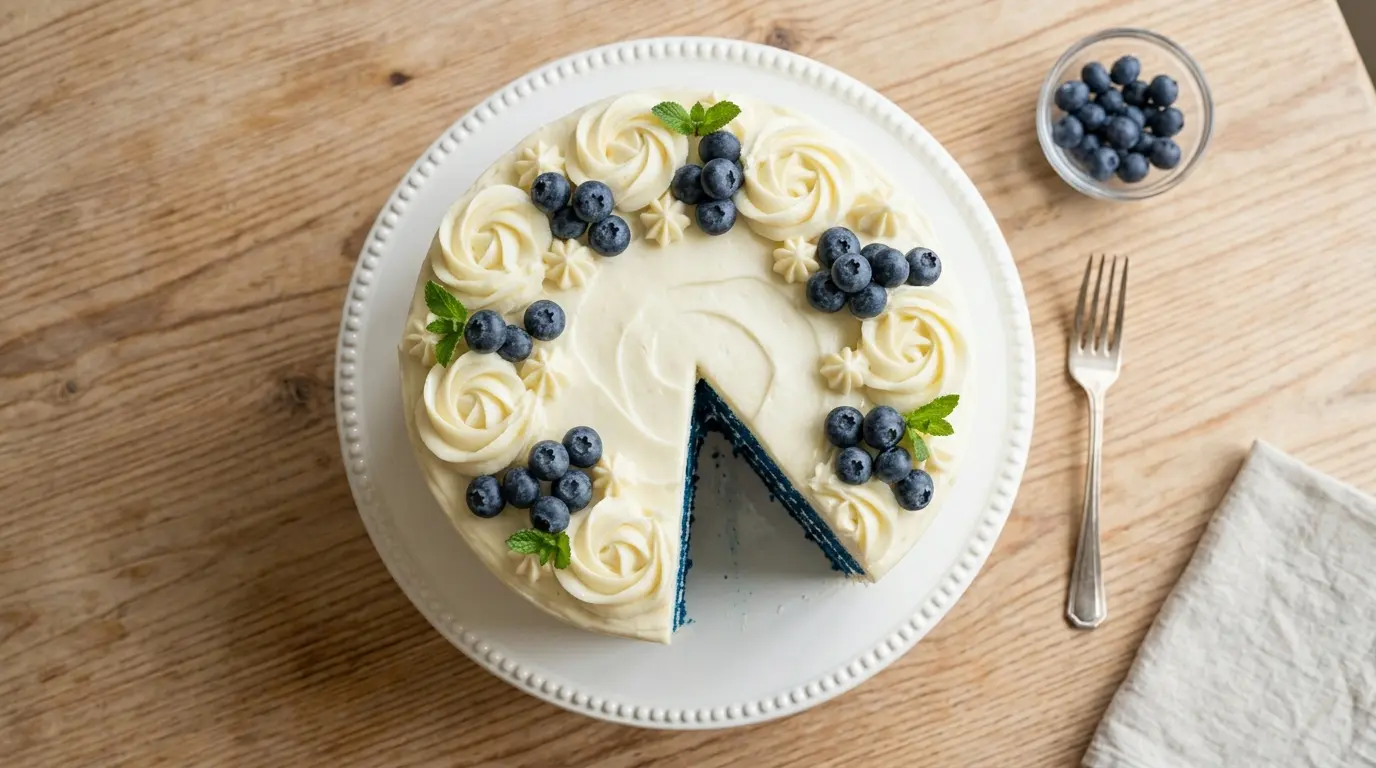
If you’re looking for a show-stopping dessert that gets people talking, this blue velvet cake recipe is it. Vibrant, moist, and layered with a tangy cream cheese frosting, it takes everything wonderful about red velvet and gives it a bold, unexpected blue makeover.
The secret to that signature velvet texture lies in the combination of buttermilk and a small amount of cocoa powder. Buttermilk keeps the crumb incredibly tender, while the cocoa adds a gentle, barely-there chocolate depth that makes the cake taste richer without being overtly chocolatey. The vinegar and baking soda react together to create a light, fluffy rise. It all comes together into a cake that is as delicious as it is beautiful.
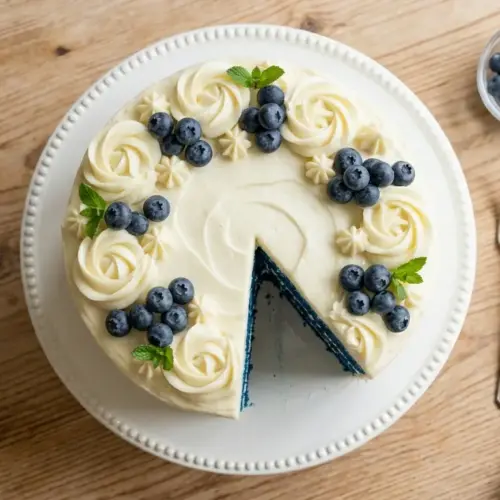
This recipe produces three lush layers stacked high and frosted generously with a smooth cream cheese frosting. The contrast between the bright blue interior and the white frosting is genuinely jaw-dropping when you cut into it. It’s the kind of cake that makes any occasion feel a little more special.
You might also enjoy: Red Velvet Cake Recipe
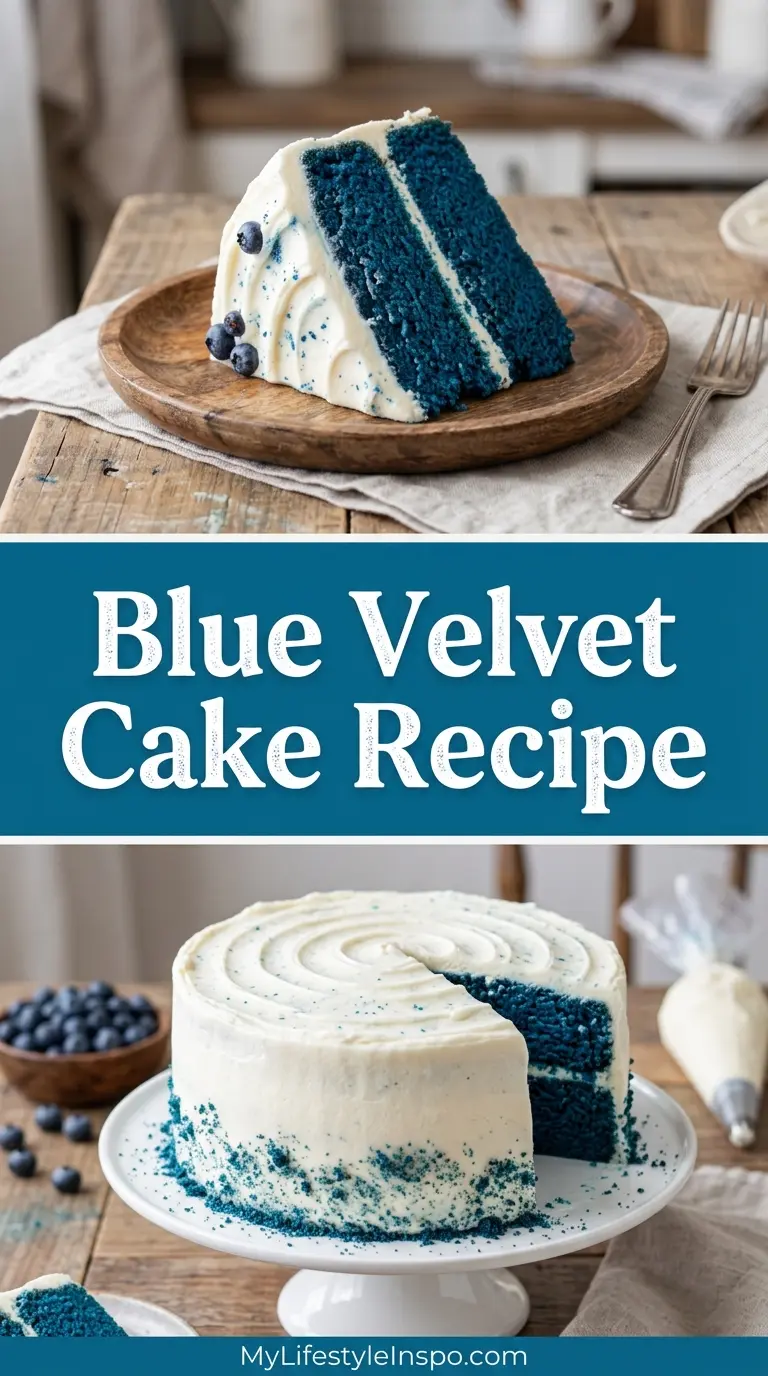
Why You’ll Love This Blue Velvet Cake Recipe
This cake is the ultimate conversation starter at any party, baby shower, or birthday celebration.
It delivers the classic velvet cake flavor you know and love, with a fun and unexpected twist in color that surprises everyone.
The three-layer structure makes it look impressively tall and bakery-worthy, even if you’re making it at home for the first time.
The cream cheese frosting is the perfect pairing. It’s tangy enough to balance the sweetness of the cake layers and smooth enough to spread like a dream.
It’s also surprisingly beginner-friendly. The steps are simple, and the batter comes together quickly without any special techniques.
Here’s a quick summary of why this recipe is a keeper:
- Bold, vibrant blue color that wows at every occasion
- Moist, tender crumb thanks to buttermilk in the batter
- Subtle cocoa flavor that adds depth without overpowering
- Tangy, smooth cream cheese frosting that complements every bite
- Three impressive layers that look stunning when sliced
- Great for baby showers, birthdays, gender reveals, and holidays
Read Also: Black Velvet Cake Recipe
Ingredients
For the best results, use room-temperature butter, eggs, and cream cheese. Cold ingredients don’t emulsify as well, which can result in a denser crumb and lumpy frosting. Gel food coloring (not liquid) is essential here because it delivers vibrant color without adding extra liquid to the batter.
For the Cake:
- 2½ cups (315g) all-purpose flour (or cake flour for a finer crumb)
- 2 tablespoons (15g) unsweetened cocoa powder
- 1 teaspoon (5g) baking soda
- ½ teaspoon (3g) salt
- ½ cup (115g) unsalted butter, softened to room temperature
- 1½ cups (300g) granulated sugar
- 2 large eggs, room temperature
- 1 cup (240ml) buttermilk, room temperature
- ½ cup (120ml) neutral oil (canola or vegetable)
- 1 tablespoon (15ml) white vinegar
- 1 teaspoon (5ml) pure vanilla extract
- 1–2 tablespoons royal blue gel food coloring (plus a drop of violet if desired for a deeper shade)
For the Cream Cheese Frosting:
- 16 oz (450g) full-fat cream cheese, softened to room temperature
- ½ cup (115g) unsalted butter, softened to room temperature
- 4 cups (480g) powdered sugar, sifted
- 2 teaspoons (10ml) pure vanilla extract
- Pinch of salt
Another velvet cake you might love: Pink Velvet Cake Recipe
Kitchen Equipment Needed
Having the right tools before you start makes this recipe much smoother. A stand mixer is ideal for creaming butter and making frosting, though a hand mixer works fine too.
- Stand mixer or electric hand mixer
- Three 8-inch round cake pans
- Parchment paper
- Large mixing bowls
- Rubber spatula
- Whisk
- Sifter or fine mesh strainer
- Offset spatula for frosting
- Cake turntable (optional but helpful for frosting)
- Cake leveler or serrated knife for leveling layers
- Wire cooling racks
- Measuring cups and spoons
- Toothpick or cake tester
Read Also: Purple Velvet Cake Recipe
Recommended Products for This Recipe
These are products I genuinely recommend based on quality and performance. They’ll make the process easier and help you get that bakery-level result at home.
1. Royal Blue Gel Food Coloring
Gel food coloring gives you that deep, vivid blue without adding excess liquid to your batter. Liquid food coloring simply cannot achieve the same intensity, and the color tends to fade during baking. Gel is the professional baker’s choice for bold color results.
2. KitchenAid Stand Mixer
A stand mixer makes creaming butter and sugar a completely hands-off task, and it gives you the whipping power needed for a perfectly smooth, fluffy cream cheese frosting. It’s one of those tools that genuinely changes how you bake. If you bake even a few times a month, it’s absolutely worth the investment.
3. Fat Daddio’s 8-Inch Round Cake Pans
Even heat distribution is everything when baking layer cakes. These anodized aluminum pans conduct heat uniformly so you get level, evenly baked layers every time, without hot spots or overbaked edges. They’re also a snap to remove cakes from when lined with parchment.
4. Ateco Offset Spatula
Frosting a three-layer cake is dramatically easier with an offset spatula. The angled blade lets you spread frosting smoothly across the top and sides without your knuckles dragging through the cake. It’s inexpensive and makes a big visible difference in your finished cake.
5. Revolving Cake Turntable
A turntable lets you spin the cake as you frost it, giving you much more control over a smooth, professional finish. It takes what feels like an awkward struggle and turns it into something almost meditative. Even a basic plastic version is a major upgrade from frosting a stationary cake.
For a gorgeous frosting that pairs beautifully with blue velvet, check out this Cream Cheese Frosting Recipe.
Step-by-Step Instructions
1. Preheat Your Oven and Prepare the Pans
- Preheat your oven to 350°F (175°C). If using dark or non-stick pans, reduce to 325°F (165°C) to prevent overbrowning on the edges.
- Grease three 8-inch round cake pans with butter or non-stick spray, making sure to coat the sides well.
- Cut three circles of parchment paper to fit the bottoms of the pans. Press them into the greased pans, then lightly grease the parchment as well. This double-greasing prevents sticking and ensures clean release every time.
2. Mix the Dry Ingredients
- In a large bowl, sift together the 2½ cups (315g) all-purpose flour, 2 tablespoons (15g) cocoa powder, 1 teaspoon (5g) baking soda, and ½ teaspoon (3g) salt.
- Sifting the flour is important. It aerates the flour and ensures there are no lumps of cocoa, which gives you a finer, more even crumb.
- Whisk the dry ingredients together briefly to make sure everything is evenly combined. Set aside.
3. Cream the Butter and Sugar
- In the bowl of your stand mixer fitted with the paddle attachment (or using a large bowl and hand mixer), add the ½ cup (115g) softened unsalted butter and 1½ cups (300g) granulated sugar.
- Beat on medium-high speed for 3 to 4 minutes until the mixture is pale, light, and fluffy. Don’t rush this step. Proper creaming incorporates tiny air bubbles that make the cake lighter.
- Scrape down the sides and bottom of the bowl with a rubber spatula at least once during this process.
4. Add the Eggs and Flavorings
- With the mixer on medium speed, add the 2 large eggs one at a time. Allow each egg to fully incorporate before adding the next. This ensures an emulsified, smooth batter.
- Add the 1 teaspoon (5ml) vanilla extract and mix briefly to combine.
- In a small bowl, mix together the 1–2 tablespoons of royal blue gel food coloring with the 2 tablespoons of cocoa powder to form a paste. This step is key: mixing the coloring with the cocoa first helps distribute it evenly and prevents streaks in the batter.
- Add the blue cocoa paste to the butter mixture and mix on low until fully incorporated. Scrape the bowl and mix again. Your batter should be a rich, vivid blue at this point.
5. Alternate the Wet and Dry Ingredients
- In a measuring cup or small bowl, combine the 1 cup (240ml) buttermilk and ½ cup (120ml) neutral oil. Stir briefly.
- With the mixer on the lowest speed, alternate adding the flour mixture and the buttermilk-oil mixture to the butter mixture. Start and end with the flour mixture. The typical pattern is: one-third flour, half the buttermilk mixture, one-third flour, remaining buttermilk mixture, final third of flour.
- Mix only until just combined after each addition. Overmixing develops gluten, which makes the cake tough instead of tender.
- Once the batter is just combined, stop the mixer.
6. Add the Vinegar and Baking Soda Reaction
- In a small bowl or cup, combine the 1 tablespoon (15ml) white vinegar with the already-measured baking soda in the batter (note: the baking soda is already in the dry ingredients, so the vinegar will react once mixed into the batter).
- Add the white vinegar directly to the batter and fold it in gently with a rubber spatula. You’ll see some bubbling. This is the reaction that helps give the cake its lift and soft crumb.
- Fold gently and do not beat after this step. You want to preserve those air bubbles.
7. Divide Batter and Bake
- Divide the batter evenly among the three prepared cake pans. Use a kitchen scale for precision, or eyeball it as carefully as you can. Each pan should hold roughly the same amount of batter.
- Use an offset spatula or the back of a spoon to smooth the tops of each pan.
- Place the pans in the preheated oven. If they don’t all fit on one rack, place two on the middle rack and one on the rack just above or below.
- Bake for 25 to 30 minutes, or until a toothpick or cake tester inserted in the center comes out clean with just a few moist crumbs.
- Do not open the oven door before 20 minutes, as temperature fluctuation can cause the cakes to sink in the center.
8. Cool the Cakes
- Remove the pans from the oven and let them cool in the pans for 10 minutes. This allows the structure to set so the cakes don’t fall apart when removed.
- After 10 minutes, run a thin knife or offset spatula around the edges to loosen the cakes.
- Invert the cakes onto wire cooling racks and remove the parchment paper. Allow them to cool completely before frosting. This typically takes 1 to 2 hours at room temperature.
- For best results, once cooled, wrap the cake layers in plastic wrap and refrigerate them for at least 1 hour or overnight. Cold cake layers are firmer and much easier to frost without crumbling.
9. Make the Cream Cheese Frosting
- In the bowl of your stand mixer fitted with the paddle attachment, beat the 16 oz (450g) softened cream cheese on medium speed for about 1 to 2 minutes until smooth and lump-free.
- Add the ½ cup (115g) softened unsalted butter and continue beating for another 2 minutes until the two are fully combined and fluffy.
- Reduce the mixer speed to low and add the 4 cups (480g) sifted powdered sugar one cup at a time. Adding it all at once can cause a cloud of powdered sugar to fly out of the bowl.
- Once all the powdered sugar is incorporated, add the 2 teaspoons (10ml) vanilla extract and a pinch of salt. Increase the speed to medium and beat for 2 to 3 more minutes until the frosting is smooth, fluffy, and glossy.
- If the frosting feels too soft, refrigerate it for 20 minutes before using.
10. Level and Assemble the Cake
- Place one cake layer flat-side up on a cake board or serving plate. If the top is domed, use a cake leveler or serrated knife to trim it flat. Flat layers stack more evenly and prevent the finished cake from leaning.
- Spread about ⅓ cup (roughly 90g) of frosting evenly over the top of the first layer using an offset spatula.
- Place the second cake layer on top and repeat with another ⅓ cup of frosting.
- Place the third and final layer on top, flat-side up.
11. Frost the Outside of the Cake
- Apply a thin “crumb coat” of frosting all over the outside of the cake. This thin first layer traps any loose crumbs so they don’t appear in your final frosting layer. Refrigerate the crumb-coated cake for 20 to 30 minutes until the frosting is firm.
- Once chilled, apply the remaining frosting generously to the top and sides of the cake. Use an offset spatula and a cake turntable to get a smooth, even finish.
- Optionally, press cake crumbs from the trimmed top layers onto the sides for decoration, or pipe rosettes around the top edge with a piping bag and large star tip.
- Refrigerate the finished cake for at least 30 minutes before slicing to allow everything to set.
This cake technique is the same one used in our beautiful White Velvet Cake Recipe if you ever want a classic white version.
Tips for Success
Small adjustments and attention to detail are what separate a good blue velvet cake from a truly great one. Keep these tips in your back pocket as you bake.
- Use gel food coloring only. Liquid food coloring is too watery and won’t give you the vibrant color you’re looking for. Gel is more concentrated, so a little goes a long way, and it won’t throw off the batter’s consistency.
- Room temperature ingredients are non-negotiable. Cold butter won’t cream properly, cold eggs can cause the batter to curdle, and cold cream cheese results in lumpy frosting.
- Don’t overmix after adding the flour. Stop the mixer as soon as the batter looks just combined. Overworked gluten makes the cake dense and chewy rather than light and soft.
- Chill your cake layers before frosting. Cold layers are much easier to work with. They don’t shed crumbs as easily and hold their shape better as you stack and frost.
- Sift your powdered sugar for the frosting. Even a few lumps in your powdered sugar can show up in your final frosting and be impossible to smooth out. Sifting takes an extra 60 seconds and makes a noticeable difference.
Here’s a quick reference list:
- Always use gel food coloring, not liquid
- Bring all refrigerated ingredients to room temperature before starting
- Mix the cocoa and food coloring into a paste before adding to the batter
- Don’t skip the crumb coat when frosting
- Chill assembled layers and after crumb coating for the cleanest finish
- Level each cake layer for a stable, professional-looking stack
Read Also: Lemon Velvet Cake Recipe
Serving Suggestions
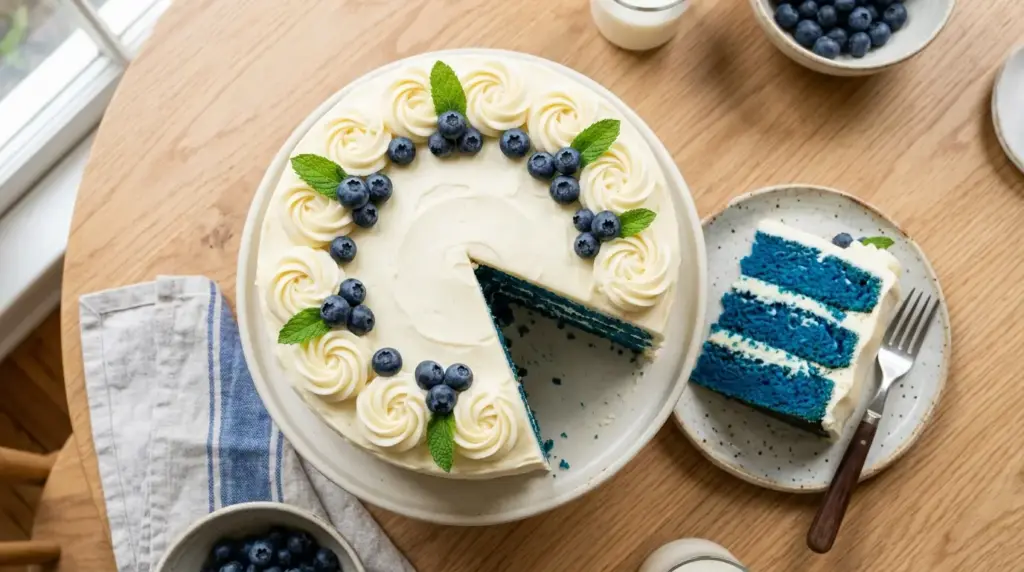
Blue velvet cake is naturally a centerpiece. It’s dramatic, colorful, and just the right kind of extra for any gathering. Serve it at room temperature for the best texture since the frosting softens slightly from the fridge and the cake itself becomes more tender.
A few slices look stunning arranged on a white cake plate or a wooden serving board, cut to show off that vivid blue interior. Pair each slice with a small scoop of vanilla bean ice cream for a dessert that truly wows.
- Fresh blueberries or raspberries on the side for a fruity contrast
- A drizzle of chocolate ganache over each slice for a richer finish
- A dollop of freshly whipped cream alongside each serving
- A glass of cold milk, which is always the right companion for a velvet cake
- Coffee or a latte to balance the sweetness of the frosting
- Edible silver or gold sprinkles for a festive, celebratory touch
Variations to Try
Once you have this recipe down, there’s a world of creative takes you can explore. The base batter is very versatile and takes to different additions beautifully.
- Blue Velvet Cupcakes: Divide the batter into lined cupcake tins and bake for 18 to 20 minutes at 350°F (175°C). Frost with swirls of cream cheese frosting. Perfect for parties where individual servings are easier.
- Blue Velvet Sheet Cake: Pour all the batter into a greased 9×13-inch (23x33cm) pan and bake for 35 to 40 minutes. Frost the cooled sheet cake directly in the pan. Easier to transport and serve at large gatherings.
- Blue Velvet Bundt Cake: Use a well-greased bundt pan and bake at 350°F (175°C) for 45 to 50 minutes. Drizzle with a cream cheese glaze instead of frosting for an elegant look.
- Blue and Purple Ombre: Mix a small amount of violet gel food coloring into one of the three cake layers and more blue into the other two. When stacked, the layers create a subtle ombre gradient.
- White Chocolate Drip: After frosting, warm some white chocolate and pour it slowly along the edges for a drip effect. It adds drama and a wonderful flavor pairing.
Here is a look at another beautiful color variation: Orange Velvet Cake Recipe
Storage and Reheating
Because of the cream cheese frosting, this cake must be stored in the refrigerator. Cream cheese is perishable and should not sit at room temperature for extended periods.
Follow these storage guidelines to keep every slice as fresh as possible:
- Refrigerator: Store the whole cake loosely covered with plastic wrap or under a cake dome in the fridge for up to 5 days. Let slices sit at room temperature for 20 to 30 minutes before eating for the best texture.
- Freezer (cake layers, unfrosted): Wrap each cooled, unfrosted cake layer individually in plastic wrap, then in aluminum foil. Freeze for up to 3 months. Thaw overnight in the refrigerator before assembling.
- Freezer (frosted slices): Place individual slices on a parchment-lined baking sheet and freeze until solid. Transfer to an airtight container or zip-lock bag. Freeze for up to 2 months. Thaw in the refrigerator overnight.
- Reheating: This cake is not typically reheated. Serve cold from the fridge or allow to come to room temperature for 20 to 30 minutes before serving.
- Do not leave out: The cream cheese frosting can spoil if left at room temperature for more than 2 hours.
For another layered cake that stores beautifully, check out the Italian Cream Cake Recipe.
Nutritional Facts
The values below are approximate and based on one slice (1/12 of the full cake, including frosting).
| Nutrient | Amount per Slice |
|---|---|
| Calories | ~480 kcal |
| Total Fat | 24g |
| Saturated Fat | 13g |
| Cholesterol | 90mg |
| Sodium | 280mg |
| Total Carbohydrates | 62g |
| Dietary Fiber | 0.5g |
| Total Sugars | 47g |
| Protein | 5g |
| Calcium | 75mg |
Note: Nutritional values will vary depending on exact brands and quantities used, and whether any ingredient substitutions are made.
You might also love our Red Velvet Cheesecake Recipe for another decadent special-occasion dessert.
Health Benefits of Key Ingredients
This is an indulgent treat, and that’s perfectly fine. A few of the key ingredients do bring some nutritional value to the table alongside all that deliciousness.
Buttermilk is the unsung hero of this recipe. Beyond its tenderizing effect on the crumb, it provides calcium, potassium, and beneficial probiotic cultures that support gut health. It’s lower in fat than regular whole milk, making it a smart baking ingredient.
Eggs contribute high-quality protein and essential vitamins including B12 and D. They also play a structural role in the batter, helping bind everything together and giving the cake a stable, sliceable crumb.
Cocoa powder, even in small amounts, contains antioxidants called flavonoids that have been linked to heart health. It also adds minerals like iron and magnesium to the recipe without adding significant fat or sugar.
- Buttermilk: Rich in calcium, probiotics, and potassium. Helps with digestion and bone health.
- Eggs: Excellent source of protein, choline, and fat-soluble vitamins.
- Cocoa powder: Contains flavonoids and antioxidants. May support heart health and mood.
- Cream cheese: Provides calcium and a small amount of protein. Best enjoyed in moderation.
- Vanilla extract: Contains trace amounts of antioxidants and may have mild anti-inflammatory properties.
Read Also: Chocolate Cake Recipe
Frequently Asked Questions
1. Can I use liquid food coloring instead of gel?
Liquid food coloring will technically work, but the results won’t be as vibrant. Liquid coloring is water-based and much less concentrated than gel, which means you’d need a large quantity to achieve that deep blue, and all that extra liquid could negatively affect the batter consistency. Gel food coloring is strongly recommended for the best color payoff.
2. Why is buttermilk important in this recipe?
Buttermilk is acidic, and that acidity reacts with the baking soda to give the cake its lift. It also tenderizes the gluten in the flour, resulting in that soft, fine crumb that’s characteristic of velvet cakes. If you don’t have buttermilk on hand, you can make a substitute by adding 1 tablespoon of white vinegar or lemon juice to 1 cup of regular whole milk and letting it sit for 5 minutes.
3. Can I make this cake in advance?
Absolutely. The unfrosted cake layers can be baked up to 2 days in advance and stored tightly wrapped in the refrigerator, or up to 3 months in the freezer. The cream cheese frosting can also be made up to 3 days ahead and stored in an airtight container in the fridge. Assemble the cake the day before serving for the freshest result.
4. Why did my cake layers come out flat or dense?
A few things could cause this. First, check that your baking soda is fresh. Baking soda that is past its prime won’t provide enough leavening power. Second, make sure you’re not overmixing the batter after the flour is added, as this develops gluten and weighs the batter down. Third, be sure to measure your flour correctly by spooning it into the measuring cup and leveling off the top, rather than scooping directly from the bag, which packs in too much flour.
5. Can I substitute the cream cheese frosting with something else?
Yes. The most traditional alternative for velvet cakes is ermine frosting, which is made from a cooked flour and milk base that is then whipped with butter. It’s less sweet and has a lighter, silkier texture than cream cheese frosting. A simple vanilla buttercream is another option. For a silkier result, check out our Vanilla Buttercream Frosting Recipe as a starting point.
Blue Velvet Cake

Equipment
- Stand mixer or electric hand mixer
- Three 8-inch round cake pans
- Parchment paper
- Large mixing bowls
- Rubber spatula
- Whisk
- Sifter or fine mesh strainer
- Offset spatula
- cake turntable - (optional but helpful for frosting)
- Cake leveler or serrated knife - for leveling layers
- Wire cooling racks
- Measuring cups and spoons
- Toothpick or cake tester
Ingredients
- 2½ cups all-purpose flour - 315g (or cake flour for a finer crumb)
- 2 tablespoons unsweetened cocoa powder - 15g
- 1 teaspoon baking soda - 5g
- ½ teaspoon salt - 3g
- ½ cup unsalted butter - 115g, softened to room temperature
- 1½ cups granulated sugar - 300g
- 2 large eggs - room temperature
- 1 cup buttermilk - 240ml, room temperature
- ½ cup neutral oil - 120ml (canola or vegetable)
- 1 tablespoon white vinegar - 15ml
- 1 teaspoon pure vanilla extract - 5ml
- 1-2 tablespoons royal blue gel food coloring - plus a drop of violet if desired for a deeper shade
For the Cream Cheese Frosting
- 16 oz full-fat cream cheese - 450g, softened to room temperature
- ½ cup unsalted butter - 115g, softened to room temperature
- 4 cups powdered sugar - 480g, sifted
- 2 teaspoons pure vanilla extract - 10ml
- salt - a pinch
Instructions
- Preheat oven to 350°F (175°C). Grease three 8-inch round cake pans, line bottoms with parchment, and grease parchment.
- Sift together the flour, cocoa powder, baking soda, and salt in a large bowl. Whisk to combine and set aside.
- Beat softened butter and sugar in a stand mixer on medium-high for 3-4 minutes until pale and fluffy. Scrape down bowl as needed.
- Add eggs one at a time, beating until fully incorporated. Mix in vanilla extract.
- Mix food coloring with cocoa powder to form a paste. Add to butter mixture and mix on low until fully incorporated and vivid blue.
- With mixer on low, alternate adding flour mixture and buttermilk-oil mixture (starting and ending with flour), mixing until just combined after each addition.
- Add white vinegar to batter and fold gently with a spatula until combined (bubbles will appear). Do not overmix.
- Divide batter evenly among prepared pans, smooth tops, and bake for 25-30 minutes until a toothpick comes out clean.
- Cool cakes in pans for 10 minutes, then invert onto wire racks. Remove parchment and cool completely before frosting.
- For the frosting, beat softened cream cheese until smooth. Add butter and beat until combined and fluffy.
- Gradually add sifted powdered sugar on low speed. Mix in vanilla and salt, then beat on medium for 2-3 minutes until smooth and fluffy.
- Level cake layers with a serrated knife. Place first layer on a serving plate, top with about ⅓ cup frosting, and repeat with remaining layers.
- Apply a thin crumb coat of frosting over entire cake. Chill for 20-30 minutes, then add remaining frosting smoothly over top and sides.
- Refrigerate finished cake for at least 30 minutes before slicing. Serve chilled or at room temperature.
Notes
- Gel food coloring is essential: Liquid food coloring is too watery and won’t give you vibrant color. Gel is concentrated and won’t throw off the batter’s consistency.
- Room temperature ingredients: Cold butter won’t cream properly, cold eggs can curdle the batter, and cold cream cheese creates lumpy frosting.
- Don’t overmix: Stop mixing as soon as flour is incorporated to avoid developing gluten, which makes the cake dense instead of tender.
- Chill layers before frosting: Cold layers are easier to handle, shed fewer crumbs, and stack more evenly.
- Sift powdered sugar: Prevents lumps in the cream cheese frosting for a perfectly smooth finish.
- Make-ahead: Unfrosted cake layers can be made 2 days ahead (refrigerated) or 3 months ahead (frozen). Frosting can be made 3 days ahead.
- Storage: Due to cream cheese frosting, store cake in the refrigerator for up to 5 days. Let sit at room temperature for 20-30 minutes before serving for best texture.
- Buttermilk substitute: Add 1 tablespoon of white vinegar or lemon juice to 1 cup of whole milk and let sit for 5 minutes.
- For a finer crumb: Use cake flour instead of all-purpose flour for an even more tender texture.
- Color variations: Try different gel colors for themed cakes, or create an ombre effect by varying color intensity in each layer.
Final Thoughts
Blue velvet cake is one of those recipes that delivers maximum impact without being any harder to make than a standard layer cake. The flavor is classic, the texture is spot-on, and the color is unforgettable.
It has become one of my favorite cakes to bring to celebrations precisely because it always gets people excited before they’ve even tasted it.
I hope this recipe gives you the confidence to try something a little bold in the kitchen. When that blue interior is revealed as you cut the first slice, the reactions make every step of the process worth it.
Give this blue velvet cake recipe a try, and let me know how it turned out in the comments below. I’d love to see your creations, so feel free to share a photo on social media and tag us.
Recommended:
- White Velvet Cake Recipe
- Pink Velvet Cake Recipe
- Lemon Velvet Cake Recipe
- Purple Velvet Cake Recipe
- Orange Velvet Cake Recipe
- Red Velvet Cake Recipe with Cake Mix
- Funfetti Cake Recipe
- Strawberry Cake Recipe
- Coconut Cake Recipe
- Marble Cake Recipe



