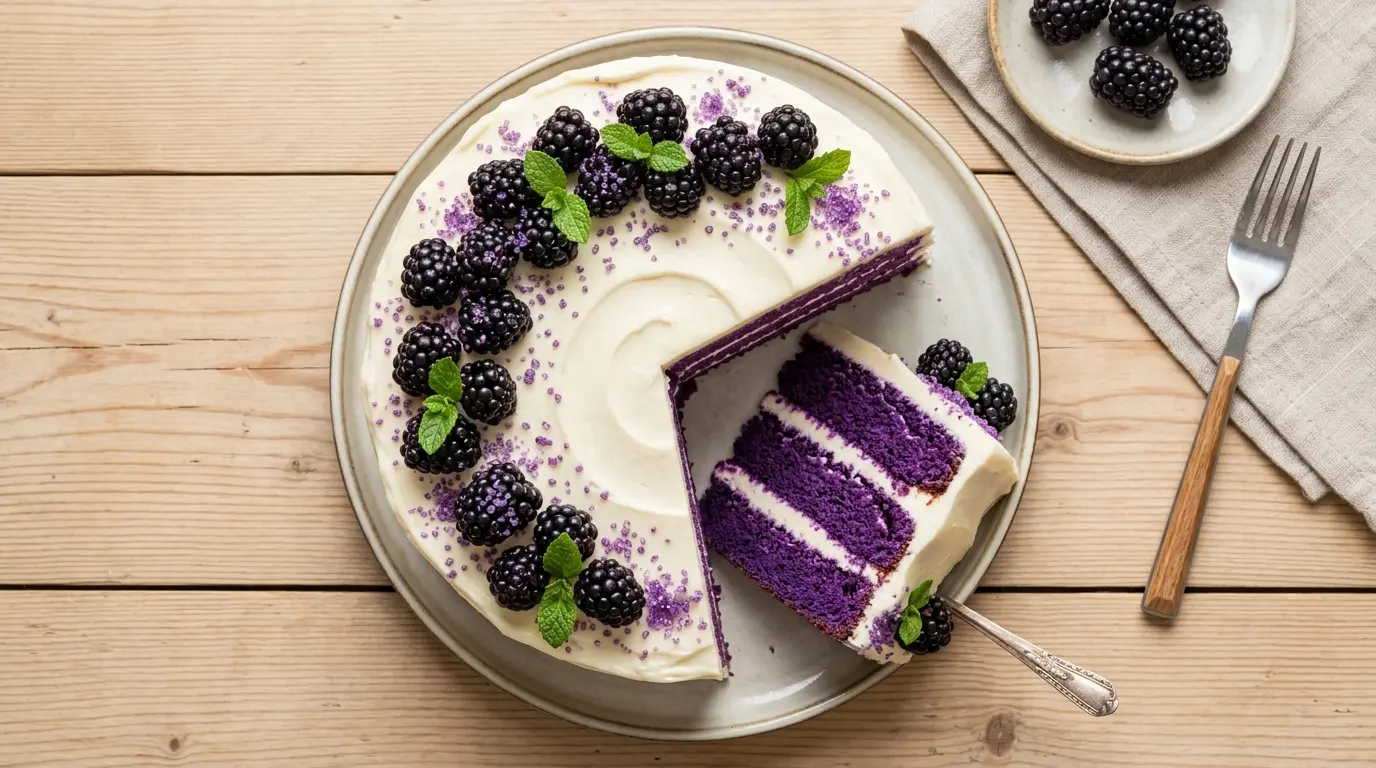
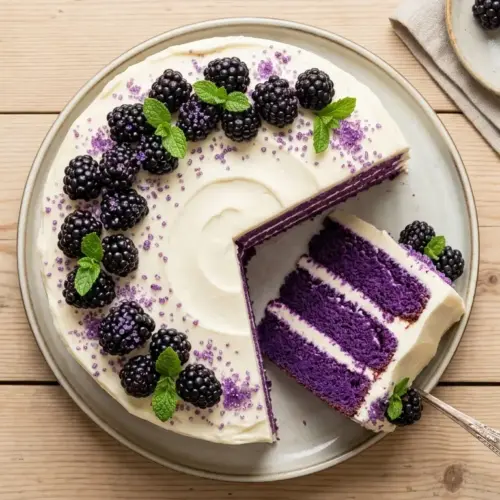
If you’ve been searching for a showstopping dessert that’s as beautiful as it is delicious, this purple velvet cake recipe is exactly what you need. Vibrant violet layers, a tender crumb, and a cloud-like cream cheese frosting make this cake the kind of thing people talk about long after the last slice is gone. It takes everything wonderful about classic red velvet and gives it a magical, whimsical upgrade, with rich purple hues that look like something out of a fairy tale.
What makes this cake special isn’t just the color. The combination of buttermilk and a touch of white vinegar creates the signature “velvet” texture, leaving the crumb soft, moist, and incredibly tender. A small amount of cocoa powder adds depth without muddying the purple hue, and a generous swipe of tangy cream cheese frosting ties every layer together.
This recipe is straightforward enough for a weekend bake and impressive enough for birthdays, holidays, baby showers, or any occasion that calls for a truly unforgettable centerpiece.
You might also enjoy: Orange Velvet Cake Recipe
Why You’ll Love This Purple Velvet Cake Recipe
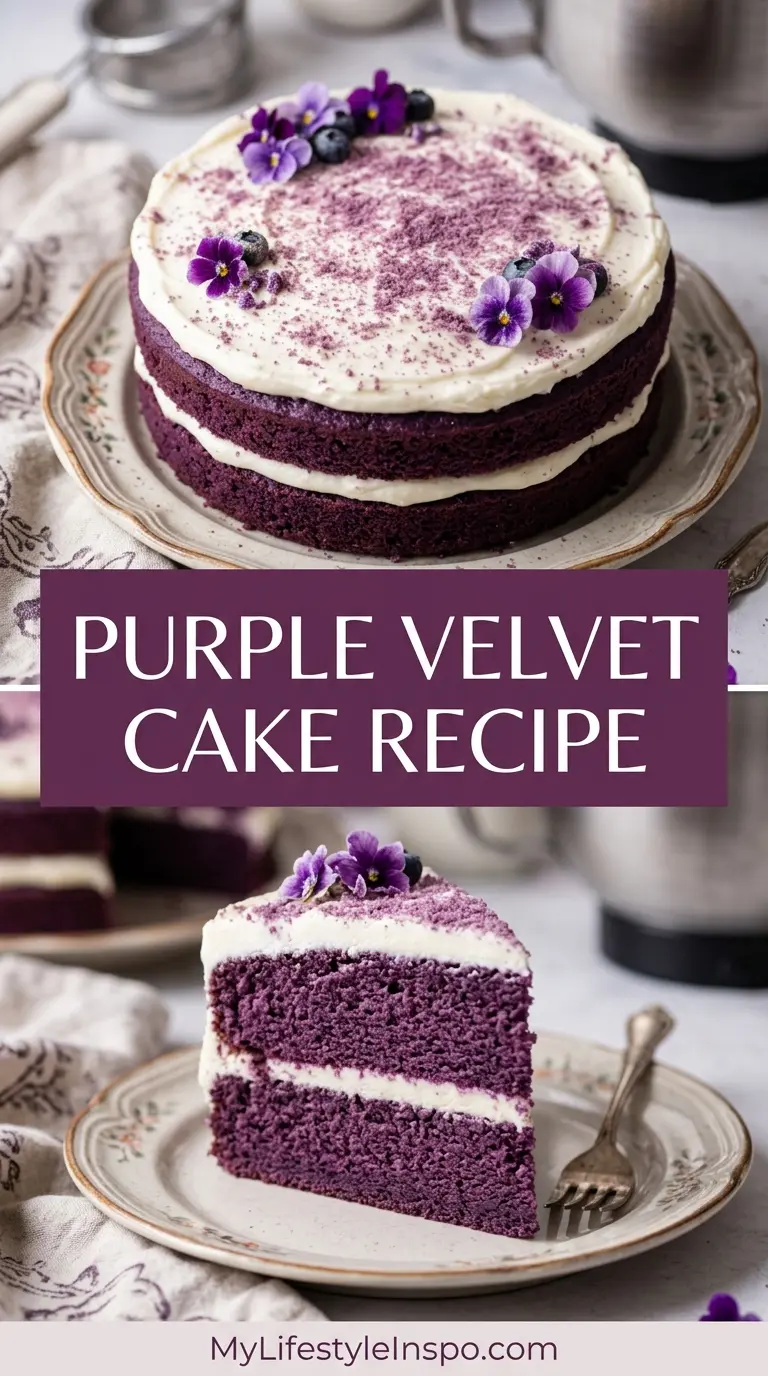
The color alone is enough to stop the room. When you slice into those deep violet layers and the white frosting contrasts against them, every single person at the table will want a piece.
Beyond the visual drama, the actual flavor is genuinely special. The buttermilk gives the cake a subtle tang, the cocoa adds a soft, earthy undertone, and the vanilla rounds everything out into something that feels classic yet completely unique.
It’s also a very forgiving bake. No complicated techniques or specialty equipment are required, just some basic mixing, two round cake pans, and a little patience while the layers cool.
Here’s why this recipe works so well:
- Moist and tender crumb thanks to the buttermilk and oil combination
- Vibrant, stable color using gel food coloring, which doesn’t water down the batter
- Tangy cream cheese frosting that balances the sweetness perfectly
- Make-ahead friendly, so you can bake the layers the day before and frost them fresh
- Crowd-pleasing flavors with a vanilla-forward taste profile that almost everyone loves
- Versatile for any occasion, from birthdays to celebrations to holiday spreads
Read Also: Red Velvet Cake Recipe
Ingredients
For the best results, use room temperature eggs, buttermilk, and cream cheese. Cold dairy ingredients don’t incorporate as smoothly, and you’ll end up with a lumpy batter or frosting. Pull everything out of the fridge about 45 minutes before you start baking.
For the Cake Layers:
- 2 1/2 cups (315g) all-purpose flour
- 1 1/2 cups (300g) granulated sugar
- 1 teaspoon baking soda
- 1 teaspoon fine salt
- 1 tablespoon (8g) unsweetened cocoa powder
- 2 large eggs, room temperature
- 1 cup (240ml) vegetable oil
- 1 cup (240ml) buttermilk, room temperature
- 2 teaspoons pure vanilla extract
- 1 teaspoon white vinegar
- 2–3 teaspoons purple gel food coloring
For the Cream Cheese Frosting:
- 16 oz (450g) full-fat block cream cheese, softened
- 1/2 cup (115g) unsalted butter, softened
- 4 cups (480g) powdered sugar, sifted
- 2 teaspoons pure vanilla extract
- Pinch of salt
This recipe makes a 2-layer, 9-inch round cake with approximately 12 servings. If you want a 3-layer cake, increase the batter ingredients by 50%.
Read Also: Cream Cheese Frosting Recipe
Kitchen Equipment Needed
Having the right tools set out before you start makes the whole process smoother. Nothing derails a bake like hunting for a spatula with batter already in the bowl.
- 9-inch round cake pans (2 pans)
- Stand mixer or hand mixer
- Large mixing bowls (at least 2)
- Medium mixing bowl
- Rubber spatula
- Whisk
- Measuring cups and spoons
- Kitchen scale (recommended for accurate measurements)
- Sifter or fine-mesh sieve
- Parchment paper
- Wire cooling rack
- Offset spatula for frosting
- Cake turntable (optional but helpful for frosting)
- Toothpick or cake tester
Another favorite: Checkerboard Cake Recipe
Recommended Products for This Recipe
These are products I genuinely recommend based on quality and performance. They make a real difference in the final result.
1. Chefmaster Purple Gel Food Coloring
Gel food coloring delivers a true, vivid purple without adding extra liquid to the batter, which is crucial for maintaining the right consistency. Chefmaster’s purple gel is highly pigmented, so a small amount goes a long way. It stays stable during baking and doesn’t fade into a dull gray.
2. Fat Daddio’s 9-Inch Round Cake Pans
Even heat distribution is key for flat, even cake layers. Fat Daddio’s anodized aluminum pans heat consistently and release cakes cleanly without sticking. They’re a favorite among professional bakers and make a noticeable difference compared to basic non-stick pans.
3. OXO Good Grips Offset Spatula
A good offset spatula is the difference between a messily frosted cake and a clean, professional finish. The OXO model has the perfect bend angle and a comfortable grip that gives you full control when spreading frosting across layers.
4. Ateco Cake Turntable
A rotating cake stand makes applying frosting significantly easier, especially for getting smooth sides. It’s not essential, but once you use one, you’ll never want to frost without it.
For more inspiring bakes, check out this Marble Cake Recipe
Step-by-Step Instructions
Step 1: Prep Your Pans and Preheat the Oven
- Preheat your oven to 350°F (175°C). Allow at least 15 minutes for the oven to fully come to temperature before baking.
- Grease both 9-inch round cake pans with butter or non-stick baking spray, making sure to coat the sides as well as the base.
- Cut two circles of parchment paper to fit the bottom of each pan and press them in. This ensures the cakes release cleanly without sticking.
- Lightly dust the greased pans with flour, tapping out any excess. This extra step really helps with a clean release.
Step 2: Mix the Dry Ingredients
- In a large mixing bowl, add the all-purpose flour, granulated sugar, baking soda, fine salt, and unsweetened cocoa powder.
- Whisk everything together vigorously for about 30 seconds to make sure the baking soda and cocoa are evenly distributed throughout the flour. Lumps of baking soda in the batter can cause uneven rising.
- Set this bowl aside.
Step 3: Mix the Wet Ingredients
- In a separate large bowl, add the eggs, vegetable oil, buttermilk, pure vanilla extract, and white vinegar.
- Whisk them together until completely smooth and uniform. The oil and buttermilk should be fully combined with no streaks.
- Add your purple gel food coloring. Start with 1 teaspoon, stir well, and assess the color. Add more, 1/2 teaspoon at a time, until you reach your desired shade of purple. For a deep royal purple, you’ll typically need 2 to 3 teaspoons of gel coloring.
- Keep in mind that the color will lighten slightly as the batter bakes, so aim for a shade slightly darker than you want in the finished cake.
Step 4: Combine Wet and Dry Ingredients
- Pour the wet ingredient mixture into the bowl with the dry ingredients.
- Using a rubber spatula or a hand mixer on low speed, stir or mix just until no dry flour streaks remain. This should take about 30 to 45 seconds of mixing.
- Do not overmix. Overworking the batter develops the gluten in the flour, which will make the cake tough and dense rather than tender and velvety. Stop as soon as the batter looks smooth and streak-free.
- Scrape down the sides and bottom of the bowl once to make sure everything is incorporated evenly.
Step 5: Bake the Cake Layers
- Divide the batter evenly between the two prepared cake pans. Use a kitchen scale to weigh each pan for the most even layers, or simply eyeball it.
- Smooth the tops gently with the back of a spoon or a small offset spatula.
- Place both pans on the center rack of your preheated oven. If your oven is small, you can place the pans side by side or on two separate racks, rotating them halfway through baking.
- Bake for 28 to 32 minutes. Start checking at the 28-minute mark by inserting a toothpick into the center of each cake. When it comes out clean or with just a few moist crumbs (not wet batter), the cakes are done.
- Avoid opening the oven door before 25 minutes, as this can cause the cakes to sink in the center.
Step 6: Cool the Cake Layers Completely
- Remove the pans from the oven and set them on a wire cooling rack. Let the cakes cool in their pans for exactly 10 minutes, no more and no less. If you remove them too early, they may crack or fall apart. If you wait too long, they may stick.
- After 10 minutes, run a thin knife or offset spatula gently around the inside edges of each pan to loosen the cake.
- Invert each pan onto the wire rack, gently tap the bottom, and lift the pan away. Peel off the parchment paper.
- Allow the cake layers to cool completely on the wire rack before frosting. This typically takes 1 to 1.5 hours at room temperature. Frosting a warm cake will cause the frosting to melt and slide off.
- For a shortcut, once the cakes have cooled for 30 minutes on the rack, wrap them individually in plastic wrap and place in the refrigerator for 30 minutes to firm up.
Step 7: Make the Cream Cheese Frosting
- In the bowl of a stand mixer fitted with the paddle attachment (or using a hand mixer), beat the softened cream cheese and softened butter together on medium speed for about 2 to 3 minutes. You want the mixture to be completely smooth with no lumps. Scrape down the sides frequently.
- Reduce the mixer speed to low and gradually add the sifted powdered sugar in three additions. Adding it all at once will create a sugar cloud and can cause lumps.
- Once all the powdered sugar is incorporated, add the vanilla extract and a pinch of salt.
- Increase the speed to medium-high and beat for 1 to 2 minutes until the frosting is light, fluffy, and completely smooth.
- Taste the frosting. If you want a sweeter frosting, add a little more powdered sugar. If it tastes too sweet, a tiny squeeze of lemon juice can balance it.
- The frosting should be thick but spreadable. If it seems too soft, refrigerate it for 15 minutes before using.
Step 8: Assemble and Frost the Cake
- Place one cooled cake layer on a cake board, plate, or cake stand. If using a cake turntable, set the stand on it now.
- Spoon a generous amount of frosting (about 1 cup) onto the top of the first layer. Use an offset spatula to spread it evenly all the way to the edges in a smooth, flat layer. This is your “filling” between the layers.
- Carefully place the second cake layer on top, pressing down gently to adhere it. Try to align the layers so the cake sits straight and level.
- Apply a thin layer of frosting all over the outside of the cake (the top and sides). This is called the crumb coat. It traps any loose crumbs so they don’t show through the final layer of frosting. Refrigerate the crumb-coated cake for 20 minutes to set.
- After chilling, apply the remaining frosting generously over the top and sides. Use your offset spatula to smooth the sides, rotating the turntable if you have one, and create a smooth or textured finish according to your preference.
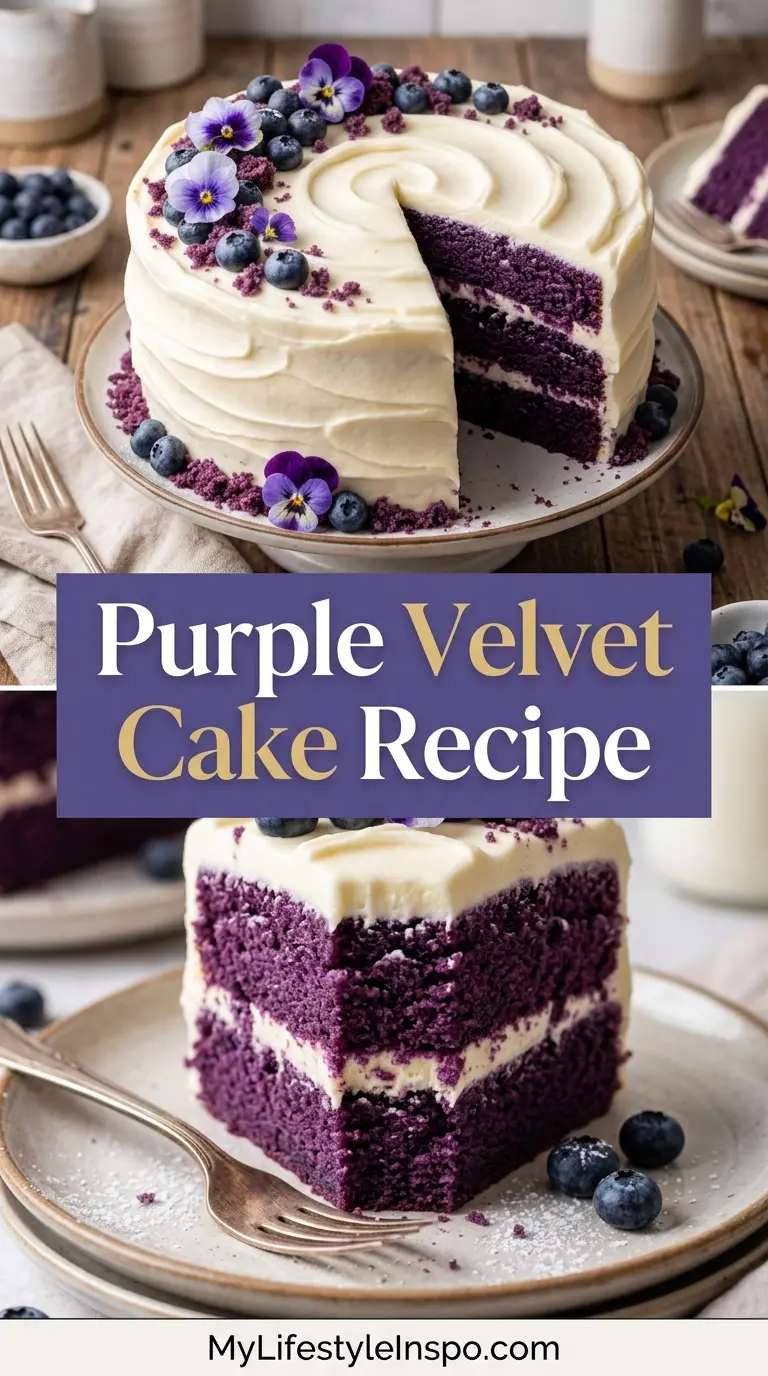
- Decorate as desired with fresh berries, purple sprinkles, or a light dusting of purple sugar.
This pairs beautifully with a slice of Lemon Cake on a dessert table for a colorful spread.
Tips for Success
Getting the best result from this recipe comes down to a few key techniques that make a noticeable difference in both flavor and texture.
- Use gel food coloring, not liquid. Liquid food coloring is too diluted to achieve a true, vibrant purple, and it adds excess moisture to the batter. Gel coloring is highly concentrated and gives you a deep, consistent hue.
- Don’t skip the vinegar. The white vinegar reacts with the buttermilk and baking soda to help the cake rise and contributes to that classic velvet texture. It doesn’t affect the flavor.
- Room temperature ingredients matter. Cold eggs and buttermilk won’t emulsify as smoothly into the batter, which can result in a denser, uneven crumb.
- Measure flour correctly. Spoon the flour into the measuring cup and level it off with a knife rather than scooping directly. Scooping compacts the flour and can result in a dry, dense cake.
- Level your cake layers if needed. If the tops of the baked layers dome up, use a serrated knife to level them before assembling. This gives you a stable, even cake.
- Chill the cake before slicing. After frosting, refrigerate the assembled cake for at least 30 minutes. This firms up the frosting and makes for much cleaner slices.
Read Also: Vanilla Buttercream Frosting Recipe
Serving Suggestions
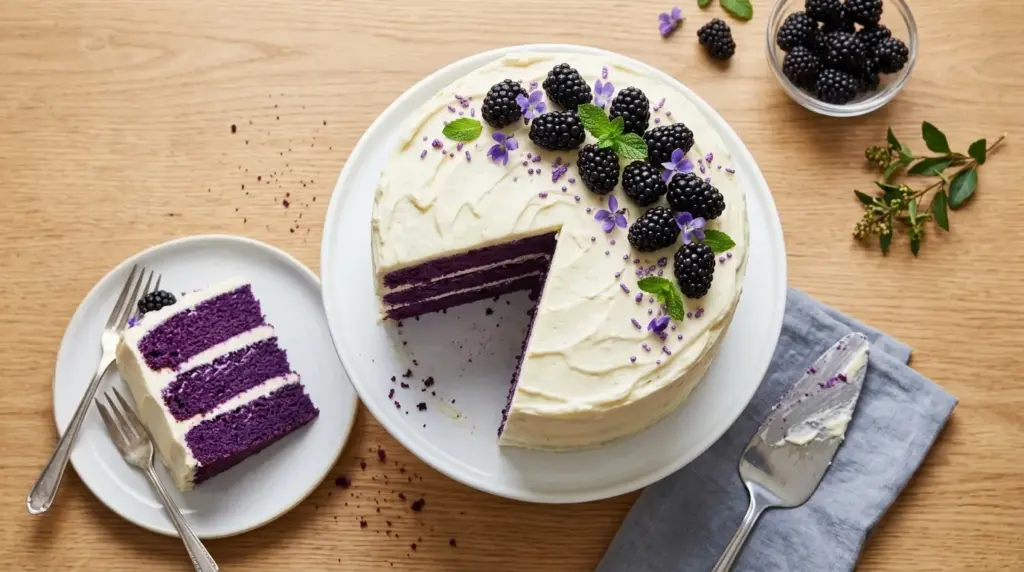
This cake is stunning enough to stand completely on its own, but if you’re putting together a full dessert table or celebration spread, there are some lovely ways to complete the experience.
Pair it with a light, fresh fruit component to contrast the richness of the cream cheese frosting. The tartness of fresh raspberries or blackberries alongside a slice of this cake is a genuinely lovely combination.
Here are some ideas for serving and styling:
- Serve each slice with a small scoop of Vanilla Bean Ice Cream for a classic pairing
- Top individual slices with a few fresh blueberries, raspberries, or blackberries
- Dust the top of the frosted cake with edible purple glitter for extra drama at a birthday or celebration
- Serve alongside a pot of Earl Grey or chamomile tea for a beautiful afternoon tea spread
- Add a drizzle of Fresh Strawberry Sauce to each plate for a pop of color and fruity contrast
- For a celebration, accompany with Cake Pops in matching purple for a full dessert display
Variations to Try
Once you’ve mastered the base recipe, there’s plenty of room to experiment with flavors, colors, and decorating styles to make this cake your own.
- Natural purple coloring: Use butterfly pea flower tea steeped in the buttermilk, or blend and strain fresh blackberries or blueberries, and use the juice as part of your liquid. This gives a more muted, natural purple hue.
- Ube purple velvet cake: Replace 1/2 teaspoon of the vanilla extract with ube extract for a subtle, sweet potato-like flavor that lends a truly authentic purple hue.
- Lavender purple velvet cake: Add 1 teaspoon of culinary-grade dried lavender steeped in the warm buttermilk, then strained, for a floral, aromatic variation.
- Purple velvet cupcakes: Divide the batter among a lined 24-cup muffin tin and bake at 350°F (175°C) for 18 to 22 minutes.
- White chocolate cream cheese frosting: Melt and cool 3 oz (85g) of white chocolate and beat it into the cream cheese frosting for a sweeter, richer finish.
- Lemon cream cheese frosting: Add 2 tablespoons of fresh lemon juice and 1 teaspoon of lemon zest to the frosting for a bright, citrusy twist.
For another uniquely colored velvet cake, explore this Orange Velvet Cake too.
Storage and Reheating
Proper storage keeps this cake moist and the frosting firm. Because of the cream cheese frosting, it must be kept refrigerated, unlike some buttercream-frosted cakes that can sit at room temperature.
- At room temperature: The frosted cake can sit out for up to 2 hours for serving purposes. Do not leave it out longer than that, as the cream cheese frosting is perishable.
- Refrigerator: Store the frosted cake covered in the refrigerator for up to 5 days. Use a cake dome, a large airtight container, or press plastic wrap gently against any cut surfaces to prevent drying out.
- Freezer: Unfrosted cake layers freeze beautifully. Wrap each cooled layer tightly in plastic wrap, then in a layer of aluminum foil, and freeze for up to 3 months. Thaw overnight in the refrigerator before frosting. Frosted slices can also be frozen individually on a parchment-lined tray, then transferred to a freezer bag.
- Serving from the fridge: For the best texture and flavor, remove the cake from the refrigerator about 30 to 45 minutes before serving. Cold cream cheese frosting is firmer and less flavorful than frosting at room temperature.
Read Also: Chocolate Ganache Recipe
Nutritional Facts
The following values are approximate per serving, based on a 12-slice cake using the full recipe with frosting.
| Nutrient | Per Serving (1 slice) |
|---|---|
| Calories | ~490 kcal |
| Total Fat | 26g |
| Saturated Fat | 10g |
| Cholesterol | 65mg |
| Sodium | 290mg |
| Total Carbohydrates | 62g |
| Dietary Fiber | 0.5g |
| Sugars | 48g |
| Protein | 5g |
These values will vary depending on exact ingredient brands, portions of frosting used, and serving size. The cake layers themselves contribute approximately 280 to 300 calories per slice, with the cream cheese frosting accounting for the remainder.
For a lighter option, try: Low Calorie Cheesecake Recipe
Health Benefits of Key Ingredients
This is a celebratory cake, but a few of its ingredients do carry some genuine nutritional value worth knowing about.
Buttermilk is lower in fat than regular milk and contains probiotics that support gut health. Its acidity also plays an important role in tenderizing the gluten in the flour, which is why it’s such a common ingredient in Southern baking and velvet-style cakes.
Eggs are one of the most nutrient-dense foods available. They provide high-quality protein, vitamins D, B12, and B2, selenium, and choline, which is important for brain health and liver function. In baking, eggs contribute structure, moisture, and richness to the crumb.
Cream cheese contains a moderate amount of protein and fat-soluble vitamins. Full-fat cream cheese provides a creamier, more stable frosting than reduced-fat alternatives, which tend to separate during mixing.
Here’s a quick look at the functional benefits of the core ingredients:
- Vegetable oil keeps the cake moist longer than butter, as oil stays liquid at room temperature
- Vinegar reacts with baking soda to create lift and contributes to the signature velvet texture
- Vanilla extract contains small amounts of antioxidants and adds depth of flavor that rounds out the sweetness
- Cocoa powder provides trace minerals including magnesium and iron, even in the small quantity used here
Read Also: Carrot Cake with Cream Cheese Frosting Recipe
Frequently Asked Questions
1. Can I make this purple velvet cake without gel food coloring?
Yes, you can. Natural alternatives include butterfly pea flower tea (which brews to a vivid blue-purple and turns more purple when mixed with buttermilk’s acidity), strained blueberry or blackberry juice, or ube extract for a true purple hue with subtle flavor.
Keep in mind that natural colorings may produce a less vibrant result than gel food coloring, and the shade may shift slightly during baking. They can also add trace flavors, which in most cases is a pleasant addition.
2. Why did my purple cake turn grayish or brownish after baking?
This is usually caused by using too much cocoa powder or using natural cocoa instead of Dutch-process cocoa. Cocoa can dull purple tones significantly.
The recipe uses only 1 tablespoon of cocoa for this reason. If you’re still seeing a muddy color, try reducing to 1 teaspoon, or use a very small amount of blue gel coloring alongside the purple to brighten the hue.
3. Can I make this cake ahead of time?
Absolutely. This cake is actually ideal for making ahead. Bake the cake layers 1 to 2 days in advance, wrap them tightly in plastic wrap, and store at room temperature or in the refrigerator.
Make the frosting on the day you plan to assemble and serve for the freshest flavor and texture. If you need to fully assemble ahead of time, a frosted cake will keep beautifully in the refrigerator for up to 5 days.
4. Can I use cake flour instead of all-purpose flour?
Yes, and many bakers prefer it for velvet cakes. Cake flour has a lower protein content, which results in an even finer, more delicate crumb.
If substituting, use 2 3/4 cups (310g) of cake flour in place of the 2 1/2 cups (315g) of all-purpose flour. The rest of the recipe stays the same.
5. My cream cheese frosting is too soft and runny. What went wrong?
The most common cause is using cream cheese that is too warm. Cream cheese softens quickly at room temperature, and if your kitchen is warm or you beat it for too long before adding the sugar, it can become too loose to hold its shape.
To fix runny frosting, refrigerate the bowl of frosting for 20 to 30 minutes, then re-beat briefly. Make sure all future batches start with cream cheese that is cool (around 65°F/18°C), not fully at room temperature.
Read Also: Funfetti Cake Recipe
Purple Velvet Cake

Equipment
- 9-inch round cake pans - 2 pans
- Stand mixer or hand mixer
- Large mixing bowls - at least 2
- Medium mixing bowl
- Rubber spatula
- Whisk
- Measuring cups and spoons
- Kitchen scale - recommended for accurate measurements
- Sifter or fine-mesh sieve
- Parchment paper
- Wire cooling rack
- Offset spatula - for frosting
- cake turntable - optional but helpful for frosting
- Toothpick or cake tester
Ingredients
- 2 1/2 cups all-purpose flour - 315g
- 1 1/2 cups granulated sugar - 300g
- 1 teaspoon baking soda
- 1 teaspoon fine salt
- 1 tablespoon unsweetened cocoa powder - 8g
- 2 large eggs - room temperature
- 1 cup vegetable oil - 240ml
- 1 cup buttermilk - 240ml, room temperature
- 2 teaspoons pure vanilla extract
- 1 teaspoon white vinegar
- 2-3 teaspoons purple gel food coloring
For the Cream Cheese Frosting
- 16 oz full-fat block cream cheese - 450g, softened
- 1/2 cup unsalted butter - 115g, softened
- 4 cups powdered sugar - 480g, sifted
- 2 teaspoons pure vanilla extract
- pinch of salt
For Serving (Optional)
- fresh raspberries
- fresh blueberries
- purple sprinkles
Instructions
- Preheat oven to 350°F (175°C). Grease two 9-inch round cake pans with butter or non-stick spray, line bottoms with parchment paper, and lightly dust with flour.
- In a large bowl, whisk together flour, sugar, baking soda, salt, and cocoa powder for 30 seconds until evenly combined.
- In a separate bowl, whisk eggs, oil, buttermilk, vanilla, and vinegar until smooth. Add purple gel food coloring starting with 1 teaspoon, then add more until desired deep purple shade is reached.
- Pour wet ingredients into dry ingredients and stir with a spatula or mixer on low speed just until no dry streaks remain, about 30-45 seconds. Do not overmix.
- Divide batter evenly between prepared pans. Bake on center rack for 28-32 minutes until a toothpick inserted in center comes out clean.
- Cool cakes in pans for 10 minutes, then run a knife around edges and invert onto wire racks. Peel off parchment and cool completely for 1-1.5 hours.
- Beat softened cream cheese and butter together for 2-3 minutes until smooth. Gradually add sifted powdered sugar in three additions, then add vanilla and salt. Beat until light and fluffy.
- Place one cooled cake layer on a plate. Spread 1 cup of frosting evenly over the top. Place second layer on top and press gently.
- Apply a thin crumb coat of frosting over entire cake. Refrigerate for 20 minutes to set. Then apply remaining frosting generously over top and sides, smoothing with an offset spatula.
- Decorate with fresh berries, purple sprinkles, or as desired. Chill for 30 minutes before slicing for clean cuts.
Notes
- Use gel food coloring, not liquid. Gel is highly concentrated and won’t water down the batter. Liquid coloring requires more product and can affect texture.
- Don’t skip the vinegar – it reacts with buttermilk and baking soda to create the signature velvet texture without affecting flavor.
- Bring all dairy ingredients (eggs, buttermilk, cream cheese, butter) to room temperature before starting for the smoothest batter and frosting.
- Measure flour correctly by spooning it into the measuring cup and leveling with a knife. Scooping directly compacts the flour and can result in a dry cake.
- If your cake layers dome, level them with a serrated knife before assembling for a stable, even cake.
- For a natural purple coloring, try butterfly pea flower tea steeped in the buttermilk, or strained blueberry juice. Note colors will be more muted.
- Store frosted cake covered in the refrigerator for up to 5 days. For best flavor, remove from fridge 30-45 minutes before serving.
- Unfrosted cake layers can be wrapped tightly and frozen for up to 3 months. Thaw overnight in the refrigerator before frosting.
- For a 3-layer cake, increase all batter ingredients by 50%.
- If cream cheese frosting becomes too soft, refrigerate for 20-30 minutes then re-beat briefly before using.
Final Thoughts
This purple velvet cake recipe is one of those bakes that genuinely delivers on its promise. It looks extraordinary, tastes wonderful, and comes together with surprisingly little effort once you understand the key steps.
The deep violet layers, the creamy frosting, and the moist, tender crumb make it a cake worth making again and again. It’s perfect for birthdays, celebrations, or any day that deserves a little color.
Give it a try and let me know how it turns out in the comments below. I’d love to hear what occasion you made it for or any fun variations you tried. Don’t forget to share a photo if you do, because this one is seriously too beautiful not to show off!
Recommended:
- Red Velvet Cake Recipe
- Italian Cream Cake Recipe
- Coconut Cake Recipe
- White Cake Recipe
- Strawberry Cake Recipe
- Lemon Chiffon Cake Recipe
- Moist Chocolate Cake Recipe
- Classic Vanilla Cake Recipe
- Tres Leches Cake Recipe
- Pound Cake Recipe



