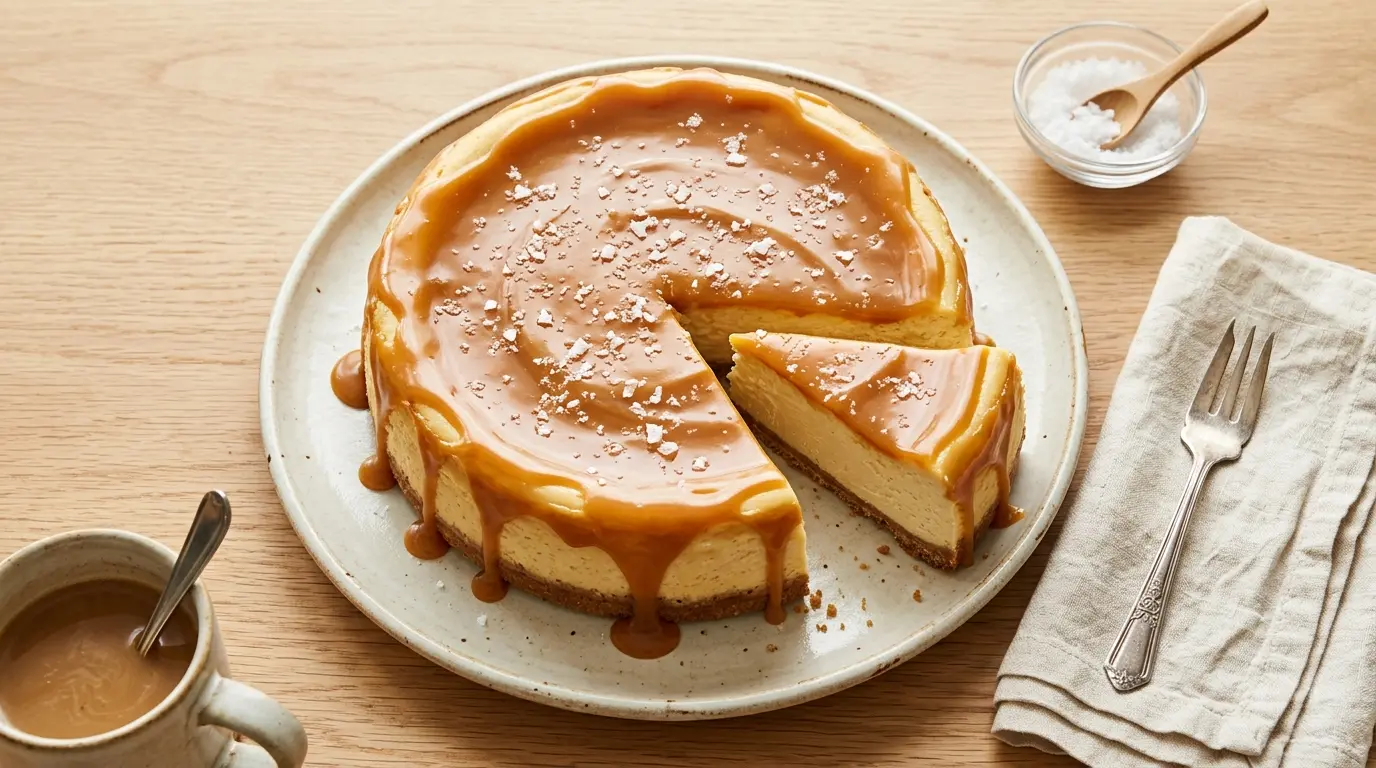
If you have ever wanted to make a truly show-stopping dessert, this salted caramel cheesecake recipe is exactly what you have been looking for.
It starts with a buttery graham cracker crust, moves into a silky-smooth cream cheese filling swirled with homemade salted caramel, and finishes with a luscious caramel topping and a sprinkle of flaky sea salt.
Every single bite gives you that perfect balance between sweet and salty, creamy and crunchy.
The magic behind this recipe comes down to a few key principles. Full-fat cream cheese at room temperature is non-negotiable; cold cream cheese creates lumps that you cannot beat out, no matter how long you mix. The homemade salted caramel sauce is made using a dry-method caramel, which means you melt sugar without water for a deeper, more complex flavor.
Using a water bath (also called a bain-marie) during baking helps the cheesecake cook gently and evenly, dramatically reducing the chance of cracks on the surface.
This is a make-ahead dessert by nature. You bake it, chill it overnight, and top it right before serving. That means less stress on the day of your dinner party or celebration.
If you love the combination of sweet caramel and a hint of salt in your desserts, this one will become your new go-to.
For another stunning cheesecake variation, check out this Turtle Cheesecake Recipe that pairs caramel with pecans and chocolate for an equally indulgent experience.
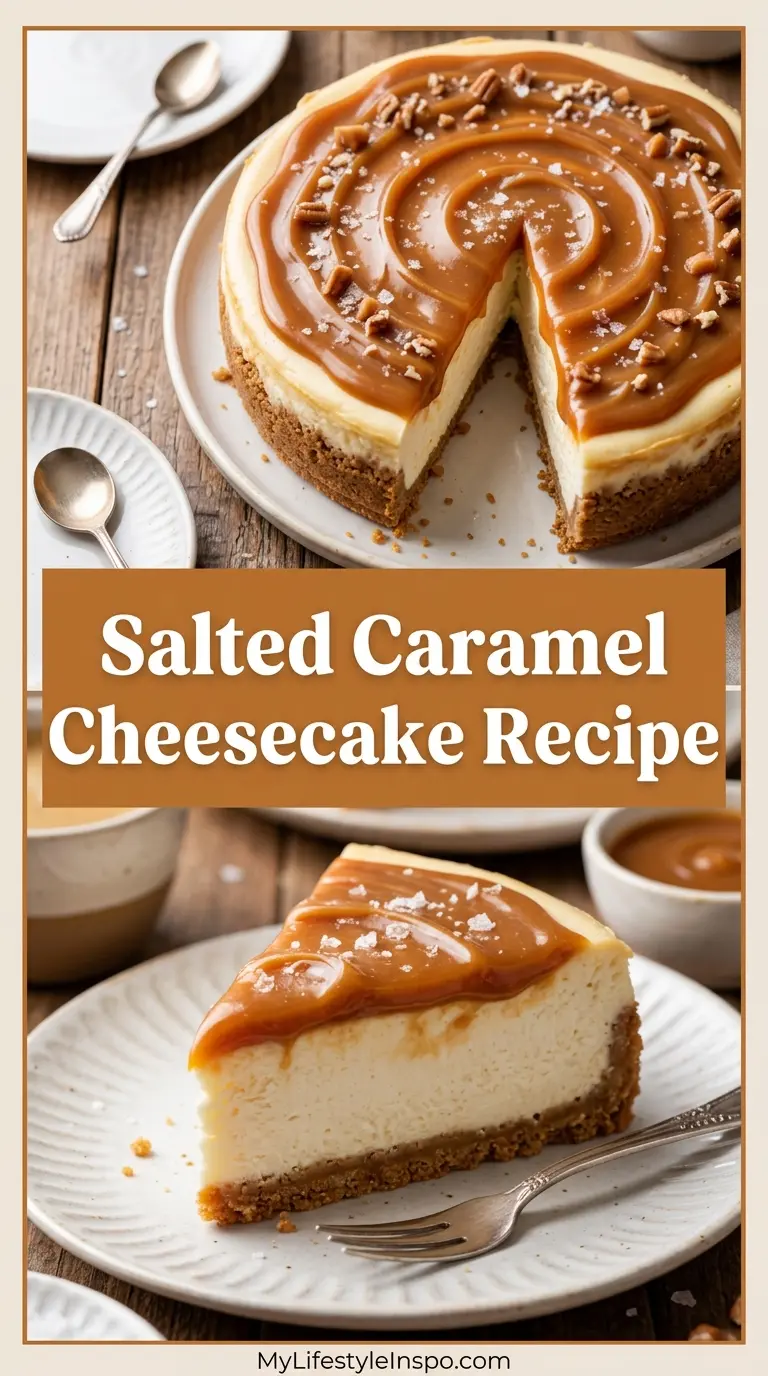
Why You’ll Love This Salted Caramel Cheesecake Recipe
This cheesecake is genuinely one of the most crowd-pleasing desserts you can bring to any gathering.
The contrast of the salty, buttery caramel against the tangy cream cheese filling is what makes it so memorable. It does not taste one-dimensional like a standard sweet dessert.
It is a baked cheesecake, which means you get that dense, velvety texture that no-bake versions simply cannot replicate. The slow bake followed by a slow cool creates an almost fudge-like interior that is absolutely dreamy.
The homemade caramel sauce is surprisingly easy to make and yields far more flavor than any store-bought version.
You can prepare the caramel sauce and the cheesecake itself a day or two ahead of time, making it perfect for entertaining.
Here is a quick summary of why this recipe stands out:
- Uses a homemade dry-method caramel for deeper flavor
- Graham cracker crust adds the perfect buttery crunch to complement the creamy filling
- A water bath ensures even cooking and a smooth, crack-free surface
- The combination of room-temperature ingredients results in a completely lump-free batter
- Finished with flaky sea salt for that iconic sweet-salty balance
- Serves up to 12 people, making it ideal for parties and celebrations
- Can be made 1 to 2 days in advance
Another favorite: Baileys Cheesecake Recipe
Ingredients
This recipe uses straightforward ingredients, but quality matters. Use full-fat versions of every dairy product for the creamiest result.
For the Salted Caramel Sauce:
- 1 cup (200g) granulated sugar
- 6 tablespoons (85g) salted butter, at room temperature, cut into cubes
- 1/2 cup (120ml) heavy whipping cream, at room temperature
- 1 teaspoon flaky sea salt (such as Maldon Sea Salt Flakes)
For the Graham Cracker Crust:
- 2 cups (240g) graham cracker crumbs (about 16 full sheets)
- 3 tablespoons (38g) granulated sugar
- 1/2 cup (113g) unsalted butter, melted
For the Cheesecake Filling:
- 32 oz (900g) full-fat Philadelphia cream cheese, softened to room temperature
- 1 cup (200g) granulated sugar
- 1/4 cup (60g) full-fat sour cream, at room temperature
- 2 teaspoons pure vanilla extract
- 3 large eggs, at room temperature
- 1/2 cup (120ml) of the prepared salted caramel sauce (from above), cooled
For Topping:
- Remaining salted caramel sauce
- 1/2 teaspoon additional flaky sea salt
Read Also: No Bake Cheesecake Recipe
Kitchen Equipment Needed
Having the right tools makes this recipe significantly easier and helps you get professional results at home.
- 9-inch springform pan (the removable sides are essential for cheesecake)
- Stand mixer or hand mixer with paddle attachment
- Large roasting pan (for the water bath)
- Medium heavy-bottomed saucepan (for the caramel)
- Silicone spatula
- Whisk
- Food processor or resealable bag and rolling pin (for crushing crackers)
- Measuring cups and spoons
- Kitchen scale (highly recommended for accuracy)
- Aluminum foil (for wrapping the pan before the water bath)
- Wire cooling rack
- Offset spatula
- Instant-read thermometer (optional but helpful)
This technique pairs beautifully with a Baked Cheesecake Recipe approach that covers all the fundamentals if you are new to baked cheesecakes.
Recommended Products for This Recipe
These are products I recommend based on quality and performance. They genuinely make a difference in the final result.
1. Maldon Sea Salt Flakes
Regular table salt will not give you the same visual appeal or the satisfying crunch of flaky sea salt on top of this cheesecake. Maldon is the gold standard for finishing salts and its large, delicate flakes dissolve beautifully on the tongue for true salted caramel flavor. A small box lasts a very long time and elevates dozens of recipes.
2. USA Pan 9-Inch Springform Pan
A quality springform pan with a tight-fitting base prevents water from seeping in during the water bath, which is one of the most common points of failure with baked cheesecakes. The USA Pan version has a non-stick coating and a leak-resistant design that gives you peace of mind. It produces clean, even sides every single time.
3. KitchenAid Stand Mixer with Paddle Attachment
The paddle attachment on a stand mixer incorporates the cream cheese filling with minimal air, which is exactly what you want. Too much air in the batter causes the cheesecake to puff and then crack as it cools. A stand mixer also frees up your hands while mixing, making the whole process more manageable.
4. Heavy-Bottomed Stainless Steel Saucepan
Making caramel requires even, controlled heat distribution. Thin pans create hot spots that burn the sugar before it caramelizes evenly. A heavy-bottomed saucepan gives you the control you need and makes the caramel-making process much less stressful.
5. Digital Kitchen Scale
Baking is a science, and measuring by weight rather than volume is the single biggest upgrade you can make for consistent results. A digital scale is especially important for cream cheese and butter in this recipe, where a little extra can affect the final texture.
Read Also: Best Cheesecake Recipe
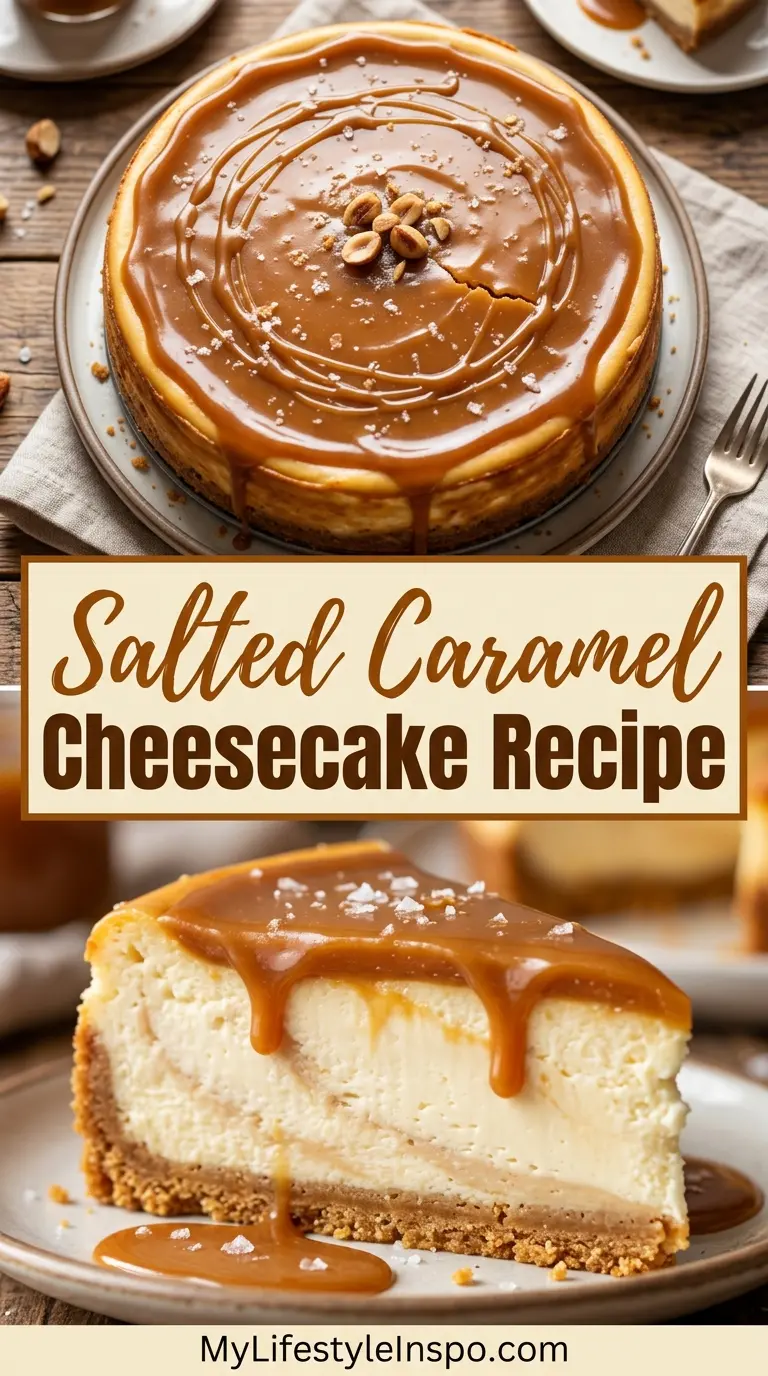
Step-by-Step Instructions
1. Make the Salted Caramel Sauce
- Place a medium heavy-bottomed saucepan over medium heat. Make sure the pan is completely dry, as any water will cause the sugar to seize.
- Pour 1 cup (200g) of granulated sugar into the pan in an even layer. Do not stir yet.
- Watch the sugar closely as it begins to melt around the edges. Once it starts liquefying, use a silicone spatula or heatproof spoon to gently push the melted sugar over the unmelted sugar. Keep the heat at medium.
- Continue cooking and stirring slowly until all the sugar has melted and turned a deep amber color, like dark honey. This process takes about 8 to 10 minutes. Do not rush it by turning up the heat, as the sugar can go from perfect to burnt very quickly.
- Once the sugar is fully melted and deep amber, immediately remove the pan from the heat and carefully add the 6 tablespoons (85g) of room-temperature cubed butter. The mixture will bubble vigorously; this is normal.
- Stir the butter in using a silicone spatula until fully melted and combined.
- Slowly pour in the 1/2 cup (120ml) of room-temperature heavy cream while stirring constantly. The mixture will bubble again. Stir until smooth.
- Add 1 teaspoon of flaky sea salt and stir to combine.
- Pour the caramel into a heatproof jar or bowl and let it cool to room temperature. Then transfer it to the refrigerator to cool completely while you prepare the rest of the recipe. You will need 1/2 cup of the cooled caramel for the filling; reserve the rest for topping.
2. Prepare the Graham Cracker Crust
- Preheat your oven to 325°F (163°C). Set a rack in the middle of the oven.
- Grease the bottom and sides of your 9-inch (23cm) springform pan with softened butter. Line the bottom with a round of parchment paper for easy release.
- If using whole graham crackers, process them in a food processor until you have fine crumbs, or place them in a resealable bag and crush them with a rolling pin. You need 2 cups (240g) of crumbs.
- In a medium bowl, combine the 2 cups (240g) of graham cracker crumbs, 3 tablespoons (38g) of granulated sugar, and 1/2 cup (113g) of melted unsalted butter. Stir until the crumbs look evenly moistened and clump together when pressed.
- Pour the crumb mixture into the prepared springform pan. Use the bottom of a flat measuring cup to press the crumbs firmly and evenly across the bottom and about 1 inch (2.5cm) up the sides. Pack it as firmly and evenly as possible to avoid a crumbly crust.
- Bake the crust for 10 to 12 minutes, until it smells lightly toasted and looks set. Remove it from the oven and let it cool on a wire rack. Reduce the oven temperature to 300°F (150°C) for the cheesecake.
3. Make the Cheesecake Filling
- Make sure all your filling ingredients are fully at room temperature before you begin. Cold cream cheese is the number one cause of lumpy cheesecake batter.
- In the bowl of your stand mixer fitted with the paddle attachment (or in a large bowl with a hand mixer), beat the 32 oz (900g) of softened cream cheese on low speed for about 2 minutes until it is completely smooth and free of lumps. Scrape down the sides and bottom of the bowl several times.
- Add the 1 cup (200g) of granulated sugar to the cream cheese. Mix on low speed for about 1 to 2 minutes until the sugar is fully incorporated and the mixture looks smooth and slightly glossy. Avoid mixing on high speed, as this incorporates too much air into the batter.
- Add the 1/4 cup (60g) of sour cream and 2 teaspoons of vanilla extract. Mix on low speed just until combined, about 30 seconds. Scrape down the bowl.
- Add the 3 large eggs one at a time, mixing on low speed after each addition just until the yolk disappears into the batter. Do not over-mix once the eggs are added; over-mixing after adding eggs is the other major cause of cracks in cheesecakes.
- Add the 1/2 cup (120ml) of cooled salted caramel sauce to the batter. Fold it in gently with a silicone spatula or mix on the lowest speed for just a few seconds until incorporated.
- Tap the bowl firmly on the counter several times to pop any large air bubbles in the batter.
4. Set Up the Water Bath and Bake
- Wrap the outside of your springform pan tightly with two layers of heavy-duty aluminum foil, making sure the foil comes all the way up the sides without any gaps. This prevents water from the water bath from seeping into the crust.
- Place the wrapped springform pan inside a large roasting pan or oven-safe baking dish.
- Pour the cheesecake batter over the cooled crust. Use an offset spatula to smooth the top evenly.
- Place the roasting pan (with the cheesecake inside it) on the center rack of the oven. Carefully pour hot water into the roasting pan around the springform pan until the water comes about 1 inch (2.5cm) up the sides of the springform pan. Be careful not to splash water onto the cheesecake.
- Bake at 300°F (150°C) for 55 to 70 minutes. The cheesecake is done when the outer 2 to 3 inches look set and the center still has a gentle, uniform jiggle when you carefully shake the pan. It should not look soupy or sloshy in the center.
5. Cool the Cheesecake Slowly
- Turn off the oven. Prop the oven door open about 1 inch using a wooden spoon or folded kitchen towel. Leave the cheesecake in the oven for 1 hour. This slow cooling process is what prevents the surface from cracking.
- After 1 hour, carefully remove the roasting pan from the oven and lift the springform pan out of the water. Remove the foil. Run a thin offset spatula or butter knife around the edge of the cheesecake to loosen it from the sides of the pan before the cheesecake cools completely and shrinks away from the sides on its own. This helps prevent cracks.
- Transfer the cheesecake to a wire rack and let it cool at room temperature for another 1 to 2 hours.
- Once fully cooled to room temperature, loosely cover the cheesecake with plastic wrap and refrigerate for at least 6 hours, preferably overnight. This chilling time is not optional; it is what gives the cheesecake its dense, sliceable texture.
6. Add the Salted Caramel Topping and Serve
- When ready to serve, remove the cheesecake from the refrigerator about 20 to 30 minutes before cutting it.
- Warm the remaining salted caramel sauce gently in the microwave in 10-second increments, or in a small saucepan over low heat, until it is pourable but not hot.
- Remove the sides of the springform pan by unlatching the clasp and carefully lifting the ring away from the cheesecake. Use your hands or a spatula to support the cheesecake if needed.
- Pour or drizzle the warmed caramel sauce generously over the top of the cheesecake, letting it drip down the sides naturally if you like.
- Immediately sprinkle the top with 1/2 teaspoon of additional flaky sea salt.
- Use a sharp knife dipped in hot water and wiped dry between each cut to slice the cheesecake cleanly. Serve immediately or return to the refrigerator.
You might also enjoy: Churro Cheesecake Recipe
Tips for Success
Following these tips will make the difference between a good cheesecake and an absolutely exceptional one.
- Room temperature ingredients are mandatory. Take your cream cheese, eggs, and sour cream out of the refrigerator at least 1 to 2 hours before baking. Cold ingredients do not emulsify properly and create a lumpy, dense batter.
- Do not over-mix after adding the eggs. Once eggs go in, mix on the lowest speed possible, just until each egg is incorporated. Over-mixing adds too much air and causes the cheesecake to puff up and then crack as it cools.
- Use room-temperature cream for the caramel. Cold heavy cream added to hot caramelized sugar causes violent splattering and can cause the caramel to seize. Warm the cream in the microwave for 30 to 45 seconds before adding it.
- Do not open the oven door while baking. Temperature fluctuations are a major cause of cracking. Trust the process and resist checking until the minimum bake time has passed.
- The slow oven cool is not optional. Cheesecakes crack when they cool too quickly. Leaving it in the turned-off oven with the door cracked for one full hour is one of the most important steps in this recipe.
- Refrigerate overnight for best texture. A cheesecake that has only chilled for 6 hours will be softer and harder to slice cleanly. Overnight chilling gives you that dense, perfect texture.
- Wrap the pan in two layers of foil. One thin layer of foil is often not enough to keep water out during the water bath. Two layers of heavy-duty foil provide much better protection.
Read Also: Lemon Cheesecake Recipe
Serving Suggestions
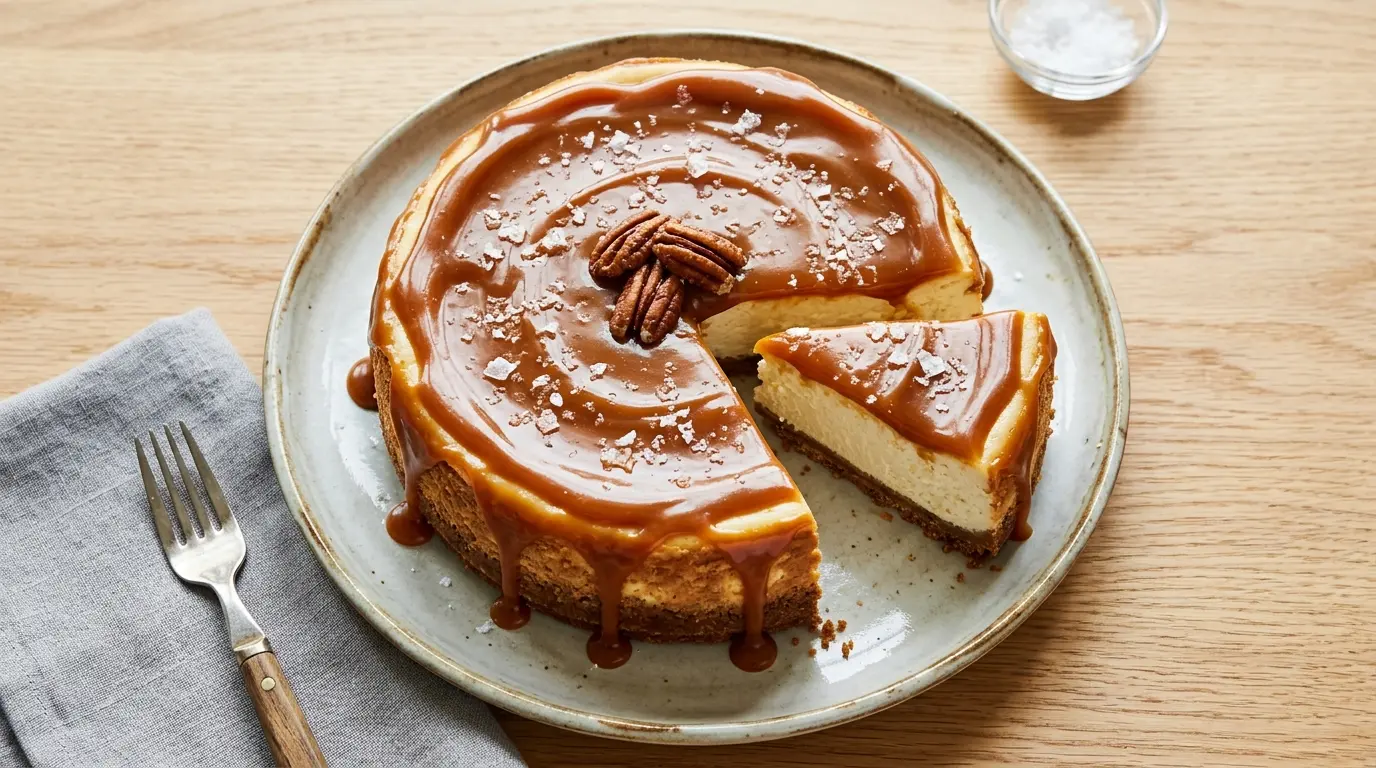
This salted caramel cheesecake is rich and satisfying on its own, but the right accompaniments make it even more special.
A small scoop of Vanilla Bean Ice Cream alongside a slice provides a lovely temperature contrast and balances the richness of the cheesecake beautifully.
Here are some great ways to serve this cheesecake:
- Pair it with a dollop of lightly sweetened whipped cream for a classic presentation
- Serve alongside a simple Fresh Strawberry Sauce for a fruity contrast to the caramel
- Add a few toasted pecans or walnuts on top for crunch and a nod to classic turtle-style flavors
- Offer thin slices at a dessert table alongside other bite-sized treats for variety
- Dust lightly with fleur de sel right before plating for a restaurant-style finish
- Serve with a warm cup of black coffee or espresso; the slight bitterness cuts through the sweetness perfectly
Variations to Try
Once you have mastered the base recipe, these variations are wonderful ways to switch things up.
- Chocolate Caramel Cheesecake: Stir 2 ounces of melted dark chocolate into the cheesecake batter along with the caramel for a richer, more decadent flavor. Top with a Chocolate Ganache Recipe in addition to the caramel sauce.
- Biscoff Crust Variation: Swap the graham cracker crumbs for crushed Biscoff (Lotus) cookies for a spiced, caramel-cookie base that pairs beautifully with the salted caramel filling.
- Bourbon Salted Caramel Cheesecake: Stir 1 tablespoon of bourbon into the caramel sauce while it is still warm for a sophisticated, smoky-sweet note.
- Mini Salted Caramel Cheesecakes: Divide the crust and filling into a standard 12-cup muffin pan lined with cupcake liners. Bake at 300°F (150°C) for 20 to 22 minutes for perfect individual portions that are great for parties.
- Gluten-Free Version: Substitute the graham crackers with gluten-free graham-style crackers or crushed gluten-free cookies for a crust that works for guests with gluten sensitivities. Check out this Gluten Free Cheesecake Recipe for more guidance on adapting the filling too.
- No-Bake Salted Caramel Cheesecake: Use a no-bake cheesecake base made with cream cheese, heavy cream, and powdered sugar, and simply fold in the cooled caramel before chilling.
Storage and Reheating
Proper storage keeps this cheesecake tasting just as good on day three as it does on day one.
- Refrigerator: Store the cheesecake covered loosely with plastic wrap or in an airtight container in the refrigerator for up to 5 days. Store leftover caramel sauce separately in a jar in the fridge for up to 2 weeks.
- Freezer: Cheesecake freezes beautifully. Wrap individual slices (without the caramel topping) tightly in plastic wrap, then in aluminum foil, and freeze for up to 2 months. Thaw overnight in the refrigerator.
- Reheating the caramel sauce: Warm the caramel sauce in the microwave in 10-second increments, stirring between each, or in a small saucepan over very low heat. Do not boil it or the texture may change.
- Serving from the refrigerator: For the best flavor and texture, let refrigerated slices sit at room temperature for 15 to 20 minutes before serving. Cold cheesecake can taste a little muted; bringing it slightly closer to room temperature allows the flavors to open up.
- Do not leave at room temperature for more than 2 hours. As with all dairy-based desserts, the cheesecake should not sit out for extended periods.
This same technique applies equally well to a Strawberry Cheesecake Recipe, which is another reader favorite.
Nutritional Facts
The following values are approximate, based on one slice (1/12 of the cheesecake, including caramel topping):
| Nutrient | Amount Per Serving |
|---|---|
| Calories | 520 kcal |
| Total Fat | 35g |
| Saturated Fat | 20g |
| Cholesterol | 145mg |
| Sodium | 370mg |
| Total Carbohydrates | 45g |
| Sugars | 38g |
| Protein | 7g |
Note: Nutritional values will vary based on specific brands and portion sizes used.
Another favorite: Low Calorie Cheesecake Recipe
Health Benefits of Key Ingredients
While this is an indulgent dessert, several of the key ingredients do bring genuine nutritional value to the table.
Enjoyed in moderation as part of a balanced diet, this cheesecake can absolutely fit into a varied and satisfying eating pattern.
Here is a look at what some of the key ingredients contribute:
- Cream cheese: A source of fat-soluble vitamins A and D, as well as small amounts of calcium. Full-fat versions provide a more satiating portion compared to reduced-fat alternatives.
- Eggs: One of the most complete protein sources available, eggs also provide choline, which supports brain health and cognitive function. They are rich in vitamins B12 and D as well.
- Heavy cream: Provides fat-soluble vitamins K2 and A, along with conjugated linoleic acid (CLA), which has been studied for its role in metabolic health.
- Sea salt: Flaky finishing salts like Maldon contain trace minerals. More importantly, using finishing salt instead of incorporating large amounts of salt throughout the recipe keeps the overall sodium in check while still delivering that iconic sweet-salty flavor.
- Butter: Provides butyric acid, a short-chain fatty acid that supports gut health and immune function. Grass-fed butter offers an even higher concentration of beneficial fatty acids.
- Sour cream: Adds probiotics to the filling, supporting digestive health and gut microbiome balance.
Read Also: Protein Cheesecake Recipe
Frequently Asked Questions
1. Why did my cheesecake crack on top?
Cracks are almost always caused by one of three things: over-mixing the batter (especially after adding eggs), baking at too high a temperature, or cooling the cheesecake too quickly.
Make sure you mix on low speed, use a water bath, and follow the slow oven-cooling step by leaving the cheesecake in the turned-off oven with the door propped open for a full hour. If you do get a small crack, do not worry; the caramel sauce topping covers it completely.
2. Can I make this cheesecake without a water bath?
You can, but the risk of cracking increases significantly without a water bath. The steam from the water bath keeps the oven environment moist and prevents the outer edges of the cheesecake from baking much faster than the center.
If you prefer to skip the water bath, bake at 275°F (135°C) and extend the bake time by about 10 to 15 minutes. You can also place a separate pan of hot water on the lower oven rack as a lower-effort alternative to a full water bath.
3. Can I use store-bought caramel sauce instead of homemade?
Yes, store-bought caramel sauce works fine for both swirling into the batter and for the topping. Look for a thick, quality caramel sauce rather than a thin caramel syrup for the best results.
That said, the homemade dry-method caramel takes only about 10 minutes to make and has a significantly more complex, buttery depth of flavor than most jarred versions. It is well worth the small extra effort.
4. How do I know when the cheesecake is done baking?
The cheesecake is done when the outer 2 to 3 inches (5 to 7.5cm) of the filling look set and matte, but the center still has a distinct, uniform wobble or jiggle when you gently shake the pan.
It should not look wet or liquidy in the center, but it absolutely should not look firm and set all the way through either. The cheesecake will continue cooking from residual heat as it cools in the oven. An internal temperature of around 150 to 155°F (65 to 68°C) at the center is a reliable indicator of doneness if you have a thermometer.
5. Can I make this recipe ahead of time?
This cheesecake is actually better when made ahead of time. The cheesecake itself can be made up to 3 days in advance and stored covered in the refrigerator.
The caramel sauce can be made up to 2 weeks ahead and stored in a sealed jar in the fridge. Add the caramel topping and the flaky sea salt just before serving for the best presentation. Drizzle the caramel while it is warmed to pourable consistency and serve immediately for the most dramatic presentation.
This recipe pairs wonderfully with the technique tips found in the Philadelphia Cheesecake Recipe.
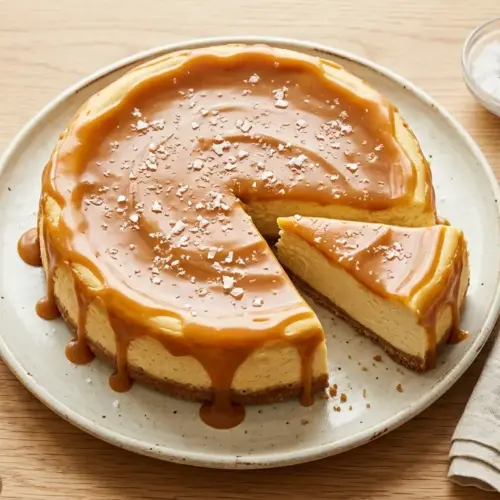
Salted Caramel Cheesecake

Equipment
- 9-inch springform pan - Essential for cheesecake; tight-fitting base prevents water seepage
- Stand mixer with paddle attachment - Or hand mixer; paddle attachment incorporates minimal air for crack-free results
- Large roasting pan - For water bath (bain-marie); must fit springform pan
- Medium Heavy-Bottomed Saucepan - For making caramel; provides even heat distribution to prevent burning
- Silicone spatula - For stirring caramel and folding batter gently
- Whisk - For combining dry ingredients if needed
- Food processor - For crushing graham crackers (or use resealable bag and rolling pin)
- Measuring cups and spoons
- Kitchen scale - Highly recommended for accuracy and consistent results
- Aluminum foil - Heavy-duty; two layers to wrap springform pan and prevent water leakage
- Wire cooling rack
- Offset spatula - For smoothing batter and loosening cheesecake from pan edges
- Instant-read thermometer - Optional but helpful for checking doneness (150-155°F center temperature)
- Heatproof Jar or Bowl - For storing caramel sauce
- Resealable Bag - Optional, for crushing graham crackers without food processor
Ingredients
- 1 cup granulated sugar - 200g
- 6 tablespoons salted butter - 85g, at room temperature, cut into cubes
- 0.5 cup heavy whipping cream - 120ml, at room temperature
- 1 teaspoon flaky sea salt - Such as Maldon Sea Salt Flakes
For the Graham Cracker Crust
- 2 cups graham cracker crumbs - 240g, about 16 full sheets
- 3 tablespoons granulated sugar - 38g
- 0.5 cup unsalted butter - 113g, melted
For the Cheesecake Filling
- 32 oz full-fat cream cheese - 900g, softened to room temperature (Philadelphia recommended)
- 1 cup granulated sugar - 200g
- 0.25 cup full-fat sour cream - 60g, at room temperature
- 2 teaspoons pure vanilla extract
- 3 large eggs - At room temperature
- 0.5 cup prepared salted caramel sauce - 120ml, cooled from above
For Topping
- remaining salted caramel sauce - From above, warmed to pourable consistency
- 0.5 teaspoon flaky sea salt - For sprinkling on top
Instructions
- Make dry-method caramel: Melt 1 cup sugar in dry saucepan over medium heat, stirring occasionally until deep amber. Remove from heat, whisk in 6 Tbsp butter, then slowly add 1/2 cup cream and 1 tsp salt. Cool completely.
- Preheat oven to 325°F. Grease springform pan. Combine 2 cups graham crumbs, 3 Tbsp sugar, and 1/2 cup melted butter. Press firmly into bottom and 1 inch up sides. Bake 10-12 minutes, then cool and reduce oven to 300°F.
- Beat 32 oz softened cream cheese on low speed until smooth. Add 1 cup sugar and mix until incorporated. Add 1/4 cup sour cream and 2 tsp vanilla, then add eggs one at a time on low speed.
- Gently fold 1/2 cup cooled salted caramel sauce into the batter until just swirled. Tap bowl to release air bubbles.
- Wrap springform pan in two layers of foil and place in roasting pan. Pour batter over crust. Place pan in oven and carefully add hot water to roasting pan until 1 inch up the sides.
- Bake at 300°F for 55-70 minutes until edges are set and center has a gentle jiggle. Turn off oven, prop door open, and leave cheesecake inside for 1 hour.
- Remove from water bath, run a knife around edges to loosen, and cool completely on wire rack for 1-2 hours. Cover and refrigerate at least 6 hours or overnight.
- Warm remaining caramel sauce until pourable. Release springform pan, drizzle caramel over top, and sprinkle with 1/2 tsp flaky sea salt. Slice with a hot, dry knife.
Notes
- Room temperature is mandatory: Take cream cheese, eggs, and sour cream out 1-2 hours before baking. Cold ingredients cause lumps and dense texture.
- Do not over-mix: Once eggs are added, mix on lowest speed just until incorporated. Over-mixing adds air and causes cracking.
- Warm cream for caramel: Adding cold cream to hot caramel causes splattering and seizing. Warm cream in microwave for 30-45 seconds first.
- Don’t open the oven: Temperature fluctuations cause cracks. Trust the process and avoid checking until minimum bake time.
- Slow cooling is essential: Leaving cheesecake in turned-off oven with door cracked for one full hour prevents cracking.
- Chill overnight: Six hours is the minimum, but overnight chilling gives the dense, sliceable texture this cheesecake is known for.
- Double foil wrap: Use two layers of heavy-duty foil around springform pan to prevent water from seeping in during the water bath.
- Make ahead: Cheesecake can be made up to 3 days ahead and stored covered in the refrigerator. Caramel sauce keeps for 2 weeks in a sealed jar.
- Freezer friendly: Wrap individual slices (without caramel topping) in plastic wrap and foil; freeze up to 2 months. Thaw overnight in refrigerator.
- Variation ideas: Swap graham crackers for Biscoff cookies, add 1 Tbsp bourbon to caramel, or make mini cheesecakes in a muffin pan (bake 20-22 minutes).
Final Thoughts
This salted caramel cheesecake recipe is the kind of dessert that people remember long after the dinner is over.
The combination of a buttery, toasted graham cracker crust, a dense and velvety cream cheese filling swirled with homemade caramel, and a glossy caramel topping finished with flaky sea salt is simply hard to beat.
It takes a little time and patience, especially with the slow baking and chilling, but every single step is worth it.
Once you make this cheesecake from scratch, you will never want to go back to a boxed or restaurant version. Go ahead and give this salted caramel cheesecake recipe a try, and let me know in the comments how it turned out. I would love to hear if you added your own twist to it!
Recommended:
- Blueberry Cheesecake Recipe
- Raspberry Cheesecake Recipe
- Oreo Cheesecake Recipe
- New York Cheesecake Recipe
- Pumpkin Cheesecake Recipe
- Mini Cheesecake Recipe
- Red Velvet Cheesecake Recipe
- Key Lime Cheesecake Recipe
- Snickers Cheesecake Recipe
- Keto Cheesecake Recipe



