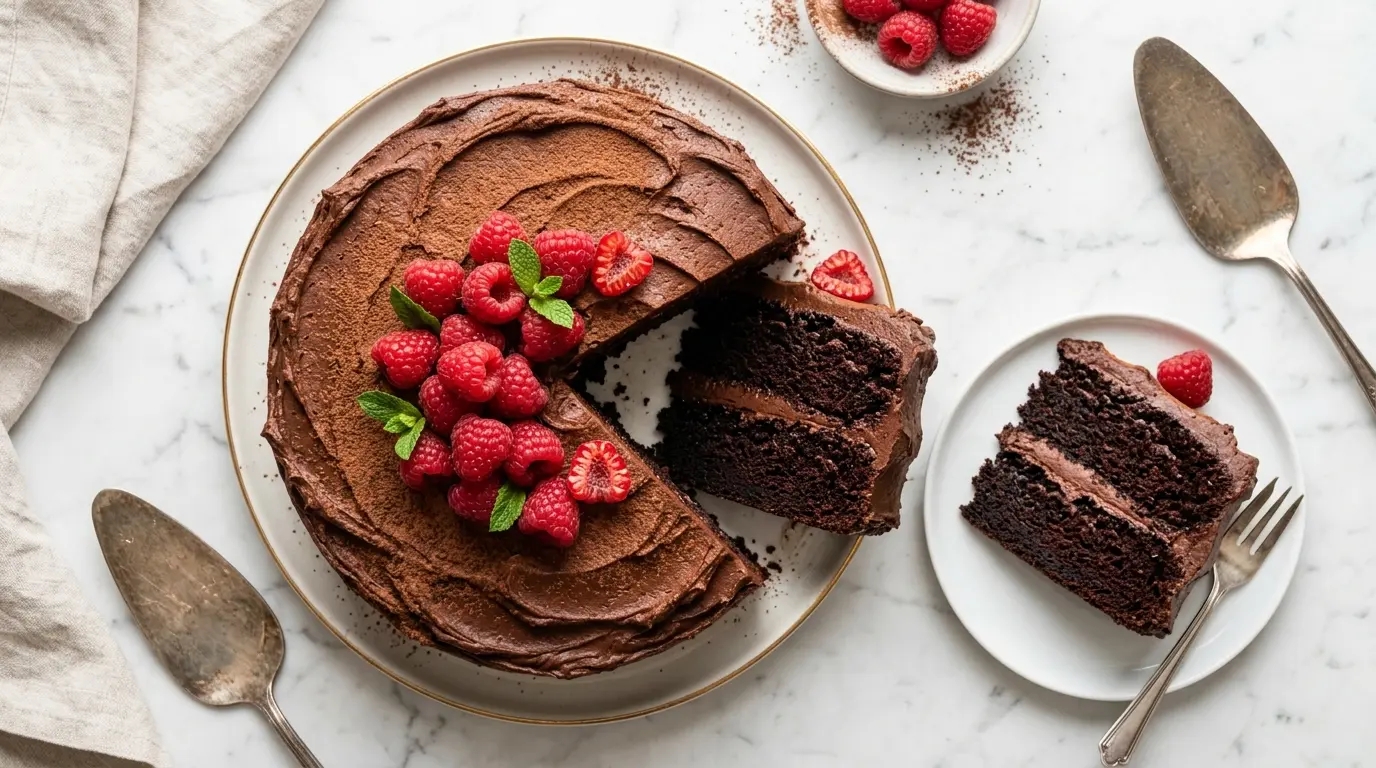
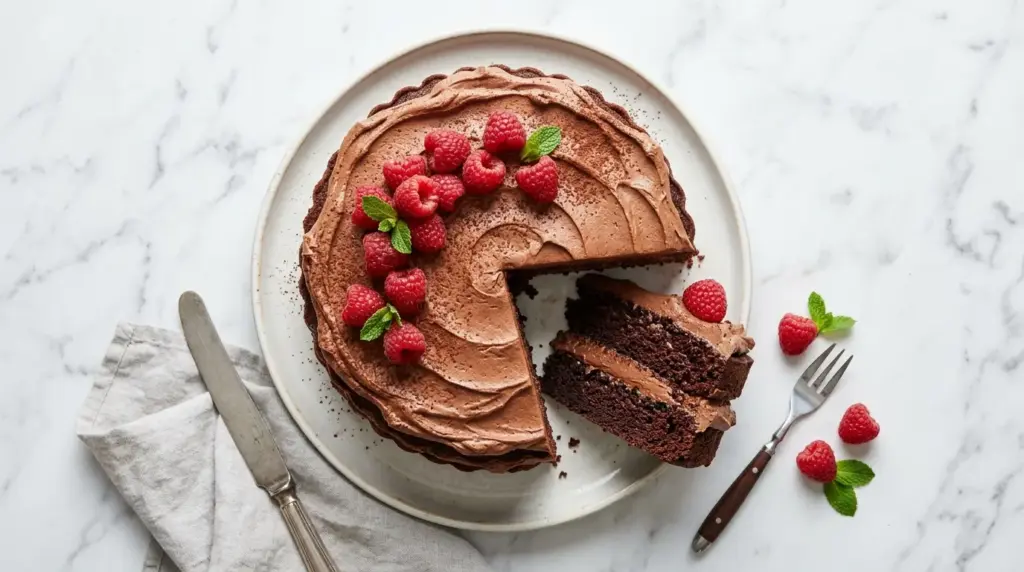
If you’ve been searching for the perfect classic chocolate cake recipe, your search ends right here. This is the real deal: a deeply rich, supremely moist two-layer chocolate cake with a tender crumb, made from scratch with simple pantry ingredients.
It’s the kind of cake that tastes like it came from a bakery, but you made it yourself in your own kitchen. Whether it’s a birthday, a dinner party, or just a Tuesday when you need something truly special, this cake delivers every single time.
The secret to its incredible depth of flavor? A combination of high-quality cocoa powder and hot water (or hot coffee, if you’re feeling bold), which blooms the cocoa and coaxes out every bit of chocolatey goodness. Buttermilk keeps the crumb impossibly tender, and a full cup of vegetable oil ensures the cake stays moist for days.
Topped with a silky, whipped chocolate buttercream frosting, this cake is the kind of thing that makes people go quiet at the table. In the best possible way.
Why You’ll Love This Classic Chocolate Cake Recipe
This cake has stood the test of time for very good reasons.
First, the texture is extraordinary. The combination of buttermilk, oil, and hot liquid creates a crumb that’s moist and soft without being dense or gummy.
Second, the chocolate flavor is genuinely deep and complex. Blooming the cocoa in hot liquid is a technique borrowed from professional bakers, and it makes a noticeable difference.
Third, this recipe is reliable. The steps are straightforward, the ingredients are accessible, and the results are consistently spectacular.
- Bakery-worthy results at home with standard pantry staples
- Two decadent layers of rich, moist chocolate cake
- Silky chocolate buttercream that pipes and spreads beautifully
- Stays moist for days thanks to the oil-based batter
- Beginner-friendly steps with detailed instructions you can actually follow
- Crowd-pleasing flavor that appeals to chocolate lovers of every age
For another stunning layer cake to add to your repertoire, check out this Classic Yellow Cake.
Ingredients
The ingredients for this classic chocolate cake are simple, but each one plays a specific role. Use the best cocoa powder you can find, as it is literally the star of the show.
- 2 cups (250 g) all-purpose flour
- 2 cups (400 g) granulated sugar
- ¾ cup (75 g) unsweetened natural cocoa powder
- 2 tsp baking soda
- 1 tsp baking powder
- 1 tsp fine salt
- 2 large eggs, room temperature
- 1 cup (240 ml) buttermilk, room temperature
- 1 cup (240 ml) vegetable oil (or another neutral oil)
- 2 tsp pure vanilla extract
- 1 cup (240 ml) hot water or hot brewed coffee
For the Chocolate Buttercream Frosting:
- 1 cup (225 g) unsalted butter, softened to room temperature
- 3½ cups (420 g) powdered sugar, sifted
- ½ cup (50 g) unsweetened cocoa powder, sifted
- ⅓ cup (80 ml) heavy cream
- 2 tsp pure vanilla extract
- ¼ tsp fine salt
You might also enjoy: Chocolate Ganache Recipe as an alternative frosting option.
Kitchen Equipment Needed
You don’t need any fancy equipment to pull this off. A few reliable baking essentials are all it takes.
- Two 9-inch round cake pans
- Parchment paper (for lining the pans)
- Large mixing bowl
- Medium mixing bowl
- Stand mixer or hand electric mixer
- Rubber spatula
- Whisk
- Wire cooling racks
- Offset spatula or cake scraper (for frosting)
- Measuring cups and spoons
- Kitchen scale (recommended for accuracy)
- Toothpick or cake tester
Read Also: Cream Cheese Frosting Recipe
Recommended Products for This Recipe
These are products I genuinely recommend based on quality and performance. They’ll make a real difference in your baking results.
1. Natural Unsweetened Cocoa Powder (High-Fat Dutch Process or Natural)
The quality of your cocoa powder has a direct impact on the flavor of this cake. A high-quality natural or Dutch-process cocoa powder produces a richer, more complex chocolate taste compared to generic brands. Look for cocoa with a fat content of at least 20-22%.
2. USA Pan Bakeware 9-Inch Round Cake Pans
Thin, flimsy cake pans lead to uneven baking, burnt edges, and stuck cakes. USA Pan’s aluminized steel pans heat evenly and feature a nonstick coating and fluted surface that releases cakes cleanly every time. These are a worthy investment for any home baker.
3. KitchenAid 5-Quart Stand Mixer
Creaming butter and beating frosting to the right consistency is much easier with a stand mixer. The KitchenAid 5-Quart is the gold standard for home bakers, handling everything from cake batter to thick buttercream without breaking a sweat.
4. Ateco Offset Spatula Set
Getting that smooth, professional finish on your frosting requires the right tools. An offset spatula lets you spread buttercream evenly without dragging your knuckles through it. Ateco makes affordable, professional-grade options that last for years.
5. OXO Good Grips Wire Cooling Rack
Cooling your cakes properly on a wire rack prevents condensation from forming underneath and keeps the bottom from getting soggy. OXO’s oven-safe cooling racks are sturdy, rust-resistant, and sized to fit most baking sheets.
The same even-baking principles apply to other baking projects, like this luscious Best Carrot Cake Recipe.
Step-by-Step Instructions
1. Prep Your Pans and Preheat the Oven
- Preheat your oven to 350°F (175°C). Make sure the oven rack is positioned in the center of the oven for even heat circulation.
- Grease two 9-inch round cake pans generously with butter or non-stick baking spray, making sure to coat the sides as well as the bottom.
- Cut two circles of parchment paper to fit the bottom of each pan, press them in, and lightly grease the parchment as well. This double-layer protection guarantees the cakes will release cleanly after baking.
- Set the prepared pans aside.
2. Combine the Dry Ingredients
- In a large mixing bowl, add the 2 cups (250 g) of all-purpose flour, 2 cups (400 g) of granulated sugar, ¾ cup (75 g) of unsweetened cocoa powder, 2 tsp of baking soda, 1 tsp of baking powder, and 1 tsp of fine salt.
- Whisk all the dry ingredients together thoroughly for about 30 seconds until completely combined and no lumps of cocoa remain. Cocoa powder loves to clump, so take your time here.
- Set the bowl aside.
3. Combine the Wet Ingredients
- In a separate medium bowl or large measuring jug, combine the 2 large room-temperature eggs, 1 cup (240 ml) of room-temperature buttermilk, 1 cup (240 ml) of vegetable oil, and 2 tsp of pure vanilla extract.
- Whisk the wet ingredients together until smooth and fully blended.
- Room temperature eggs and buttermilk emulsify more easily with the oil, which means a more even, tender crumb in the finished cake. If you forgot to bring them to room temperature, set the eggs in a bowl of warm water for 5-10 minutes and microwave the buttermilk for about 15 seconds.
4. Mix the Batter
- Pour the wet ingredient mixture into the bowl of dry ingredients.
- Using an electric hand mixer or stand mixer on low speed (or a whisk if mixing by hand), stir until just combined. Do not overmix at this stage, as overworking the flour develops gluten and can make the cake tough.
- You will still see some dry streaks in the batter at this point, and that is perfectly fine. Stop mixing as soon as no large dry pockets remain.
5. Add the Hot Liquid
- Carefully pour the 1 cup (240 ml) of hot water or hot brewed coffee into the batter.
- Stir gently with a spatula or whisk until the batter is smooth and uniform. The batter will be noticeably thin and very pourable, almost like a loose chocolate milk. This is correct and expected, and is exactly what gives the cake its moist, tender texture.
- If using coffee, do not worry: the coffee flavor does not come through in the finished cake. It simply enhances the chocolate flavor and makes it taste richer and more complex.
6. Divide and Pour the Batter
- Divide the batter evenly between the two prepared 9-inch cake pans. The easiest way to do this accurately is to place each pan on a kitchen scale and pour in equal weights of batter.
- If you do not have a scale, simply use a liquid measuring cup to pour the batter in roughly equal portions.
- Gently tap each pan on the counter two or three times to release any large air bubbles trapped in the batter.
7. Bake the Cakes
- Place both cake pans in the center of the preheated oven. If your oven is small, rotate the pans halfway through baking to ensure even browning on both sides.
- Bake for 30 to 35 minutes, or until a toothpick or thin skewer inserted into the center of each cake comes out clean or with just a few moist crumbs (not wet batter) clinging to it.
- The cakes should have pulled slightly away from the edges of the pans and the tops should spring back gently when pressed lightly with a fingertip.
- Avoid opening the oven door before the 25-minute mark, as the rush of cold air can cause the cakes to sink in the center.
8. Cool the Cakes
- Remove the pans from the oven and set them on a wire cooling rack. Allow the cakes to cool in their pans for exactly 15 minutes. No more, no less: too short and the cakes are too fragile to turn out; too long and they can steam and stick.
- After 15 minutes, run a thin butter knife or offset spatula around the edge of each pan to loosen the cakes.
- Invert each cake onto the wire rack, peel off the parchment paper, then flip the cakes right-side up to finish cooling completely.
- The cakes must be fully cooled to room temperature before frosting. Warm cake will melt the buttercream and cause it to slide off. This usually takes at least 1 hour.
9. Make the Chocolate Buttercream Frosting
- In the bowl of a stand mixer (or in a large bowl with a hand mixer), beat the 1 cup (225 g) of softened unsalted butter on medium-high speed for about 3 to 4 minutes until it becomes pale, fluffy, and noticeably lighter in color. This step is crucial: properly creamed butter creates a frosting with a light, airy texture rather than a heavy, greasy one.
- Reduce the mixer speed to low and add the ½ cup (50 g) of sifted cocoa powder. Mix until fully incorporated.
- Add the 3½ cups (420 g) of sifted powdered sugar in two or three additions, mixing on low after each addition to prevent a sugar cloud from erupting in your kitchen.
- Add the ⅓ cup (80 ml) of heavy cream, 2 tsp of vanilla extract, and ¼ tsp of salt.
- Increase the mixer speed to medium-high and beat the frosting for an additional 3 to 4 minutes, scraping down the sides of the bowl as needed, until the frosting is light, fluffy, and smooth.
- If the frosting seems too thick to spread, add additional heavy cream 1 teaspoon at a time. If it seems too thin, add more sifted powdered sugar a tablespoon at a time.
10. Assemble and Frost the Cake
- Place one fully cooled cake layer on a flat serving plate or cake board, flat side down.
- Using an offset spatula, spread approximately 1 cup of chocolate buttercream frosting in an even layer across the top of the first cake layer, spreading it all the way to the edges.
- Carefully place the second cake layer on top, flat side up (this gives you a perfectly level surface to frost).
- Apply a thin layer of frosting all over the outside of the cake, including the sides. This is called the crumb coat: it traps any loose crumbs and keeps them from showing in the final frosting layer.
- Refrigerate the crumb-coated cake for 15 to 20 minutes to firm up.
- Once the crumb coat is set, apply the remaining frosting in a thick, even layer over the top and sides of the cake, smoothing with a clean offset spatula or cake scraper for a polished finish.
- Serve immediately or refrigerate until ready to serve.
This cake pairs wonderfully alongside a scoop of Vanilla Bean Ice Cream for a truly showstopping dessert plate.
Tips for Success
Small adjustments in technique can take a good chocolate cake to a great one. Keep these in mind before you start baking.
- Use room temperature ingredients. Cold eggs and buttermilk do not mix smoothly into the oil, which can result in an uneven batter and an uneven crumb. Set them out at least 30 minutes before you begin.
- Bloom the cocoa in hot liquid. Whether you use hot water or hot coffee, the high temperature opens up the cocoa particles and dramatically intensifies the chocolate flavor. Do not skip this step or substitute cold liquid.
- Do not overmix. Once the flour hits the wet ingredients, stir only until you no longer see dry streaks. Overmixing activates the gluten in the flour and can make the cake chewy and dense instead of tender.
- Sift your powdered sugar and cocoa. For the smoothest possible frosting, always sift these ingredients before adding them. Lumps in powdered sugar are almost impossible to beat out once they’re in the bowl.
- Let the cakes cool completely. Frosting a warm cake is one of the most common mistakes home bakers make. Even slightly warm cake will cause the buttercream to melt and slide. Be patient.
- Use a crumb coat. That thin first layer of frosting traps any crumbs on the surface, ensuring your final frosting layer looks clean and professional.
- Measure by weight when possible. Volume measurements like cups can vary significantly depending on how you scoop the flour. A kitchen scale removes that variable entirely and gives you more consistent results every time.
Read Also: Vanilla Buttercream Frosting Recipe
Serving Suggestions
This classic chocolate cake is wonderful on its own, but the right accompaniments can make it truly memorable. A few ideas to elevate your presentation:
- Serve each slice with a generous scoop of homemade Vanilla Bean Ice Cream and let it melt slightly over the warm cake.
- Drizzle each plate with a warm Chocolate Ganache for a double-chocolate effect that chocolate lovers will adore.
- Spoon a pool of bright, fresh Fresh Strawberry Sauce alongside each slice for a beautiful contrast of color and flavor.
- Top the finished cake with a handful of fresh raspberries or sliced strawberries just before serving.
- Dust the top of the frosted cake lightly with cocoa powder or powdered sugar for a simple, elegant finish.
- Offer a small pitcher of warm Caramel Sauce at the table so guests can drizzle it over their slices.
Variations to Try
Once you’ve mastered the base recipe, these variations are a natural next step. Each one uses the same classic chocolate cake foundation with a different twist.
- Chocolate Espresso Cake: Replace the hot water with double-strength hot brewed espresso for an intensified, coffee-forward chocolate flavor.
- German Chocolate Cake: Swap the chocolate buttercream for a traditional coconut-pecan frosting, which complements the chocolate beautifully. You can find inspiration in this German Chocolate Cake Bars Recipe.
- Chocolate Peanut Butter Cake: Use a peanut butter buttercream in place of the chocolate one. Beat ½ cup of creamy peanut butter into the butter before adding the powdered sugar for a rich, Reese’s-inspired combination.
- Chocolate Mint Cake: Add ½ tsp of pure peppermint extract to the cake batter and use a peppermint buttercream for a holiday-ready version.
- Chocolate Lava Filling: Spread a layer of warm chocolate ganache between the cake layers instead of buttercream for a molten, fudgy center that sets as the cake chills.
- Sheet Cake Version: Pour the batter into a greased 9×13-inch (23×33 cm) baking pan and bake for 35 to 40 minutes for an easy, crowd-friendly sheet cake.
- Cupcakes: This batter makes approximately 24 standard cupcakes. Fill lined muffin tins two-thirds full and bake at 350°F (175°C) for 18 to 22 minutes.
Another favorite: Chocolate Pudding Recipe
Storage and Reheating
Proper storage keeps your classic chocolate cake fresh and delicious for as long as possible. Here’s how to handle leftovers.
- At room temperature: Store the frosted cake under a cake dome or in an airtight container at room temperature for up to 2 days. Keep it away from direct sunlight and heat.
- In the refrigerator: Refrigerate the frosted cake, covered loosely with plastic wrap or in an airtight container, for up to 5 days. Bring slices to room temperature for 30 minutes before serving for the best texture and flavor.
- In the freezer (whole cake): Freeze the unfrosted cake layers individually. Wrap each layer tightly in two layers of plastic wrap, then in a layer of aluminum foil. Freeze for up to 3 months. Thaw overnight in the refrigerator before frosting and serving.
- In the freezer (slices): Wrap individual frosted slices in plastic wrap and place them in a zip-top freezer bag. Freeze for up to 2 months. Thaw at room temperature for 1 to 2 hours.
- Reheating: To restore the just-baked softness to refrigerated slices, microwave on 50% power for 15 to 20 seconds. Do not overheat or the frosting will melt.
This technique for keeping cakes moist during storage also works beautifully for the Pound Cake Recipe.
Nutritional Facts
The following values are approximate and based on a two-layer 9-inch cake sliced into 12 equal servings, including the chocolate buttercream frosting.
| Nutrient | Per Serving (1 slice) |
|---|---|
| Calories | ~520 kcal |
| Total Fat | 28 g |
| Saturated Fat | 10 g |
| Cholesterol | 55 mg |
| Sodium | 370 mg |
| Total Carbohydrates | 68 g |
| Dietary Fiber | 3 g |
| Total Sugars | 52 g |
| Protein | 5 g |
Note: Nutritional values will vary based on specific brands and ingredients used. For precise dietary tracking, calculate using your exact ingredients.
For a fun, scaled-down indulgence, you might also love this Mug Cake Recipe.
Health Benefits of Key Ingredients
This is a celebratory cake, no question. But several of its key ingredients do carry genuine nutritional benefits worth knowing about.
Cocoa powder, the undisputed star of this recipe, is one of the richest plant-based sources of flavonoids you can find. These powerful antioxidant compounds have been linked in multiple studies to improved heart health, reduced inflammation, and better circulation.
- Cocoa powder: Rich in flavonoids and antioxidants that support cardiovascular health and may improve blood flow
- Eggs: An excellent source of complete protein, as well as vitamins B12 and D, choline (critical for brain function), and healthy fats
- Buttermilk: Contains probiotics and live cultures that support gut health; also contributes calcium, potassium, and B vitamins to the cake
- Vegetable oil: Provides heart-healthy unsaturated fats and keeps the crumb moist without the saturated fat content of all-butter cakes
- Dark cocoa (if used): Higher-percentage cocoa products contain compounds that may support mood regulation through their influence on serotonin production
Read Also: Chocolate Buttercream Frosting Recipe
Frequently Asked Questions
1. Can I make this classic chocolate cake without buttermilk?
Yes, you can easily make a buttermilk substitute at home. Add 1 tablespoon of white vinegar or fresh lemon juice to a measuring cup, then fill it up to the 1-cup (240 ml) line with regular whole milk. Stir, then let it sit for 5 to 10 minutes until it curdles slightly.
This DIY buttermilk works because the acid reacts with the baking soda in the batter to provide lift, and it tenderizes the gluten in the flour in the same way real buttermilk does. The result is nearly identical in taste and texture.
2. Why is my chocolate cake dry?
The most common cause of dry chocolate cake is overbaking. Even a few extra minutes in the oven can cook out all the moisture, especially in a cake this thin.
Start checking for doneness at the 28-minute mark by inserting a toothpick in the center. It should come out with a few moist crumbs attached. Another common cause is incorrectly measured flour. Too much flour makes a dense, dry cake, which is why a kitchen scale is so valuable.
3. Can I use Dutch-process cocoa powder instead of natural cocoa powder?
You can, and many bakers prefer it for its smoother, less bitter flavor. However, there is one important consideration.
Natural cocoa powder is acidic and reacts with the baking soda in this recipe to help the cake rise. Dutch-process cocoa has been treated to neutralize its acidity, so if you use it as a straight swap, you may get slightly less lift. Most home bakers find the difference negligible, but for maximum rise and structure, natural cocoa is the safer choice in this specific recipe.
4. Can I make this cake ahead of time?
Absolutely. The unfrosted cake layers can be baked up to 2 days in advance and stored at room temperature, tightly wrapped in plastic wrap.
Alternatively, bake and freeze the layers up to 3 months ahead. The chocolate buttercream frosting can also be made up to 1 week in advance and stored in an airtight container in the refrigerator. Let it come fully to room temperature and re-beat it briefly before using.
5. Can I make this a three-layer cake?
Yes. To make three layers, divide the batter between three 8-inch (20 cm) round cake pans instead of two 9-inch ones. Reduce the baking time to approximately 25 to 30 minutes, and check for doneness early.
You will need to increase the frosting recipe by about 50% to have enough to frost three layers generously. Triple-layer cakes are especially stunning for celebrations and are well worth the extra effort.
For more baking inspiration, this Tres Leches Cake Recipe is another showstopper that your guests will love.
Final Thoughts
A classic chocolate cake recipe is one of those baking skills that pays dividends for the rest of your life. Once you make this cake and feel that spongy, moist crumb beneath your fork, you’ll understand why it’s been a beloved classic for generations.
Every component in this recipe has been chosen with intention: the hot liquid to bloom the cocoa, the buttermilk for tenderness, the oil for lasting moisture, the crumb coat for a flawless finish. These are not arbitrary steps, they are the difference between a good cake and an unforgettable one.
Pull out your mixing bowl, preheat that oven, and make this cake for someone you love. I promise it will be the best chocolate cake they’ve ever had.
If you try this recipe, I’d love to hear how it turned out. Leave a comment below with your experience, share a photo, or let me know if you tried any of the variations!
Recommended:
- Moist Chocolate Cake Recipe
- Easy Chocolate Cake Recipe
- Lemon Chiffon Cake Recipe
- Angel Food Cake Recipe
- Sour Cream Coffee Cake Recipe
- Pastry Cream Recipe
- Hot Fudge Cake Recipe
- Checkerboard Cake Recipe
- Carrot Cake With Cream Cheese Frosting Recipe
- Classic Vanilla Cake Recipe


