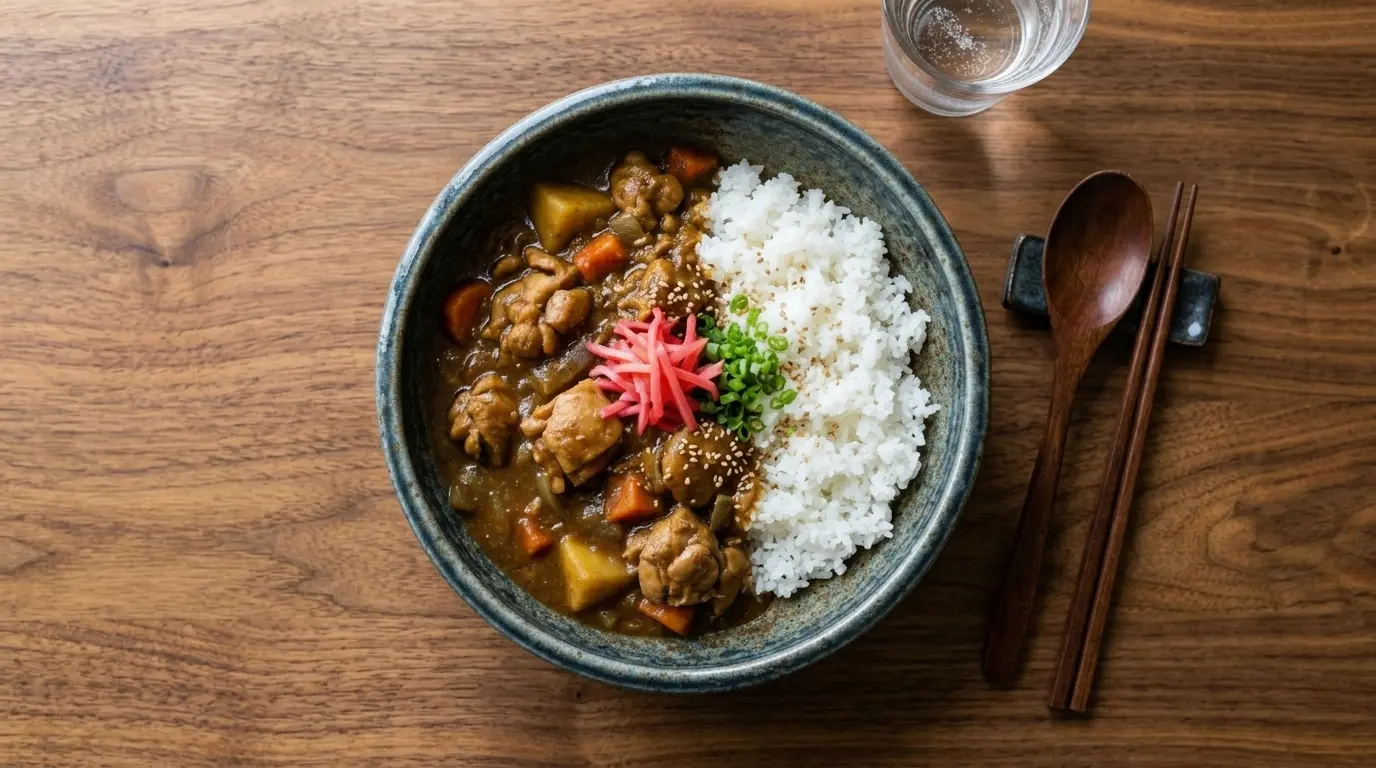
If you’ve never made a Japanese Chicken Curry Recipe at home, you’re in for a wonderful treat. Unlike the bold heat of Indian curries or the bright, herbaceous punch of Thai curries, Japanese curry is all about depth, warmth, and a gentle sweetness that makes it one of the most addictive comfort foods on the planet.
The sauce is thick, almost gravy-like, and coats every grain of rice with rich, savory flavor. Tender chicken, soft potatoes, and sweet carrots all soak up that gorgeous brown sauce while everything simmers together.
The secret to that distinctive Japanese curry flavor lies in the roux. A simple butter-and-flour base, cooked until it deepens in color, then bloomed with curry powder and garam masala, creates that signature thick, complex sauce that sets this dish apart from every other curry style.
This recipe uses widely available ingredients and comes together in about 45 minutes. It’s the kind of meal you’ll want to make on repeat.
You may also like: Chicken Curry Recipe

Why You’ll Love This Japanese Chicken Curry Recipe
Japanese curry is one of those dishes that appeals to virtually everyone, including picky eaters and kids who normally avoid anything remotely spicy.
The flavor profile is uniquely its own. It’s savory, subtly sweet from the apple and honey, and deeply warming from the spices, without ever crossing into overwhelming heat territory.
It’s also genuinely practical for busy households. The entire dish reheats beautifully and tastes even better the next day as the flavors continue to develop overnight.
You can make a big batch on Sunday and have satisfying lunches or dinners ready for the rest of the week.
- Mild and crowd-pleasing: The gentle heat makes this perfect for the whole family, including children.
- Thick, luxurious sauce: The homemade roux creates a restaurant-quality texture that coats every bite of rice.
- One-pot simplicity: Everything comes together in a single pot, meaning less mess and less cleanup.
- Better the next day: Like most braised dishes, the flavors deepen overnight in the fridge.
- Customizable protein: Swap chicken for beef, pork, or tofu without changing the core recipe.
- Freezer-friendly: This curry freezes exceptionally well for make-ahead meal planning.
You might also enjoy: Coconut Curry Chicken Recipe
Ingredients
Japanese chicken curry uses a short list of everyday ingredients, but a few items make a real difference. Chicken thighs are the best choice here because their higher fat and collagen content keeps them tender and juicy through the simmering process, whereas chicken breast can dry out. The grated apple is a traditional Japanese technique that adds natural sweetness and helps thicken the sauce. Honey deepens the sweetness and adds a lovely gloss to the finished curry.
For the Homemade Roux:
- 3 tablespoons (42 g) unsalted butter
- 3 tablespoons (24 g) all-purpose flour
- 2 tablespoons Japanese curry powder (such as S&B brand)
- 1 teaspoon garam masala
- 1/2 teaspoon paprika
For the Curry:
- 1.5 lbs (680 g) boneless, skinless chicken thighs, cut into 1.5-inch (4 cm) pieces
- 2 tablespoons vegetable oil, divided
- 1 large yellow onion, thinly sliced
- 4 cloves garlic, minced
- 1 tablespoon fresh ginger, grated
- 1 medium apple (Fuji or Gala), peeled and grated
- 2 medium carrots, peeled and cut into 1-inch (2.5 cm) chunks
- 2 medium Yukon Gold potatoes, peeled and cut into 1-inch (2.5 cm) cubes
- 3 cups (720 ml) low-sodium chicken broth
- 1 tablespoon soy sauce
- 1 tablespoon honey
- Salt and black pepper, to taste
For Serving:
- Steamed Japanese short-grain rice or long-grain white rice
- Pickled red ginger (beni shoga), optional but traditional
Read Also: Indian Curry Chicken Recipe
Kitchen Equipment Needed
Having the right tools on hand makes this recipe significantly smoother. A wide, heavy-bottomed pot is essential because it gives you enough surface area to properly brown the chicken and caramelize the onions, which both add critical flavor depth to the finished curry. A small saucepan for the roux is just as important since cooking it separately gives you more control over the color and prevents the spices from scorching.
- Large heavy-bottomed pot or Dutch oven (5- to 6-quart capacity)
- Small saucepan for the roux
- Wooden spoon or heat-safe silicone spatula
- Sharp chef’s knife
- Cutting board
- Box grater (for the apple and ginger)
- Measuring cups and spoons
- Ladle for serving
You might also enjoy: Thai Green Curry Chicken Recipe
Recommended Products for This Recipe
These are products I recommend based on quality and consistent performance in making Japanese-style curry at home.
1. S&B Japanese Curry Powder
This is the most widely used and authentic Japanese curry powder brand available. It contains a pre-blended mix of turmeric, coriander, fenugreek, and other spices in the exact ratios used in Japanese home cooking. Using this instead of a generic curry powder makes a genuinely noticeable difference in the final flavor.
2. Lodge Enameled Cast Iron Dutch Oven
A quality Dutch oven distributes heat evenly across the base, which is critical for getting that golden-brown sear on the chicken and proper caramelization on the onions. The enamel coating makes cleanup quick even after a long simmer, and it goes from stovetop to oven without any issues.
3. Japanese Short-Grain Rice
The texture of the finished dish is dramatically better when served over Japanese short-grain rice. Its slightly sticky, tender quality holds the thick curry sauce beautifully, whereas long-grain rice can feel a bit dry in comparison. Koshihikari is the most popular variety for this purpose.
4. Beni Shoga Pickled Red Ginger
This bright pink pickled ginger is a traditional garnish served alongside Japanese curry rice in restaurants across Japan. It cuts through the richness of the sauce with a sharp, tangy bite. A small jar goes a long way and keeps in the fridge for months.
Read Also: Jamaican Curry Chicken Recipe

Step-by-Step Instructions
Step 1: Make the Homemade Roux
- Place a small saucepan over medium heat and add the 3 tablespoons of unsalted butter.
- Let the butter melt completely, swirling the pan occasionally to prevent any browning at the edges.
- Once the butter is fully melted and just starting to foam, add the 3 tablespoons of all-purpose flour all at once.
- Stir continuously with a wooden spoon or whisk, making sure there are no dry flour pockets. The mixture will look very thick and paste-like at first.
- Keep stirring constantly for about 2 to 3 minutes, until the roux turns a light tan color and smells slightly nutty. This cooks out the raw flour taste.
- Add the 2 tablespoons of Japanese curry powder, 1 teaspoon of garam masala, and 1/2 teaspoon of paprika.
- Stir vigorously for another 1 to 2 minutes until all the spices are fully incorporated and the roux turns a warm brown color. The mixture will look quite dark at this stage.
- Remove the small saucepan from the heat and set the roux aside in a bowl or leave it in the saucepan. It will be added later.
Step 2: Season and Brown the Chicken
- Pat the chicken thigh pieces dry with paper towels. Removing surface moisture is critical for getting a proper sear rather than steaming.
- Season the chicken generously on all sides with salt and freshly ground black pepper.
- Heat 1 tablespoon of vegetable oil in your large Dutch oven or heavy-bottomed pot over medium-high heat. The oil should shimmer and move fluidly when you tilt the pan.
- Add the chicken pieces in a single layer, making sure not to crowd the pan. If your pot is smaller, cook in two batches rather than overcrowding, which causes steaming instead of browning.
- Let the chicken cook undisturbed for 3 to 4 minutes until a deep golden-brown crust forms on the bottom. Resist the urge to move the pieces around.
- Flip each piece and brown the other side for another 2 to 3 minutes.
- Transfer the browned chicken to a plate and set aside. The chicken does not need to be fully cooked at this stage; it will finish cooking in the sauce.
Step 3: Caramelize the Onions
- In the same pot, add the remaining 1 tablespoon of vegetable oil if needed. Reduce the heat to medium.
- Add the thinly sliced onion and a pinch of salt. The salt helps draw out moisture and speeds up the caramelization process.
- Cook the onion, stirring occasionally, for 10 to 12 minutes until it turns deeply golden and softened. The onion should be well past translucent and leaning toward a light brown color.
- This step is worth taking your time with because deeply caramelized onion is the foundation of the sweet, complex flavor in Japanese curry sauce.
Step 4: Add the Aromatics and Apple
- Add the minced garlic and grated fresh ginger to the caramelized onions in the pot.
- Stir constantly for about 60 seconds until fragrant. Garlic and ginger can burn very quickly, so keep stirring.
- Add the grated apple (with its juices) to the pot and stir to combine everything together.
- Cook for 1 to 2 minutes, stirring occasionally, to let the apple soften slightly and begin incorporating into the onion mixture.
Step 5: Build the Curry Sauce
- Return the browned chicken pieces to the pot, along with any juices that collected on the plate.
- Add the carrot chunks and potato cubes, stirring gently to distribute everything evenly throughout the pot.
- Pour in the 3 cups of chicken broth, the 1 tablespoon of soy sauce, and the 1 tablespoon of honey.
- Stir to combine, then bring the liquid to a gentle boil over medium-high heat.
Step 6: Simmer Until Tender
- Once the curry reaches a boil, reduce the heat to medium-low to maintain a steady, gentle simmer.
- Cover the pot with a lid, leaving it slightly ajar to allow some steam to escape. This prevents the liquid from boiling over while still allowing some evaporation to concentrate the flavors.
- Simmer for 20 to 25 minutes, stirring every 5 minutes, until the potatoes and carrots are fork-tender and the chicken is fully cooked through.
Step 7: Add the Roux and Finish the Sauce
- This is the step that transforms the broth into that signature thick Japanese curry sauce.
- Add the prepared roux to the simmering pot one large spoonful at a time, stirring after each addition to incorporate it fully before adding more.
- Once all the roux is added, stir the curry continuously over medium heat for 3 to 5 minutes as it thickens to a rich, glossy, gravy-like consistency.
- If the curry becomes too thick, add a splash of chicken broth or water and stir to reach your desired consistency.
- Taste the curry and adjust seasoning with additional salt, a bit more soy sauce for umami, or a drizzle of honey for extra sweetness.
Step 8: Serve
- Ladle the finished curry generously over steamed rice in deep bowls.
- Add a small pile of pickled red ginger (beni shoga) on the side if using, which is traditional in Japanese curry restaurants.
- Serve immediately while hot.
For more Asian-inspired rice dishes, try this Chicken Fried Rice Recipe.
Tips for Success
Getting Japanese curry right is mostly about patience with two steps: browning the chicken and caramelizing the onions. Both of these build layers of flavor that you simply can’t shortcut without noticing a difference in the final dish. The roux is equally important and needs steady stirring throughout so it doesn’t scorch.
- Dry the chicken before browning: Patting the chicken pieces completely dry with paper towels ensures you get a proper golden sear rather than a pale, steamed exterior.
- Don’t rush the onions: Deep, golden caramelized onions take at least 10 minutes. Light or barely softened onions will make the curry taste flat and one-dimensional.
- Use a Fuji or Gala apple: These varieties are naturally sweeter and firmer, which grates more cleanly and melts into the sauce without making it taste fruity.
- Add the roux gradually: Spooning the roux into the hot liquid one addition at a time and stirring after each prevents lumps from forming in the sauce.
- Taste and adjust at the end: Japanese curry benefits from a final taste and adjustment. A little more soy sauce for savory depth, or a touch more honey for sweetness, can make a noticeable difference.
- Cut vegetables evenly: Uniform cuts on the potatoes and carrots ensure everything cooks at the same rate, so you don’t end up with mushy potatoes and crunchy carrots at the same time.
This technique works equally well in a Chicken Stew Recipe if you love one-pot comfort cooking.
Serving Suggestions
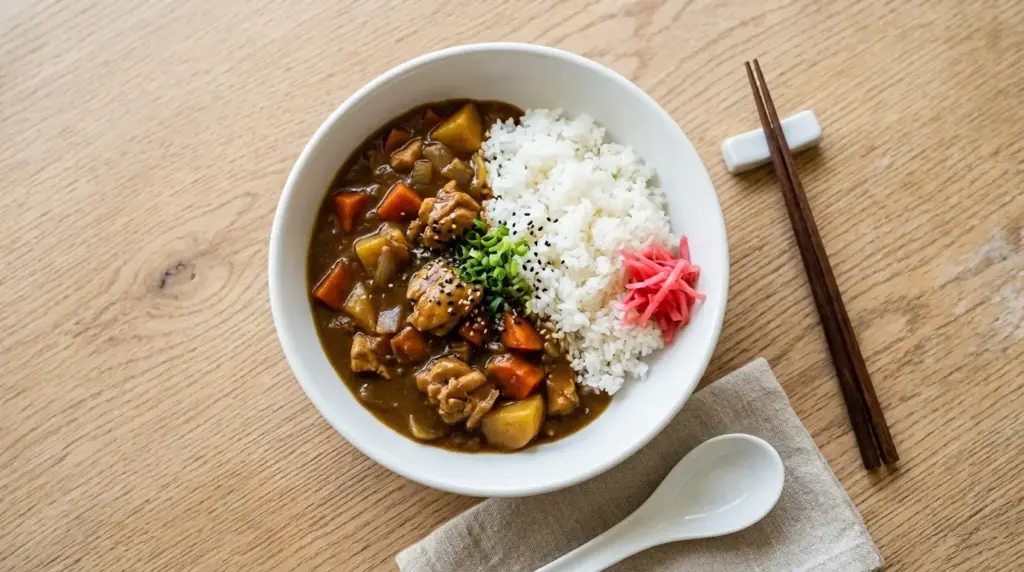
Japanese curry rice is traditionally served in a simple but satisfying way: a scoop of steamed rice on one side of the bowl with the curry ladled generously alongside or on top. The contrast between the fluffy rice and thick, savory sauce is the whole point of the dish.
Beyond the basics, there are some wonderful accompaniments that complement the curry’s richness perfectly.
- Steamed Japanese short-grain rice: The slightly sticky texture grabs onto the thick sauce far better than long-grain rice.
- Garlic Naan Bread: Perfect for scooping up every last drop of curry sauce from the bowl.
- Simple green salad: A lightly dressed salad with rice vinegar and sesame oil provides a fresh, acidic counterpoint to the rich curry.
- Soft-boiled eggs: Halved and placed on top of the curry, a jammy soft-boiled egg adds a luxurious richness to each bowl.
- Pickled daikon or beni shoga: Traditional Japanese pickles cut through the richness of the sauce and cleanse the palate between bites.
- Steamed or roasted broccoli: A simple green vegetable side adds color, nutrition, and a pleasant textural contrast.
You might also enjoy: Jeera Rice Recipe
Variations to Try
The base recipe is perfect as written, but Japanese curry is one of those dishes that lends itself to easy customization without much risk of going wrong. The foundational sauce pairs with almost any protein or vegetable you want to use.
- Beef Japanese Curry: Swap the chicken for 1.5 lbs of beef stew meat (chuck). Brown it the same way, then increase the simmering time to 40 to 50 minutes until the beef becomes tender.
- Pork Japanese Curry: Use boneless pork shoulder cut into cubes. The slightly fattier meat adds even more richness to the sauce.
- Vegetable Japanese Curry: Skip the meat entirely and add mushrooms, bell peppers, zucchini, and eggplant instead. Add extra broth as needed and reduce the simmering time to about 15 minutes.
- Katsu Curry: Make a batch of crispy fried chicken cutlets (tonkatsu), slice them, and lay them on top of the curry rice for the most popular Japanese curry restaurant style.
- Spicy Version: Add 1 teaspoon of cayenne pepper or a tablespoon of gochujang to the roux for a medium-heat curry with more complexity.
- Creamy Japanese Curry: Stir in 3 tablespoons of heavy cream or coconut cream at the very end, just before serving, for a richer, silkier sauce.
Read Also: Thai Red Curry Chicken Recipe
Storage and Reheating
Japanese chicken curry stores exceptionally well, and many people insist the flavor is noticeably better on day two. The sauce thickens considerably as it cools and sits in the fridge, which is completely normal.
- Refrigerator: Store the curry (without the rice) in an airtight container for up to 4 days. Store the rice separately to prevent it from becoming soggy.
- Freezer: Cool the curry completely before transferring to freezer-safe containers or zip-lock bags. It freezes well for up to 3 months.
- Reheating on the stovetop: Pour the curry into a saucepan over medium-low heat. Add a splash of chicken broth or water to loosen the sauce as it heats, stirring occasionally until warmed through.
- Reheating in the microwave: Transfer a portion to a microwave-safe bowl, add a small splash of water or broth, and cover with a microwave-safe lid or damp paper towel. Heat in 90-second intervals, stirring between each, until hot throughout.
- Thawing from frozen: Transfer frozen curry to the refrigerator the night before and allow it to thaw overnight. Reheat using either method above.
For another make-ahead favorite, check out this Chicken Biryani Recipe.
Nutritional Facts
The following values are approximate per serving (based on 4 servings, curry only, not including rice).
| Nutrient | Amount Per Serving |
|---|---|
| Calories | 420 kcal |
| Protein | 32 g |
| Total Fat | 18 g |
| Saturated Fat | 6 g |
| Carbohydrates | 30 g |
| Fiber | 4 g |
| Sugar | 10 g |
| Sodium | 620 mg |
| Potassium | 780 mg |
| Vitamin A | 90% DV |
| Vitamin C | 25% DV |
| Iron | 15% DV |
Values are estimates and will vary based on specific ingredients and portion sizes used.
This pairs beautifully with Basmati Rice Recipe for a complete, satisfying meal.
Health Benefits of Key Ingredients
Japanese curry is not just delicious. The combination of spices and vegetables in this recipe contributes some genuinely worthwhile nutritional benefits.
Each ingredient was included for both flavor and function, making this a dish you can feel good about serving regularly.
- Turmeric (in curry powder): Contains curcumin, a well-studied anti-inflammatory compound associated with reduced inflammation and joint support.
- Ginger: Fresh ginger has long been valued for its digestive benefits and contains gingerols, which have antioxidant and anti-nausea properties.
- Garlic: Rich in allicin, a sulfur compound linked to cardiovascular health and immune system support.
- Carrots: An excellent source of beta-carotene, which the body converts to vitamin A, essential for eye health and immune function.
- Potatoes: Provide a meaningful amount of potassium, vitamin C, and resistant starch, which feeds beneficial gut bacteria.
- Chicken thighs: Contain more iron and zinc than chicken breast, along with collagen-supporting amino acids that give the sauce its body.
- Apple: Provides natural pectin, a soluble fiber that supports digestive health, alongside natural sugars that eliminate the need for added processed sweeteners.
Read Also: Curry Chicken Salad Recipe
Frequently Asked Questions
1. Can I use store-bought curry roux blocks instead of making my own?
Yes, store-bought Japanese curry roux blocks (like those from S&B or House Foods) are a perfectly valid option and are actually the most common way Japanese households make this dish. Simply dissolve 3 to 4 blocks in the simmering liquid instead of making the homemade roux in this recipe. The flavor will be slightly different but equally delicious and much faster.
2. What is the best cut of chicken for Japanese curry?
Boneless, skinless chicken thighs are the best choice by a significant margin. They stay moist and tender through the long simmer, whereas chicken breast tends to dry out and become stringy. If you prefer white meat, cut the chicken breast into larger pieces and reduce the simmering time by 5 minutes to prevent overcooking.
3. Why does my curry sauce look too thin?
The sauce thickens as it simmers, so if it looks thin 10 minutes in, give it more time before adding extra roux. If the sauce is still too thin after the full simmer time, mix one tablespoon of cornstarch with two tablespoons of cold water to make a slurry, then stir it into the simmering curry. Let it cook for 2 more minutes and the sauce will thicken quickly.
4. Is Japanese curry spicy?
Traditional Japanese curry is quite mild, designed to be enjoyed by the whole family, including children. The heat comes from curry powder and garam masala, neither of which adds sharp heat. If you want more kick, you can add cayenne pepper, chili flakes, or a spoonful of gochujang when building the roux.
5. Can I make this Japanese chicken curry ahead of time?
Absolutely, and in fact it’s recommended. The curry tastes noticeably better on the second day after the flavors have had more time to meld together. Make the full recipe, cool it to room temperature within 2 hours of cooking, then refrigerate it in an airtight container. Reheat gently on the stovetop with a splash of broth to loosen the sauce before serving.
For more cozy chicken dinner inspiration, check out this Chicken Tikka Masala Recipe.
Japanese Chicken Curry

Equipment
- Large heavy-bottomed pot or Dutch oven (5- to 6-quart capacity)
- Small saucepan - For making the roux
- Wooden spoon or heat-safe silicone spatula
- Sharp chef's knife
- Cutting board
- Box grater - For the apple and ginger
- Measuring cups and spoons
- Ladle - For serving
Ingredients
- 3 tablespoons unsalted butter - 42g
- 3 tablespoons all-purpose flour - 24g
- 2 tablespoons Japanese curry powder - such as S&B brand
- 1 teaspoon garam masala
- 1/2 teaspoon paprika
- 1.5 lbs boneless skinless chicken thighs - 680g, cut into 1.5-inch (4 cm) pieces
- 2 tablespoons vegetable oil - divided
- 1 large yellow onion - thinly sliced
- 4 cloves garlic - minced
- 1 tablespoon fresh ginger - grated
- 1 medium apple - Fuji or Gala, peeled and grated
- 2 medium carrots - peeled and cut into 1-inch (2.5 cm) chunks
- 2 medium Yukon Gold potatoes - peeled and cut into 1-inch (2.5 cm) cubes
- 3 cups low-sodium chicken broth - 720 ml
- 1 tablespoon soy sauce
- 1 tablespoon honey
- salt - to taste
- black pepper - to taste
For Serving
- steamed Japanese short-grain rice - or long-grain white rice
- pickled red ginger - beni shoga, optional but traditional
Instructions
- Melt the butter in a small saucepan over medium heat until foaming. Whisk in the flour and cook for 2 to 3 minutes until it turns light tan and smells nutty. Stir in the curry powder, garam masala, and paprika, and cook for 1 to 2 minutes until fragrant and dark brown. Remove from heat and set aside.
- Pat the chicken thighs dry with paper towels and season generously with salt and pepper. Heat 1 tablespoon of oil in a large Dutch oven over medium-high heat. Brown the chicken in a single layer for 3 to 4 minutes per side until golden. Transfer to a plate and set aside.
- Reduce the heat to medium and add the remaining 1 tablespoon of oil to the pot. Add the sliced onion with a pinch of salt and cook for 10 to 12 minutes, stirring occasionally, until deeply golden and softened.
- Add the minced garlic and grated ginger to the pot and stir for 60 seconds until fragrant. Add the grated apple with its juices and cook for 1 to 2 minutes, stirring occasionally, to soften slightly.
- Return the browned chicken and any juices to the pot. Add the carrots, potatoes, chicken broth, soy sauce, and honey. Stir to combine and bring to a gentle boil over medium-high heat.
- Reduce the heat to medium-low and simmer, covered with the lid slightly ajar, for 20 to 25 minutes, stirring every 5 minutes, until the vegetables are fork-tender and the chicken is cooked through.
- Add the prepared roux to the pot one spoonful at a time, stirring after each addition until fully incorporated. Continue cooking over medium heat for 3 to 5 minutes until the sauce thickens to a glossy, gravy-like consistency. Taste and adjust seasoning with salt, soy sauce, or honey as needed.
- Ladle the hot curry over steamed rice in deep bowls. Garnish with pickled red ginger on the side if desired. Serve immediately.
Notes
- Dry the chicken thoroughly before browning to ensure a proper golden sear rather than a steamed exterior.
- Don’t rush the onions—deep caramelization takes at least 10 minutes and is essential for building the curry’s sweet, complex flavor.
- Use Fuji or Gala apples for their natural sweetness and ability to melt smoothly into the sauce without tasting overly fruity.
- Add the roux gradually to prevent lumps from forming in the sauce. Stir continuously after each addition.
- For a richer, silkier sauce, stir in 3 tablespoons of heavy cream or coconut cream just before serving.
- To make it spicier, add 1 teaspoon of cayenne pepper or a tablespoon of gochujang to the roux.
- Store the curry (without rice) in an airtight container in the refrigerator for up to 4 days. The flavor improves overnight.
- This curry freezes beautifully for up to 3 months. Thaw overnight in the refrigerator before reheating.
- Reheat gently on the stovetop with a splash of broth or water to loosen the sauce. Avoid overheating to prevent the sauce from breaking.
- For an authentic Japanese curry experience, serve with pickled red ginger (beni shoga) and a side of fukujinzuke (pickled vegetables).
Final Thoughts
Japanese chicken curry is the kind of recipe that earns a permanent spot in your regular dinner rotation after the very first time you make it.
It’s comforting without being heavy, satisfying without being complicated, and genuinely one of the most crowd-pleasing dishes you can put on the table.
The homemade roux takes a little extra effort compared to using a box of curry blocks, but the payoff in flavor is well worth the 10 minutes it requires.
Give this recipe a try this week, and don’t be surprised if it becomes a new household favorite. If you make it, drop a comment below to let me know how it turned out, or share a photo on social media. I’d love to see your bowls!
Recommended:
- Chicken Stir Fry Recipe
- Mango Chutney Recipe
- Chicken Lo Mein Recipe
- Chicken Pad Thai Recipe
- Easy Fried Rice Recipe
- Chicken Korma Recipe
- Chicken Saag Recipe
- Stir Fry Sauce Recipe
- Chicken Vindaloo Recipe
- Mulligatawny Soup Recipe



