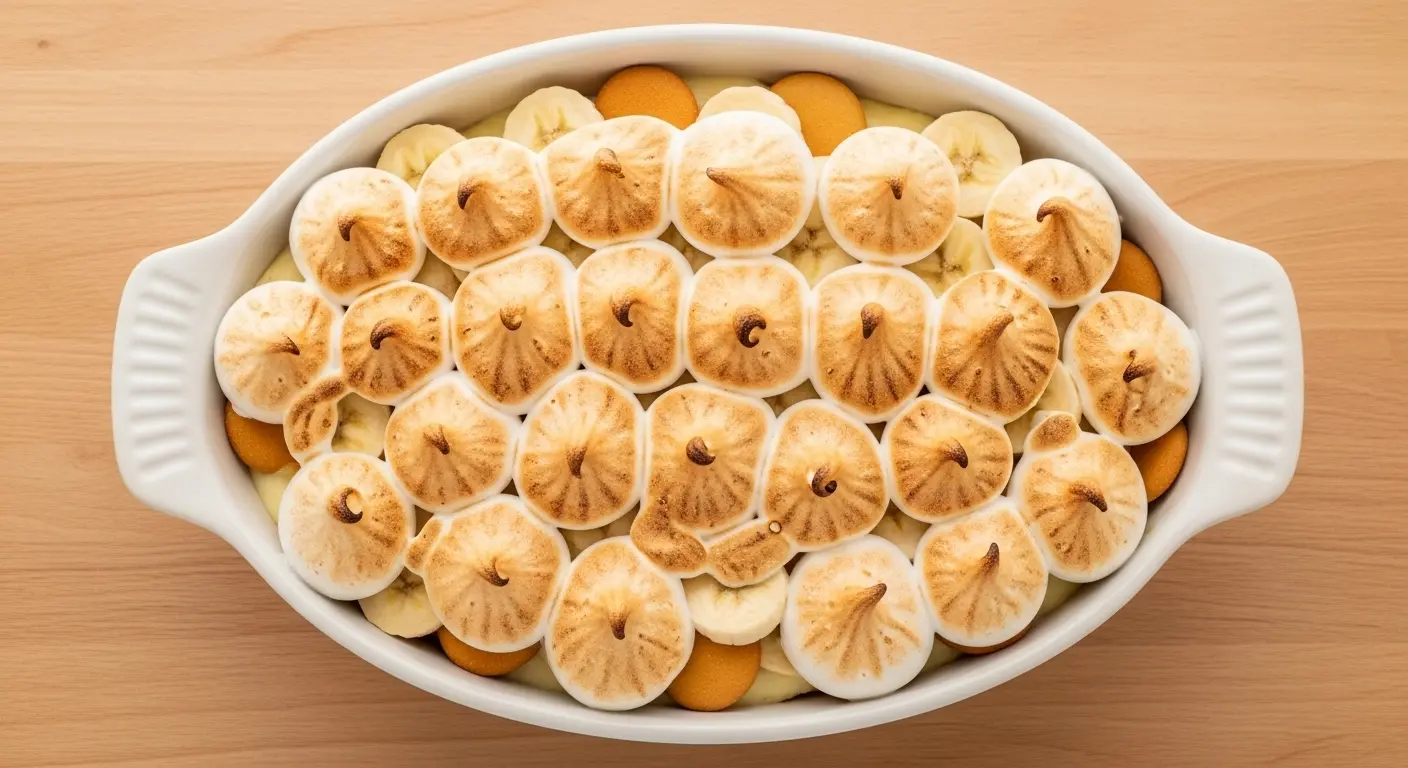
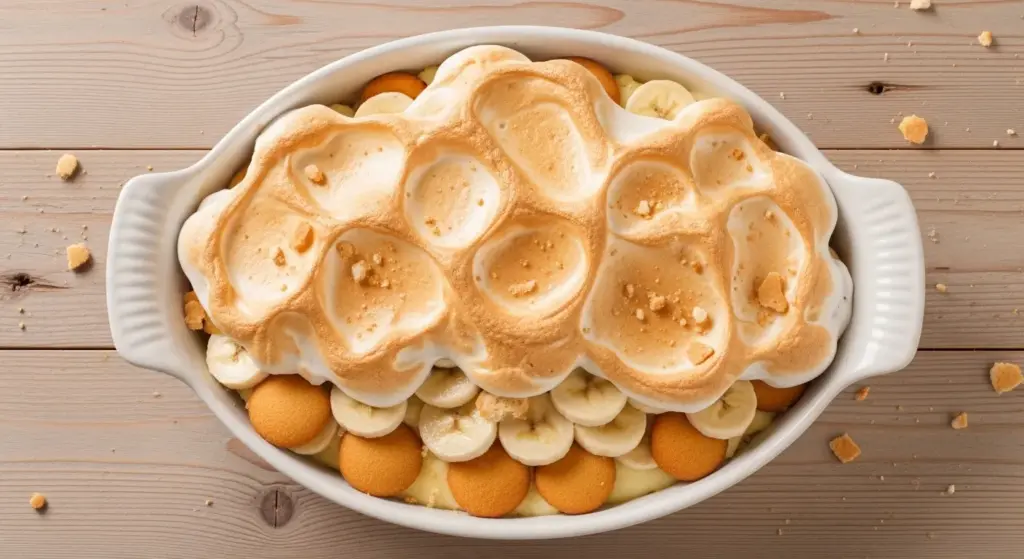
If you have been searching for the ultimate banana pudding recipe, your search ends right here. This is the classic, old-fashioned version made completely from scratch, with a rich homemade vanilla custard, layers of fresh banana slices, crisp vanilla wafers, and a golden, billowy meringue on top.
This is not a shortcut recipe using boxed pudding mix. It is the real deal, the kind that has been passed down through Southern families for generations, served at potlucks, Sunday dinners, and holiday tables for as long as anyone can remember.
What makes this version so special is the custard itself. By cooking egg yolks into a silky vanilla pudding base, you get a depth of flavor and creaminess that no instant mix can replicate.
The wafers soften as the dessert chills, turning into something closer to a tender cake layer than a crunchy cookie. And the meringue, lightly toasted in the oven, gives this pudding its signature old-fashioned look and that subtle, airy sweetness that perfectly balances the richness below.
It does take a little patience, but every single step is worth it.
You might also enjoy: Banana Cream Pie
Why You’ll Love This Banana Pudding Recipe
This recipe delivers comfort in every single bite.
It tastes like something your grandmother would pull from the oven on a warm Sunday afternoon, and it has that magical quality of tasting even better the next day after everything melds together overnight in the fridge.
It is made with simple, everyday ingredients you likely already have on hand.
No specialty equipment is needed, and the steps are very approachable even if you have never made a cooked custard before.
The layers of creamy pudding, soft banana slices, and pillowy meringue create a beautiful contrast of textures that keeps everyone coming back for seconds.
It is also a wonderful make-ahead dessert, which takes the stress out of entertaining.
- From scratch flavor: Homemade vanilla custard made with egg yolks has a richness and depth that boxed pudding simply cannot match.
- Beautiful presentation: The toasted meringue on top makes this look as impressive as it tastes.
- Crowd-pleasing classic: This recipe consistently disappears first at any gathering, no matter the occasion.
- Flexible serving options: Serve it warm right out of the oven or chilled from the fridge the next day. Both are equally delicious.
- Make-ahead friendly: The pudding base can be prepared up to two days in advance, making assembly day quick and easy.
For another rich, layered dessert the whole family will love, check out this No Bake Cheesecake.
Ingredients
Here is everything you need to make this classic banana pudding from scratch. Using ripe but still firm bananas is key. You want them yellow with just a few small spots, not overripe and mushy, which would turn brown too quickly in the pudding.
- 4 ripe but firm bananas (about 1 lb / 450g), sliced into 1/4-inch rounds
- 1 (11 oz / 312g) box Nilla Wafers (vanilla wafer cookies)
- 1 cup (200g) granulated sugar, divided
- 1/3 cup (40g) all-purpose flour
- 1/4 teaspoon salt
- 3 cups (720ml) whole milk
- 4 large eggs, separated (yolks for pudding, whites for meringue)
- 2 tablespoons (28g) unsalted butter
- 2 teaspoons pure vanilla extract, divided
- 1/4 teaspoon cream of tartar
- 1 tablespoon lemon juice (for brushing bananas to prevent browning)
Read Also: Dirt Pudding Recipe
Kitchen Equipment Needed
You do not need any specialized gadgets to make this recipe, but having the right basics on hand will make the process much smoother.
- 9×13-inch baking dish (or an 8×8-inch dish for a taller, more layered presentation)
- Medium heavy-bottomed saucepan (for making the custard without scorching)
- Stand mixer or hand electric mixer (for whipping the meringue)
- Whisk
- Two medium mixing bowls
- Rubber spatula
- Sharp knife and cutting board
- Measuring cups and spoons
- Pastry brush (for applying lemon juice to bananas)
For an even more impressive presentation, a trifle bowl makes the layers beautifully visible from the sides.
Another favorite: Vanilla Pudding Recipe
Recommended Products for This Recipe
These are products chosen based on quality and performance that can genuinely make a difference in how this banana pudding turns out.
1. Nabisco Nilla Wafers (Original)
The classic Nabisco Nilla Wafer is the gold standard for banana pudding. Their light, vanilla-forward flavor and slightly crisp texture soften perfectly as they absorb the custard, creating those tender, almost cake-like layers that define great banana pudding. Generic vanilla wafers tend to have a blander flavor and different texture.
2. Nielsen-Massey Madagascar Bourbon Pure Vanilla Extract
Vanilla is one of the most prominent flavors in this pudding, so using a high-quality extract makes a noticeable difference. Nielsen-Massey is consistently praised by bakers for its rich, complex vanilla flavor that elevates homemade custards far beyond what standard supermarket extracts deliver.
3. Anchor Hocking Glass Trifle Bowl
Serving this banana pudding in a clear glass trifle bowl showcases the stunning layers of golden custard, white wafers, and pale banana slices. It transforms a simple dessert into a showstopper centerpiece. The deep bowl also holds generous portions perfectly.
4. KitchenAid 5-Speed Hand Mixer
Getting a stiff, glossy meringue requires sustained beating power. A quality hand mixer like the KitchenAid 5-Speed ensures your egg whites whip up to firm, beautiful peaks without overheating, giving your meringue the stability it needs to hold up beautifully in the oven.
5. All-Clad Stainless Steel Saucepan
A heavy-bottomed saucepan is crucial for making smooth, lump-free custard. The All-Clad distributes heat evenly across the base, which means you are far less likely to scorch the pudding or cook the eggs too quickly. It is an investment that will pay off in every custard and sauce you ever make.
You might also enjoy: Brownie Pudding Recipe
Step-by-Step Instructions
1. Preheat the Oven and Prep Your Dish
- Preheat your oven to 350°F (175°C) and position a rack in the center.
- Lightly grease your 9×13-inch (or 8×8-inch) baking dish with a small amount of butter or non-stick spray and set aside.
- Having your dish prepped before you start cooking the custard saves time, since the pudding will need to be used fairly quickly once finished.
2. Separate and Prep the Eggs
- Separate 4 large eggs, placing the yolks in one medium bowl and the egg whites in a clean, grease-free bowl (any trace of grease will prevent the whites from whipping properly).
- Set the egg whites aside at room temperature while you make the custard. Room-temperature whites whip up much more easily into a stable meringue.
- Lightly beat the egg yolks with a fork and set them aside.
3. Make the Vanilla Custard Base
- In your heavy-bottomed saucepan, whisk together 3/4 cup (150g) of the granulated sugar, the all-purpose flour, and the salt until evenly combined.
- Gradually whisk in the 3 cups (720ml) of whole milk, starting slowly to prevent lumps from forming.
- Place the saucepan over medium heat and cook, stirring constantly with your whisk, until the mixture begins to thicken and bubble. This will take approximately 8 to 12 minutes. Do not walk away, as this custard can scorch on the bottom of the pan if left unattended.
- Once the mixture is thick and bubbling, remove from heat briefly.
4. Temper the Egg Yolks
- Tempering is the process of slowly raising the temperature of your egg yolks before adding them to the hot custard, which prevents them from scrambling.
- Scoop out about 1/2 cup (120ml) of the hot custard mixture and very slowly drizzle it into the beaten egg yolks while whisking constantly. This raises the temperature of the yolks gradually.
- Pour the tempered yolk mixture back into the saucepan with the rest of the custard, whisking constantly as you add it.
- Return the saucepan to medium heat and continue cooking, stirring constantly, for another 2 to 3 minutes until the pudding thickens to a rich, creamy consistency that coats the back of a spoon.
5. Finish the Pudding
- Remove the saucepan from heat.
- Add the 2 tablespoons of unsalted butter and 1 teaspoon of vanilla extract (reserving the second teaspoon for the meringue).
- Stir gently until the butter has fully melted and the vanilla is incorporated.
- The custard will be very thick, smooth, and glossy. Set it aside to cool slightly while you prepare the bananas and wafers. Do not let it cool completely or it will become too stiff to spread.
6. Slice the Bananas
- Peel and slice all 4 bananas into rounds approximately 1/4 inch (6mm) thick.
- Using a pastry brush, lightly brush the cut surfaces of the banana slices with a small amount of fresh lemon juice.
- This step slows the oxidation process that causes bananas to turn brown, keeping your pudding looking fresh and appealing for longer.
7. Assemble the Layers
- Arrange a single, even layer of vanilla wafers across the bottom of your prepared baking dish. Do not overlap them; they just need to cover the base in one layer.
- Next, arrange an even layer of banana slices directly on top of the wafers, covering them as completely as possible.
- Pour approximately half of the warm vanilla custard over the bananas, spreading it evenly with a rubber spatula so every banana slice is covered.
- Repeat with another layer of vanilla wafers, followed by another layer of banana slices, and then pour and spread the remaining custard on top.
- Make sure the final layer of custard completely covers all the banana slices. Any exposed banana will brown during refrigeration.
8. Make the Meringue
- Add the 1/4 teaspoon of cream of tartar to the egg whites in the clean bowl. Cream of tartar stabilizes the meringue and helps it hold its peaks.
- Using your stand or hand mixer, beat the egg whites on medium speed until soft peaks form. This means the whites have turned opaque white and when you lift the beaters, the tips curl over softly.
- Increase the speed to high and gradually add the remaining 1/4 cup (50g) of granulated sugar, one tablespoon at a time, beating continuously.
- Finally, beat in the remaining 1 teaspoon of vanilla extract.
- Continue beating until stiff, glossy peaks form. When you lift the beaters, the tips should stand straight up without drooping. This is the stage you want before topping the pudding.
9. Top the Pudding with Meringue and Bake
- Spoon the meringue evenly over the top of the custard layer, making sure to spread it all the way to the edges of the dish. Sealing the meringue to the edges of the dish prevents it from shrinking away during baking.
- Use the back of a spoon or a small offset spatula to swirl and create attractive peaks and swoops across the surface.
- Place the dish in the preheated 350°F (175°C) oven and bake for 12 to 15 minutes, until the meringue peaks are beautifully golden brown.
- Keep a close eye on the oven during the last few minutes, as meringue can go from golden to burnt very quickly.
10. Cool and Chill Before Serving
- Remove the pudding from the oven and allow it to cool at room temperature for at least 30 minutes.
- Transfer to the refrigerator and chill for a minimum of 4 hours, though overnight is ideal.
- The chilling time allows the vanilla wafers to soften fully into the custard layers, creating that classic texture that makes banana pudding so irresistible.
- Serve cold, straight from the refrigerator, scooping down through all the layers.
Read Also: Rice Pudding Recipe
Tips for Success
A few simple techniques will ensure your banana pudding turns out perfectly every single time.
- Use room-temperature egg whites: Cold egg whites are much harder to whip into a stable meringue. Separate your eggs when they are cold (it is easier) but then let the whites come to room temperature for about 30 minutes before beating.
- Keep your bowl grease-free for the meringue: Even a tiny trace of fat will prevent egg whites from forming stiff peaks. Wipe your mixing bowl and beaters with a paper towel dampened in white vinegar before using them for the meringue.
- Do not stop stirring the custard: Constant stirring is non-negotiable during the entire cooking time. The second you walk away, the eggs can begin to scramble or the bottom can scorch.
- Choose ripe but firm bananas: Bananas that are still slightly firm hold their shape in the layers instead of turning mushy. Save overripe bananas for banana bread or smoothies.
- Seal the meringue to the edges: Spreading the meringue all the way to the sides of the baking dish creates a seal that prevents “weeping,” which is the watery liquid that can collect under an improperly applied meringue.
- Chill overnight for best results: Four hours is the minimum, but overnight chilling is truly where the magic happens. The layers meld together into something spectacular.
For another creamy, rich dessert, try this Sticky Toffee Pudding.
Serving Suggestions
This banana pudding is a complete dessert all on its own, but there are some lovely ways to serve and present it that make it even more special.
Scoop it into individual dessert glasses or clear Mason jars for a beautiful presentation at parties.
Serve it alongside a cold glass of sweet tea or a cup of hot coffee for a classic Southern pairing.
It is also wonderful alongside other classic Southern desserts at a potluck or holiday spread.
- A drizzle of warm caramel sauce over the top adds a decadent finishing touch.
- Serve alongside a simple Fruit Salad for a lighter contrast on the dessert table.
- A dollop of fresh lightly sweetened whipped cream on individual servings adds extra richness.
- Garnish each serving with a whole vanilla wafer pressed into the pudding for a polished, classic look.
- For a beautiful dessert buffet, set it next to a Fruit Tart for a stunning variety of fresh, creamy desserts.
Variations to Try
Once you have mastered the classic version, there are several delicious ways to put a new spin on this beloved dessert.
- No-bake version: Skip the meringue entirely and top the assembled, chilled pudding with homemade whipped cream just before serving. This is the version most commonly seen at parties and is equally delicious.
- Chessmen cookie version: Swap the vanilla wafers for Pepperidge Farm Chessmen butter cookies. They add a slightly richer, more buttery flavor to the layers.
- Chocolate banana pudding: Layer in some chocolate pudding alternating with the vanilla custard for a chocolate-banana twist that chocolate lovers will adore.
- Banana pudding trifle: Assemble the layers in a large glass trifle bowl for a spectacular presentation, topping with whipped cream and crushed vanilla wafers instead of meringue.
- Peanut butter banana pudding: Whisk 3 tablespoons of creamy peanut butter into the warm custard before layering for a nutty, rich variation that pairs beautifully with the bananas.
- Individual banana pudding cups: Layer the pudding into small mason jars or dessert cups for single-serve portions that are perfect for parties and easy to grab and go.
Read Also: Chia Seed Pudding Recipe
Storage and Reheating
Proper storage ensures your banana pudding stays fresh, creamy, and delicious for as long as possible.
- Refrigerator storage: Cover the baking dish tightly with plastic wrap and store in the refrigerator for up to 3 days. Beyond day 3, the bananas will begin to brown noticeably and the texture of the wafers will become overly soft and mushy.
- Do not freeze: This banana pudding does not freeze well. The custard separates and the banana slices become watery and unpleasant after freezing and thawing. Only the plain custard base (without bananas or wafers) can be frozen for up to 3 months.
- Serving from cold: This dessert is best served cold, directly from the refrigerator. Simply scoop and serve with no reheating needed.
- Avoid reheating: Reheating banana pudding with meringue will cause the meringue to weep and the bananas to break down. If you prefer a warm version, make and serve it immediately out of the oven before chilling.
For another make-ahead dessert with a long shelf life, try this Easy Tiramisu.
Nutritional Facts
The following estimates are based on one serving out of 12 total servings from a 9×13-inch pan.
| Nutrient | Per Serving (Approx.) |
|---|---|
| Calories | 310 kcal |
| Total Fat | 9g |
| Saturated Fat | 4g |
| Cholesterol | 80mg |
| Sodium | 190mg |
| Total Carbohydrates | 52g |
| Dietary Fiber | 1.5g |
| Total Sugars | 34g |
| Protein | 6g |
| Potassium | 270mg |
| Calcium | 110mg |
| Vitamin C | 5mg |
Nutritional values are approximate estimates and will vary depending on specific brands and ingredient quantities used.
Another beloved Southern dessert to add to your table: Boston Cream Pie
Health Benefits of Key Ingredients
This dessert is undeniably an indulgence, but a few of its main ingredients do bring real nutritional value to the table.
The stars of the show are worth appreciating beyond their deliciousness.
- Bananas: One of the most nutrient-dense fruits available, bananas are an excellent source of potassium, which supports healthy heart function and muscle performance. They also contain vitamin B6, vitamin C, magnesium, and dietary fiber that supports digestive health.
- Eggs: Whole eggs and egg yolks are one of nature’s most complete foods. They provide high-quality protein, choline (essential for brain health), vitamin D, vitamin B12, selenium, and lutein, which supports eye health.
- Whole milk: A strong source of calcium for bone health, whole milk also provides vitamin D, phosphorus, and high-quality protein. The fat in whole milk helps your body absorb fat-soluble vitamins A and D effectively.
- Vanilla extract: Pure vanilla extract contains small amounts of antioxidants and has been traditionally used for its calming, mood-enhancing properties. Its aromatic compounds also contribute to the overall sensory satisfaction of the dessert.
Read Also: Bread Pudding Recipe
Frequently Asked Questions
1. Can I make banana pudding without the meringue?
Absolutely. The no-bake version topped with whipped cream is just as beloved as the classic baked meringue version and is actually more common at modern gatherings. Simply assemble your layers, chill the pudding for at least 4 to 6 hours, and pile on freshly whipped heavy cream right before serving. The texture will be slightly different, richer and creamier on top rather than light and airy, but it is equally delicious.
2. Why is my banana pudding runny?
Runny banana pudding usually means the custard was not cooked long enough to fully thicken, or the egg yolks were not incorporated properly during the tempering step. Make sure you cook the custard on medium heat and stir constantly until it is thick enough to coat the back of a spoon before removing from heat. If your custard is still thin after cooling, it did not cook long enough.
3. Can I use instant pudding mix instead of making it from scratch?
Yes, you can use two packages of instant vanilla pudding mix prepared according to package directions as a shortcut. The flavor will be noticeably lighter and less rich than the scratch-made custard, but the overall dessert will still be very enjoyable. Many popular quick versions also incorporate cream cheese or sweetened condensed milk whipped into the pudding mix for extra creaminess.
4. How do I prevent the bananas from turning brown?
Brushing the sliced bananas with a small amount of fresh lemon juice before layering significantly slows the browning process. Additionally, making sure the custard completely covers every banana slice in the assembled dish prevents the exposed surfaces from coming into contact with air, which is what causes oxidation and browning. Serve within 2 to 3 days for the best appearance.
5. Can banana pudding be made ahead of time?
Yes, and it actually benefits from being made a day ahead. The vanilla wafers soften beautifully overnight in the custard, the flavors develop and meld together, and the texture becomes more cohesive. You can also prepare the custard base up to 2 days in advance, store it covered with plastic wrap pressed directly onto the surface (to prevent a skin from forming), and assemble the dish the day before serving.
You might also enjoy: Malva Pudding Recipe
Final Thoughts
This from-scratch banana pudding recipe is one of those desserts that never goes out of style.
It is comforting, deeply satisfying, and the kind of thing that people remember long after the meal is over.
The extra effort of making a real custard from scratch rather than opening a box of instant mix is genuinely worth every minute.
Once you taste the difference, you will never want to go back.
Give this recipe a try for your next gathering, family dinner, or whenever you need a reminder that the classics are classic for a very good reason.
If you make this, drop a comment below and tell me how it turned out. I would love to hear from you, and if you share it on social media, be sure to tag me so I can see your gorgeous layers!
Recommended:
- Figgy Pudding Recipe
- Yorkshire Pudding Recipe
- Corn Pudding Recipe
- Easy Banana Bread Recipe with Self-Rising Flour
- Amish Banana Bread Recipe
- Banana Bread Recipe with Sour Cream
- Easy Pecan Pie
- Classic Pumpkin Pie
- Blueberry Pie
- Strawberry Sauce


