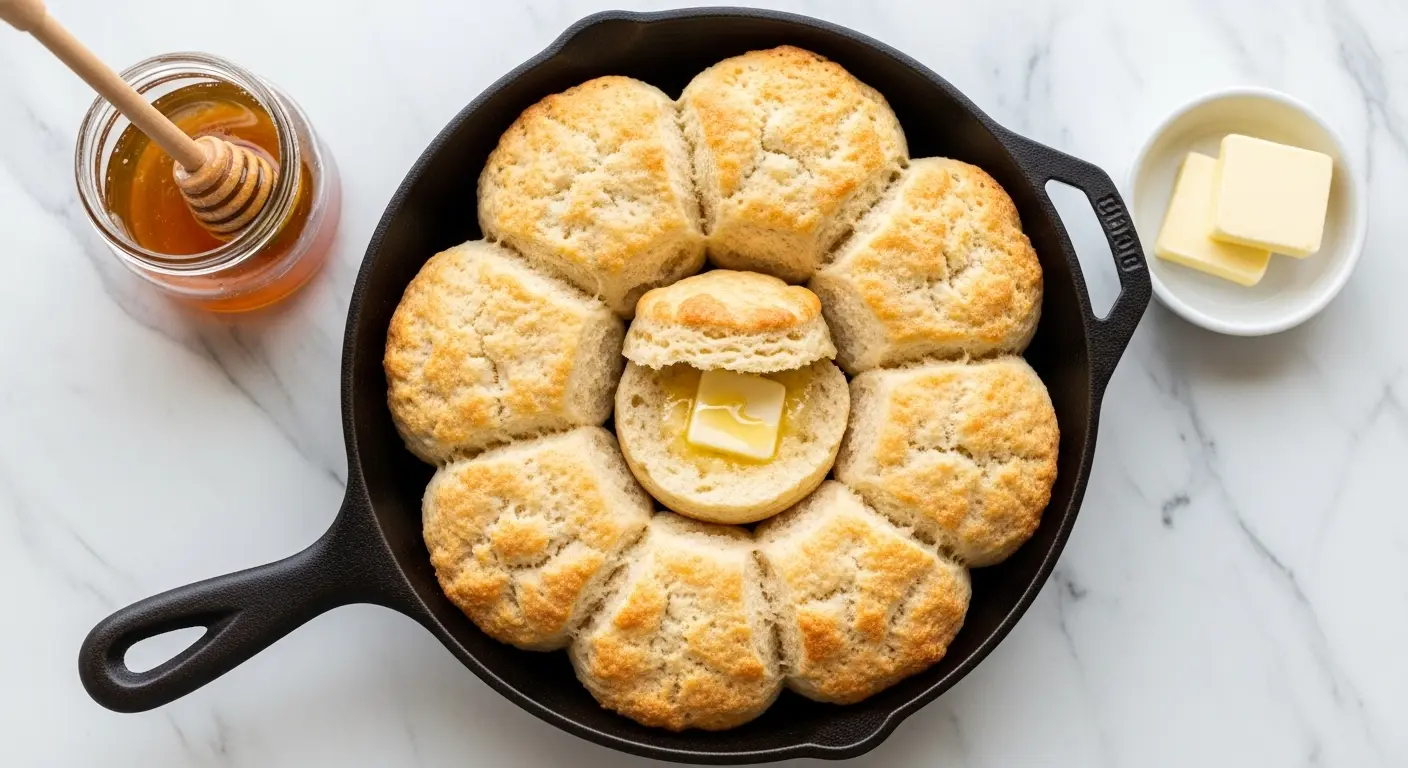
Few things in the kitchen come close to the magic of pulling a tray of golden, steaming biscuits from the oven. This buttermilk biscuit recipe is the real deal — a Southern classic that turns just six simple ingredients into tall, tender, flaky layers that shatter at the touch. The secret is cold butter, cold buttermilk, and a gentle hand. Overwork the dough and you lose the flakiness; treat it right and you get pillowy biscuits with a crisp golden top that will have everyone reaching for seconds before the tray even hits the table.
Buttermilk does two things in this recipe that no other liquid can replicate. First, its acidity reacts with the baking soda to create extra lift, giving biscuits that dramatic rise. Second, it adds a subtle tang that deepens the flavor and makes every bite taste like it came from a Southern grandmother’s kitchen. Paired with frozen or very cold butter — grated directly into the flour so it distributes evenly — the result is dozens of thin, buttery layers that puff apart in the oven like a book fanning open.
This recipe comes together in under 30 minutes from start to finish.
You might also enjoy: Homemade Biscuit Recipe
Why You’ll Love This Buttermilk Biscuit Recipe
You don’t need a stand mixer, special equipment, or any baking experience to make these biscuits absolutely perfect.
The ingredient list is short and approachable — flour, butter, buttermilk, baking powder, baking soda, and salt — and every single one is probably already in your kitchen.
The folding technique used in this recipe creates flaky, distinct layers without requiring you to roll and cut multiple times.
These biscuits go with everything from sausage gravy to honey butter, making them one of the most versatile baked goods you can add to your rotation.
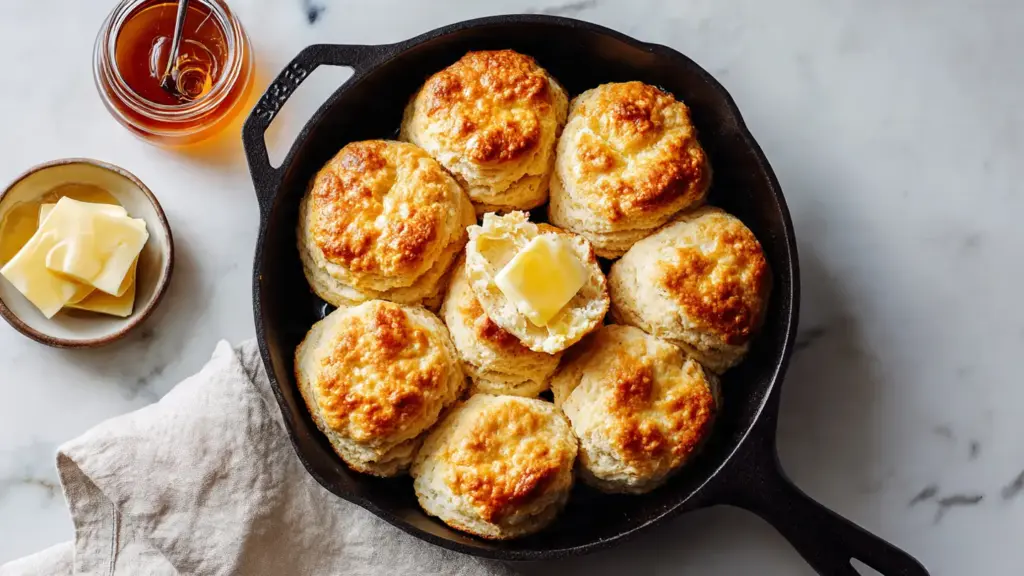
They bake up beautifully golden on the outside while staying cloud-soft on the inside — every single time.
This is also a freezer-friendly recipe, so you can prep a double batch and have fresh biscuits ready in minutes on any morning of the week.
For a breakfast pairing that’s equally satisfying, pair these with a hearty Breakfast Casserole.
Ingredients
The beauty of this recipe is that each ingredient plays a specific role in achieving that perfect biscuit texture. Cold butter creates steam pockets as it melts in the oven, and buttermilk’s acidity ensures a tender crumb and a proper rise. Use the freshest baking powder you have — old baking powder is a common reason biscuits turn out flat.
- 2 cups (240g) all-purpose flour, plus extra for dusting
- 1 tablespoon baking powder
- 1/4 teaspoon baking soda
- 1 teaspoon fine sea salt
- 1 teaspoon granulated sugar
- 6 tablespoons (85g) unsalted butter, frozen or very cold
- 3/4 cup (180ml) cold buttermilk, plus 1 tablespoon for brushing
- 2 tablespoons unsalted butter, melted, for brushing after baking (optional)
Read Also: Apple Pie Biscuits Recipe
Kitchen Equipment Needed
Having the right tools on hand makes the difference between biscuits that look rustic and those that look like they came from a bakery. A box grater for the butter is particularly key — it disperses the fat more evenly than a pastry cutter and keeps your hands (and the butter) cool throughout.
- Large mixing bowl
- Box grater
- Pastry cutter or two forks (optional, as backup to grater)
- Wooden spoon or silicone spatula
- Biscuit cutter, 2.5-inch (6cm)
- Parchment-lined baking sheet
- Cast iron skillet (optional, but creates a crispier bottom crust)
- Pastry brush
- Measuring cups and spoons
- Sharp knife or bench scraper (for squaring the dough edges)
This recipe pairs wonderfully alongside a classic Sausage Gravy for a full Southern breakfast.
Recommended Products for This Recipe
The right tools and a couple of quality ingredients can elevate a good biscuit recipe into a truly memorable one. Here are a few products that genuinely make a difference in this recipe.
1. Lodge Pre-Seasoned Cast Iron Skillet
Baking biscuits in a cast iron skillet creates an incomparable crispy bottom crust while keeping the inside perfectly soft. The even heat distribution of cast iron ensures your biscuits rise uniformly, and the natural non-stick surface means easy release without any fuss.
2. OXO Good Grips Box Grater
Grating frozen butter directly into the flour is the single most effective technique for ultra-flaky biscuits, and a sturdy box grater makes this effortless. The OXO Good Grips version has a comfortable, non-slip handle and large shredding holes that are ideal for butter.
3. Ateco Round Biscuit Cutter Set
A sharp-edged biscuit cutter pressed straight down (never twisted) gives your biscuits clean, unsealed edges that rise tall and straight. A good cutter set with multiple sizes gives you flexibility for different batch sizes and presentations.
4. Cultured Butter (European-Style)
European-style or cultured butter has a higher fat content and more complex, tangy flavor than standard American butter. In a recipe where butter is the star ingredient, using a premium brand makes an immediately noticeable difference in richness and depth of flavor.
5. King Arthur All-Purpose Flour
Not all all-purpose flours are equal. King Arthur has a slightly higher protein content and consistent quality that produces biscuits with reliable structure and excellent rise. Many professional bakers swear by it as their go-to for biscuit dough.
This recipe also calls for quality buttermilk — if you’re inspired to explore more Southern baking, take a look at this Cracklin Bread Recipe for another iconic Southern staple.
Step-by-Step Instructions
1. Freeze the Butter and Chill the Buttermilk
- Cut the 6 tablespoons of butter into a rough block and place it in the freezer for at least 15 minutes before you begin.
- Pour the 3/4 cup of buttermilk (plus the extra tablespoon for brushing) into a small measuring cup and place it in the refrigerator.
- Cold fat is non-negotiable in biscuit making. When frozen butter enters the hot oven, it releases steam, which creates the flaky, airy layers biscuits are famous for. Warm butter melts into the dough before baking and produces a denser, less flaky result.
2. Preheat the Oven
- Set your oven to 425°F (220°C) and allow it to fully preheat — this takes at least 15 to 20 minutes for most home ovens.
- Place the oven rack in the upper-middle position.
- If you are using a cast iron skillet, place it in the oven while it preheats so it gets screaming hot. A hot skillet creates that beautiful, crispy bottom crust on the first contact.
- If using a baking sheet, line it with parchment paper and set aside.
3. Whisk the Dry Ingredients
- Add the 2 cups of all-purpose flour to a large mixing bowl.
- Add 1 tablespoon baking powder, 1/4 teaspoon baking soda, 1 teaspoon salt, and 1 teaspoon sugar.
- Whisk all the dry ingredients together until evenly combined.
- Make sure there are no lumps of baking powder — these can cause uneven spots in the finished biscuits.
- The sugar is a small amount but it helps the tops of the biscuits brown more evenly and rounds out the slightly tangy flavor of the buttermilk.
4. Grate the Frozen Butter into the Flour
- Remove the frozen butter from the freezer.
- Using the large holes of a box grater, grate the butter directly into the bowl of dry ingredients, holding the grater over the bowl so the shreds fall right in.
- Work quickly — the goal is to keep the butter cold the entire time.
- Once all the butter is grated in, use your fingertips to very lightly toss the butter shreds through the flour until each piece is coated.
- You should still be able to see distinct, flat flakes and small pieces of butter throughout the mixture. This is exactly what you want — these will melt in the oven to create steam and flaky layers.
- Do not rub the butter in until it disappears. If the mixture looks like wet sand, the butter is too incorporated.
5. Add the Cold Buttermilk
- Retrieve the cold buttermilk from the refrigerator.
- Make a well in the center of the butter-flour mixture.
- Pour the 3/4 cup of cold buttermilk into the well all at once.
- Using a wooden spoon or silicone spatula, stir from the center outward in broad, gentle strokes.
- Stir only until the dough just comes together and no streaks of dry flour remain — this will take about 10 to 15 stirs.
- The dough will look shaggy and rough, not smooth like bread dough. This is correct.
- Overmixing activates the gluten in the flour, which tightens the dough and produces tough, dense biscuits. Stop mixing the moment the ingredients combine.
6. Fold the Dough to Create Layers
- Lightly flour a clean work surface.
- Turn the shaggy dough out onto the floured surface. It will be sticky and rough.
- Flour your hands generously to prevent sticking.
- Pat the dough gently into a rough rectangle about 3/4 inch (2cm) thick. Do not use a rolling pin at this stage.
- Fold the dough in half from one short side to the other, as if folding a letter. Press down gently.
- Rotate the dough 90 degrees and fold it in half again.
- Repeat this fold-and-rotate process a total of 4 to 6 times. You are building layers with each fold.
- After the final fold, gently pat or press the dough into an even slab about 1 inch (2.5cm) thick. This thickness is important — thinner dough produces short, flat biscuits.
7. Cut Out the Biscuits
- Using a sharp 2.5-inch (6cm) biscuit cutter, press straight down into the dough with firm, decisive pressure. Do not twist the cutter.
- Twisting seals the cut edges of the dough, which prevents the biscuit from rising fully. A straight press-and-lift motion keeps the layers open and free to puff upward.
- Cut the biscuits as close together as possible to minimize scraps.
- Dip the cutter in flour between each cut to prevent sticking.
- Gather the scraps, press them together gently, pat back to 1-inch thickness, and cut additional biscuits. Note that biscuits from the second cut are slightly less tender than the first — work the dough as minimally as possible.
- This recipe yields approximately 8 biscuits.
8. Arrange the Biscuits and Brush the Tops
- If using a cast iron skillet: carefully remove it from the oven using heavy oven mitts and arrange the biscuits inside so they are touching each other slightly. Biscuits placed close together rise taller because they support one another.
- If using a baking sheet: arrange the biscuits so they are just barely touching.
- Using a pastry brush, brush the tops of the biscuits with the reserved 1 tablespoon of cold buttermilk. This helps them achieve a beautiful golden-brown color.
- Do not brush the sides — you want the sides to steam and rise freely.
9. Bake Until Golden
- Transfer the skillet or baking sheet to the preheated oven.
- Bake for 13 to 15 minutes, until the tops are deep golden brown and the biscuits have risen tall. Check at the 12-minute mark — ovens vary.
- Do not underbake. Pale biscuits may look done on the outside but will be gummy and doughy in the center.
- When done, the bottoms should be golden and the tops will be richly browned.
10. Finish with Butter and Serve
- Remove the biscuits from the oven.
- Immediately brush the warm tops with the 2 tablespoons of melted butter if using. This adds richness and a beautiful sheen.
- Allow the biscuits to cool for just 3 to 4 minutes before serving. They are best eaten warm.
- Serve with butter, honey, jam, sausage gravy, or as a sandwich base.
Read Also: Sausage Balls Recipe
Tips for Success
Even a simple recipe like biscuits has a few critical techniques that separate good from extraordinary. Getting these habits right from the start will make a dramatic difference in your results every time.
- Keep everything cold. Cold butter, cold buttermilk, and even chilled mixing bowls help maintain the integrity of the fat pieces in the dough, which is what creates flaky layers. On a hot day, chill your mixing bowl in the freezer for 10 minutes before starting.
- Do not twist the biscuit cutter. Always press straight down and lift straight up. Twisting seals the dough layers together and prevents a proper rise.
- Measure flour correctly. Scoop and level — do not pack the flour into the measuring cup. Overpacked flour produces dry, crumbly biscuits. For best results, spoon the flour into the measuring cup and sweep off the excess with a straight edge.
- Do not overwork the dough. Mix only until combined and fold only the recommended number of times. Ten extra seconds of kneading can noticeably toughen a biscuit.
- Use real buttermilk. Homemade buttermilk substitutes (milk plus vinegar) work in a pinch, but real cultured buttermilk gives a deeper flavor and better rise. It’s worth picking up a carton.
- Bake at high heat. The 425°F (220°C) temperature creates a burst of steam that lifts the biscuits quickly. Lower temperatures slow this process and produce flatter results.
- Place biscuits touching. Biscuits that touch their neighbors on the pan rise higher because the sides are not exposed to the drying heat of the oven.
For a comforting meal pairing, try serving these alongside a warm bowl of Chicken and Dumplings.
Serving Suggestions
Warm buttermilk biscuits are endlessly versatile — they move seamlessly from a casual breakfast table to a Sunday dinner spread without missing a beat.
- Slather with Honey Butter and a drizzle of wildflower honey for a simple, deeply satisfying breakfast.
- Spoon a generous ladleful of sausage gravy over split biscuits for a classic biscuits and gravy plate that never gets old.
- Use them as the base for breakfast sandwiches filled with scrambled eggs, crispy bacon, and sharp cheddar.
- Serve alongside Southern Fried Chicken for a true Southern comfort dinner.
- Split and toast leftover biscuits the next morning and top with Creamy Mashed Potatoes and gravy for a satisfying lunch.
- Fill warm biscuits with thin-sliced country ham and a smear of mustard for a simple, savory sandwich.
- Serve alongside a bowl of Chicken Soup for a comforting weeknight dinner.
- Top with fresh strawberries and whipped cream for a quick, easy strawberry shortcake-style dessert.
Variations to Try
Once you have the base recipe mastered, biscuits become a versatile canvas for all kinds of delicious additions. These variations use the same dough as a foundation with minor tweaks.
- Cheddar and Chive Biscuits: Add 3/4 cup (85g) of shredded sharp cheddar cheese and 2 tablespoons of freshly snipped chives to the dry ingredients before adding the buttermilk. These are outstanding alongside soup or chili.
- Garlic Herb Biscuits: Add 1/2 teaspoon garlic powder and 1 teaspoon dried Italian herbs (or fresh thyme and rosemary) to the dry ingredients. Brush the finished biscuits with garlic butter straight from the oven.
- Honey Biscuits: Add 1 tablespoon of honey to the buttermilk before mixing into the dough. These bake up slightly sweeter and pair beautifully with jams and soft cheeses.
- Black Pepper Biscuits: Add 1 teaspoon of freshly cracked black pepper to the dry ingredients. The subtle heat is incredible with country ham or smoked meats.
- Whole Wheat Biscuits: Replace half the all-purpose flour with white whole wheat flour for a slightly nutty, heartier biscuit. Add a tablespoon more buttermilk if the dough feels dry.
- Cream Biscuits: Substitute an equal amount of cold heavy cream for the buttermilk and eliminate the baking soda. The result is a richer, slightly denser biscuit with a beautiful creamy flavor.
For another Southern quick bread worth adding to your baking list, try this Skillet Cornbread Recipe.
Storage and Reheating
Buttermilk biscuits are at their absolute best the moment they come out of the oven, but they store and reheat reasonably well with a few simple techniques.
- Room temperature: Store fully cooled biscuits in an airtight container at room temperature for up to 2 days.
- Refrigerator: Transfer to an airtight container and refrigerate for up to 4 days. Note that refrigerating biscuits can dry them out slightly, so the reheating step is particularly important for fridge-stored biscuits.
- Freezer (baked): Wrap individual cooled biscuits in plastic wrap and place in a zip-top freezer bag. Freeze for up to 3 months.
- Freezer (unbaked): Cut the biscuits, arrange on a parchment-lined tray, and freeze until solid. Transfer to a freezer bag. Bake straight from frozen at 425°F (220°C), adding 4 to 5 minutes to the baking time.
- Reheating: Warm refrigerated or thawed biscuits in a 300°F (150°C) oven for 8 to 10 minutes. Wrap them loosely in foil to prevent the tops from over-browning. For a quick option, microwave a single biscuit for 20 to 30 seconds, though this softens the crust.
- Do not microwave for too long. Microwaving for more than 45 seconds turns biscuits rubbery. The oven is always the better reheating method.
Read Also: Easy Scone Recipe
Nutritional Facts
Per serving (1 biscuit, based on a yield of 8 biscuits)
| Nutrient | Amount |
|---|---|
| Calories | 215 kcal |
| Total Fat | 10g |
| Saturated Fat | 6g |
| Cholesterol | 26mg |
| Sodium | 310mg |
| Total Carbohydrates | 27g |
| Dietary Fiber | 1g |
| Sugars | 2g |
| Protein | 4g |
| Calcium | 90mg |
| Iron | 1.5mg |
Nutritional values are estimates based on standard ingredient brands and may vary depending on specific ingredients and serving sizes.
For a lighter morning option to complement your breakfast spread, check out this Baked Oatmeal Recipe.
Health Benefits of Key Ingredients
While buttermilk biscuits are certainly a treat, the core ingredients are not without their nutritional merits.
Knowing what’s in your food helps you make informed choices — and it’s reassuring to know that a few of these ingredients bring genuine nutritional value to the table.
- Buttermilk is lower in fat than regular whole milk and contains probiotics from the live cultures in cultured buttermilk. These beneficial bacteria support digestive health and can help maintain a balanced gut microbiome.
- All-purpose flour provides carbohydrates, which are the body’s primary energy source, as well as small amounts of iron and B vitamins like niacin and thiamine that support metabolism and energy production.
- Butter is a source of fat-soluble vitamins A, D, E, and K2. Consumed in moderate amounts, high-quality butter from grass-fed cows also contains conjugated linoleic acid (CLA), which has been studied for its potential metabolic benefits.
- Baking powder and baking soda are leavening agents that contribute no significant calories or macronutrients but enable the chemical reactions that create the biscuit’s light, airy texture.
- Salt is an essential mineral that supports nerve function, fluid balance, and muscle contractions. Used in the modest amounts in this recipe (1 teaspoon across 8 biscuits), it contributes to flavor without excessive sodium per serving.
For more inspiration on how to build a balanced and nourishing breakfast, take a look at this Breakfast Skillet Recipe.
Frequently Asked Questions
1. Why did my biscuits not rise?
There are a few common culprits here. The most frequent issue is old baking powder that has lost its potency — test yours by dropping a teaspoon into hot water; if it doesn’t bubble vigorously, it’s time to replace it. Other causes include overmixing the dough (which develops too much gluten), twisting the biscuit cutter (which seals the edges and prevents rise), or butter that was too warm when it went into the dough.
2. Can I make these biscuits without buttermilk?
Yes, you can make a buttermilk substitute by combining 3/4 cup of whole milk with 3/4 tablespoon of white vinegar or lemon juice. Let the mixture sit for 5 to 10 minutes until it curdles and thickens slightly, then use as directed. The flavor will be slightly milder than real buttermilk, but the biscuits will still turn out well.
3. Can I use self-rising flour instead of all-purpose?
You can, but skip the baking powder, baking soda, and salt if you do — self-rising flour already contains leaveners and salt. White Lily self-rising flour is the traditional Southern choice and produces a particularly tender, delicate crumb because it is made from soft winter wheat with a lower protein content.
4. Why are my biscuits tough?
Tough biscuits are almost always the result of overworked dough. Stirring too vigorously when adding the buttermilk or kneading the dough too many times develops gluten strands that make the texture chewy rather than tender. Mix just until the dough comes together, and limit your folds to no more than 6. The dough should look rough and somewhat shaggy — a smooth, elastic dough is a sign you’ve gone too far.
5. Can I make the dough ahead of time?
Absolutely. You can prepare the dough through the folding and cutting steps, then place the uncooked biscuits on a parchment-lined tray and refrigerate for up to 24 hours before baking. You can also freeze the cut, unbaked biscuits solid on the tray, then transfer to a freezer bag for up to 3 months. Bake directly from the refrigerator or freezer — no need to thaw.
For a comforting Southern dinner to round out your biscuit experience, check out this Chicken Stew Recipe.
Final Thoughts
A great buttermilk biscuit recipe is one of the most rewarding things you can learn to make from scratch. The ingredients are affordable, the technique is learnable in a single batch, and the payoff — warm, golden, flaky biscuits fresh from your own oven — is worth every minute.
Try this recipe this weekend and see just how quickly it becomes a household staple. Share a photo in the comments below, or let us know your favorite way to serve them — we love hearing from you!
Recommended:
- Homemade Biscuit Recipe
- Apple Pie Biscuits Recipe
- Sausage Gravy Recipe
- Sweet Cornbread Recipe
- Dinner Rolls Recipe
- Classic Scone Recipe
- Shrimp and Grits Recipe
- Easy Fried Chicken Recipe
- Collard Greens Recipe
- Classic Red Beans and Rice Recipe


