If you’ve been looking for a chicken tenders recipe that actually delivers on that crispy-outside, juicy-inside promise, you’re in the right place. This classic buttermilk-marinated, pan-fried version is the one you’ll come back to again and again. It’s the kind of recipe that makes the whole family rush to the dinner table, and it’s surprisingly easy to pull off at home.
The secret is a two-step process: first, soaking the chicken in seasoned buttermilk to tenderize and flavor the meat all the way through, then coating it in a well-seasoned flour mixture before frying to golden perfection.
No shortcuts, no weird ingredients. Just simple pantry staples that work together to produce the most satisfying homemade chicken tenders you’ve ever had.
This is the pan-fried version using the classic three-step breading station that most people associate with restaurant-style tenders. The result is a shatteringly crispy crust with a succulent center that no store-bought frozen tender can touch.
If you love this recipe, you’ll also want to bookmark this Air Fryer Chicken Tenders Recipe for nights when you want the same great flavor with less oil.
Why You’ll Love This Chicken Tenders Recipe
Once you try making chicken tenders from scratch, the frozen bag in your freezer aisle just won’t cut it anymore.
The buttermilk marinade does double duty: the acidity breaks down the muscle fibers for ultra-tender meat, while the fat coats the surface so seasoning clings beautifully.
You have complete control over the seasoning, the crispiness, and the thickness of each strip.
These tenders are ready in under 45 minutes from start to finish, making them totally doable on a weeknight.
They’re also endlessly versatile. Serve them as a main dish, slice them for salads, tuck them into sandwiches, or lay them out as party appetizers.
Kids love them. Adults love them. Even picky eaters approve.
- Crispy, golden crust with a juicy, tender center
- Made with pantry staples you already have on hand
- Buttermilk marinade adds deep flavor and keeps the chicken moist
- Ready in under 45 minutes
- Perfect for dinner, snacking, meal prep, or entertaining
- Easily customizable with your favorite seasonings
For another crowd-pleasing chicken dish, check out this Easy Fried Chicken Recipe.
Ingredients
This recipe uses simple, everyday ingredients that each play an important role. The buttermilk is the most important element: its lactic acid gently tenderizes the chicken while also helping the breading stick more effectively than regular milk ever could.
- 1.5 lbs (680g) chicken tenderloins (or boneless skinless chicken breasts, sliced into 1-inch / 2.5cm strips)
- 1 cup (240ml) buttermilk
- 1 egg, beaten
- 1 teaspoon hot sauce (optional, but adds great depth without heat)
- 1.5 cups (190g) all-purpose flour
- 1 teaspoon garlic powder
- 1 teaspoon onion powder
- 1 teaspoon smoked paprika
- 1 teaspoon salt
- 1/2 teaspoon black pepper
- 1/4 teaspoon cayenne pepper (optional, for a little kick)
- Vegetable or canola oil, for frying (enough to reach 2 inches / 5cm deep in your pan)
For dipping, this Comeback Sauce Recipe is absolutely the perfect pairing.
Kitchen Equipment Needed
You don’t need any specialty equipment here. The most important thing is having a heavy-bottomed pan, like a cast iron skillet, which holds heat evenly and prevents those dreaded temperature drops when you add cold chicken to the oil.
- Large cast iron skillet or heavy-bottomed pan
- Instant-read thermometer (for checking oil temp and internal chicken temp)
- 3 shallow dishes or bowls (for the breading station)
- Wire cooling rack set over a baking sheet (for resting finished tenders)
- Paper towels
- Tongs
- Large zip-lock bag or airtight container (for marinating)
- Knife and cutting board
For a lighter take on crispy chicken, have a look at this Air Fryer Chicken Nuggets Recipe as well.
Recommended Products for This Recipe
These are products I genuinely recommend based on quality and how much they improve the end result of this recipe.
1. Lodge Pre-Seasoned Cast Iron Skillet
A cast iron skillet is the single best pan for frying chicken tenders. It maintains a consistent frying temperature far better than thin pans, which means your breading sets up quickly and crisps beautifully without absorbing excess oil. It also lasts a lifetime with proper care.
2. ThermoPro Instant-Read Meat Thermometer
Guessing whether your chicken is cooked through is the fastest way to ruin a batch of tenders. An instant-read thermometer takes the guesswork out completely and ensures you hit that safe internal temperature of 165°F (74°C) every single time.
3. Smoked Paprika (Spanish-Style)
Regular paprika and smoked paprika are not the same thing. The smoked variety adds a subtle depth and warmth to the breading that elevates the entire flavor profile of these tenders. It’s worth having a good-quality tin in your pantry.
4. OXO Good Grips Wire Cooling Rack
Resting fried chicken on paper towels traps steam underneath and softens the bottom crust. A wire rack lets hot air circulate all around each tender, keeping every surface crispy from the moment they come out of the oil until the moment they hit the table.
You might also enjoy: Bang Bang Sauce Recipe as a dipping option alongside these tenders.
Step-by-Step Instructions
Step 1: Prepare the Chicken
- If using chicken tenderloins, inspect each piece and locate the white tendon running along one side. Grip it firmly with a paper towel for extra traction and pull it out slowly. It comes away cleanly and removing it prevents that tough, rubbery texture in the finished tender.
- If using chicken breasts instead, place them on a cutting board and slice against the grain into strips approximately 1 inch (2.5cm) thick. Cutting against the grain shortens the muscle fibers, which makes every bite more tender once cooked.
- Pat all the chicken pieces dry with paper towels. This step matters: excess moisture on the surface dilutes the buttermilk marinade and can prevent the breading from adhering well.
Step 2: Marinate in Buttermilk
- In a large bowl, whisk together the buttermilk, beaten egg, hot sauce (if using), 1/2 teaspoon of salt, and 1/4 teaspoon of black pepper. The egg adds structure to the marinade and helps it cling to the chicken more thoroughly.
- Add the prepared chicken strips to the bowl and toss until every piece is completely coated.
- Cover the bowl with plastic wrap, or transfer everything to a zip-lock bag, and refrigerate for at least 30 minutes. For the best possible flavor and tenderness, marinate for 4 to 8 hours. Overnight (up to 24 hours) also works well.
- When you are ready to cook, remove the chicken from the refrigerator and let it sit at room temperature for about 15 minutes. Starting with cold chicken causes the oil temperature to drop sharply, which results in greasy, pale tenders instead of crispy golden ones.
Step 3: Set Up Your Breading Station
- Grab three shallow dishes and arrange them in a line.
- In the first shallow dish, add 1 cup (125g) of the flour.
- The second shallow dish is not needed here since you are using the buttermilk marinade as your wet layer. Your marinade bowl serves as the middle station.
- In the third shallow dish, combine the remaining 1/2 cup (65g) of flour with the garlic powder, onion powder, smoked paprika, the remaining 1/2 teaspoon of salt, the remaining 1/4 teaspoon of black pepper, and the cayenne (if using). Whisk everything together thoroughly.
- Make sure every layer is seasoned. A bland flour coating is the most common reason homemade tenders taste flat compared to restaurant versions.
Step 4: Bread the Chicken Tenders
- Remove a chicken tender from the buttermilk marinade and let any excess drip off for a few seconds. You want the chicken coated, not dripping.
- Place the tender in the seasoned flour mixture and press firmly on all sides so the coating adheres completely. Don’t just dip and shake. Press and hold for a full 3 to 5 seconds on each side.
- Transfer the breaded tender to a clean plate or a sheet of parchment paper. The breaded tenders benefit from resting for 5 to 10 minutes before frying. This brief resting period allows the coating to hydrate slightly and bond to the chicken surface, which means it will hold together beautifully in the hot oil instead of falling off in pieces.
- Repeat with the remaining chicken pieces.
Step 5: Heat the Oil
- Pour enough vegetable or canola oil into your cast iron skillet or heavy-bottomed pan to reach a depth of about 2 inches (5cm).
- Heat the oil over medium-high heat until it reaches 350°F to 375°F (175°C to 190°C). Use an instant-read or candy thermometer to verify the temperature. If you don’t have a thermometer, drop a pinch of flour into the oil. If it sizzles immediately and floats to the surface, the oil is ready.
- Do not rush this step. Oil that is not hot enough will absorb into the breading instead of crisping it, resulting in soggy, greasy tenders.
Step 6: Fry the Chicken Tenders
- Gently lower 4 to 5 chicken tenders into the hot oil using tongs. Do not overcrowd the pan. Adding too many pieces at once drops the oil temperature dramatically, which leads to uneven cooking and a soft crust.
- Fry the tenders for 3 to 4 minutes on the first side, until deep golden brown.
- Flip each tender using tongs and fry for another 3 to 4 minutes on the second side.
- To confirm doneness, use your instant-read thermometer to check that the thickest part of each tender has reached an internal temperature of 165°F (74°C).
- Remove the finished tenders from the oil and place them on a wire rack set over a baking sheet. Do not place them directly on paper towels for more than a minute or two, as this traps steam and softens the underside of the crust.
- Repeat the process with the remaining tenders in batches, allowing the oil to return to temperature between each batch.
Step 7: Season and Serve
- As soon as the tenders come out of the oil and are resting on the wire rack, give them a light sprinkle of fine salt. The surface is still hot and slightly moist from frying, which allows the salt to adhere and season the crust perfectly.
- Allow them to rest for 2 to 3 minutes before serving. This brief rest lets the juices redistribute inside the chicken and allows the crust to fully set and firm up.
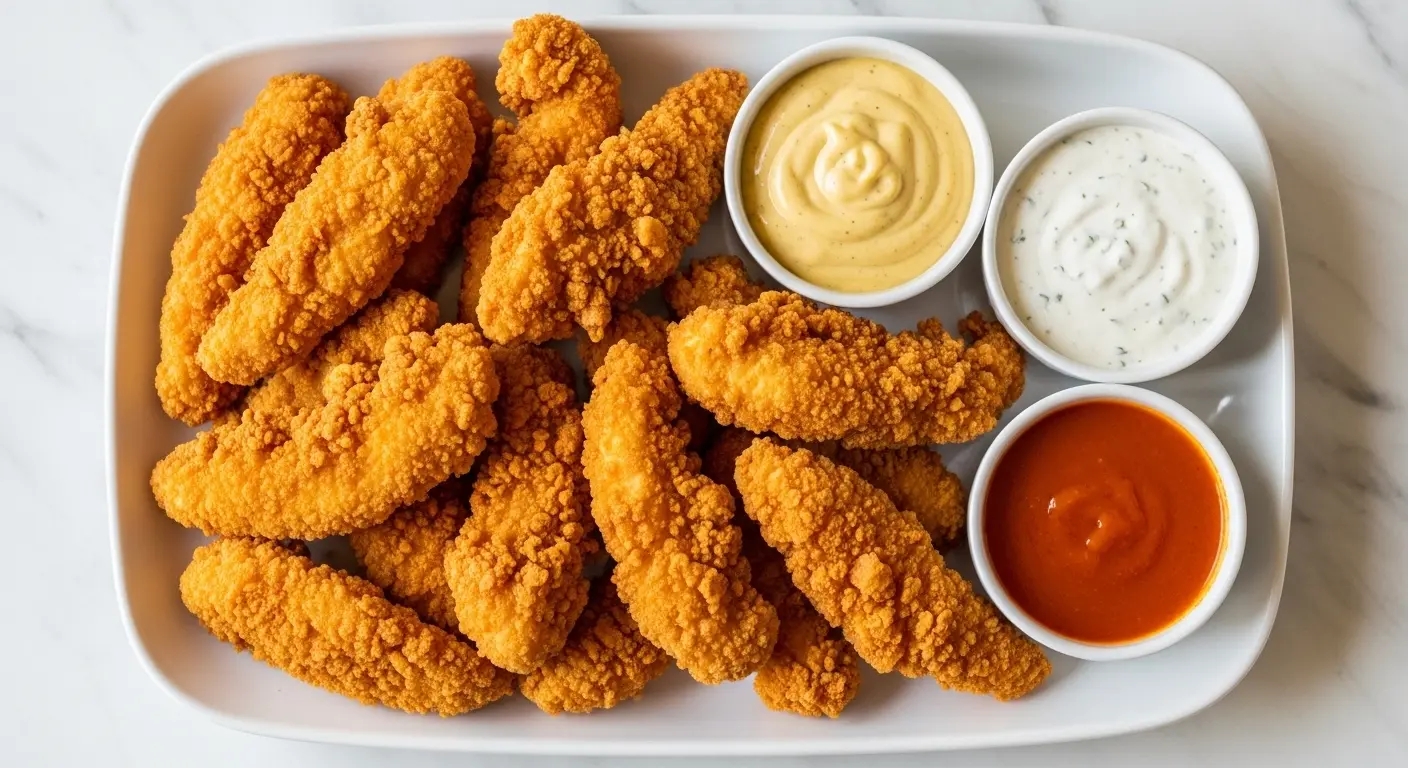
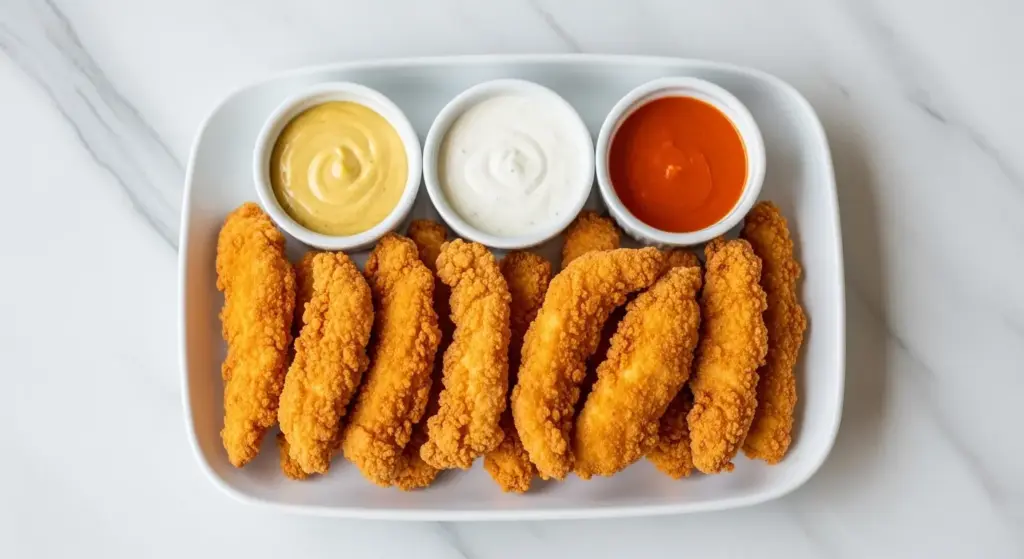
- Serve immediately with your favorite dipping sauces.
These tenders pair beautifully with a warm side of Buttermilk Biscuits for a truly comforting Southern-style meal.
Tips for Success
These practical tips come from the details that separate good chicken tenders from genuinely great ones. None of them require any extra ingredients or equipment, just a small shift in how you approach each step.
- Marinate for at least 30 minutes, but longer is better. The buttermilk needs time to work its way into the meat. A quick 30-minute soak is the minimum, but 4 to 8 hours produces noticeably juicier, more flavorful results.
- Press the breading firmly. This is the most common mistake in homemade breaded chicken. Lightly dipping the chicken in flour produces a thin, fragile coating. Pressing hard on all sides creates a thick, even crust that stays on through the entire frying process.
- Rest the breaded tenders before frying. Five to ten minutes on the counter gives the flour coating time to hydrate and bind to the surface, preventing it from separating in the hot oil.
- Use a thermometer. Oil temperature is everything in frying. At 350°F to 375°F (175°C to 190°C), the outside crisps before the oil can soak in. Too low, and the tenders become greasy. Too high, and the exterior burns before the interior is cooked through.
- Fry in small batches. Four to five tenders at a time is ideal for a 10-inch pan. Overcrowding drops the oil temperature too quickly.
- Rest on a wire rack, not paper towels. The rack allows air to circulate underneath, keeping the crust crispy on all sides.
- Season immediately after frying. Salt sticks best to a freshly fried, still-hot surface.
For another great weeknight chicken option, try this Air Fryer Chicken Breast Recipe.
Serving Suggestions
Chicken tenders are one of the most versatile proteins you can put on the table. They shine as a standalone meal with dipping sauces, but they also transform easily into something more elaborate.
Classic dipping sauces like honey mustard, ranch, barbecue, and buffalo sauce are the obvious crowd-pleasers, but don’t overlook fun options like Comeback Sauce, Bang Bang Sauce, or a simple honey butter for the kids.
- Serve alongside Creamy Coleslaw and dipping sauce for a classic fast-food-style spread at home
- Slice and lay over a chopped salad with ranch dressing and shredded cheddar
- Tuck into a brioche bun with pickles and honey mustard for a quick chicken sandwich
- Serve with Air Fryer French Fries and Garlic Mashed Potatoes
- Wrap in a flour tortilla with avocado, salsa, and sour cream for a quick chicken wrap dinner
- Lay over mac and cheese for the ultimate comfort food plate
- Cut into bite-size pieces and serve on a party platter with a trio of dipping sauces
Variations to Try
Once you have the base recipe down, it’s incredibly easy to change up the flavor profile. The buttermilk marinade and breading formula stays the same; it’s just the seasoning additions that shift.
- Spicy Nashville-Style: Add 1 tablespoon of cayenne to the flour mixture and brush the finished tenders with a mix of 3 tablespoons of hot frying oil, 1 teaspoon of cayenne, 1/2 teaspoon of brown sugar, and 1/2 teaspoon of garlic powder.
- Honey Garlic: After frying, toss warm tenders in a sauce made from 3 tablespoons of honey, 2 cloves of minced garlic, and 1 tablespoon of soy sauce.
- Parmesan Herb: Add 1/4 cup (25g) of finely grated Parmesan to the flour mixture along with 1 teaspoon of Italian seasoning and 1/2 teaspoon of dried basil.
- Panko-Crusted (Extra Crispy): Replace the seasoned flour coating with a mixture of panko breadcrumbs and the same seasoning blend. Panko produces a dramatically crunchier, more textured crust.
- Air Fryer Version: Coat the breaded tenders lightly with cooking spray and air fry at 400°F (200°C) for 10 to 12 minutes, flipping halfway. This delivers a lighter result with significantly less oil.
- Baked Version: Place breaded tenders on a wire rack over a baking sheet, spray with cooking spray, and bake at 425°F (220°C) for 18 to 20 minutes until golden.
- Gluten-Free: Substitute the all-purpose flour with a 1:1 gluten-free flour blend and use gluten-free panko breadcrumbs for the coating.
Read Also: Air Fryer Chicken Parmesan Recipe
Storage and Reheating
Leftover chicken tenders store well and reheat beautifully when done correctly. The key is avoiding the microwave, which turns a crispy crust into a soggy, steamed coating within seconds.
- Refrigerator: Store cooled tenders in an airtight container, with a piece of parchment between layers to prevent sticking. They will keep well for up to 3 days.
- Freezer: Arrange fully cooled tenders on a baking sheet in a single layer and freeze for 1 hour until solid. Transfer to a zip-lock bag and freeze for up to 2 months.
- Oven Reheat (best method): Place tenders on a wire rack over a baking sheet and reheat in a 400°F (200°C) oven for 8 to 10 minutes from refrigerated, or 18 to 22 minutes from frozen. They come out nearly as crispy as fresh.
- Air Fryer Reheat: Air fry at 375°F (190°C) for 4 to 5 minutes from refrigerated. This method restores the crunch beautifully and is much faster than the oven.
- Avoid the microwave: Microwave heating produces steam that softens the breading completely and leaves the chicken rubbery.
Another great use for leftover tenders is this Chicken Casserole Recipe.
Nutritional Facts
The following values are per serving of approximately 3 to 4 tenders (roughly 4 oz / 113g of cooked chicken with breading), based on pan-frying in vegetable oil. Exact values will vary depending on how much oil is absorbed during frying.
- Calories: approximately 310 to 340 kcal
- Protein: 28 to 30g
- Total Fat: 12 to 15g
- Saturated Fat: 2 to 3g
- Carbohydrates: 22 to 25g
- Fiber: 1g
- Sugars: 1g
- Sodium: 480 to 520mg
- Cholesterol: 95 to 105mg
Note: Baked or air fryer versions of this recipe will have significantly lower fat content (typically 5 to 7g of total fat per serving) compared to the pan-fried version. Opting for the air fryer or oven method can reduce total calories by 80 to 120 calories per serving.
For a lighter protein-packed meal, this Healthy Chicken Salad Recipe is a wonderful option.
Health Benefits of Key Ingredients
Chicken tenders are more than just a comforting meal. When made at home with whole ingredients, they also deliver real nutritional value.
The star of the show is, of course, the chicken itself. Chicken breast and tenderloin are among the leanest animal proteins available, packing around 28 to 30 grams of protein per 4-ounce serving with relatively low fat.
- Chicken Tenderloins: Rich in high-quality complete protein, which supports muscle maintenance, immune function, and satiety. They are also a good source of selenium, phosphorus, and B vitamins including niacin (B3) and B6, all of which play key roles in energy metabolism.
- Buttermilk: Contains live cultures and probiotics in some varieties, supporting gut health. It’s also a source of calcium and phosphorus for bone health.
- Garlic Powder: Derived from garlic, which contains allicin, a compound studied for its antioxidant and anti-inflammatory properties. Garlic has also been linked to cardiovascular health benefits.
- Smoked Paprika: Made from dried red peppers, paprika is a meaningful source of vitamins A and E, both of which function as antioxidants that help protect cells from oxidative damage.
- Eggs: Provide additional complete protein and are one of the few dietary sources of choline, a nutrient essential for brain health and liver function.
Another nutritious chicken dish to add to your rotation is this Chicken Soup Recipe.
Frequently Asked Questions
1. Can I use chicken breasts instead of chicken tenderloins?
Yes, absolutely. Boneless skinless chicken breasts work perfectly in this recipe. Simply slice them lengthwise into strips approximately 1 inch (2.5cm) thick, making sure to cut against the grain of the meat.
Cutting against the grain shortens the muscle fibers, which makes the cooked chicken noticeably more tender than if you were to slice with the grain.
2. How long should I marinate the chicken in buttermilk?
The minimum is 30 minutes, but for the best results, aim for at least 4 hours. Overnight marinating (up to 24 hours) produces the most deeply flavored and tender results.
If you’re short on time, even a quick 30-minute soak is significantly better than skipping the marinade step altogether. The buttermilk begins breaking down the surface proteins almost immediately.
3. Can I make these ahead of time?
Yes, in two ways. First, you can marinate the chicken up to 24 hours in advance and keep it covered in the refrigerator until ready to bread and fry. Second, you can fully cook the tenders, cool them completely, and freeze them for up to 2 months.
Reheat frozen tenders directly in the oven at 400°F (200°C) for 18 to 22 minutes, or in the air fryer at 375°F (190°C) for 6 to 8 minutes.
4. Why is my breading falling off during frying?
There are a few common causes. The chicken may not have been dried properly before going into the buttermilk, or the breaded tenders were placed in the oil before resting long enough for the coating to bond.
Make sure to pat the raw chicken dry, press the flour coating on firmly, and let the breaded tenders sit for at least 5 to 10 minutes before they go into the oil. Also ensure the oil is at the correct temperature: 350°F to 375°F (175°C to 190°C).
5. What oil is best for frying chicken tenders?
Any neutral-flavored oil with a high smoke point works well. Vegetable oil and canola oil are the two most commonly used options because they’re affordable, widely available, and handle frying temperatures well without imparting any flavor to the chicken.
Avoid using olive oil for deep frying. Its lower smoke point means it breaks down at frying temperatures, which can impart a bitter flavor and produce more smoke in your kitchen.
For an easy dipping option to serve alongside these tenders, this Buffalo Sauce Recipe is a quick favorite.
Final Thoughts
A great chicken tenders recipe is one of those timeless home cooking staples that earns its place in the regular rotation. This buttermilk-marinated, perfectly seasoned version delivers everything you love about restaurant tenders, but with the added satisfaction of having made it yourself from scratch.
The steps are simple, the ingredients are accessible, and the result is something genuinely impressive.
Give this recipe a try this week and taste the difference that a proper marinade and the right technique can make. If you do, leave a comment below to let me know how it turned out, and feel free to share your favorite dipping sauce combinations!
Recommended:
- Southern Fried Chicken Recipe
- Chicken Fajita Recipe
- BBQ Sauce Recipe
- Honey Butter Recipe
- Chicken Tortilla Soup Recipe
- Classic Chicken Parmesan Recipe
- Chicken and Broccoli Recipe
- Air Fryer French Fries Recipe
- Yum Yum Sauce Recipe
- Garlic Mashed Potatoes Recipe


