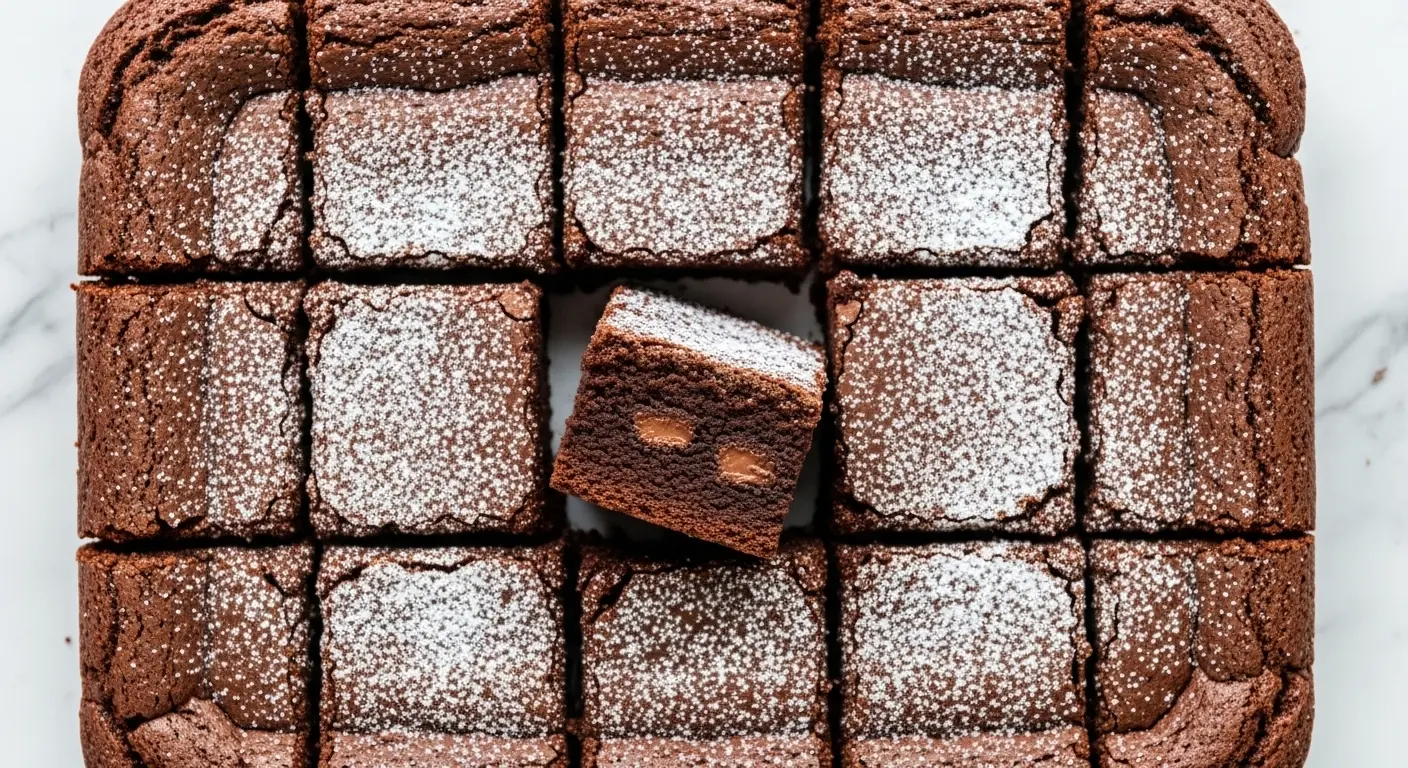
If you have been searching for the ultimate fudge brownie recipe, this is the one you want to bookmark. These brownies are thick, dense, and packed with deep chocolate flavor that hits different from anything boxed.
Made with real butter, quality cocoa, and melted chocolate, they deliver that iconic shiny, crinkly top and a gooey center that stays fudgy for days.
This is not a cakey brownie. The ratio of fat to flour is intentionally high, and the mixing method is kept simple to avoid developing too much gluten, which is what keeps every bite dense and moist.
One bowl, pantry staples, and about 40 minutes of your time. That is all it takes.
If you love baking with chocolate, you might also enjoy this Moist Chocolate Cake Recipe for another indulgent chocolate treat.
Why You’ll Love This Fudge Brownie Recipe
This fudge brownie recipe earns a permanent spot in your baking rotation for a reason.
The combination of melted butter, brown sugar, and cocoa powder creates a batter that bakes up with that coveted glossy, papery top, a hallmark of truly great brownies.
You get maximum chocolate flavor with minimal effort.
Everything comes together in one bowl, which means less cleanup and more time enjoying the results.
The texture is the real star here: firm on the outside, fudgy and dense at the center, with the kind of chew that keeps you reaching for another piece.
These brownies also keep beautifully, staying moist and flavorful for several days at room temperature.
- One-bowl recipe with minimal cleanup
- Uses both cocoa powder and melted chocolate for deep, complex flavor
- Produces that iconic crinkly, shiny top every single time
- Dense and fudgy center, never cakey
- Ready in under an hour from start to finish
- Easily customizable with mix-ins like walnuts or chocolate chips
- Keeps well at room temperature for up to 4 days
For another easy crowd-pleaser, check out this Brownie Pudding Recipe that uses similar pantry ingredients.
Ingredients
Good brownies start with quality ingredients. The fat content matters here, so do not substitute the butter or skip the chocolate.
- 1 cup (225g) unsalted butter
- 8 oz (225g) dark chocolate (60-70% cacao), chopped or use baking chips
- 1 ½ cups (300g) granulated sugar
- ½ cup (110g) packed light brown sugar
- 4 large eggs, room temperature
- 2 teaspoons pure vanilla extract
- 1 cup (125g) all-purpose flour
- ½ cup (45g) Dutch-process cocoa powder
- 1 teaspoon fine sea salt
- Optional: 1 cup (170g) semi-sweet chocolate chips or chopped walnuts for mix-ins
For more chocolate-forward desserts, take a look at this Hot Fudge Cake Recipe that is just as rich and satisfying.
Kitchen Equipment Needed
You do not need anything fancy to make these, but a few key tools will make the process smoother and your results more consistent.
- 9×13 inch metal baking pan
- Large heatproof mixing bowl
- Medium saucepan (for double boiler method)
- Whisk
- Rubber spatula
- Parchment paper
- Toothpick or cake tester
- Kitchen scale (recommended for accuracy)
- Cooling rack
Read Also: Hot Fudge Sauce Recipe
Recommended Products for This Recipe
These are products I genuinely recommend based on quality and how much they improve your baking results.
1. Ghirardelli Semi-Sweet Chocolate Baking Bars
High-quality chocolate makes an enormous difference in brownies. Ghirardelli baking bars melt smoothly and have a clean, rich cocoa flavor that elevates the entire recipe without any waxy aftertaste. Use these in place of grocery store chocolate chips for noticeably better results.
2. Rodelle Dutch-Process Cocoa Powder
Dutch-process cocoa is alkalized, which gives it a darker color and a smoother, less bitter flavor compared to natural cocoa. Using it here deepens the chocolate intensity and contributes to that gorgeous dark color in the finished brownies.
3. USA Pan 9×13 Metal Baking Pan
This pan heats evenly and the light-colored metal prevents over-browning on the edges. Darker pans can cause the sides to cook faster than the center, resulting in uneven brownies. This is a workhorse pan that will serve you well for years.
4. OXO Good Grips Kitchen Scale
Weighing your ingredients rather than using cup measurements is the single best thing you can do for consistent baking results. Too much flour is the most common reason brownies turn out cakey instead of fudgy, and a scale eliminates that guesswork entirely.
You might also enjoy: The Original Fantasy Fudge Recipe
Step-by-Step Instructions
1. Prepare Your Pan and Preheat the Oven
- Preheat your oven to 350°F (175°C). If your oven runs hot, go with 325°F (165°C) to prevent the edges from overcooking.
- Cut a piece of parchment paper large enough to line the bottom and hang over the two long sides of your 9×13 inch pan. This creates handles that make lifting the brownies out clean and easy.
- Lightly grease the two short sides of the pan that are not covered by parchment.
- Set the pan aside while you prepare the batter.
2. Melt the Butter and Chocolate
- Fill a medium saucepan with about 2 inches (5cm) of water and bring it to a gentle simmer over medium-low heat.
- Place your large heatproof mixing bowl on top of the saucepan, making sure the bottom of the bowl does not touch the water. This creates a double boiler.
- Add the 1 cup (225g) of unsalted butter and the 8 oz (225g) of chopped dark chocolate to the bowl.
- Stir frequently with a rubber spatula until both are fully melted and the mixture is smooth and glossy, about 4 to 6 minutes.
- Remove the bowl from heat and allow the chocolate mixture to cool slightly for about 5 minutes. It should be warm but not hot to the touch. Adding eggs to very hot chocolate will scramble them.
3. Whisk in the Sugars
- Add the 1 ½ cups (300g) of granulated sugar and the ½ cup (110g) of packed light brown sugar to the warm chocolate mixture.
- Whisk vigorously for about 1 to 2 minutes until the sugars are fully incorporated.
- The mixture will look grainy at first, which is normal. Keep whisking until it becomes smooth and slightly thickened.
- The brown sugar adds moisture and a hint of molasses flavor that contributes to the fudgy, chewy texture.
4. Add the Eggs and Vanilla
- Add the 4 large eggs to the batter one at a time, whisking well after each addition.
- Adding them one at a time ensures they fully emulsify into the batter, which helps develop that shiny, crinkly top.
- Add the 2 teaspoons of pure vanilla extract and whisk to combine.
- After all the eggs are in, whisk the batter for an additional 30 seconds until it looks glossy and slightly thickened. This step is key for that papery top crust.
5. Fold in the Dry Ingredients
- Add the 1 cup (125g) of all-purpose flour, the ½ cup (45g) of Dutch-process cocoa powder, and the 1 teaspoon of fine sea salt to the bowl.
- Using a rubber spatula, fold the dry ingredients into the wet mixture using slow, deliberate strokes.
- Fold just until no streaks of flour remain. Do not overmix. Overmixing develops gluten, which makes brownies cakey and tough rather than fudgy.
- If you are using mix-ins like chocolate chips or walnuts, fold them in now with a few gentle strokes.
6. Pour the Batter into the Pan
- Pour the batter into your prepared 9×13 inch pan.
- Use the rubber spatula to spread it into an even layer, reaching all four corners.
- Tap the pan gently on the countertop two or three times to release any large air bubbles.
- If desired, sprinkle a few extra chocolate chips or a pinch of flaky sea salt on top for presentation.
7. Bake the Brownies
- Place the pan on the center rack of your preheated oven.
- Bake for 25 to 30 minutes, or until a toothpick inserted into the center comes out with moist crumbs, not wet batter.
- The key distinction here: wet batter on the toothpick means they need more time, but a few moist crumbs are exactly what you want. A completely clean toothpick usually means the brownies are overbaked.
- The edges will look set and the center may still have a very slight jiggle, which is perfect.
- Start checking at the 23-minute mark since ovens vary, and overbaked brownies lose their fudgy quality quickly.
8. Cool Before Slicing
- Remove the pan from the oven and place it on a cooling rack.
- Allow the brownies to cool completely in the pan before lifting them out using the parchment paper overhang.
- This step is non-negotiable if you want clean, fudgy slices. Cutting brownies while warm causes them to crumble and the texture is gooey rather than properly set.
- Allow at least 1 hour of cooling time at room temperature, or for the cleanest slices, refrigerate for 30 minutes after the initial cool down.
- Lift the entire slab out onto a cutting board and slice into squares using a sharp knife. For the cleanest cuts, wipe the blade with a damp cloth between each slice.
Another favorite: Chocolate Pudding Recipe
Tips for Success
A few small details make a big difference between good brownies and truly exceptional ones. Keep these in mind every time you bake this recipe.
- Use room temperature eggs. Cold eggs can cause the melted chocolate and butter mixture to seize slightly. Set your eggs out on the counter for about 30 minutes before you start baking.
- Do not skip the cooling step. Brownies firm up significantly as they cool. Cutting them warm almost always results in a messy, crumbly slice.
- Use a metal pan, not glass. Glass baking dishes retain heat differently and often result in overcooked edges and an underdone center.
- Weigh your flour. Scooping flour with a cup measure compresses it, and too much flour is the top reason homemade brownies end up dry and cakey.
- Whisk the eggs in well. The air beaten into the eggs with the sugar is what creates that beautiful shiny top. Do not rush this step.
- Know your oven. Most residential ovens run 10 to 25 degrees hotter or cooler than indicated. An oven thermometer is a worthwhile investment if you bake regularly.
Read Also: Best Chocolate Chip Cookies Recipe
Serving Suggestions
These brownies are stunning on their own, but pairing them thoughtfully takes the experience up a notch.
A cold glass of whole milk is the classic companion for a reason, the fat in the milk balances the richness of the chocolate perfectly.
Warm a brownie square briefly in the microwave and serve it topped with a generous scoop of vanilla ice cream and a drizzle from this Hot Fudge Sundae for a restaurant-worthy dessert at home.
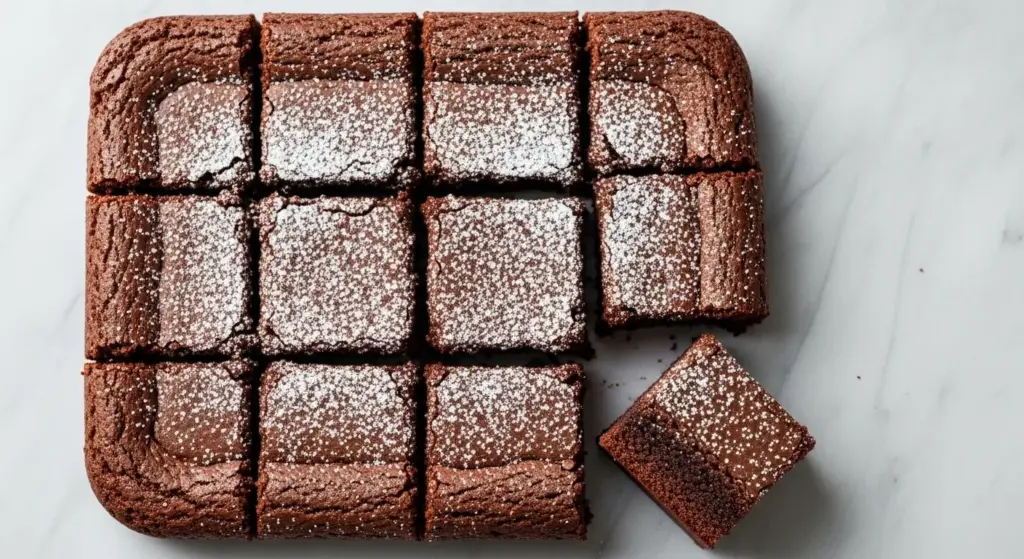
- Dust with powdered sugar for an elegant, simple presentation
- Top with Hot Fudge Sauce and crushed nuts for a decadent sundae bar option
- Pair with a scoop of vanilla, coffee, or salted caramel ice cream
- Serve alongside a warm mug of Hot Chocolate for the ultimate chocolate overload experience
- Crumble a brownie over a parfait with whipped cream and fresh raspberries
- Add to a dessert board alongside other sweet bites for a gathering
This pairs beautifully with a Chocolate Pudding layered in a trifle for an impressive make-ahead dessert.
Variations to Try
Once you have the base recipe down, it is fun to experiment. Here are some well-loved variations that work beautifully with this batter.
- Salted Caramel Brownies: Swirl 3 to 4 tablespoons of thick caramel sauce into the top of the batter just before baking, then sprinkle with flaky sea salt.
- Peanut Butter Swirl Brownies: Warm ¼ cup of creamy peanut butter until it is pourable, then dollop it over the batter and swirl with a toothpick.
- Walnut Brownies: Fold in 1 cup (120g) of roughly chopped toasted walnuts for crunch and a nutty depth of flavor that pairs beautifully with dark chocolate.
- Espresso Brownies: Add 1 teaspoon of instant espresso powder to the dry ingredients. It does not add a coffee flavor but dramatically amplifies the chocolate.
- Mint Chocolate Brownies: Add ½ teaspoon of pure peppermint extract along with the vanilla for a refreshing mint-chocolate combination.
- Triple Chocolate Brownies: Fold in both semi-sweet and white chocolate chips along with the batter for three layers of chocolate in every bite.
Read Also: Chewy Chocolate Chip Cookies Recipe
Storage and Reheating
These brownies keep very well, which makes them ideal for baking ahead of time.
Store them properly to maintain that perfect fudgy texture for as long as possible.
- Room temperature: Store in an airtight container at room temperature for up to 4 days. Place a sheet of parchment between layers to prevent sticking.
- Refrigerator: Wrap tightly and refrigerate for up to 1 week. The cold will firm them up, which many people actually prefer.
- Freezer: Wrap individual squares in plastic wrap and place in a freezer-safe bag. They freeze beautifully for up to 3 months.
- Thawing: Transfer frozen brownies to the countertop for 1 to 2 hours, or overnight in the refrigerator.
- Reheating: Microwave a brownie square for 15 to 20 seconds to restore that warm, gooey texture. Add 5-second intervals if needed, but be careful not to overheat or the texture will toughen.
You might also enjoy: Mug Cake Recipe
Nutritional Facts
The following nutritional information is an estimate per serving, based on 24 brownies cut from a 9×13 pan. Values will vary depending on mix-ins and specific brands used.
| Nutrient | Per Serving |
|---|---|
| Calories | 230 kcal |
| Total Fat | 13g |
| Saturated Fat | 8g |
| Cholesterol | 55mg |
| Sodium | 95mg |
| Total Carbohydrates | 28g |
| Dietary Fiber | 1.5g |
| Total Sugars | 21g |
| Protein | 3g |
| Iron | 1.5mg |
| Calcium | 20mg |
Note: Nutrition values are estimates calculated using standard ingredient databases and may vary with specific brands or optional add-ins.
This recipe is also a great base for variations like the layered Checkerboard Cake Recipe if you want to get creative with chocolate and vanilla combinations.
Health Benefits of Key Ingredients
These brownies are an indulgence, but a few of the core ingredients do bring some real nutritional value to the table.
Dark chocolate and cocoa powder are both worth noting for their contribution beyond just great flavor.
- Dark Chocolate (60-70% cacao): Rich in antioxidants called flavanols, dark chocolate has been associated with improved blood flow and reduced inflammation when consumed in moderate amounts. It also provides small amounts of iron, magnesium, and zinc.
- Cocoa Powder: Dutch-process cocoa retains many of the same flavanols found in whole cacao. It is also a source of fiber and minerals like manganese and copper, which support bone health and energy metabolism.
- Eggs: A powerhouse of complete protein, eggs provide all nine essential amino acids. They also supply choline, a nutrient important for brain health and cell membrane function.
- Butter: Provides fat-soluble vitamins like Vitamin A, D, E, and K2 when sourced from grass-fed cows. The fat also helps carry flavor compounds and contributes to the rich, fudgy texture.
- Walnuts (optional): If you add walnuts, you get a dose of omega-3 fatty acids, which support heart and brain health, along with additional protein and fiber.
Read Also: Easy Chocolate Cake Recipe
Frequently Asked Questions
1. Why are my brownies cakey instead of fudgy?
The most common culprits are too much flour or too many eggs. Make sure you are measuring your flour by weight, or if using cups, spoon the flour into the cup and level it off rather than scooping directly. Using 4 eggs rather than adding an extra egg also helps keep the texture dense.
Overmixing after the flour is added can also develop too much gluten, which creates a more bread-like or cakey texture. Fold gently and stop as soon as no flour streaks remain.
2. How do I know when my brownies are done baking?
The toothpick test is the most reliable method, but the goal here is different from cake. Insert a toothpick into the center of the pan. You want it to come out with moist, fudgy crumbs, not wet raw batter and not completely clean. A clean toothpick almost always means your brownies are overbaked.
The edges will look fully set and the top will have a papery, crinkled appearance. The very center can still have a very slight wobble when you gently shake the pan, and that is perfectly fine.
3. Can I use natural cocoa instead of Dutch-process cocoa?
You can, but there are differences. Natural cocoa is more acidic and has a sharper, fruitier chocolate flavor. Dutch-process cocoa has been treated to neutralize the acidity, resulting in a darker color and a smoother, deeper chocolate flavor that works especially well in fudge brownies.
If you only have natural cocoa on hand, the recipe will still work. Just be aware the color will be slightly lighter and the flavor will be a bit more intense and acidic.
4. Do I have to use both butter and melted chocolate, or can I just use one?
Both are important and serve different purposes in this recipe. Butter provides flavor and richness, and the water content in butter creates steam during baking that contributes to lift and texture. The melted chocolate provides concentrated chocolate flavor and additional fat that makes the brownies dense and fudgy.
Replacing the melted chocolate with more cocoa powder alone will give you a different texture and less complex flavor. For the best results, use both as written.
5. Can I make these in a different pan size?
Yes, but you will need to adjust the baking time. An 8×8 inch (20x20cm) pan will produce thicker brownies and may need 35 to 40 minutes. A 9×9 inch (23x23cm) pan is a middle ground. Always start checking early and rely on the toothpick method rather than the clock.
Avoid using a glass or ceramic baking dish if possible. Metal pans conduct heat more evenly and consistently, which is important for getting the edges and center to cook at the same rate.
This Cookie Skillet Recipe is another one to try if you love warm, gooey chocolate desserts baked in a single pan.
Final Thoughts
This fudge brownie recipe is one of those baking fundamentals that once you have it perfected, you will never need to buy a boxed mix again.
The combination of melted butter and dark chocolate creates a depth of flavor that simply cannot be replicated with shortcuts.
What makes this recipe stand out is the attention to technique: the way the eggs are whisked in, the type of cocoa used, and the restraint in mixing once the flour is added.
Every detail exists for a reason, and following them closely will reward you with brownies that look and taste like they came from a real bakery.
Give this recipe a try the next time you need a reliable, crowd-pleasing chocolate dessert, and share how they turned out in the comments below. Variations, tips, or serving ideas are always welcome. Happy baking!
Recommended:
- Brownie Pudding Recipe
- Hot Fudge Cake Recipe
- The Original Fantasy Fudge Recipe
- Chocolate Pudding Recipe
- Best Carrot Cake Recipe
- Easy Tiramisu Recipe
- Sticky Toffee Pudding Recipe
- Pumpkin Bar Recipe
- Toffee Recipe
- No Bake Cookie Recipe


