The original fantasy fudge recipe has been a beloved holiday staple for generations, and for good reason. This is the iconic recipe that once lived on the back of every Kraft Jet-Puffed Marshmallow Creme jar, the one your grandma made every December, the one that disappeared from goodie trays faster than anything else. Rich, silky, and deeply chocolatey, it delivers that perfect melt-in-your-mouth texture that no other fudge quite matches.
What makes this recipe so special is its simplicity. You need just a handful of pantry staples, a good heavy-bottomed pot, and about 20 minutes of active cooking time. The secret weapon is Jet-Puffed Marshmallow Creme, which creates an ultra-smooth, creamy base that prevents the grainy texture that plagues so many homemade fudge recipes.
This isn’t a fancy, trendy dessert. It’s a classic that has been made in millions of kitchens for decades, and it never gets old.
You might also enjoy: No Bake Cookie Recipe
Why You’ll Love This Original Fantasy Fudge Recipe
This recipe is as close to foolproof as candy-making gets.
Once you understand the basic technique of bringing the sugar mixture to the right temperature, the rest comes together almost effortlessly.
It makes a large batch, which is perfect for holiday gifting, potlucks, or family gatherings.
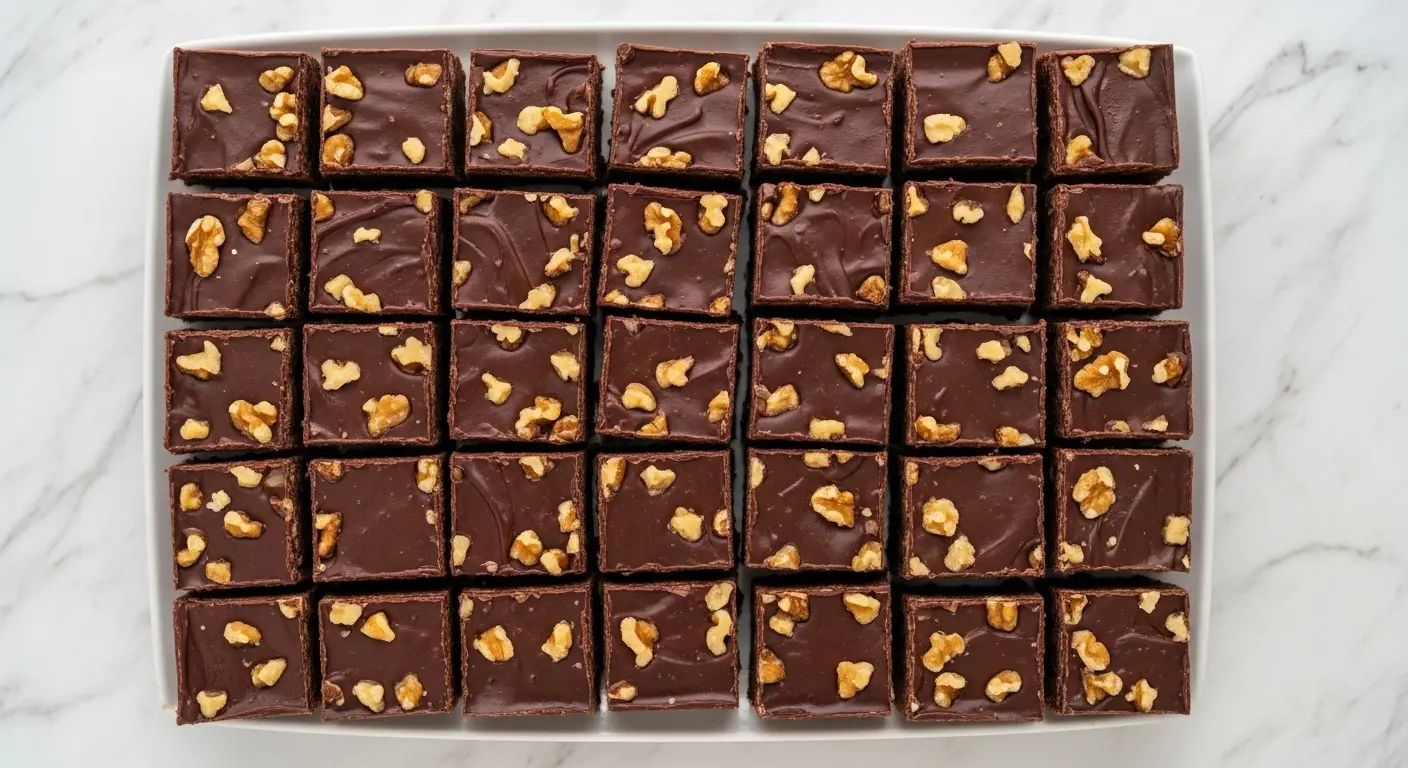
One standard 9×13-inch pan yields around 80 small squares, enough to fill several goodie boxes with ease.
The flavor is the kind of rich, nostalgic chocolate that people remember from childhood.
It hits that sweet spot between creamy and dense, with just enough chew to make each bite satisfying.
Here is why home bakers keep coming back to this recipe year after year:
- No candy thermometer required (mostly): If you boil for exactly 5 minutes on medium heat and stir constantly, the fudge will set up beautifully without needing a thermometer.
- Incredibly smooth texture: The marshmallow creme is the key to that velvety, non-grainy consistency that makes this recipe legendary.
- Uses simple ingredients: Sugar, butter, evaporated milk, chocolate chips, and marshmallow creme are easy to find at any grocery store.
- Great for gifting: The fudge cuts cleanly into neat squares and holds its shape well, making it ideal for packaging.
- Endlessly customizable: Add walnuts, swap in peanut butter chips, or swirl in caramel for a fun twist.
- Freezer-friendly: Make it weeks ahead and pull it out whenever you need a sweet treat.
Read Also: Fudge Brownie Recipe
Ingredients
The ingredient list is short and straightforward, but the quality of each item matters. Use real butter (not margarine) for the best results, since margarine’s higher water content can prevent the fudge from setting properly. Good-quality semi-sweet chocolate chips, like Ghirardelli or Toll House, will give you a much better flavor and smoother texture than off-brand chips.
- 3 cups (600g) granulated white sugar
- ¾ cup (170g) unsalted butter, cut into cubes
- ⅔ cup (160ml) evaporated milk (about ⅔ of a 12oz can)
- 12 oz (340g) semi-sweet chocolate chips
- 1 jar (7 oz / 200g) Jet-Puffed Marshmallow Creme
- 1 teaspoon (5ml) pure vanilla extract
- 1 cup (120g) chopped walnuts or pecans (optional)
Read Also: Hot Fudge Sauce Recipe
Kitchen Equipment Needed
You do not need any fancy equipment for this recipe, but having the right tools on hand will make the process much smoother, especially since you need to work quickly once the chocolate goes in. A heavy-bottomed saucepan is the most important piece of equipment here, as it distributes heat evenly and prevents the sugar from scorching on the bottom.
- Large heavy-bottomed saucepan (at least 3-quart capacity)
- Wooden spoon or heat-resistant silicone spatula
- Candy thermometer (optional but recommended for beginners)
- 9×13-inch baking pan (or 9×9-inch pan for thicker fudge)
- Parchment paper
- Measuring cups and spoons
- Offset spatula or rubber spatula for spreading
- Sharp knife for cutting
This pairs beautifully with parchment paper-lined pans for the easiest fudge release you have ever experienced.
Recommended Products for This Recipe
These are my top product picks for making this recipe based on quality and performance. Having the right ingredients and tools makes a real difference in getting that perfect, creamy result every time.
1. Ghirardelli Semi-Sweet Chocolate Chips
Ghirardelli chocolate chips melt smoothly and deliver a rich, deep chocolate flavor that elevates the final fudge well beyond what you get with generic chips. The quality of your chocolate is arguably the single most important factor in the finished texture and taste. If you want fudge that tastes truly exceptional, start here.
2. Kraft Jet-Puffed Marshmallow Creme (Pack of 4)
This is the original ingredient that makes Fantasy Fudge what it is. Stocking up with a multi-pack means you are ready to make multiple batches throughout the holiday season without an extra trip to the store. The creme creates a silky-smooth base that prevents grainy fudge every single time.
3. OXO Good Grips Silicone Spatula
Working quickly is essential once you pull the mixture off the heat, and this OXO silicone spatula handles high heat without warping or melting. It also scrapes every last bit of fudge out of the pot and into the pan, which matters when you are dealing with expensive chocolate.
4. ThermoPro Candy Thermometer
If you are new to candy-making, a candy thermometer takes the guesswork out of hitting the correct temperature (234°F / 112°C). Once you have made this recipe a few times, you may not need it, but for beginners, it is a reassuring tool that ensures the fudge sets properly.
Another great holiday treat to make alongside this fudge is the Buckeyes Recipe for a stunning chocolate and peanut butter candy tray.
Step-by-Step Instructions
Before you start, measure out all your ingredients and have them ready to go on the counter. Once the sugar mixture reaches the right temperature, you will need to add the remaining ingredients quickly, so there is no time to be searching for the vanilla extract or digging out the marshmallow creme jar.
Step 1: Prepare the Pan
- Line your 9×13-inch (23x33cm) baking pan with parchment paper, leaving several inches of overhang on both long sides so you can easily lift the fudge out later.
- Lightly spray the parchment with non-stick cooking spray to help it stay in place and to make the fudge release cleanly.
- Set the pan aside on a heat-safe surface near your stove, within easy reach for when the fudge is ready to pour.
Step 2: Combine Sugar, Butter, and Evaporated Milk
- Add the 3 cups (600g) of granulated sugar, ¾ cup (170g) of cubed unsalted butter, and ⅔ cup (160ml) of evaporated milk to your large, heavy-bottomed saucepan.
- Place the saucepan over medium to medium-high heat.
- Begin stirring immediately with a wooden spoon or silicone spatula, making sure to move continuously around the bottom and sides of the pot so the sugar does not stick or burn.
- Keep stirring steadily as the butter melts and the sugar begins to dissolve into the milk.
Step 3: Bring to a Full Rolling Boil
- Continue stirring and cooking over medium heat until the mixture comes to a full, rolling boil, meaning the entire surface is bubbling vigorously and it does not stop when you stir it.
- Do not rush this step by cranking up the heat. Medium heat allows the sugar to dissolve evenly and prevents scorching on the bottom of the pot.
- This initial heating phase typically takes 8 to 12 minutes, depending on your stovetop.
Step 4: Boil for Exactly 5 Minutes
- Once you have reached a full rolling boil, set a timer for exactly 5 minutes.
- Continue stirring constantly throughout the entire 5 minutes without stopping, scraping the bottom and sides of the pot as you go.
- If you are using a candy thermometer, you are aiming for 234°F (112°C), which is the soft-ball stage. This is the temperature at which the fudge will set up with the right creamy texture.
- Do not exceed 5 minutes of boiling, as overcooking is the number one cause of dry, crumbly, grainy fudge.
- The mixture will look thick and a deep caramel-tan color at this stage.
Step 5: Remove from Heat and Add Chocolate Chips
- As soon as the timer goes off (or the thermometer reads 234°F / 112°C), remove the saucepan from the heat immediately.
- Pour in the 12 oz (340g) of semi-sweet chocolate chips all at once.
- Stir vigorously and continuously. The mixture may look strange or grainy at first, as though the chocolate is seizing. This is normal. Keep stirring and it will come together into a smooth, glossy mixture.
- Stir until every chocolate chip is fully melted and no lumps remain, about 1 to 2 minutes of steady stirring.
Step 6: Stir in the Marshmallow Creme and Vanilla
- Add the entire 7 oz (200g) jar of Jet-Puffed Marshmallow Creme to the hot chocolate mixture.
- Add 1 teaspoon (5ml) of pure vanilla extract at the same time.
- Stir everything together until the marshmallow creme is fully incorporated and no white streaks remain. The fudge will look thick, shiny, and beautifully smooth.
- If you are adding walnuts or pecans, stir in 1 cup (120g) of chopped nuts at this point and fold them in gently until evenly distributed throughout the mixture.
Step 7: Pour into the Prepared Pan
- Working quickly, because the fudge will begin to thicken as it cools, pour the entire mixture into your prepared parchment-lined pan.
- Use an offset spatula or the back of your wooden spoon to spread the fudge evenly across the bottom of the pan and into the corners.
- Smooth the top as best you can. A few swirls and texture marks on top are totally fine and give the fudge a beautiful, handmade look.
- Do not bang or press the fudge down hard. Just spread gently.
Step 8: Cool Completely Before Cutting
- Allow the fudge to cool at room temperature for at least 3 hours, or until it is completely firm and set.
- For faster setting, place the pan in the refrigerator for 1 to 1.5 hours.
- Once fully set, use the parchment paper overhang to lift the entire slab of fudge out of the pan and onto a cutting board.
- Use a sharp knife to cut the fudge into 1-inch (2.5cm) squares, wiping the blade clean between cuts for the neatest edges.
- Arrange in a single layer or with parchment paper between layers in an airtight container for storing or gifting.
This technique is very similar to the method used in the Toffee Recipe if you want to try another classic candy-making project.
Tips for Success
Making this fudge successfully comes down to a few non-negotiable techniques. Mastering these will have you turning out perfect batches every single time with zero stress.
- Never rush the boil: Medium heat is the right heat. Turning it up to get to boil faster leads to scorched sugar and uneven cooking.
- Use a timer for the 5-minute boil: Seriously, set an actual timer. Guessing the time is the most common mistake people make, and even one extra minute can ruin the texture.
- Stir constantly the entire time: This is not a recipe where you can walk away. Continuous stirring prevents the sugar from crystallizing on the sides of the pot and from burning on the bottom.
- Have ingredients pre-measured and ready: Once you take the pot off the heat, you have about 3 to 5 minutes before the mixture starts to thicken. Pre-measuring everything ensures smooth assembly.
- Use real butter, not margarine: Butter has a lower water content than margarine, which helps the fudge set firmly with the right texture.
- Do not over-stir after adding the marshmallow creme: Stir just until smooth and combined. Over-mixing at this stage can make the fudge grainy and dense.
- Quality chocolate matters: A higher fat content in better-quality chocolate chips results in a smoother, creamier melt and better overall flavor.
Read Also: Bourbon Balls Recipe
Serving Suggestions

This original fantasy fudge is at its absolute best when served at room temperature, where the chocolate flavor really opens up and the texture is at its most creamy. Pull it out of the refrigerator about 15 minutes before you plan to serve it for the best experience.
It is a versatile treat that works beautifully in a number of settings and presentations. Consider these favorite ways to serve and present it:
- Holiday cookie and candy trays: Arrange fudge squares alongside Classic Deviled Eggs, cookies, truffles, and peanut brittle for a showstopping spread.
- Gift boxes: Layer squares with wax paper in a festive tin or box. This fudge ships and keeps beautifully.
- Dessert board: Pair fudge squares with shortbread cookies, dried fruit, and fresh berries for an elegant sweet spread.
- Over ice cream: Crumble or cube pieces of fudge and serve over vanilla ice cream with Hot Fudge Sundae toppings for a next-level dessert.
- After-dinner treat: Serve a small plate of fudge squares with coffee or tea as a simple, satisfying end to a meal.
- Bake sale star: Cut into slightly larger squares (1.5 inches) and wrap individually in small squares of parchment twisted at the ends. They always sell out first.
Variations to Try
Once you have mastered the original, it is easy and fun to experiment with different flavor profiles using this same tried-and-true base recipe. The method stays the same; only the mix-ins or swaps change.
- Peanut Butter Fantasy Fudge: Replace the semi-sweet chocolate chips with 12 oz (340g) of peanut butter chips for a rich, nutty variation that is just as creamy.
- Rocky Road Fudge: Stir in mini marshmallows and chopped almonds just before pouring into the pan for a fun, chunky texture.
- Mint Chocolate Fudge: Add ½ to 1 teaspoon of pure peppermint extract along with the vanilla for a cool, refreshing holiday twist.
- Dark Chocolate Fudge: Swap semi-sweet chips for dark chocolate chips (60% cacao or higher) for a more intense, bittersweet flavor.
- Swirled Caramel Fudge: Drizzle 2 to 3 tablespoons of caramel sauce over the top of the poured fudge and use a toothpick to swirl it in before it sets.
- Walnut and Cranberry Fudge: Replace the traditional walnuts with a mix of ½ cup walnuts and ½ cup dried cranberries for a festive, slightly tart contrast to the rich chocolate.
Another fun no-bake candy to try alongside this is the Muddy Buddy Recipe for a complete holiday treat lineup.
Storage and Reheating
This fudge stores wonderfully, which is one of the reasons it has always been so popular as a make-ahead holiday treat. Proper storage ensures it stays fresh, soft, and delicious for as long as possible.
- Room temperature: Store fudge in a single layer or with parchment paper between layers in an airtight container at room temperature for up to 1 week. Keep it away from heat sources or direct sunlight.
- Refrigerator: Transfer to an airtight container and refrigerate for up to 2 to 3 weeks. Place parchment or wax paper between layers to prevent sticking. Let fudge sit at room temperature for 10 to 15 minutes before serving for the best texture.
- Freezer: Wrap individual squares in plastic wrap, then place them in a zip-top freezer bag or airtight freezer container. Freeze for up to 2 months. Thaw overnight in the refrigerator, then bring to room temperature before serving.
- Do not reheat: Fudge is not typically reheated after it sets. If you want a gooier, warmer fudge experience, microwave a single piece for 10 seconds maximum.
For another freezer-friendly sweet treat, try the Cake Pop Recipe which also makes and stores beautifully for events.
Nutritional Facts
The following nutritional information is an estimate based on the recipe cut into approximately 80 one-inch squares.
| Nutrient | Per Serving (1 square, no nuts) |
|---|---|
| Calories | 75 kcal |
| Total Carbohydrates | 11g |
| Sugars | 10g |
| Total Fat | 3g |
| Saturated Fat | 2g |
| Protein | 0.5g |
| Sodium | 15mg |
| Cholesterol | 5mg |
| Fiber | 0.2g |
Note: Nutritional values are estimates based on standard ingredients and will vary depending on the specific brands used and exact serving size.
The traditional fudge recipe is an indulgent treat, best enjoyed in moderation as part of a balanced holiday spread. For another rich festive dessert with a different nutritional profile, try the Pumpkin Bar Recipe.
Health Benefits of Key Ingredients
While this original fantasy fudge is certainly a dessert and not a health food, a few of its key ingredients do bring some genuine nutritional value worth noting.
This recipe is rich in dark antioxidants from the semi-sweet chocolate. Chocolate made from quality cocoa beans contains flavanols, which are plant-based antioxidants linked to heart health and improved circulation when consumed in moderation.
Here is a closer look at the contributions of a few key ingredients:
- Semi-sweet chocolate chips: Provide flavanols (antioxidants), a modest amount of iron and magnesium, and the theobromine compound found in cocoa, which may support mood and energy.
- Evaporated milk: Contributes calcium, phosphorus, and vitamin D to the recipe, all of which support bone health. Using evaporated milk versus regular milk also gives the fudge a richer, more concentrated dairy flavor with less water.
- Butter: A source of fat-soluble vitamins A, D, E, and K2, along with butyrate, a short-chain fatty acid that may support gut health in small amounts.
- Walnuts (optional): If you add walnuts, you are getting omega-3 fatty acids, vitamin E, magnesium, and antioxidants, along with a satisfying crunch.
- Vanilla extract: Pure vanilla contains small amounts of vanillin, a naturally occurring antioxidant. It also adds flavor complexity without additional sugar.
For another dessert that offers some nutritional value alongside its indulgence, check out the Best Carrot Cake Recipe.
Frequently Asked Questions
1. Why did my fantasy fudge turn out grainy?
Grainy fudge is almost always the result of overcooking the sugar mixture or cooking at too high a heat.
The sugar crystals do not dissolve properly when cooked too fast or too long, which creates that sandy, gritty texture. Stick to medium heat and exactly 5 minutes of boiling, and also make sure you do not over-stir the fudge after adding the marshmallow creme, as excess agitation can also cause crystallization.
2. Can I use marshmallow fluff instead of marshmallow creme?
Yes, they are very similar and both work well in this recipe.
The primary difference is the production method, and marshmallow creme tends to produce a slightly silkier final texture while marshmallow fluff creates a slightly heavier fudge. Both will taste delicious, so use whichever you have available.
3. Why did my fudge not set up properly?
Fudge that does not set is usually caused by not cooking the sugar mixture long enough or to a high enough temperature.
The mixture needs to reach 234°F (112°C), the soft-ball stage, to set properly once cooled. If your fudge is still soft after several hours at room temperature, refrigerate it overnight and it may firm up enough to cut. In future batches, use a candy thermometer to verify the temperature.
4. Can I double this recipe?
Doubling is possible but tricky because a larger volume of hot sugar takes longer to come to temperature and can be harder to manage.
If you want a larger batch, it is much easier and more reliable to make two separate batches back-to-back rather than trying to cook a double batch in a single pot. This also gives you better control over the texture.
5. How do I get clean cuts when slicing the fudge?
The best approach is to let the fudge cool completely, then lift it out of the pan using the parchment paper overhang and place it on a cutting board.
Use a large, sharp chef’s knife and wipe the blade clean with a damp cloth between each cut. If the fudge is too soft to cut cleanly, refrigerate it for another hour before slicing. Scoring the top lightly with the knife before making full cuts also helps you get even, neat squares.
Read Also: Hot Fudge Cake Recipe
Final Thoughts
The original fantasy fudge recipe is one of those rare classics that truly does not need to be improved or reinvented.
It is simple, reliable, and produces the kind of rich, creamy chocolate candy that people genuinely get excited about every holiday season.
Whether you are making it for the first time or the fiftieth, the process is the same: good ingredients, steady stirring, and exactly five minutes of boiling.
The result is always worth it, a glossy, deeply chocolatey slab of fudge that sets up beautifully and tastes even better than you remember.
Give this recipe a try this holiday season and share it with the people you love most. If you make it, drop a comment below and let me know how it turned out, or share a photo of your batch. I would love to hear your fudge stories!
Recommended:
- Fudge Stripe Cookies Recipe
- Sugar Cookies Recipe
- Snickerdoodle Cookie Recipe
- Peanut Butter Cookie Recipe
- Oatmeal Cookie Recipe
- Gingerbread Cookie Recipe
- No Bake Cookie Recipe
- Peanut Butter Blossom Cookies Recipe
- Chewy Chocolate Chip Cookies Recipe
- Original Rice Krispie Treat Recipe


