
If you have ever wanted to bake a loaf of bread that looks like it came straight from a fancy bakery, this Dutch oven bread recipe is exactly what you need.
It is a no knead recipe, which means you do not need a stand mixer, special skills, or hours of hands on work. You simply mix a few ingredients together, let time do the heavy lifting, and then let your Dutch oven work its magic in the oven.
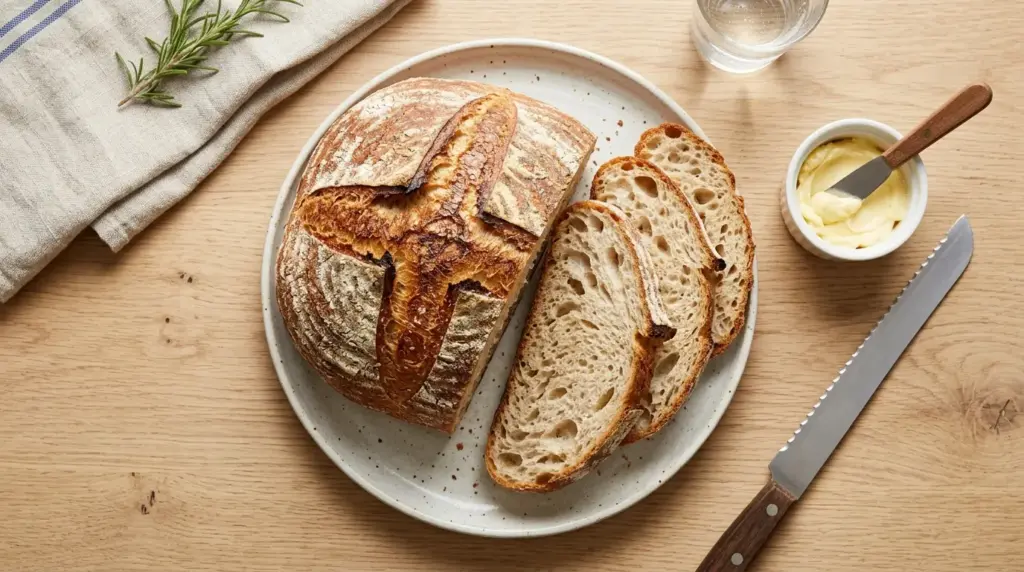
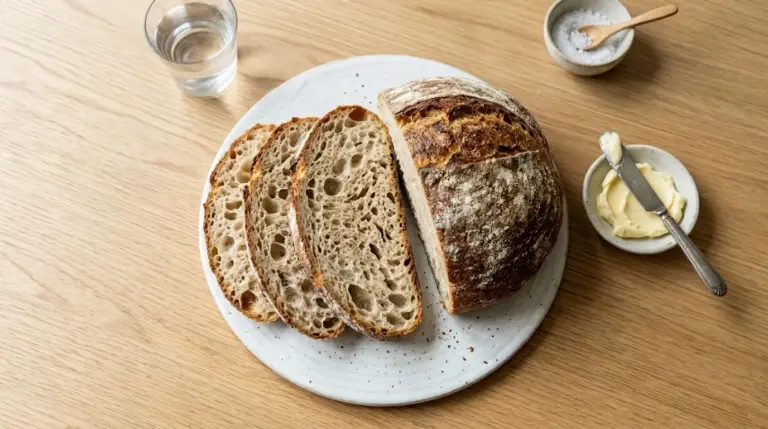
The result is a loaf with a crackly golden crust and a soft, airy interior full of those gorgeous big holes you usually only see in artisan bakery bread. The best part is that the ingredient list is short, the method is forgiving, and even a complete beginner can pull this off on the first try.
You might also enjoy: Dutch Oven Sourdough Bread Recipe

Why You’ll Love This Dutch Oven Bread Recipe
This bread checks every box you could want from a homemade loaf.
It is simple, it is reliable, and it makes your kitchen smell incredible while it bakes.
Here is why this recipe is going to become a regular in your kitchen:
- Only 5 minutes of hands on prep. There is no kneading, no stand mixer, and no fancy folding techniques required.
- Crispy, crackly crust. Baking inside a covered Dutch oven traps steam, which gives the loaf that bakery style crust everyone loves.
- Soft, chewy interior. The long rise time develops flavor and creates those big, beautiful air pockets inside the bread.
- Budget friendly ingredients. You likely already have flour, salt, yeast, and water in your pantry right now.
- Versatile for any meal. Serve it with soup, use it for sandwiches, or simply slather it with butter while it is warm.
This loaf pairs wonderfully with a bowl of garlic butter shrimp style flavors, since the bread is perfect for soaking up any extra sauce.
Ingredients
This recipe relies on basic pantry staples, which is part of what makes it so approachable for beginner bakers.
Each ingredient plays an important role, from building structure to creating that signature flavor and texture.
- All purpose flour, 480 g (4 cups), plus extra for dusting
- Instant or active dry yeast, 1 teaspoon
- Fine sea salt, 2 teaspoons
- Warm water, 480 ml (2 cups), about 100 to 110 degrees Fahrenheit (38 to 43 degrees Celsius)
- Cornmeal or extra flour for dusting the proofing surface
Read Also: Cinnamon Butter Recipe
Kitchen Equipment Needed
You do not need a lot of specialized equipment for this recipe, which is part of its charm.
A few key tools will make the process much smoother and help you get that perfect bakery style result.
- A large mixing bowl
- A wooden spoon or rubber spatula for stirring
- A Dutch oven with a lid, 5 to 7 quarts in size
- Plastic wrap or a clean kitchen towel for covering the dough
- A kitchen scale for accurate measurements
- Parchment paper for transferring the dough
- A sharp knife or bread lame for scoring the loaf
- Oven mitts, since the Dutch oven gets extremely hot
This same baking method works beautifully for whole wheat sourdough bread as well, so it is worth getting comfortable with the technique.
Recommended Products for This Recipe
These are a few products that genuinely make a difference when baking Dutch oven bread, based on quality and performance.
Investing in even one or two of these can take your bread baking up a notch.
1. Le Creuset Enameled Cast Iron Dutch Oven
A heavy enameled Dutch oven holds and distributes heat evenly, which is essential for achieving that deep golden crust without any scorched spots. The tight fitting lid traps steam efficiently, giving the bread its signature crackly exterior. It is also incredibly durable, so it will likely outlast many other kitchen tools you own.
2. Digital Kitchen Scale
Bread baking is much more consistent when ingredients are measured by weight rather than volume. A digital scale removes the guesswork from measuring flour, which can vary a lot depending on how it is scooped. This small investment leads to noticeably more consistent loaves.
3. Bread Lame for Scoring
A sharp bread lame allows you to score the dough cleanly right before baking, which helps control how the loaf expands in the oven. Clean scoring also gives the finished bread that classic artisan look with a beautiful open crumb. It is a small tool that makes a big visual difference.
4. Parchment Paper Sheets
Precut parchment sheets make it much easier to lift the sticky dough and lower it into a hot Dutch oven without burning your fingers. They also prevent the bottom of the loaf from sticking to the pot. This makes cleanup faster and the whole transfer process far less stressful.
If you love this style of baking, the sourdough discard bread recipe is another great one to try with similar equipment.

Step-by-Step Instructions
1. Mix the Dry Ingredients
- In a large mixing bowl, add the all purpose flour, instant yeast, and fine sea salt.
- Whisk these together until they are evenly combined, making sure the yeast and salt are distributed throughout the flour.
- This step ensures the yeast is spread evenly so the dough rises consistently in every section.
2. Add the Warm Water
- Pour the warm water into the bowl with the dry ingredients.
- Use a wooden spoon or rubber spatula to stir everything together until no dry flour remains visible.
- The dough will look shaggy, sticky, and rough, which is completely normal and expected for this style of bread.
- Do not worry about smoothing it out, since this is a no knead recipe and the dough is meant to stay rough textured at this stage.
3. Cover and Let the Dough Rise
- Cover the bowl tightly with plastic wrap or a damp kitchen towel.
- Place the bowl in a warm spot in your kitchen, away from direct drafts.
- Allow the dough to rise for 12 to 18 hours at room temperature.
- During this long rise, the dough will roughly double or triple in size and develop small bubbles on the surface, which is a sign that fermentation is working properly.
4. Shape the Dough
- Once the rise time is complete, generously dust a clean work surface with flour or cornmeal.
- Gently turn the dough out onto the floured surface using a spatula, being careful not to deflate too many of the air bubbles.
- With lightly floured hands, fold the edges of the dough toward the center a few times to form a rough ball shape.
- Place the shaped dough seam side down onto a piece of parchment paper.
5. Second Rest
- Cover the shaped dough loosely with the kitchen towel.
- Let it rest for 30 to 45 minutes while your oven preheats.
- This short rest allows the dough to relax and puff slightly before baking, which helps create a better rise in the oven.
6. Preheat the Dutch Oven
- About 30 minutes before baking, place your empty Dutch oven, with the lid on, into the oven.
- Preheat the oven to 450 degrees Fahrenheit (230 degrees Celsius) with the Dutch oven inside.
- Preheating the pot is essential, since a hot Dutch oven gives the dough an immediate burst of heat that helps it rise quickly once it goes in.
7. Score the Dough
- Carefully remove the hot Dutch oven from the oven using oven mitts.
- Using a sharp knife or bread lame, score the top of the dough with one or two shallow cuts.
- Scoring allows the bread to expand in a controlled way as it bakes, rather than cracking randomly along the sides.
8. Bake the Bread
- Using the parchment paper as a sling, carefully lower the dough into the preheated Dutch oven.
- Cover the pot with its lid and place it back in the oven.
- Bake covered for 30 minutes, which allows the trapped steam to create that crackly crust.
- After 30 minutes, remove the lid and continue baking for an additional 10 to 15 minutes, until the crust is deep golden brown.
9. Cool the Bread
- Once baked, carefully remove the Dutch oven from the oven and lift the bread out using the parchment paper.
- Transfer the loaf to a wire rack to cool.
- Let the bread cool for at least 30 minutes before slicing, since cutting too early can make the inside gummy as the loaf is still finishing its cooking process internally.
For another simple, no fuss recipe using the same hands off approach, check out this air fryer garlic bread made with crusty bread slices.
Tips for Success
A few small details can make a big difference between an average loaf and an outstanding one.
Keep these tips in mind as you work through the recipe.
- Use a kitchen scale for the flour, since measuring by volume can lead to too much or too little flour in the dough.
- Make sure your water is warm, not hot, since water that is too hot can kill the yeast and prevent the dough from rising properly.
- Do not skip the long rise time, since this is what builds flavor and structure in a no knead dough.
- Always preheat the Dutch oven fully before adding the dough for the best crust.
- Let the bread cool completely before slicing for the cleanest cuts and best texture.
Read Also: Gluten Free Sourdough Bread Recipe
Serving Suggestions
This bread is wonderfully versatile, which means it fits into almost any meal.
Here are some of our favorite ways to serve it.
- Slice it thick and serve alongside a bowl of Wild Rice and Mushroom Soup for dipping.
- Toast slices and top them with butter, honey, or jam for breakfast.
- Use it as the base for an open faced sandwich with cheese and roasted vegetables.
- Serve warm slices alongside a simple salad and olive oil for dipping.
- Cube leftover bread to make homemade croutons or a savory bread pudding.
Variations to Try
Once you have mastered the basic loaf, there is a lot of room to get creative.
These variations use the same base method with a few small tweaks.
- Herb and garlic bread. Add 1 tablespoon of dried herbs and 2 cloves of minced garlic to the dry ingredients before mixing.
- Cheese loaf. Fold in 1 cup of shredded cheddar or parmesan cheese after the first rise, before shaping.
- Whole wheat blend. Replace up to 1 cup of the all purpose flour with whole wheat flour for a heartier loaf.
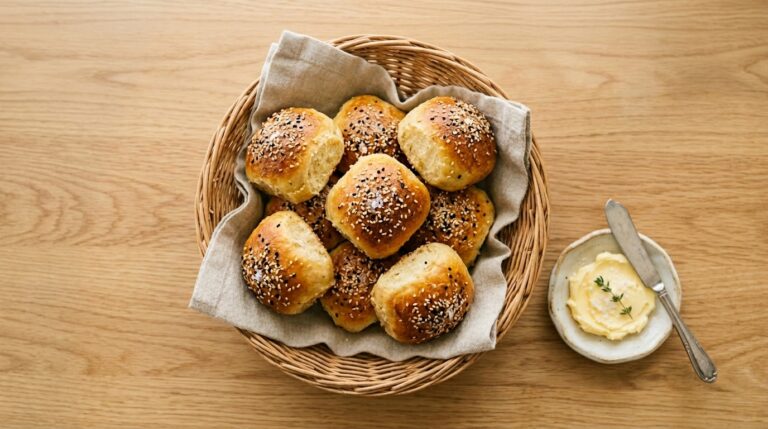
- Seeded crust. Brush the top of the shaped dough with water and sprinkle with sesame or poppy seeds before scoring.
- Olive bread. Gently fold in half a cup of chopped pitted olives during the shaping step.
Another favorite: Sourdough Discard Flatbread Recipe
Storage and Reheating
Proper storage keeps this bread tasting fresh for as long as possible.
Here is how to store and reheat your loaf.
- Store leftover bread at room temperature, wrapped in a clean kitchen towel or paper bag, for up to 2 days.
- Avoid storing fresh bread in plastic, since this traps moisture and softens the crust.
- For longer storage, slice the bread and freeze it in a freezer safe bag for up to 3 months.
- To reheat, warm slices in a toaster or in a 350 degree Fahrenheit (175 degree Celsius) oven for about 5 minutes.
- A whole loaf can be refreshed by sprinkling it with a little water and warming it in the oven for 10 minutes.
This same approach to freezing and reheating works great for Savory Bread Pudding made from leftover slices.
Nutritional Facts
This bread is naturally low in fat and made from simple, recognizable ingredients.
Below is an approximate breakdown per slice, based on a loaf cut into 12 slices.
- Calories: approximately 140 per slice
- Carbohydrates: approximately 29 g
- Protein: approximately 4 g
- Fat: approximately 0.5 g
- Sodium: approximately 290 mg
- Fiber: approximately 1 g
These values are estimates and will vary depending on exact measurements and any add ins used. If you enjoy lighter meals built around bread, the Simple Tortellini Soup Recipe makes a great pairing.
Health Benefits of Key Ingredients
While this bread is a simple comfort food, a few of its ingredients offer some nice nutritional benefits.
Here is a quick look at what each main ingredient brings to the table.
- Flour provides carbohydrates, which are the body’s primary source of energy.
- Yeast is a natural leavening agent and also contains small amounts of B vitamins.
- Salt helps regulate fluid balance in the body when consumed in moderate amounts.
- Water is essential for hydration and also helps activate the yeast for fermentation.
- Whole wheat flour, if used in the variation, adds extra fiber and nutrients compared to all purpose flour alone.
This bread also pairs nicely with Chicken Noodle Soup for a comforting, balanced meal.
Frequently Asked Questions
1. Can I make this bread without a Dutch oven?
Yes, you can use any heavy, oven safe pot with a lid, such as a cast iron pot or a covered ceramic baker.
The key is having a tight fitting lid that traps steam during the first part of baking.
2. Why is my dough so sticky?
A sticky, shaggy dough is completely normal for no knead bread recipes.
The high hydration is what creates the soft, airy interior, so resist the urge to add extra flour.
3. Can I speed up the rise time?
The long rise is important for developing flavor, but you can shorten it slightly by using a warmer spot in your kitchen.
Just keep in mind that a shorter rise may result in a slightly denser loaf with less complex flavor.
4. How do I know when the bread is fully baked?
The crust should be deep golden brown and the loaf should sound hollow when tapped on the bottom.
An instant read thermometer inserted into the center should read about 200 degrees Fahrenheit (93 degrees Celsius).
5. Can I double this recipe?
Yes, but you will need a larger Dutch oven or two separate pots to bake two loaves.
Doubling the ingredients works well, just make sure your mixing bowl is large enough to hold the increased volume of dough.
Read Also: Sourdough Discard Pita Bread Recipe
Final Thoughts
This Dutch oven bread recipe proves that homemade bread does not have to be complicated or time consuming in terms of effort.
With just a handful of pantry staples and a little patience, you can create a loaf that looks and tastes like it came from a professional bakery.
I hope this recipe becomes a regular in your kitchen rotation, whether it is for weeknight dinners or weekend brunches.
If you give this bread a try, I would love to hear how it turned out. Leave a comment below and let me know, or share a photo of your finished loaf with friends and family.
Recommended:
- Pull Apart Garlic Bread Recipe
- Monkey Bread Recipe
- Sourdough Discard Breadsticks Recipe
- Chicken Tortilla Soup Recipe
- Mediterranean Lentil Soup Recipe
- Creamy Chicken Wild Rice Soup Recipe
- Chocolate Zucchini Bread Recipe
- Healthy Banana Bread Recipe
- Southern Cornbread Recipe