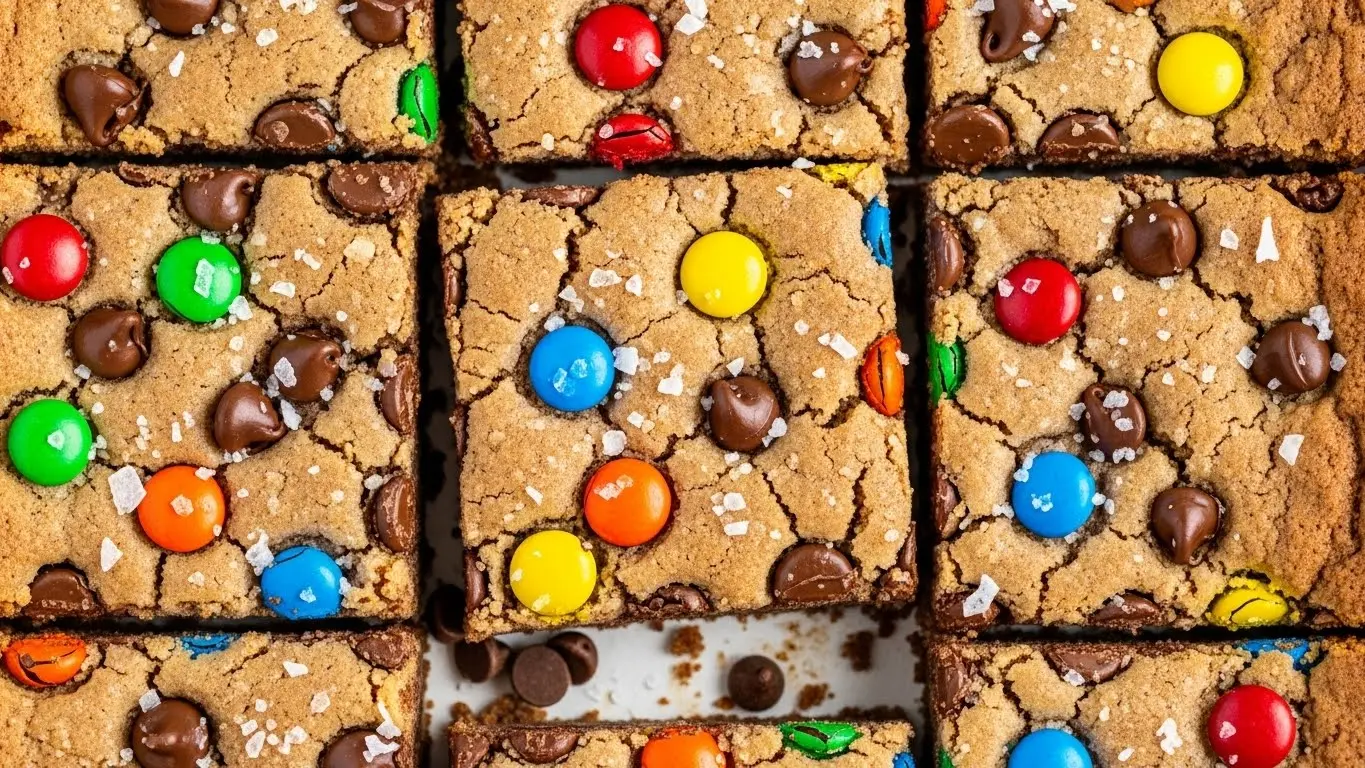
I’ve spent years perfecting this monster cookie bars recipe, and I can honestly say it’s become one of the most-requested treats in my household. My kids call them “the everything bars” because they’re loaded with oats, peanut butter, chocolate chips, and M&Ms all in one glorious bite.
These bars combine the classic flavors of monster cookies with the convenience of bar form. No scooping, no rolling, just press the dough into a pan and bake.
The best part? They come together in about 15 minutes of active prep time, and you probably have most of the ingredients sitting in your pantry right now. The texture is perfectly chewy on the inside with slightly crisp edges that give way to a soft, almost fudgy center.
I first made these for a school bake sale, and they sold out before any other item on the table. Parents kept asking for the recipe, and I knew I had something special on my hands.
Why You’ll Love This Monster Cookie Bars Recipe
These bars deliver everything you love about traditional monster cookies without the hassle of portioning individual cookies. You’ll get consistent results every single time.
The combination of peanut butter and oats creates a hearty base that’s naturally gluten-free if you use certified gluten-free oats. The chocolate chips and M&Ms add pops of sweetness and color that make these bars irresistible to both kids and adults.
Here’s what makes these bars stand out:
- No flour needed – The oats and peanut butter create the perfect texture without any all-purpose flour
- One-bowl mixing – Less cleanup means more time enjoying these delicious bars
- Customizable mix-ins – Swap the M&Ms for your favorite candies or add extra chocolate chips
- Perfect for meal prep – These bars stay fresh for days and freeze beautifully
- Crowd-pleaser guaranteed – I’ve never met anyone who doesn’t love these
You might also enjoy: Peanut Butter Cookie Recipe
Ingredients
Getting the right ingredients makes all the difference in these bars. I always use creamy peanut butter rather than natural peanut butter, as the stabilized kind gives better texture.
Here’s everything you’ll need:
- 1 cup (256g) creamy peanut butter
- ½ cup (113g) unsalted butter, softened
- 1 cup (200g) light brown sugar, packed
- ½ cup (100g) granulated sugar
- 3 large eggs
- 2 teaspoons vanilla extract
- 1 teaspoon baking soda
- ½ teaspoon salt
- 3 cups (270g) old-fashioned rolled oats
- 1½ cups (255g) semi-sweet chocolate chips
- 1 cup (170g) M&M candies
Kitchen Equipment Needed
Having the right tools makes this recipe even easier to execute. I recommend investing in a good quality baking pan for even heat distribution.
You’ll need these items:
- Large mixing bowl
- Electric mixer or wooden spoon
- 9×13-inch baking pan
- Parchment paper or aluminum foil
- Measuring cups and spoons
- Rubber spatula
- Wire cooling rack
Recommended Products for This Recipe
After making these bars countless times, I’ve found a few products that genuinely make a difference in both the process and the final result. These are my personal recommendations based on years of baking experience.
1. Jif Creamy Peanut Butter
The consistency of Jif creates the perfect texture in these bars – not too oily, not too thick. I’ve tried several brands, and this one consistently gives me the best results with a smooth, creamy base that holds the bars together beautifully.
2. USA Pan Bakeware Rectangular Pan
This commercial-grade pan distributes heat so evenly that you’ll never have burnt edges or undercooked centers. The nonstick coating makes cleanup effortless, and it’s the pan I reach for every time I make these bars.
3. Bob’s Red Mill Old Fashioned Rolled Oats
These oats have the perfect texture – not too thick, not too fine. They create that classic chewy consistency that makes monster cookies so addictive, and they’re certified gluten-free if that’s important to you.
4. Ghirardelli Semi-Sweet Chocolate Chips
The quality difference is noticeable with these chips. They have a richer chocolate flavor and melt beautifully into the bars without becoming greasy. Worth every penny for the depth of chocolate flavor they provide.
Another favorite: No Bake Cookie Recipe
Step-by-Step Instructions
I’ve broken down each step to make this foolproof, even if you’re new to baking. Take your time with the mixing process to ensure everything is properly combined.
1. Prepare Your Baking Pan
- Preheat your oven to 350°F (175°C)
- Line your 9×13-inch baking pan with parchment paper, leaving an overhang on two sides for easy removal
- Alternatively, spray the pan generously with nonstick cooking spray
- Set the prepared pan aside while you make the dough
2. Cream the Wet Ingredients
- In a large mixing bowl, combine the softened butter and peanut butter
- Use an electric mixer on medium speed to beat them together until smooth and creamy, about 2 minutes
- Add both the brown sugar and granulated sugar to the bowl
- Beat on medium-high speed for 3-4 minutes until the mixture is light and fluffy
- Scrape down the sides of the bowl with a rubber spatula to ensure everything is incorporated
3. Add Eggs and Vanilla
- Crack the eggs into the bowl one at a time, beating well after each addition
- This ensures each egg is fully incorporated before adding the next
- Add the vanilla extract and mix until combined
- The mixture should be smooth and creamy at this point
4. Mix in Dry Ingredients
- Add the baking soda and salt directly to the wet mixture
- Stir with a wooden spoon or spatula until just combined
- Add all 3 cups of oats at once
- Fold the oats into the mixture using a sturdy spatula, making sure every oat is coated with the wet ingredients
- The dough will be thick and slightly sticky – this is exactly what you want
5. Fold in the Mix-Ins
- Add the chocolate chips to the dough
- Reserve about ¼ cup of M&Ms for topping the bars
- Fold in the remaining M&Ms until they’re evenly distributed throughout the dough
- Use a gentle folding motion to avoid crushing the candies
6. Spread and Top the Dough
- Transfer the dough to your prepared baking pan
- Use a rubber spatula or your hands (lightly dampened works great) to press the dough evenly into the pan
- Make sure the dough reaches all corners and is level across the top
- Press the reserved M&Ms into the top of the dough for visual appeal
- You can also add a few extra chocolate chips on top if desired
7. Bake to Perfection
- Place the pan in the preheated oven on the center rack
- Bake for 20-25 minutes, checking at the 20-minute mark
- The bars are done when the edges are golden brown and the center looks set but still slightly soft
- A toothpick inserted in the center should come out with a few moist crumbs, not wet batter
- Don’t overbake – the bars will continue to set as they cool
8. Cool and Cut
- Remove the pan from the oven and place it on a wire cooling rack
- Let the bars cool in the pan for at least 30 minutes
- For cleaner cuts, allow them to cool completely, about 2 hours
- If you used parchment paper with overhang, lift the entire slab out of the pan
- Use a sharp knife to cut into bars, wiping the knife between cuts for neat edges
- Cut into 24 bars for standard serving sizes, or 16 larger bars for bigger appetites
Read Also: Oatmeal Cookie Recipe
Tips for Success
Getting these bars just right requires a few insider tricks. I’ve learned these through trial and error so you don’t have to.
Here’s how to nail it every time:
- Use room temperature ingredients – Softened butter and eggs at room temperature mix more easily and create a smoother texture
- Don’t skip the parchment paper – It makes removal and cutting so much easier
- Press firmly into the pan – This prevents the bars from falling apart when you cut them
- Watch the baking time carefully – Every oven is different; start checking at 20 minutes
- Let them cool completely – This is crucial for clean cuts and proper texture
- Measure oats correctly – Spoon them into measuring cups rather than scooping directly from the container
Serving Suggestions
These bars are incredibly versatile and pair well with so many things. I love serving them at different times of day for different occasions.
They’re perfect on their own, but you can elevate them with these serving ideas:
- Warm them slightly and serve with a scoop of vanilla ice cream
- Pack them in lunchboxes with fresh fruit
- Serve alongside a glass of cold milk for the ultimate afternoon snack
- Crumble over vanilla yogurt for a decadent breakfast parfait
- Stack them on a platter with other cookies for a dessert bar
- Wrap individually for party favors or bake sale treats
These pair wonderfully with my Hot Chocolate Recipe.
Variations to Try
Once you’ve mastered the basic recipe, experimenting with variations keeps things exciting. I rotate through these different versions throughout the year.
Try these delicious twists:
- White Chocolate Version – Replace chocolate chips with white chocolate chips and use Reese’s Pieces instead of M&Ms
- Triple Chocolate – Use chocolate M&Ms and add ½ cup of cocoa powder to the dough
- Nutty Bars – Mix in ½ cup of chopped peanuts or cashews with the chocolate chips
- Butterscotch Twist – Replace half the chocolate chips with butterscotch chips
- Trail Mix Bars – Add dried cranberries and replace M&Ms with your favorite trail mix
- Almond Butter Base – Swap peanut butter for almond butter for a different flavor profile
- Mini Chip Version – Use mini chocolate chips and mini M&Ms for more even distribution
- Seasonal Colors – Use holiday-colored M&Ms for festive occasions
For a similar texture, check out my Oatmeal Raisin Cookie Recipe.
Storage and Reheating
Proper storage keeps these bars fresh and delicious for days. I’ve tested all these methods extensively.
Follow these guidelines:
- Room Temperature – Store in an airtight container for up to 5 days
- Refrigerator – Keep in a sealed container for up to 2 weeks
- Freezer – Wrap individual bars in plastic wrap, then place in a freezer bag for up to 3 months
- Thawing – Let frozen bars sit at room temperature for 30 minutes before serving
- Reheating – Microwave individual bars for 10-15 seconds to recreate that fresh-baked warmth
Nutritional Facts
Each bar (based on 24 servings) contains approximately:
- Calories: 245
- Total Fat: 12g
- Saturated Fat: 4g
- Cholesterol: 30mg
- Sodium: 135mg
- Total Carbohydrates: 31g
- Dietary Fiber: 2g
- Sugars: 20g
- Protein: 5g
Read Also: Peanut Butter Blossom Cookies Recipe
Health Benefits of Key Ingredients
While these are definitely a treat, they do contain some nutritious ingredients that offer real benefits. The oats and peanut butter provide substance beyond just sweetness.
Here’s what you’re getting:
- Oats – Provide fiber for digestive health and help keep you feeling full longer
- Peanut Butter – Offers protein and healthy fats that provide sustained energy
- Eggs – Supply high-quality protein and essential vitamins like B12 and vitamin D
- Dark Chocolate – Contains antioxidants that support heart health (if using dark chocolate chips)
- Whole Grains – The oats provide whole grain nutrition that processed flour can’t match
Frequently Asked Questions
1. Can I make these bars without eggs?
Yes, you can substitute each egg with a flax egg (1 tablespoon ground flaxseed mixed with 3 tablespoons water, let sit for 5 minutes). The texture will be slightly denser but still delicious.
2. Why are my bars falling apart when I cut them?
This usually happens when the bars haven’t cooled completely or if the dough wasn’t pressed firmly enough into the pan. Make sure to let them cool for at least 2 hours and press the dough down firmly before baking.
3. Can I use quick oats instead of old-fashioned oats?
I don’t recommend it because quick oats will create a mushy texture rather than the chewy consistency we’re after. Old-fashioned rolled oats are essential for the right texture.
4. How do I know when the bars are done baking?
The edges should be golden brown and pulling away slightly from the sides of the pan. The center should look set but still be slightly soft – it will firm up as it cools.
5. Can I double this recipe?
Absolutely! Use two 9×13-inch pans or one large sheet pan. Keep in mind that a sheet pan may require a few extra minutes of baking time.
For another chocolate and peanut butter treat, try my Buckeyes Recipe.
Final Thoughts
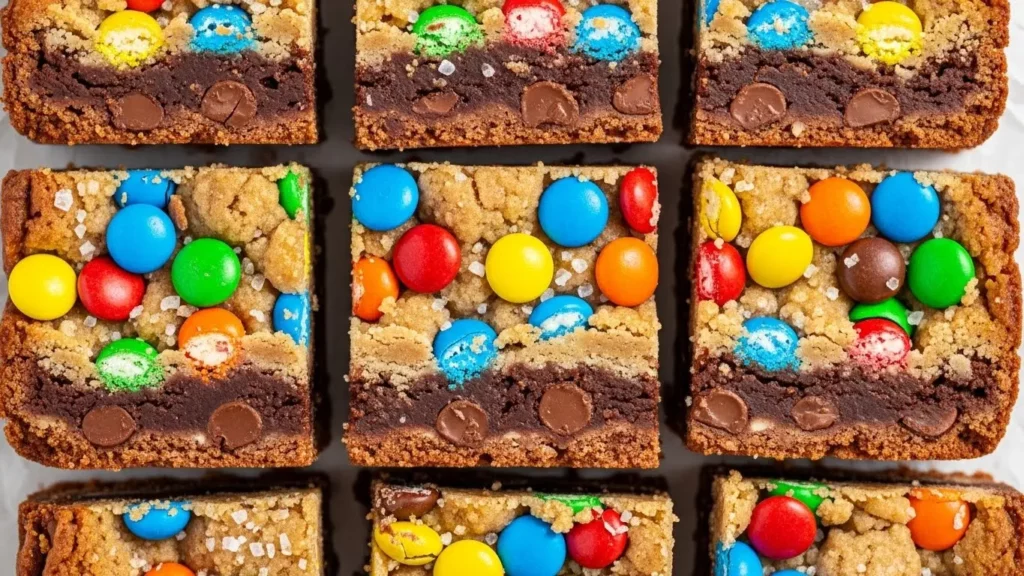
This monster cookie bars recipe has become a staple in my kitchen, and I hope it becomes one in yours too. The combination of chewy oats, creamy peanut butter, melty chocolate, and colorful M&Ms creates something truly special that brings smiles to everyone who tries them.
These bars are proof that the best recipes don’t have to be complicated. With simple ingredients and straightforward steps, you can create something that tastes like you spent hours in the kitchen.
I’d love to hear how your bars turn out! Drop a comment below with any variations you try or share a photo of your finished bars. Happy baking!
Recommended:
- Sugar Cookies Recipe
- Snickerdoodle Cookie Recipe
- Gingerbread Cookie Recipe
- Chocolate Shortbread Cookies Recipe
- Lemon Shortbread Cookies Recipe
- Christmas Shortbread Cookies Recipe
- Pecan Shortbread Cookies Recipe
- Fudge Brownie Recipe
- Pumpkin Bar Recipe
- Rugelach Recipe


