I’ve been making shortbread for years, but it wasn’t until I added cocoa powder that I realized what I’d been missing all along.
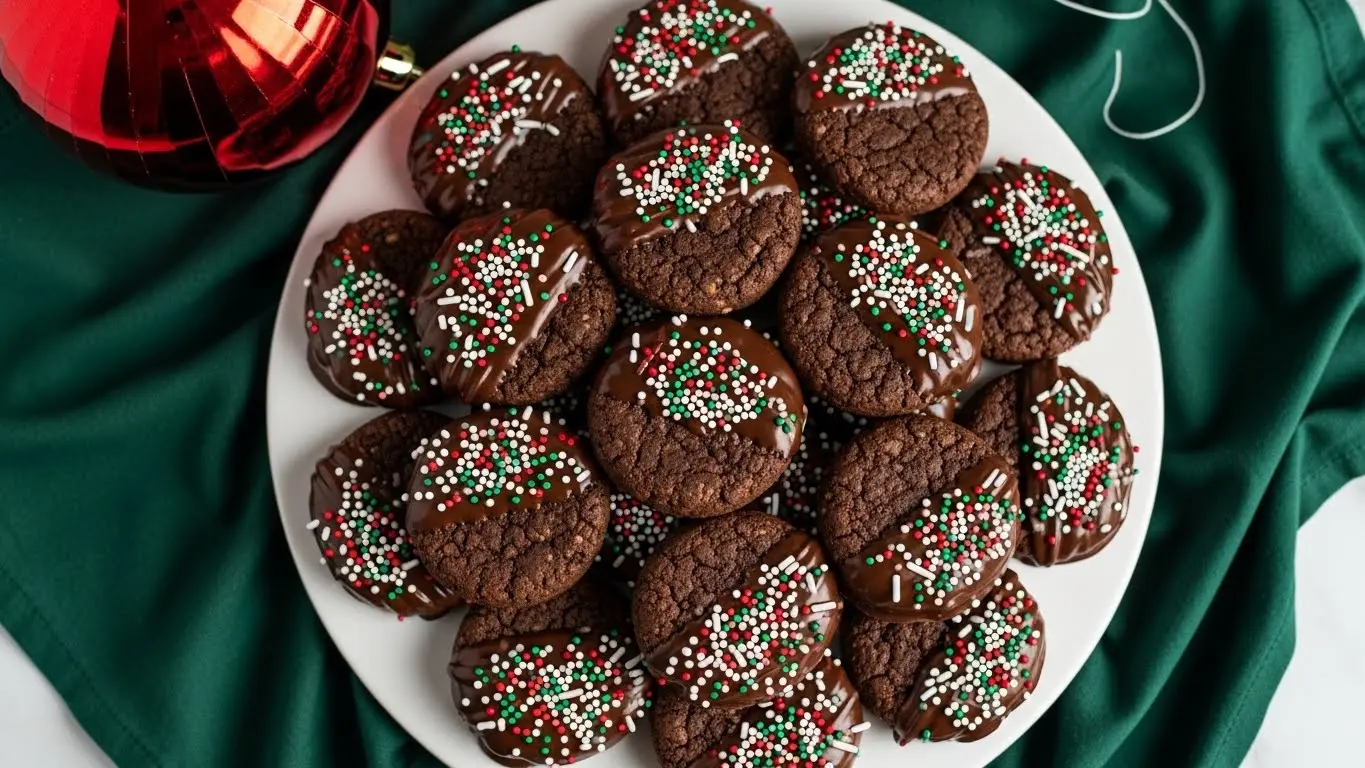
These chocolate shortbread cookies recipe combines the buttery, melt-in-your-mouth texture of classic shortbread with deep chocolate flavor that makes them utterly irresistible. They’re rich without being overly sweet, elegant enough for a holiday cookie platter, yet simple enough to whip up on a Tuesday afternoon when you need something special.
The best part? You only need a handful of ingredients you probably already have in your pantry. No eggs, no leavening agents, just pure butter, cocoa powder, flour, and sugar coming together to create cookie magic.
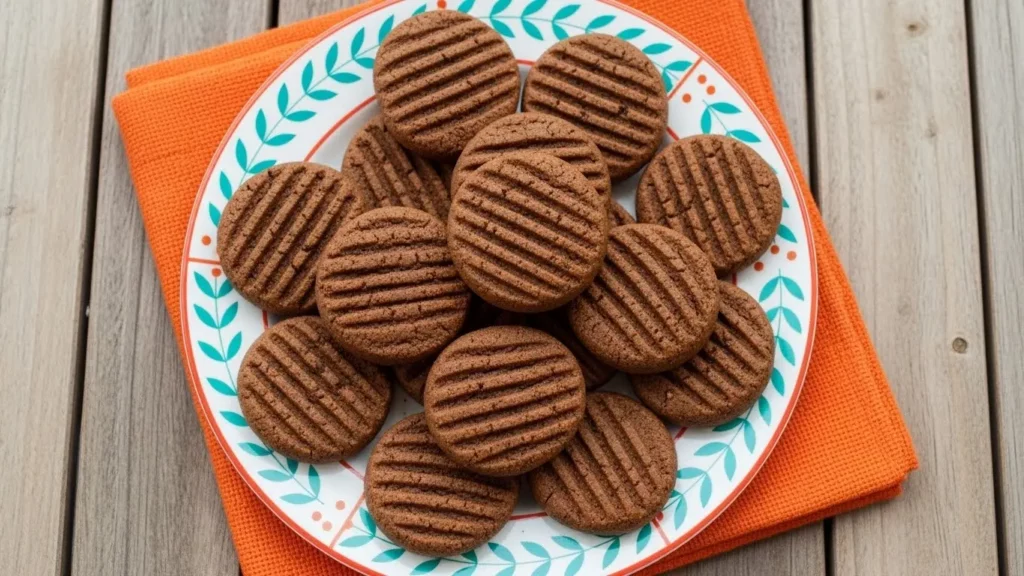
I love how these cookies hold their shape perfectly, making them ideal for cutting into festive shapes or keeping them simple as traditional wedges. They’re sturdy enough to package as gifts but delicate enough to impress anyone who takes a bite.
Why You’ll Love This Chocolate Shortbread Cookies Recipe
These cookies deliver everything you want from a homemade treat without the fuss of complicated techniques or hard-to-find ingredients.
The chocolate flavor is sophisticated and not too sweet, making these cookies perfect for adults and kids alike. They’re incredibly versatile too—dress them up with a dusting of powdered sugar, dip them in melted chocolate, or enjoy them plain with your afternoon coffee.
Here’s what makes them absolutely worth making:
- Simple ingredient list – No specialty items required, just pantry staples
- Buttery, tender texture – They literally melt on your tongue
- Make-ahead friendly – The dough freezes beautifully for up to three months
- Customizable – Add extracts, spices, or toppings to suit your taste
- Impressive results – They look and taste like they came from a fancy bakery
- Perfect for gifting – These cookies travel well and look beautiful packaged
Ingredients
These cookies rely on quality ingredients since there are so few of them. Use the best butter and cocoa powder you can find—it really makes a difference in the final flavor.
- 2 cups (240g) all-purpose flour – The base of your cookies
- ½ cup (50g) unsweetened cocoa powder – For that rich chocolate flavor
- ¾ cup (95g) powdered sugar – Creates the perfect tender texture
- ¼ teaspoon salt – Enhances all the other flavors
- 1 cup (226g) unsalted butter – Softened to room temperature
- 1 teaspoon vanilla extract – Adds depth to the chocolate
- 2 tablespoons granulated sugar – For sprinkling (optional)
Kitchen Equipment Needed
You don’t need fancy equipment for these cookies, but having the right tools makes the process smoother and more enjoyable.
- Stand mixer or hand mixer – For creaming the butter
- Mixing bowls – Various sizes for prep
- Baking sheets – Two or three for efficiency
- Parchment paper – Prevents sticking and makes cleanup easy
- Rolling pin – If you’re making cut-out shapes
- Cookie cutters – Optional, for shaped cookies
- Wire cooling rack – For cooling cookies properly
- Sharp knife – For cutting wedges if making traditional shortbread rounds
If you’re planning to make my Lemon Shortbread Cookies Recipe, you’ll use most of the same equipment.
Recommended Products for This Recipe
After making countless batches of shortbread, I’ve discovered a few products that truly elevate the results and make the process more enjoyable.
1. Ghirardelli Premium Dutch Process Cocoa
This cocoa powder delivers an incredibly rich, deep chocolate flavor that transforms these cookies from good to extraordinary. Dutch-processed cocoa gives a smoother, less acidic taste that pairs perfectly with the buttery shortbread base. I’ve tried many brands, and this one consistently gives the best results.
2. Nordic Ware Natural Aluminum Commercial Baker’s Half Sheet
These heavy-duty baking sheets conduct heat evenly, so your cookies bake uniformly without any burnt edges or undercooked centers. The natural aluminum won’t warp in the oven, and they’ll last you decades. I’ve been using mine for over ten years, and they still look nearly new.
3. Kerrygold Pure Irish Butter
The quality of butter makes or breaks shortbread since it’s such a dominant flavor. Kerrygold has a higher butterfat content and richer flavor than standard American butter. Your cookies will be more tender and have that authentic, European-style taste that makes people ask for your secret.
4. Silpat Non-Stick Silicone Baking Mat
While parchment paper works fine, a silicone baking mat is reusable and provides even better non-stick properties. Your cookies will release perfectly every time, and you’ll save money in the long run by not constantly buying parchment paper. Plus, it’s better for the environment.
Step-by-Step Instructions
Take your time with these steps—shortbread is forgiving, but attention to detail yields the best results.
1. Prepare Your Workspace and Preheat the Oven
- Clear your countertop and gather all ingredients and equipment before you begin
- Preheat your oven to 325°F (165°C) so it’s fully heated when you’re ready to bake
- Line your baking sheets with parchment paper or silicone baking mats
- Take your butter out of the refrigerator if you haven’t already—it should be soft enough to leave an indent when pressed but not melted or greasy
- Check that your cocoa powder has no lumps; if it does, sift it beforehand to save time later
2. Sift the Dry Ingredients Together
- Place the flour, cocoa powder, powdered sugar, and salt in a medium bowl
- Use a whisk or sifter to combine these ingredients thoroughly, breaking up any lumps in the cocoa powder or powdered sugar
- Sifting creates a lighter, more uniform texture and prevents pockets of cocoa or sugar in your finished cookies
- Set this bowl aside while you work on the butter mixture
- Make sure you’ve measured accurately—too much flour will make the cookies dry, while too little can make them spread
3. Cream the Butter Until Light and Fluffy
- Place your softened butter in the bowl of your stand mixer or a large mixing bowl if using a hand mixer
- Beat the butter on medium speed for about 3-4 minutes until it becomes pale and fluffy
- Stop and scrape down the sides of the bowl at least once during this process to ensure even mixing
- The butter should increase in volume and look almost whipped—this incorporates air that helps create a tender texture
- Don’t rush this step; properly creamed butter is key to achieving that melt-in-your-mouth consistency
4. Add Vanilla and Mix Until Combined
- Pour the vanilla extract into the creamed butter
- Mix on medium speed for about 30 seconds until the vanilla is fully incorporated
- The mixture should smell wonderfully fragrant at this point
- Scrape down the bowl again to catch any butter that’s stuck to the sides
- This is also a good time to check your butter consistency—it should still be smooth and fluffy, not separated or greasy
5. Gradually Incorporate the Dry Ingredients
- With your mixer on low speed, add the dry ingredient mixture in three additions
- Add about one-third of the flour mixture, mixing just until you can no longer see dry streaks
- Add another third, again mixing just until combined
- Add the final third and mix until the dough comes together
- Don’t overmix once you add the flour—this develops gluten and creates tough cookies instead of tender ones
- The dough will look crumbly at first but should hold together when pressed
- If the dough seems too dry or won’t hold together, you can add 1 teaspoon of milk at a time, but this is rarely necessary
Another favorite of mine that uses a similar mixing method is Almond Shortbread Cookies Recipe.
6. Shape the Dough
- Remove the dough from the mixer and place it on a clean work surface
- Knead it gently just 2-3 times to bring it together into a cohesive mass
- For traditional round shortbread: divide the dough in half and shape each half into a disc about 6-7 inches in diameter and ½-inch thick on your prepared baking sheet
- For wedges: score each disc into 8-12 triangular sections using a sharp knife, cutting about halfway through the dough
- For rectangular cookies: pat the dough into a rectangle about ½-inch thick and cut into fingers or squares
- For cut-out cookies: roll the dough between two sheets of parchment paper to ½-inch thickness, then chill for 15 minutes before cutting shapes
- Press the edges with a fork to create a decorative pattern if desired
- Prick the surface of the dough all over with a fork—this prevents puffing during baking and creates the classic shortbread appearance
7. Bake Until Just Set
- Place the baking sheets in your preheated 325°F (165°C) oven
- Bake for 22-28 minutes, depending on the size and thickness of your cookies
- The cookies are done when the edges look set and feel firm to a gentle touch
- They won’t brown much due to the cocoa powder, so don’t wait for color change
- The centers should still look slightly soft—they’ll firm up as they cool
- Avoid overbaking, as this creates hard, dry cookies rather than tender, buttery ones
- If baking multiple sheets, rotate them halfway through for even baking
8. Cool and Finish the Cookies
- Remove the baking sheets from the oven and place them on wire cooling racks
- If you made round shortbread scored into wedges, re-cut along the score marks while the cookies are still warm—they’ll be easier to separate
- Let the cookies cool on the baking sheet for 10 minutes; they’re very fragile when hot
- After 10 minutes, carefully transfer the cookies to the wire rack to cool completely
- If desired, dust with powdered sugar once completely cool
- For a finishing touch, you can sprinkle granulated sugar on the cookies immediately after they come out of the oven while they’re still warm
- Store cooled cookies in an airtight container at room temperature
Tips for Success
Getting shortbread right is all about technique and quality ingredients. These tips will help you achieve bakery-worthy results every time.
- Use room temperature butter – It should be soft enough to blend easily but not melted or greasy; leave it out for about 1-2 hours before baking
- Don’t overmix the dough – Once you add the flour, mix just until combined to keep the cookies tender
- Measure flour correctly – Spoon it into your measuring cup and level it off; scooping directly from the bag packs in too much flour
- Keep cookies the same size – Uniform thickness ensures even baking so some aren’t overdone while others are underbaked
- Use quality cocoa powder – Dutch-processed cocoa gives the richest, smoothest chocolate flavor
- Watch the baking time carefully – These cookies don’t change color much, so set a timer and check for doneness by touch
- Let them cool completely – Shortbread is fragile when warm and firms up as it cools
- Chill the dough if it’s too soft – If your kitchen is warm or the dough seems sticky, refrigerate it for 15-20 minutes
Serving Suggestions
These chocolate shortbread cookies are delicious on their own, but they also pair beautifully with other foods and beverages.
Serve them alongside a hot cup of coffee or tea for an afternoon treat. The buttery chocolate flavor complements the slight bitterness of coffee perfectly. They’re also wonderful with a glass of cold milk—the classic combination never gets old.
For a more elegant presentation, try these serving ideas:
- With fresh berries – The tartness of strawberries or raspberries cuts through the richness
- Alongside vanilla pudding – Create a simple but impressive dessert
- Ice cream sandwiches – Place a scoop between two cookies for a homemade treat
- With hot chocolate – Dunk them in or serve on the side
- Cheese plate addition – Pair with mild, creamy cheeses for a sophisticated appetizer
- Dipped in melted chocolate – Half-dip cooled cookies in dark or white chocolate for extra decadence
- Crumbled over yogurt – Add texture and flavor to your breakfast or snack
You might also enjoy serving these with chocolate pudding for a chocolate lover’s dessert.
Variations to Try
Once you’ve mastered the basic recipe, these variations will keep things interesting and let you customize the cookies to your preferences.
- Add espresso powder – Mix 1 tablespoon of instant espresso powder with the dry ingredients for mocha shortbread
- Stir in mini chocolate chips – Fold in ½ cup of mini chocolate chips after mixing the dough
- Create orange chocolate shortbread – Add 1 tablespoon of finely grated orange zest to the butter before creaming
- Make them spicy – Add ¼ teaspoon of cayenne pepper for a subtle kick
- Try peppermint chocolate – Replace vanilla extract with peppermint extract and add crushed candy canes on top
- Add sea salt – Sprinkle flaky sea salt on top before baking for sweet-salty contrast
- Mix in chopped nuts – Fold in ½ cup of finely chopped pecans or hazelnuts
- Drizzle with caramel – Top cooled cookies with caramel sauce for extra indulgence
Storage and Reheating
Proper storage keeps these cookies fresh and delicious for weeks, making them perfect for making ahead or giving as gifts.
- Room temperature – Store in an airtight container for up to 2 weeks; layer cookies between parchment paper to prevent sticking
- Refrigerator – These don’t need refrigeration, but if you live in a very warm climate, you can refrigerate them for up to 3 weeks
- Freezer – Wrap cookies individually or layer between parchment in a freezer-safe container for up to 3 months
- Freeze the dough – Shape the dough into logs, wrap tightly in plastic wrap, then aluminum foil, and freeze for up to 3 months; slice and bake from frozen, adding 2-3 minutes to the baking time
- Thawing – Remove frozen baked cookies from the freezer and let them come to room temperature for about 30 minutes
- No reheating needed – These cookies are best enjoyed at room temperature; reheating isn’t necessary and can actually make them less crispy
Nutritional Facts
Per cookie (based on 24 cookies per batch):
- Calories: 118
- Total Fat: 8g
- Saturated Fat: 5g
- Cholesterol: 20mg
- Sodium: 28mg
- Total Carbohydrates: 11g
- Dietary Fiber: 1g
- Sugars: 5g
- Protein: 1g
Note: Nutritional information is approximate and may vary based on specific ingredients used and cookie size.
Health Benefits of Key Ingredients
While these are definitely a treat, the ingredients do offer some nutritional benefits worth noting.
Unsalted butter provides fat-soluble vitamins like vitamin A, which supports eye health and immune function. It also contains conjugated linoleic acid (CLA), which has been studied for potential health benefits. Using real butter instead of margarine means you’re getting a natural, minimally processed ingredient.
Here are some benefits of the main ingredients:
- Cocoa powder – Rich in antioxidants called flavonoids that support heart health and may improve mood
- Butter – Contains vitamins A, D, E, and K2, which are important for bone health and calcium absorption
- Vanilla extract – Has small amounts of antioxidants and has been used traditionally to reduce anxiety
- Dark chocolate (if using for dipping) – Contains minerals like iron, magnesium, and zinc, plus beneficial plant compounds
Of course, moderation is key with any dessert, but it’s nice to know your indulgence includes some beneficial compounds.
Frequently Asked Questions
1. Why are my chocolate shortbread cookies crumbly and falling apart?
The most common cause is not enough butter or overmixing the dough. Make sure your butter is properly softened to room temperature and measure it accurately—1 cup should equal 226 grams or 2 sticks. When you add the dry ingredients, mix just until the dough comes together. The dough should be slightly crumbly but hold together when pressed. If it’s too dry, add 1 teaspoon of milk at a time until it holds together.
2. Can I use salted butter instead of unsalted?
Yes, you can use salted butter, but I recommend reducing or omitting the added salt in the recipe. Salted butter varies in salt content between brands, so using unsalted gives you better control over the final flavor. If you do use salted butter, taste the dough before baking and adjust accordingly.
3. How do I know when chocolate shortbread is done baking?
This is tricky because the cookies won’t change color much due to the cocoa powder. Look for edges that are set and firm to a gentle touch, while the centers may still look slightly soft. They should feel dry on the surface but not hard. Remember, they’ll continue to firm up as they cool, so don’t wait for them to look completely done in the oven.
4. Can I make this dough ahead of time?
Absolutely! Shortbread dough is perfect for making ahead. You can refrigerate the dough for up to 3 days wrapped tightly in plastic wrap, or freeze it for up to 3 months. If freezing, I recommend shaping it into logs or discs first, then wrapping well. Let frozen dough thaw in the refrigerator overnight before rolling or shaping.
5. What’s the difference between regular cocoa powder and Dutch-process cocoa?
Dutch-process cocoa has been treated with an alkalizing agent to neutralize its acidity, resulting in a darker color and smoother, more mellow chocolate flavor. Regular (natural) cocoa powder is more acidic with a sharper, more intense chocolate taste. For shortbread, Dutch-process is preferred because it gives a richer, more sophisticated flavor, but natural cocoa will still work well.
Final Thoughts
These chocolate shortbread cookies have become my go-to when I want something special but don’t have hours to spend in the kitchen. They’re elegant enough to serve at holiday gatherings yet simple enough to make just because.
I love how the rich chocolate flavor never overwhelms the buttery shortbread base—it’s the perfect balance. Every time I make a batch, they disappear faster than I expect, which is always the sign of a great recipe.
Give this chocolate shortbread cookies recipe a try this weekend. I’d love to hear how they turn out for you! Drop a comment below and let me know if you tried any of the variations, and don’t forget to share photos of your beautiful cookies on social media.
Recommended:
- Cranberry Pistachio Shortbread Cookies Recipe
- Cherry Almond Shortbread Cookies Recipe
- Almond Shortbread Cookies Recipe
- Scottish Shortbread Cookie Recipe
- Pecan Shortbread Cookies Recipe
- Christmas Shortbread Cookies Recipe
- Lemon Shortbread Cookies Recipe
- Shortbread Cookie Recipe
- Sugar Cookies Recipe
- Snickerdoodle Cookie Recipe


