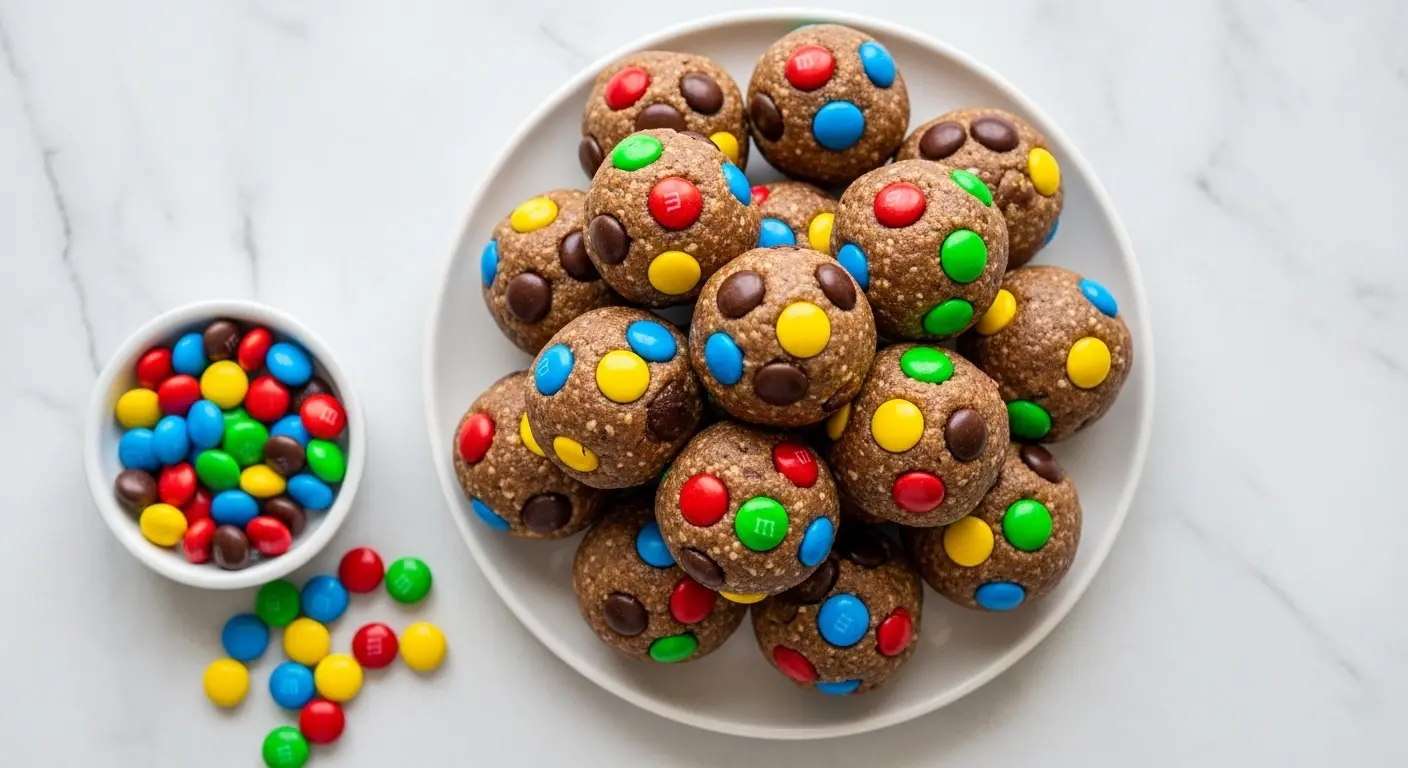
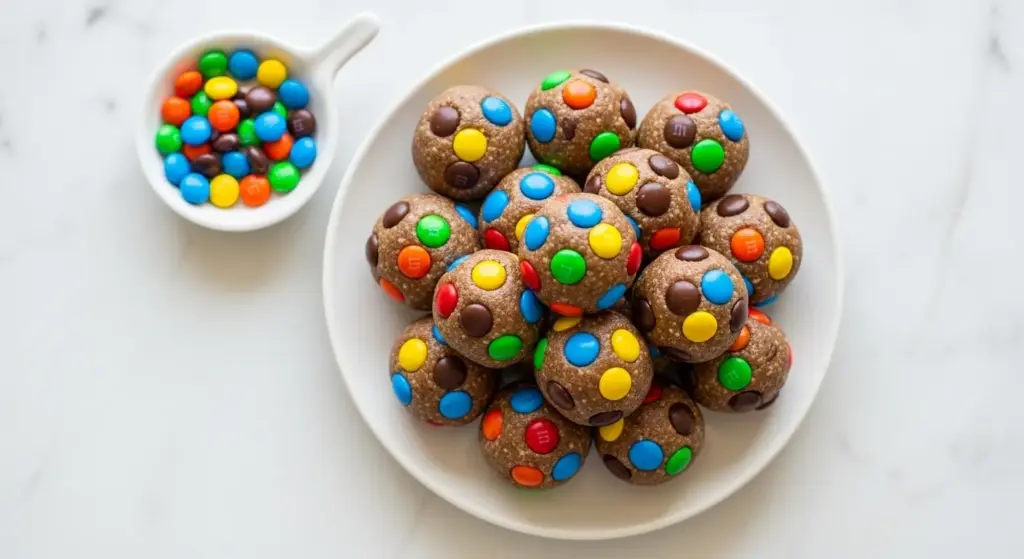
If you’ve ever wished you could eat a monster cookie and call it a snack, these monster cookie protein balls are exactly what you’ve been waiting for.
Packed with creamy peanut butter, old-fashioned oats, vanilla protein powder, mini M&Ms, and mini chocolate chips, these no-bake bites deliver all the nostalgic flavor of your favorite monster cookie in a bite-sized, protein-rich package.
They take about 15 minutes to throw together, require zero baking, and keep beautifully in the fridge or freezer for weeks.
That means you can make a big batch on Sunday and have a ready-to-grab snack all week long. Post-workout fuel, afternoon pick-me-up, or late-night sweet tooth? These protein balls have you covered every single time.
If you love the Monster Cookie Recipe but want a healthier, protein-boosted version you can eat on the go, this recipe is your new best friend.
Why You’ll Love This Monster Cookie Protein Balls Recipe
These little bites check every box for a perfect snack: quick, portable, delicious, and actually filling.
Here’s exactly why this recipe works so well:
- No baking required. Mix, roll, chill, done. No oven, no mess, no fuss.
- Real monster cookie flavor. Oats, peanut butter, M&Ms, and chocolate chips deliver everything you love about the classic cookie.
- High in protein. With protein powder and peanut butter working together, each ball delivers a satisfying protein boost.
- Kid and adult approved. The colorful M&Ms make them fun for kids, while the nutrition stats make adults feel great about eating them.
- Meal-prep friendly. A double batch stores in the freezer for up to 3 months, so you always have a snack on hand.
- Easily customizable. Swap nut butters, change up the protein powder flavor, or use different mix-ins to match what you have on hand.
Another reader favorite with a similar nostalgic twist is this Monster Cookie Dough Dip for when you want a shareable dessert option.
Ingredients
These protein balls use pantry-friendly ingredients you probably already have on hand.
A quick note before you start: the type of peanut butter you choose really matters here. Natural, drippy peanut butter (like the kind where the oil separates at the top) is ideal because it blends easily and gives the balls a soft, cookie dough-like texture. If your peanut butter is thick and stiff, the mixture can end up dry and crumbly. Always stir it well before measuring.
- 1 cup (90g) old-fashioned rolled oats
- ½ cup (130g) natural creamy peanut butter (well stirred)
- ⅓ cup (35g) vanilla protein powder
- 3 tablespoons honey or pure maple syrup
- 2 tablespoons mini chocolate chips
- ¼ cup (45g) mini M&Ms
- 1 tablespoon ground flaxseed (optional but recommended for fiber and binding)
- 1–2 tablespoons milk or water (as needed, to adjust consistency)
- ½ teaspoon vanilla extract
- Pinch of salt
You might also enjoy: Monster Cookie Bars Recipe
Kitchen Equipment Needed
The beauty of this recipe is that you need almost no special equipment.
A large mixing bowl and a cookie scoop will do most of the work.
- Large mixing bowl
- Rubber spatula or wooden spoon for mixing
- Cookie scoop (1.5–2 tablespoon size) for uniform balls
- Baking sheet or large plate
- Parchment paper
- Airtight food storage containers for storing
Read Also: No Bake Cookie Recipe
Recommended Products for This Recipe
These are products I genuinely recommend based on quality and performance for this specific recipe.
1. Vanilla Protein Powder (High-Quality, Low Sugar)
A good-quality vanilla protein powder makes all the difference in flavor here. Cheaper brands can taste chalky or overly sweet, which will throw off the whole cookie-dough flavor profile. Look for a protein powder with a clean ingredient list and a balanced macronutrient ratio.
2. Natural Creamy Peanut Butter (Drippy Style)
The consistency of your peanut butter is critical to getting the right texture in these protein balls. A natural, drippy peanut butter blends seamlessly into the oat mixture without the need for extra liquid. It also has fewer additives than conventional brands.
3. Mini M&Ms
Regular-sized M&Ms can overpower the small protein balls and make them tricky to roll. Mini M&Ms distribute evenly throughout the mixture so you get a little candy color in every single bite.
4. Small Cookie Scoop (2-Tablespoon)
This is the tool that makes rolling protein balls actually fun and fast. A consistent scoop size means all your balls are the same size, which matters for even chilling and accurate nutrition stats. It also keeps your hands cleaner.
The same great cookie-dough flavors shine through in this Monster Cookie Ice Cream Recipe if you’re in the mood for a frozen treat!
Step-by-Step Instructions
1. Prepare Your Workspace
- Line a large baking sheet or plate with parchment paper and set it aside. This is where you’ll place the rolled protein balls before chilling.
- Measure out all your ingredients before you start mixing. Having everything ready makes the process smooth and quick.
- Make sure your peanut butter is at room temperature and well stirred. Cold or stiff peanut butter is harder to incorporate and may leave dry pockets in the mixture.
2. Mix the Dry Ingredients
- Add 1 cup (90g) of old-fashioned rolled oats to a large mixing bowl.
- Add ⅓ cup (35g) of vanilla protein powder to the bowl.
- Add 1 tablespoon of ground flaxseed if using.
- Add a pinch of salt.
- Using a rubber spatula, stir the dry ingredients together so they’re evenly combined before the wet ingredients go in. This ensures the protein powder doesn’t clump.
3. Add the Wet Ingredients
- Add ½ cup (130g) of well-stirred natural creamy peanut butter directly on top of the dry mixture.
- Drizzle in 3 tablespoons of honey or pure maple syrup.
- Add ½ teaspoon of vanilla extract.
- Begin mixing everything together using your spatula or wooden spoon.
- The mixture will be thick and stiff at first. Keep pressing and folding it together until all the oats are coated and the peanut butter is fully incorporated. This takes about 1–2 minutes of active stirring.
4. Adjust Consistency if Needed
- After mixing, check the consistency of the dough. It should hold together when you press a small amount between your fingers without crumbling or feeling overly sticky.
- If the mixture feels too dry and crumbly, add 1 tablespoon of milk or water at a time, mixing after each addition, until the dough just comes together.
- If the mixture feels too wet or sticky to roll, add 1–2 tablespoons of extra oats and mix again.
- The goal is a dough that you can roll into a ball that holds its shape without falling apart.
5. Fold in the Mix-Ins
- Add 2 tablespoons of mini chocolate chips and ¼ cup (45g) of mini M&Ms to the bowl.
- Gently fold them into the dough using your spatula, distributing them evenly throughout.
- Try not to over-stir at this point, as the M&M candy coating can start to bleed color into the mixture if worked too aggressively.
6. Portion and Roll the Balls
- Using a 1.5 to 2-tablespoon cookie scoop, scoop a portion of the dough and deposit it onto the parchment-lined baking sheet.
- Once you’ve scooped out all portions, roll each one between your palms into a smooth, round ball.
- If the dough is sticking to your hands, lightly dampen your palms with cold water before rolling each ball. This makes the process much cleaner and easier.
- Space the balls about 1 inch (2.5cm) apart on the baking sheet. You should get approximately 18–22 balls depending on your scoop size.
7. Chill and Set
- Transfer the baking sheet to the refrigerator and allow the protein balls to chill for at least 30 minutes to 1 hour.
- Chilling firms up the peanut butter and allows the oats to absorb a little moisture, resulting in a better texture that is less sticky and more satisfying to eat.
- You can also place them in the freezer for 20–30 minutes if you’re short on time.
- Once firm, transfer the balls to an airtight container for storage.
Read Also: Oatmeal Cookie Recipe
Tips for Success
A few small details make a big difference in how these protein balls turn out.
Follow these tips and your batch will come out perfectly every single time:
- Use drippy peanut butter. Stir your jar thoroughly before measuring. If the peanut butter is very thick, warm it in the microwave for 10–15 seconds to soften it slightly before adding it to the bowl.
- Start with less liquid. Only add milk or water if the mixture is genuinely too dry to roll. Too much liquid creates a sticky dough that’s frustrating to work with, especially with whey protein powder.
- Chill the dough if needed. If your mixture feels very soft and hard to roll, pop the bowl in the refrigerator for 10–15 minutes before scooping. This firms it up and makes rolling much easier.
- Wet hands for rolling. Slightly damp palms prevent the dough from sticking to your hands and help you get smooth, round balls effortlessly.
- Use mini mix-ins. Mini M&Ms and mini chocolate chips distribute more evenly through the dough than regular-sized ones and keep the balls compact and well-shaped.
- Double the batch. These disappear fast. Doubling the recipe takes only a few extra minutes and means you’ll have plenty stashed in the freezer for busy weeks.
You might also enjoy: Peanut Butter Cookie Recipe
Serving Suggestions
Monster cookie protein balls are one of the most versatile snacks you can keep in your fridge.
Here are some of the best ways to enjoy them:
- As a post-workout snack. Eat 2–3 balls within 30 minutes after exercise for a quick hit of protein and carbohydrates to support recovery.
- As a lunchbox treat. Tuck 2–3 balls into a lunchbox alongside fresh fruit for a balanced midday snack kids will actually be excited about.
- With a Banana Protein Smoothie. Pair a couple of protein balls with a protein-rich smoothie for a satisfying post-gym breakfast that travels well.
- As a dessert swap. Serve a couple of balls after dinner instead of reaching for cookies or candy. The chocolate and M&Ms hit the sweet spot without overdoing it.
- Alongside a Fruit Salad. Fresh fruit and these protein bites make a colorful and nourishing snack plate for kids or guests.
- Straight from the freezer. These are surprisingly satisfying eaten straight from the freezer, almost like a tiny frozen cookie-dough bite.
Variations to Try
Once you’ve mastered the base recipe, it’s incredibly easy to customize these balls to suit your taste preferences or whatever you have in your pantry.
Here are some fun and tested variations:
- Chocolate protein powder version. Swap vanilla protein powder for chocolate protein powder and add 1 tablespoon of cocoa powder for an extra-chocolatey, brownie-batter flavor.
- Almond butter swap. Replace peanut butter with almond butter or sunflower seed butter for a nut-free school-friendly version with a slightly different but equally delicious flavor.
- Maple syrup instead of honey. Pure maple syrup works as a one-for-one swap for honey and gives a lovely, slightly caramel-like sweetness.
- Add chia seeds. Mix in 1 tablespoon of chia seeds along with or instead of flaxseed for extra fiber and a subtle crunch.
- Coconut flakes. Stir in 2 tablespoons of unsweetened shredded coconut for a tropical twist.
- Raisins or dried cranberries. Swap the M&Ms for raisins or dried cranberries if you prefer a fruit-forward, candy-free version.
- Dark chocolate chips. Upgrade the mix-ins by using dark chocolate chips for a richer, slightly less sweet flavor profile.
The same peanut butter and oat combination is the star of this Chewy Oatmeal Chocolate Chip Cookie Recipe if you’re in the mood for something baked.
Storage and Reheating
These protein balls are a meal-prepper’s dream because they store so well without any loss of flavor or texture.
Here’s everything you need to know about keeping them fresh:
- Refrigerator: Store the rolled protein balls in an airtight container in the fridge for up to 1–2 weeks. They stay soft and chewy and taste even better after the first day as the flavors meld together.
- Freezer: For longer storage, freeze them in a single layer on a parchment-lined baking sheet for 1–2 hours until solid, then transfer to a zip-top freezer bag or airtight container. They keep well for up to 3 months.
- Thawing from frozen: Simply place the number of balls you want in the fridge overnight, or let them sit at room temperature for 10–15 minutes before eating. They can also be eaten straight from the freezer for a firmer, frozen cookie-dough-like texture.
- Avoiding stickiness in storage: If stacking protein balls in a container, place a small sheet of parchment paper between layers to prevent them from sticking together.
Read Also: Easy Overnight Oats Recipe
Nutritional Facts
The numbers below are approximate and based on a batch of 20 balls using the ingredient amounts listed in this recipe.
| Nutrient | Per Ball (approx.) |
|---|---|
| Calories | 115–130 kcal |
| Protein | 5–6g |
| Carbohydrates | 12–14g |
| Fat | 6–7g |
| Fiber | 1–2g |
| Sugar | 7–9g |
| Sodium | 55–80mg |
Keep in mind that actual nutrition will vary based on the specific protein powder brand, peanut butter, and whether you use honey or maple syrup. Using a lower-sugar protein powder and natural peanut butter with no added oils or sugar will keep the numbers on the leaner end of this range.
For those tracking macros, these balls offer a balanced ratio of protein, healthy fats, and complex carbohydrates from the oats, making them a much smarter snack than a standard cookie.
This Chia Seed Pudding Recipe is another high-protein, prep-ahead snack worth bookmarking if you’re building out your weekly snack rotation.
Health Benefits of Key Ingredients
Every ingredient in this recipe pulls its weight nutritionally.
Here’s a closer look at why these key components are so beneficial:
- Old-fashioned oats are a whole grain rich in beta-glucan, a soluble fiber shown to support healthy cholesterol levels and help stabilize blood sugar after meals. They provide slow-releasing carbohydrates that keep you full longer than processed snacks.
- Natural peanut butter delivers a combination of plant-based protein, heart-healthy monounsaturated fats, magnesium, and vitamin E. It’s also one of the most satisfying whole-food ingredients you can add to a snack because fat and protein together slow digestion and prevent energy crashes.
- Vanilla protein powder is the star ingredient for bumping up the protein content of each ball. Whey protein powder, in particular, contains all nine essential amino acids and is one of the most bioavailable protein sources available. Plant-based options work well here too and are a great choice for dairy-free diets.
- Ground flaxseed adds a meaningful dose of omega-3 fatty acids, which support brain and heart health, plus soluble fiber that feeds beneficial gut bacteria. It also acts as a binding agent in the recipe, helping the balls hold their shape.
- Honey or maple syrup provides natural sugars that give these balls a gentle sweetness without refined sugar. Honey also has small amounts of antioxidants and antimicrobial properties.
The Easy Protein Pancakes Recipe uses many of the same nutritional building blocks if you’re looking for a high-protein breakfast to round out your healthy eating routine.
Frequently Asked Questions
1. Can I make monster cookie protein balls without protein powder?
Yes, absolutely. You can leave out the protein powder entirely and simply replace it with an equal amount of additional oats or ground flaxseed.
The balls will have slightly less protein per serving (around 3–4g versus 5–6g), but they’ll still taste great and hold together well. If you go this route, you may also need to reduce the liquid slightly since protein powder absorbs a fair amount of moisture.
2. Why are my protein balls falling apart and not holding together?
The most common reason is that the dough is too dry, which usually happens when the peanut butter is too thick or there isn’t enough liquid in the recipe.
Add 1 tablespoon of milk or water at a time, mixing well after each addition, until the dough holds together when pressed between your fingers. Also make sure your peanut butter is at room temperature and well stirred before you measure it.
3. How do I know what size to roll the balls?
The standard size for this recipe is about 1.5 to 2 tablespoons of dough per ball, which produces a bite-sized snack that’s satisfying without being overly large.
Using a cookie scoop is the easiest way to get uniform sizing. If you don’t have a scoop, a heaping tablespoon works just fine. Consistent sizing also helps all the balls chill and firm up at the same rate.
4. Can I use quick oats instead of old-fashioned oats?
Yes, quick oats can be substituted in this recipe and they produce a slightly softer, more uniform texture.
Old-fashioned oats give a chewier, more textured bite that closely resembles the feel of an actual monster cookie. Both versions taste great, so use whichever you have on hand. Avoid instant oats, as they are too fine and can make the mixture mushy.
5. Are monster cookie protein balls gluten-free?
The ingredients in this recipe are naturally gluten-free, but oats are frequently processed in facilities that also handle wheat, which can lead to cross-contamination.
If you have celiac disease or a serious gluten intolerance, use certified gluten-free oats to ensure the recipe is safe for you. All other ingredients (peanut butter, honey, protein powder, M&Ms, chocolate chips) are typically gluten-free, but always check labels if you’re highly sensitive.
Read Also: Baked Oatmeal Recipe
Final Thoughts
These monster cookie protein balls are one of those recipes that you’ll find yourself making on repeat because they’re just that good and that easy.
They nail the balance between satisfying a sweet craving and actually fueling your body with something wholesome.
Whether you’re meal prepping for the week ahead, looking for a post-workout snack, or just need something better than reaching for a cookie, this recipe delivers every single time.
Give them a try this weekend and let me know how it goes! Leave a comment below with your favorite mix-in variation or tag us on social media so we can see your protein ball creations.
Recommended:
- Monster Cookie Bars Recipe
- Monster Cookie Dough Dip
- Monster Cookie Ice Cream Recipe
- No Bake Cookie Recipe
- Oatmeal Raisin Cookie Recipe
- Peanut Butter Blossom Cookies Recipe
- Best Chocolate Chip Cookies Recipe
- Easy Granola Recipe
- Muddy Buddy Recipe
- Bourbon Balls Recipe


