
If you’ve been looking for the coziest, most satisfying bowl of soup to get you through a cold day, this Roasted Cauliflower Soup Recipe delivers exactly that. It’s velvety, deeply savory, and packed with that nutty, caramelized flavor that only comes from roasting cauliflower in a hot oven until the edges turn golden brown.
What makes this recipe genuinely special isn’t just the ingredients, it’s the technique. Roasting the cauliflower before it ever hits a pot is the key step that transforms an otherwise mild vegetable into something rich and full of flavor.
You’ll also roast a whole head of garlic alongside it, and that slow-cooked garlic adds a mellow sweetness you simply cannot get from raw garlic sauteed in a pan. Together, the two create a soup base that tastes like it simmered all day, even though it comes together in about an hour.
This recipe uses simple, everyday ingredients and makes excellent use of your blender or immersion blender to create a soup that’s silky smooth without needing a drop of heavy cream. A little butter added at the end is all it takes to give the soup a luxurious, restaurant-quality finish.
Why You’ll Love This Roasted Cauliflower Soup Recipe
This is the kind of soup that makes you wonder why you don’t make it every single week. It hits every note you want from a bowl of comfort food.
It’s incredibly simple. You need just a handful of ingredients, and most of the cooking time is hands-off while the cauliflower roasts in the oven.
The flavor is deeply satisfying. Roasting the cauliflower develops a nutty, slightly caramelized depth that plain boiled cauliflower just can’t match.
It’s naturally gluten-free. No flour, no roux, just vegetables, broth, and butter blended into something incredibly creamy.
It’s easy to make vegetarian or vegan. Swap the butter for plant-based butter or soaked cashews and use vegetable broth to keep it fully plant-based.
It stores and reheats beautifully. This soup actually tastes better the next day, making it perfect for meal prep.
- Silky smooth texture without any cream
- Deeply savory flavor from roasted cauliflower and garlic
- Ready in about 1 hour from start to finish
- Naturally gluten-free
- Easy to customize with your favorite toppings and variations
- Great for meal prep and freezer-friendly
You might also enjoy: Curried Cauliflower Soup
Ingredients
Here’s what you’ll need to make this roasted cauliflower soup. Each ingredient plays an important role, so don’t skip the garlic or the squeeze of lemon at the end.
- 1 large head of cauliflower (about 2 lbs / 900g), cut into florets
- 1 whole head of garlic
- 3 tablespoons olive oil, divided
- 1 medium yellow onion, roughly chopped
- 2 stalks of celery, roughly chopped
- 4 cups (960ml) vegetable broth (or chicken broth)
- 2 tablespoons unsalted butter
- 1 teaspoon fresh thyme leaves (or 1/2 teaspoon dried thyme)
- 1/2 teaspoon salt, plus more to taste
- 1/4 teaspoon black pepper, plus more to taste
- 1 tablespoon fresh lemon juice
- Optional: 1/4 cup (25g) freshly grated Parmesan cheese or sharp cheddar
- Optional toppings: reserved roasted cauliflower florets, chopped fresh parsley, chives, green onions, croutons, a drizzle of olive oil
For another hearty and satisfying soup option, the Cauliflower Soup Recipe on this site is a wonderful companion recipe worth bookmarking.
Kitchen Equipment Needed
You don’t need any fancy equipment for this recipe. Here’s what to have on hand before you start.
- Large rimmed baking sheet
- Parchment paper (optional, for easier cleanup)
- Aluminum foil (for wrapping the garlic)
- Large soup pot or Dutch oven
- Immersion blender OR a regular countertop blender
- Chef’s knife and cutting board
- Wooden spoon or silicone spatula
- Measuring cups and spoons
- Ladle for serving
Read Also: Roasted Butternut Squash Soup Recipe
Recommended Products for This Recipe
These are some products I genuinely recommend for making this roasted cauliflower soup easier and more enjoyable. They’re chosen based on quality and real performance in the kitchen.
1. Cuisinart Smart Stick Immersion Blender
An immersion blender is the single most useful tool for this soup. You can blend directly in the pot, which means fewer dishes and no risk of hot soup splattering out of a countertop blender. The Cuisinart Smart Stick is powerful enough to create a perfectly smooth, velvety texture in seconds. It’s one of those kitchen tools you’ll reach for again and again.
2. Nordic Ware Natural Aluminum Baking Sheet
A good, heavy-duty baking sheet makes a real difference when roasting cauliflower. This Nordic Ware pan heats evenly and develops beautiful caramelization on the florets without hot spots that can cause burning. It’s also sturdy enough to handle high oven temperatures without warping.
3. Le Creuset Signature Round Dutch Oven
Once the cauliflower is roasted, you’ll want a reliable pot to build the soup base. A Dutch oven like this one distributes heat evenly, so your onions and celery soften gently without scorching. The wide base also gives you plenty of room to simmer everything together before blending.
4. Swanson Vegetable Broth (Low Sodium)
The broth you use makes a real difference in the final flavor. A good quality, low-sodium vegetable broth lets you control the salt level and keeps the natural flavor of the roasted cauliflower in the spotlight. Swanson’s is widely available and consistently reliable.
5. Microplane Premium Classic Zester Grater
If you’re adding Parmesan to your soup, freshly grated is the way to go. Pre-shredded cheese doesn’t melt as smoothly into hot soup. A Microplane zester makes quick work of grating cheese and doubles as a zester for lemon if you want to add a little citrus brightness.
For another creamy vegetable soup you’ll love, check out this Carrot Soup Recipe that uses a similar roasting-and-blending technique.
Step-by-Step Instructions
Step 1: Preheat the Oven and Prep Your Vegetables
- Preheat your oven to 425°F (220°C). This high temperature is essential for getting proper caramelization on the cauliflower.
- Line a large baking sheet with parchment paper. This step is optional, but it makes cleanup much easier and prevents the cauliflower from sticking.
- Remove the outer leaves from the cauliflower head and cut it into bite-sized florets. Try to make them roughly the same size so they roast evenly. Smaller florets will caramelize faster, while oversized ones may stay pale in the center.
- If you want to reserve a few florets for garnishing the finished soup, set them aside now and keep them separate.
Step 2: Season and Roast the Cauliflower
- Place the cauliflower florets on the prepared baking sheet in a single layer. Avoid overcrowding the pan, as too many florets piled together will steam rather than roast. Use two baking sheets if needed.
- Drizzle 2 tablespoons of the olive oil over the cauliflower. Toss well with your hands or a spatula to make sure every piece is lightly and evenly coated.
- Sprinkle with 1/2 teaspoon salt and 1/4 teaspoon black pepper.
- Place the baking sheet in the preheated oven. Roast for 25 to 35 minutes, tossing the florets once at the halfway mark (around 15 minutes in).
- You’re looking for the cauliflower to be completely tender and the edges to turn deep golden brown. This caramelization is where all the flavor comes from, so don’t rush it or pull it out too early.
Step 3: Roast the Garlic
- Take the head of garlic and slice off about 1/4 inch (0.6cm) from the top to expose the tops of the individual cloves.
- Place the garlic head cut-side up on a small piece of aluminum foil. Drizzle with about 1 teaspoon of olive oil. Fold the foil up and around the garlic to create a loose packet.
- Place the foil packet on the same baking sheet as the cauliflower. The garlic will roast at the same time and should be done within the same window of 25 to 35 minutes.
- When the garlic is done, the cloves will look deeply golden and feel completely soft when pressed. Allow the packet to cool for a few minutes before handling it.
- Once cool enough to touch, squeeze the soft garlic cloves out of their skins directly into the soup pot or into a small bowl. The roasted garlic should pop out easily and look like a soft, golden paste.
Step 4: Sauté the Onion and Celery
- While the cauliflower is in its final minutes of roasting, begin building the soup base on the stovetop. Heat the remaining 1 tablespoon of olive oil in a large Dutch oven or soup pot over medium heat.
- Add the roughly chopped onion and celery to the pot. Stir to coat them in the oil.
- Cook for 6 to 8 minutes, stirring occasionally, until the onion becomes soft and translucent. You don’t need to brown the onion here. Just softening it thoroughly brings out its natural sweetness and creates a good base.
- Add the fresh thyme leaves to the pot and stir for about 30 seconds until fragrant.
Step 5: Add the Roasted Cauliflower, Garlic, and Broth
- Once the cauliflower has finished roasting and you have your roasted garlic squeezed out, add both to the pot with the softened onion and celery.
- If you set aside a few florets for garnish, keep those out of the pot.
- Pour in the 4 cups (960ml) of vegetable broth. Stir everything together.
- Bring the soup to a gentle boil over medium-high heat, then reduce the heat to low.
- Let the soup simmer, uncovered, for 10 to 15 minutes. This gives all the flavors time to meld together before blending.
Step 6: Blend Until Smooth
- Remove the pot from heat and allow the soup to cool slightly for 5 minutes. Blending extremely hot liquids can cause pressure to build up, especially in a countertop blender.
- If using an immersion blender, place it directly into the pot and blend until the soup is completely smooth. Move the blender around to make sure you reach all the corners and edges of the pot.
- If using a countertop blender, transfer the soup in batches. Fill the blender no more than halfway, hold the lid down firmly with a folded kitchen towel (never your bare hand), and blend until perfectly smooth. Return each blended batch to the pot.
- If you prefer a chunkier texture, blend only about two-thirds of the soup and leave the rest with some texture for contrast.
Step 7: Finish the Soup and Adjust Seasoning
- Return the pot to low heat. Add the 2 tablespoons of butter and stir until fully melted into the soup. This is what gives the soup that rich, silky finish without needing any cream.
- If you’re adding Parmesan or cheddar cheese, stir it in now and let it melt fully into the hot soup.
- Add the 1 tablespoon of fresh lemon juice. This step brightens all the flavors and balances the richness of the butter. Don’t skip it.
- Taste the soup and adjust with more salt and pepper as needed. If the soup is thicker than you’d like, stir in a splash of additional broth or water until it reaches your desired consistency.
Step 8: Serve and Garnish
- Ladle the soup into bowls. If you reserved some roasted cauliflower florets, place one or two on top of each bowl.
- Add your desired toppings: a sprinkle of fresh chives or parsley, a small drizzle of olive oil, or a handful of croutons for crunch.
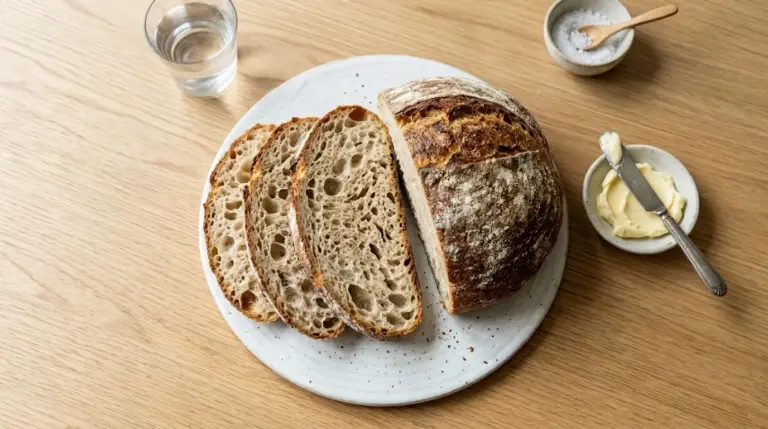
- Serve immediately alongside crusty bread for dipping.
This pairs wonderfully with a slice of Cheesy Garlic Bread on the side.
Tips for Success
A few smart moves in this recipe make the difference between a good soup and a truly great one. Keep these tips in mind before you start.
- Don’t crowd the baking sheet. Overcrowding causes the cauliflower to steam instead of roast, and you’ll miss out on the caramelization that gives the soup its deep flavor. Use two pans if necessary.
- Roast until it’s really golden. Some recipes pull the cauliflower too early. Wait until the edges are deeply browned for maximum flavor.
- Don’t skip the lemon juice. It might seem like a minor detail, but a tablespoon of fresh lemon juice at the end brightens the whole bowl and keeps the soup from tasting flat.
- Use good broth. Since this recipe has so few ingredients, the quality of your broth matters. Low-sodium is best so you can control the final salt level.
- Blend safely. If using a countertop blender, never fill it more than halfway when blending hot liquids. Vent the lid slightly or use a folded kitchen towel over the top.
- Add cheese while the soup is hot. If using Parmesan or cheddar, stir it in right after blending while the soup is still steaming. This ensures it melts smoothly rather than clumping.
- Taste before serving. Every head of cauliflower and every broth is slightly different. Always taste and adjust salt, pepper, and lemon juice at the end before ladling into bowls.
For another veggie-forward comfort soup, this Spinach Soup Recipe is a beautiful follow-up to try.
Serving Suggestions

This roasted cauliflower soup is incredibly versatile and works beautifully as both a light lunch and a satisfying dinner. It pairs well with a wide variety of accompaniments.
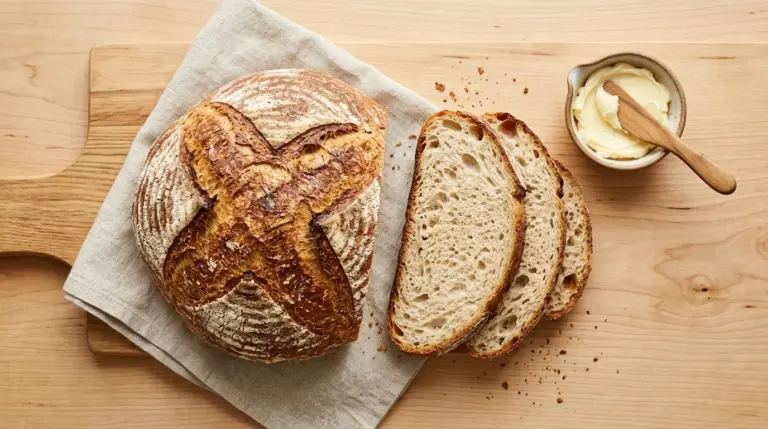
Crusty bread is the obvious companion, think sourdough, a warm baguette, or thick slices of garlic bread for dipping directly into the bowl.
For a more substantial meal, serve it alongside a simple green salad with a bright vinaigrette to complement the richness of the soup.
It also works beautifully as a starter for a dinner party, especially in smaller portions followed by a heartier main course.
- Sourdough bread or baguette slices
- Cheesy Garlic Bread
- Simple mixed green salad
- Broccoli Salad
- Crusty dinner rolls
- Roasted Broccoli as a side
- Crackers or a cheese board for a casual lunch pairing
- Grilled cheese sandwich cut into dipping strips
Another cozy soup that would make a wonderful pairing for a soup-focused dinner night: Celery Soup
Variations to Try
Once you’ve mastered the classic version, there are so many fun directions you can take this recipe. The base is very forgiving and pairs well with a wide range of add-ins and seasonings.
- Cheddar Cauliflower Soup: Stir in 1/2 cup (50g) of shredded sharp cheddar after blending for a richer, slightly tangier version. It tastes similar to broccoli cheddar soup but with all the depth of roasted cauliflower.
- Curried Cauliflower Soup: Add 1 teaspoon of curry powder and a pinch of turmeric to the onions while they sauté. Swap the butter for coconut oil and use coconut milk instead of broth for an even more aromatic result.
- Spicy Roasted Cauliflower Soup: Add 1/4 teaspoon of red pepper flakes when cooking the onion, or stir in a small spoonful of harissa paste after blending for a North African-inspired kick.
- Loaded Cauliflower Soup: Top each bowl with crispy bacon crumbles, shredded cheddar, sour cream, and chives for a fully loaded baked potato-style experience.
- Vegan Version: Replace the butter with a good plant-based butter or blend in 1/4 cup (35g) of soaked raw cashews for creaminess. Use vegetable broth and skip the cheese entirely.
- Roasted Garlic and Parmesan: Double the garlic and stir in a generous handful of freshly grated Parmesan right after blending. Serve with extra Parmesan on top.
- Smoky Version: Add 1/2 teaspoon of smoked paprika to the cauliflower before roasting for a subtle smoky depth that works particularly well with cheddar.
Read Also: Zucchini Soup Recipe
Storage and Reheating
This soup keeps wonderfully and may taste even better the next day as the flavors deepen overnight. Here’s how to store and reheat it properly.
- Refrigerator: Allow the soup to cool completely to room temperature. Transfer to an airtight container and refrigerate for up to 4 days.
- Freezer: This soup freezes exceptionally well. Pour cooled soup into freezer-safe containers or zip-lock bags, leaving about 1 inch (2.5cm) of headspace for expansion. Freeze for up to 3 months. Label with the date so you know what you’re pulling out.
- To reheat from the fridge: Pour the soup into a small saucepan and warm over medium-low heat, stirring occasionally, until heated through. Alternatively, microwave in 90-second increments, stirring between each, until hot.
- To reheat from frozen: Thaw the soup overnight in the refrigerator, then reheat on the stovetop as described above. If the soup has thickened during storage, stir in a splash of broth or water while reheating until it reaches your desired consistency.
- Do not boil when reheating: Bringing the blended soup to a rolling boil can affect the texture. Heat it gently to just below a simmer for the best results.
Read Also: Mushroom Soup Recipe
Nutritional Facts
The following nutritional information is an estimate for one serving (based on 4 servings from this recipe) without optional cheese toppings.
| Nutrient | Per Serving |
|---|---|
| Calories | ~175 kcal |
| Total Fat | 12g |
| Saturated Fat | 4g |
| Carbohydrates | 14g |
| Dietary Fiber | 4g |
| Sugars | 5g |
| Protein | 4g |
| Sodium | ~540mg |
| Vitamin C | 75mg (83% DV) |
| Vitamin K | 18mcg |
| Folate | 70mcg |
Nutritional values are estimates and will vary depending on the specific brands and ingredients used. Adding cheese or using chicken broth will alter these values.
This is a naturally low-calorie, low-carbohydrate soup that still manages to feel indulgent and satisfying, making it a smart choice for lighter eating without feeling deprived.
This Corn Soup Recipe is another wholesome option worth exploring if you enjoy vegetable-forward soups.
Health Benefits of Key Ingredients
Beyond being delicious, this roasted cauliflower soup is a genuinely nutritious meal. The ingredients work together to deliver real health benefits with every bowl.
Cauliflower is a nutritional powerhouse that’s easy to overlook because of how mild and pale it looks. It’s rich in fiber, which supports healthy digestion and helps you feel full longer after eating.
It’s also an excellent source of Vitamin C, with a single cup of cauliflower providing over 75% of your recommended daily intake. That’s a real immune system boost, especially welcome in the cold and flu season when this soup is most appealing.
- Cauliflower: High in fiber, Vitamin C, Vitamin K, and folate. Contains unique antioxidants and plant compounds that support immune function and may help reduce inflammation.
- Garlic: Rich in allicin, a compound with potent antimicrobial and anti-inflammatory properties. Regular consumption of garlic has been linked to lower blood pressure and improved heart health.
- Olive oil: A source of healthy monounsaturated fats and polyphenols, which are antioxidants associated with reduced risk of heart disease.
- Onion and celery: Both are low in calories and rich in antioxidants. Onions provide quercetin, a flavonoid known for its anti-inflammatory effects, while celery adds Vitamin K and notable hydration.
- Lemon juice: Adds Vitamin C and acts as a natural preservative. The acid also helps the body absorb iron from plant-based foods more effectively.
- Vegetable broth: A hydrating, low-calorie base that contributes minerals and electrolytes without adding fat.
For another vegetable-based soup with impressive nutritional credentials, this Kale Soup Recipe is a reader favorite.
Frequently Asked Questions
1. Can I make this roasted cauliflower soup without a blender?
You can make a rustic version without a blender, but it will have a very different texture. Instead of blending, you could mash the roasted cauliflower with a potato masher directly in the pot for a chunkier, more textured soup. It won’t be silky smooth, but it will still taste delicious with all the same roasted flavors.
2. Can I use frozen cauliflower for this recipe?
Fresh cauliflower is strongly recommended for this recipe because frozen cauliflower has a much higher water content. When roasted from frozen, it tends to steam rather than caramelize, which means you lose the signature nutty, golden-brown flavor that makes this soup so special. If fresh is unavailable, thaw frozen florets completely and pat them very dry with paper towels before roasting.
3. How do I make this soup vegan?
It’s very easy to make this soup fully vegan. Replace the butter with a good-quality plant-based butter like Miyoko’s or Earth Balance, and make sure you’re using vegetable broth rather than chicken broth. For an even richer result without dairy, blend in 1/4 cup (35g) of soaked raw cashews along with the cauliflower. The cashews add a natural, creamy richness that beautifully mimics the texture of cream.
4. Can I add protein to this soup to make it more filling?
Absolutely. Crispy chickpeas roasted with a bit of olive oil and smoked paprika make a fantastic protein-rich topping. You can also stir in white beans directly into the blended soup for extra protein and fiber. For non-vegetarian options, shredded rotisserie chicken stirred in at the end or crumbled crispy bacon as a garnish both work very well with the flavor profile of this soup.
5. Why is my roasted cauliflower soup bitter?
A bitter taste in cauliflower soup is usually caused by one of two things. Either the cauliflower was overcooked to the point of becoming scorched and acrid, rather than caramelized and golden, or it wasn’t blended long enough to fully break down the florets. A squeeze of fresh lemon juice and a pinch of extra salt at the end can also help balance out any bitterness. Using a very fresh, firm head of cauliflower without any yellowing or browning on the florets also helps prevent any off-flavors from the start.
Read Also: Pumpkin Soup Recipe
Final Thoughts
This roasted cauliflower soup recipe is one of those dishes that proves simple food done well can be more satisfying than anything complicated.
The combination of deeply caramelized cauliflower, sweet roasted garlic, and a touch of butter creates a bowl of soup that tastes far more indulgent than the ingredient list would suggest.
If you’ve never tried roasting cauliflower before blending it, this is your sign to start. The flavor difference is genuinely remarkable compared to boiled or steamed versions.
Give this recipe a try the next time you’re craving something warm, nourishing, and deeply comforting. We’d love to hear how it turned out in the comments below.
Share this recipe with a friend who loves cozy soups, and feel free to leave a rating if you make it!
Recommended:
- Cauliflower Soup Recipe
- Curried Cauliflower Soup Recipe
- Roasted Carrot Soup Recipe
- Cream of Broccoli Soup Recipe
- Healthy Broccoli Soup Recipe
- Potato Leek Soup Recipe
- Vegetable Soup Recipe
- Chicken Vegetable Soup Recipe
- Roasted Butternut Squash Soup Recipe
- Lentil Soup Recipe
