If you love cookies and ice cream in equal measure, this monster cookie ice cream recipe is about to become your new obsession.
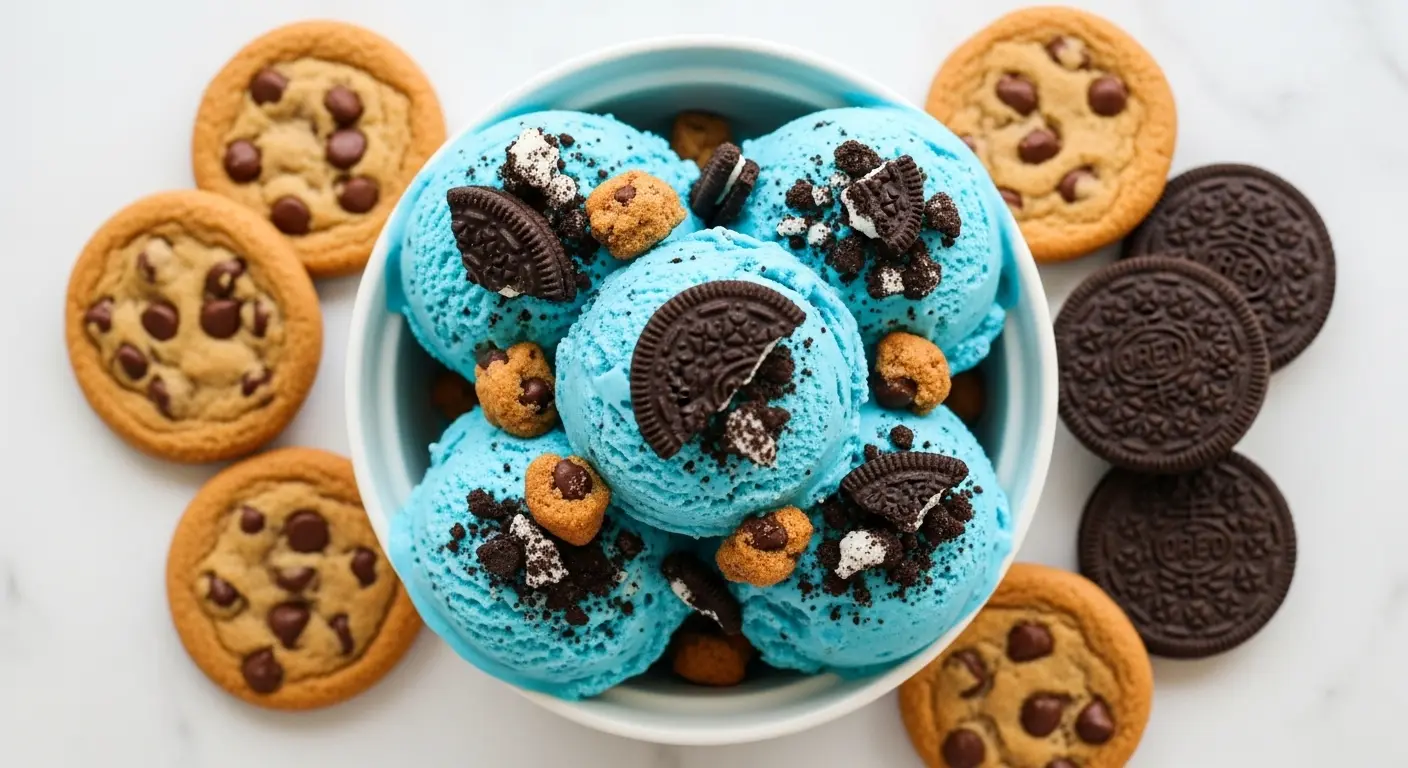
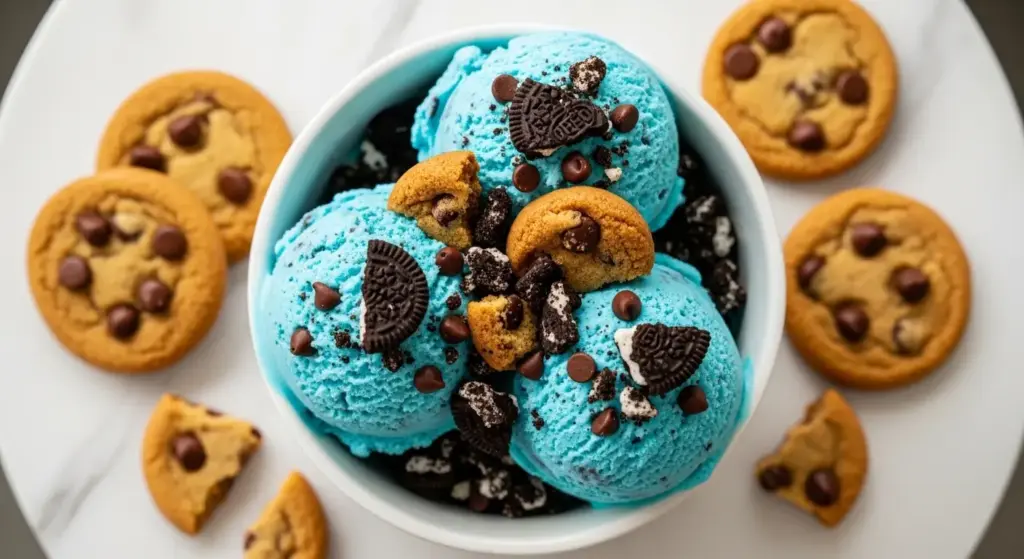
It is a vibrant blue, no-churn vanilla ice cream base packed with chunky pieces of Oreos and chocolate chip cookies in every single scoop. No ice cream maker required, no cooking a custard, no fussy technique. Just a handful of ingredients, an electric mixer, and a freezer.
The brilliant blue color is purely for fun. It comes from gel food coloring and has no flavor impact whatsoever. The taste is all about rich, creamy vanilla ice cream studded with two kinds of crunchy cookies.
This recipe is inspired by the beloved Sesame Street character and is perfect for birthday parties, summer get-togethers, or any time you need a dessert that makes everyone at the table smile.
The no-churn method works by whipping heavy cream to stiff peaks, which traps air and creates that light, scoopable texture you expect from great ice cream. When combined with sweetened condensed milk (which dissolves perfectly and keeps the base from getting icy), the result is a smooth, creamy frozen treat that rivals anything from an ice cream shop.
You might also love making Monster Cookie Bars if you want to use those same monster cookie flavors in a chewy, handheld dessert.
Why You’ll Love This Monster Cookie Ice Cream Recipe
This is one of those recipes that delivers maximum wow factor with minimal effort.
It takes about 15 minutes of hands-on time, and then the freezer does the rest of the work. No special equipment is needed beyond an electric hand mixer or stand mixer.
The combination of two types of cookies creates different textures in every bite. The Oreos bring a deep chocolate crunch, while the chocolate chip cookies add a buttery, golden sweetness.
The blue color makes it an instant showstopper at any party. Kids absolutely go wild for it, and honestly, so do adults.
Here is what you will love most:
- No ice cream maker needed — the no-churn method is simple and foolproof
- Ready with just 15 minutes of prep — the freezer handles the rest
- Two types of cookies provide layered texture and flavor in every scoop
- Rich, creamy base made from heavy cream and sweetened condensed milk
- Vibrant blue color makes it perfect for kids’ parties, Sesame Street themes, and celebrations
- Completely customizable with your favorite cookies and mix-ins
- Stores beautifully in the freezer for up to two months
If you enjoy this kind of cookie-filled treat, you will also want to check out the Monster Cookie Dough Dip for another fun and crowd-pleasing dessert.
Ingredients
The ingredient list for this recipe is short, and every single item pulls its weight. The quality of your heavy cream matters most here — make sure it is cold straight from the refrigerator, as warm cream will not whip properly.
Here is everything you will need:
- 2 cups (480 ml) heavy whipping cream, very cold
- 1 can (14 oz / 396 g) sweetened condensed milk
- 2 teaspoons (10 ml) pure vanilla extract
- 1/2 teaspoon (2.5 ml) blue gel food coloring (adjust to achieve your desired shade)
- 1/4 teaspoon (1.5 g) fine salt
- 15 Oreo cookies (about 1 cup / 150 g), roughly chopped into 1/2-inch pieces
- 10 Chips Ahoy chocolate chip cookies (about 1 cup / 120 g), roughly chopped into 1/2-inch pieces
- 1/2 cup (85 g) semi-sweet chocolate chips (optional, for extra chocolatey pockets)
- 1/4 cup (45 g) white chocolate chips (optional, for visual contrast)
- Extra cookies for topping, if desired
Read Also: Monster Cookie Recipe
Kitchen Equipment Needed
You do not need anything fancy for this recipe. The tools listed below are all you need to pull off a perfect batch of no-churn ice cream.
- Electric hand mixer or stand mixer (for whipping the cream)
- 9×5 inch loaf pan or any similar freezer-safe container
- Large mixing bowl (must be cold — place it in the fridge for 15 minutes before using)
- Medium mixing bowl (for the condensed milk mixture)
- Rubber spatula for folding
- Parchment paper for lining the pan
- Plastic wrap for covering the pan during freezing
- Ice cream scoop for serving
- Large zip-top bag and rolling pin for crushing the cookies
The Monster Cookie Protein Balls is another great recipe that uses many of the same pantry staples if you want to make good use of your grocery haul.
Recommended Products for This Recipe
These are products I genuinely recommend based on quality and performance. They will help you get the best results from this recipe every time.
1. Wilton 9×5 Inch Loaf Pan
A sturdy, non-stick loaf pan is the ideal vessel for no-churn ice cream. It freezes evenly, releases ice cream cleanly, and the standard 9×5 size holds the exact amount this recipe yields. A quality pan also means less freezer burn around the edges.
2. Gel Food Coloring Set
Gel food coloring gives you a far more vibrant, saturated blue than liquid food coloring, without adding extra moisture that could affect the texture of your ice cream. A quality gel set means you can dial in the exact shade of blue you want.
3. KitchenAid Stand Mixer
Whipping heavy cream by hand is possible, but a stand mixer does the work in about 3 minutes with zero effort. It frees your hands and ensures perfectly consistent stiff peaks every time, which is the key to a creamy, smooth ice cream base.
4. OXO Good Grips Ice Cream Scoop
A quality ice cream scoop with a comfortable grip and sharp edge cuts through frozen ice cream cleanly and makes beautiful rounded scoops. It works especially well after you let the ice cream sit at room temperature for 2 to 3 minutes before serving.
5. Ghirardelli Semi-Sweet Chocolate Chips
Premium chocolate chips melt beautifully into the ice cream and create little pockets of chocolate flavor in every bite. Ghirardelli chips are consistently high quality and taste noticeably better than generic store brands.
The flavors in this recipe pair beautifully with a Cheesecake Ice Cream Cake if you are planning a bigger frozen dessert spread.
Step-by-Step Instructions
Step 1: Chill Your Bowl and Prepare Your Tools
- Place your large mixing bowl and the beaters of your electric mixer in the refrigerator for at least 15 minutes before starting. A cold bowl is essential for whipping cream to stiff peaks quickly and efficiently.
- While the bowl chills, line your 9×5 inch loaf pan with a sheet of parchment paper, leaving some overhang on the sides. This makes it easier to lift the finished ice cream out of the pan for slicing if desired.
- Pull the heavy whipping cream out of the refrigerator only when you are ready to use it. It should be ice cold.
Step 2: Crush the Cookies
- Place your Oreo cookies into a large zip-top bag and seal it tightly, pressing out as much air as possible.
- Use a rolling pin to gently crush the Oreos into roughly 1/2-inch chunks. You want varied pieces — some smaller crumbles for flavor and some larger chunks for satisfying texture bites. Do not crush them into fine crumbs.
- Transfer the crushed Oreos to a small bowl and set aside.
- Repeat the same process with the Chips Ahoy chocolate chip cookies. Crush them into 1/2-inch pieces in a separate zip-top bag.
- Transfer to a second small bowl and set aside.
- If using semi-sweet or white chocolate chips, measure them out and set them aside as well.
Step 3: Mix the Condensed Milk Base
- In a medium mixing bowl, whisk together the sweetened condensed milk, vanilla extract, and fine salt until well combined.
- The salt might seem like an unusual addition, but it enhances the sweetness and rounds out the overall flavor — do not skip it.
- Set this bowl aside while you whip the cream. You want the condensed milk mixture ready to go so you can move quickly once the cream is whipped.
Step 4: Whip the Heavy Cream to Stiff Peaks
- Remove your chilled bowl from the refrigerator and pour in the cold heavy whipping cream.
- Beat on medium-high speed with your electric mixer. After about 1 minute, the cream will start to thicken and show soft peaks.
- Continue beating for another 1 to 2 minutes until you reach stiff peaks. Stiff peaks mean the cream holds its shape firmly when you lift the beaters — the tip of the peak stands straight up without flopping over.
- Be careful not to over-whip. Over-beaten cream will look grainy and start to separate, and it cannot be fixed. Stop as soon as you see firm, glossy peaks.
Step 5: Add the Blue Color and Condensed Milk
- Add the blue gel food coloring directly to the whipped cream bowl. Start with 1/4 teaspoon and mix it in before adding more.
- Pour the sweetened condensed milk mixture over the whipped cream.
- Using your rubber spatula, fold the condensed milk and food coloring into the whipped cream with slow, wide strokes. Scoop from the bottom and fold over the top, rotating the bowl as you go.
- Fold just until the mixture is uniform in color and the condensed milk is fully incorporated. Avoid stirring aggressively — you want to preserve as much air in the cream as possible. This trapped air is what creates the creamy, scoopable texture.
- If the blue is not dark enough for your liking, add a small amount more gel coloring and fold again briefly.
Step 6: Fold in the Cookies and Chocolate Chips
- Add about two-thirds of the crushed Oreos, two-thirds of the crushed Chips Ahoy, and all of the semi-sweet chocolate chips into the ice cream mixture.
- Using the rubber spatula, fold the cookies in gently with the same slow folding motion. Distribute them evenly throughout the base without deflating the mixture.
- Reserve the remaining one-third of each cookie for the top layers.
Step 7: Layer and Freeze the Ice Cream
- Pour half of the ice cream mixture into your prepared loaf pan.
- Scatter half of the reserved cookie pieces over the top of the first layer. This creates a cookie layer in the middle of the ice cream, ensuring you get cookie pieces in every slice.
- Pour the remaining ice cream mixture over the cookie layer and smooth the top with the back of your spatula.
- Scatter the remaining reserved cookie pieces over the very top. You can also press a few extra whole cookies into the surface for a decorative finish.
- If using white chocolate chips, scatter them over the top as a visual garnish.
- Cover the pan tightly with plastic wrap, pressing it directly against the surface of the ice cream. This prevents ice crystals from forming on the top.
- Place the pan in the coldest part of your freezer — usually the back, away from the door.
Step 8: Freeze Until Set
- Freeze the ice cream for a minimum of 6 hours. Overnight freezing gives the best results — the ice cream will be firmer, scoopable, and fully set throughout.
- Resist the urge to check on it by lifting the plastic wrap frequently, as warm air exposure will cause ice crystals to develop on the surface.
Step 9: Serve and Scoop
- Remove the pan from the freezer and let it sit on the counter for 2 to 3 minutes before scooping. This short temper time makes scooping significantly easier without softening the ice cream too much.
- Use a quality ice cream scoop dipped briefly in warm water for the cleanest, most rounded scoops.
- Serve in bowls or cones, and top with extra crushed cookies, hot fudge sauce, or whipped cream if desired.
This recipe is wonderful served alongside a warm batch of Chewy Chocolate Chip Cookies for the ultimate cookies-and-cream experience.
Tips for Success
A few key tips make the difference between great ice cream and truly exceptional ice cream. Keep these in mind before you start.
- Keep everything cold. Your cream, your bowl, and even your loaf pan should all be cold before you begin. Warm cream will not whip properly and the result will be a flat, dense ice cream.
- Use gel food coloring, not liquid. Gel coloring creates a vivid, saturated blue without adding extra moisture to the mixture. Liquid food coloring can dilute the cream and affect the texture.
- Do not over-mix after adding the condensed milk. Fold gently and stop as soon as the mixture looks uniform. Over-mixing knocks the air out of the whipped cream, which leads to a denser, icier final product.
- Size your cookie pieces thoughtfully. Aim for 1/2-inch chunks — pieces that are too small disappear into the base, while pieces that are too large are hard to bite through when frozen. A mix of sizes is ideal.
- Use store-bought crunchy cookies. Homemade cookies are softer and tend to become soggy and gummy in ice cream. Crunchy, commercial cookies hold their texture much better when frozen.
- Line your pan with parchment. The overhang makes it easy to lift the ice cream block out cleanly if you want to slice it instead of scoop it.
- Freeze overnight for best results. Six hours works, but overnight freezing produces a noticeably firmer, creamier texture that scoops beautifully.
You might also enjoy: Old Fashioned Chocolate Chip Cookie Recipe
Serving Suggestions
Monster cookie ice cream is delicious on its own, but it really shines with the right accompaniments and presentation.
Serve it in waffle cones for a classic ice cream shop feel. The crunchy cone complements the creamy base and cookie chunks beautifully.
Here are some fun and delicious ways to serve it:
- In an ice cream sandwich between two soft chocolate chip cookies — press gently so the ice cream spreads to the edges
- Topped with Hot Fudge Sauce for a rich, decadent drizzle over each scoop
- With a sprinkle of extra Oreo crumbles for added crunch on top
- Alongside a slice of birthday cake — the blue color makes it a natural party pairing
- In a sundae bowl with whipped cream and a maraschino cherry on top
- Drizzled with caramel sauce for a sweet and salty contrast
- Served with a warm Cookie Skillet for a hot-and-cold dessert combo
Variations to Try
Once you have mastered the basic recipe, there are so many fun directions you can take this ice cream.
The no-churn base is incredibly versatile and pairs well with a wide range of mix-ins and flavors. Here are some variations worth exploring.
- Peanut Butter Monster Cookie Ice Cream: Swirl in 1/2 cup of creamy peanut butter with the condensed milk and add peanut butter cookies instead of or alongside Chips Ahoy for a salty-sweet twist
- Cookie Dough Version: Fold in chunks of safe-to-eat edible cookie dough along with the cookie pieces for an extra indulgent treat
- M&M Cookie Monster Ice Cream: Chop up mini M&M candies (avoid whole M&Ms as they become rock hard when frozen) and fold them in along with the cookies
- Mint Cookie Monster Ice Cream: Add 1/2 teaspoon of pure mint extract along with the vanilla for a cool, refreshing flavor that pairs perfectly with Oreos
- Gluten-Free Version: Substitute your favorite gluten-free sandwich cookie and gluten-free chocolate chip cookies — the no-churn base itself is naturally gluten-free
- Extra Chocolate Version: Add 1/4 cup of cocoa powder to the condensed milk mixture for a chocolate-tinted blue base with an even deeper flavor
- Nutter Butter Version: Replace the Chips Ahoy with crushed Nutter Butter cookies for a peanut butter cookie crunch that takes the flavor in a whole new direction
Read Also: Monster Cookie Protein Balls Recipe
Storage and Reheating
No-churn ice cream stores very well and can last for up to two months in the freezer when stored properly.
The key to keeping your ice cream fresh is protecting it from air exposure and temperature fluctuations.
- In the pan: Keep the ice cream in the loaf pan and cover the surface directly with plastic wrap. Press the wrap flush against the ice cream surface to block air contact and prevent ice crystals from forming on top.
- In an airtight container: Transfer scoops to a freezer-safe airtight container for easier access. Press a sheet of plastic wrap against the exposed surface before sealing the lid.
- Avoid the freezer door: Store ice cream toward the back of the freezer where temperatures are most consistent. The freezer door area experiences temperature fluctuations every time it opens.
- Consume within 2 months: The ice cream stays fresh and creamy for up to 2 months. After that, it may begin to crystallize and develop a slightly icy texture.
- To serve from frozen: Remove the ice cream from the freezer and let it sit at room temperature for 2 to 3 minutes before scooping. This brief temper time significantly improves scoopability without melting the ice cream.
Another favorite: Hot Fudge Sundae
Nutritional Facts
The following values are approximate, based on the full recipe divided into 8 servings. Actual values will vary depending on the specific brands of cookies and condensed milk you use.
| Nutrient | Per Serving (approx.) |
|---|---|
| Calories | 420 kcal |
| Total Fat | 26 g |
| Saturated Fat | 15 g |
| Cholesterol | 85 mg |
| Sodium | 220 mg |
| Total Carbohydrates | 44 g |
| Dietary Fiber | 1 g |
| Total Sugars | 34 g |
| Protein | 5 g |
| Calcium | 130 mg |
| Iron | 1.5 mg |
Note: These values are estimates and should be used as a general guide only.
This is a rich, indulgent dessert meant to be enjoyed as a treat. Portion sizes can be adjusted based on your preferences.
Read Also: Dirt Pudding Recipe
Health Benefits of Key Ingredients
While monster cookie ice cream is unquestionably a treat, a few of its key ingredients do bring some genuine nutritional value to the table.
It is nice to know that even your favorite indulgences have a few things going for them.
Here is a look at the standout ingredients:
- Heavy cream: Rich in fat-soluble vitamins A, D, E, and K, which support vision, bone health, and immune function. The fat content also helps promote satiety, so a smaller serving can feel satisfying.
- Sweetened condensed milk: Provides a source of calcium and phosphorus, both of which are important for bone strength and dental health.
- Dark chocolate chips (semi-sweet): Contain antioxidants called flavonoids, which have been linked to improved heart health and reduced inflammation. They also provide a small amount of iron and magnesium.
- Oat-based cookies (if you choose oatmeal-style): Oats are a source of beta-glucan fiber, which supports healthy cholesterol levels and digestive health.
- White chocolate: Provides a small amount of calcium from its milk solids content, along with a concentrated source of energy from its cocoa butter fat content.
This pairs well as a fun party dessert alongside a Banana Pudding Recipe for a crowd-pleasing spread.
Frequently Asked Questions
1. Do I need an ice cream maker for this monster cookie ice cream recipe?
No, this recipe is specifically designed as a no-churn ice cream. All you need is an electric hand mixer or stand mixer to whip the heavy cream to stiff peaks. The whipped cream replaces the churning process by trapping air mechanically, which creates the light, creamy texture you expect from good ice cream.
2. Why is my ice cream icy instead of creamy?
Icy texture usually results from one of two issues. Either the heavy cream was not whipped to true stiff peaks before the condensed milk was added, or the mixture was stirred too aggressively after the cream was folded in. Both of these cause air to escape, which reduces creaminess. Make sure to whip fully to stiff peaks and fold gently throughout.
3. Can I use a different color or skip the food coloring entirely?
Absolutely. The blue color is purely cosmetic and has zero impact on the flavor. You can use any color you like, match it to a party theme, or simply leave it out for a natural cream-colored ice cream. The recipe works exactly the same either way.
4. How long does this ice cream need to freeze?
A minimum of 6 hours is needed for the ice cream to set enough to scoop cleanly. For the best texture and flavor, freeze it overnight. Overnight freezing gives the ice cream time to fully firm up throughout, which means better scoops and a smoother, creamier bite.
5. Can I substitute the cookies with other varieties?
Yes, you can use any crunchy store-bought cookies you enjoy. Nutter Butters, Golden Oreos, Biscoff cookies, or even shortbread all work wonderfully. The key word is crunchy — soft or homemade cookies tend to turn soggy and gummy once frozen. Also, make sure to chop them into roughly 1/2-inch pieces for the best distribution and texture in every scoop.
Read Also: Caramel Sauce Recipe
Final Thoughts
This monster cookie ice cream recipe is one of those rare desserts that is just as fun to make as it is to eat.
The vibrant blue color, the chunky cookie pieces, and the rich creamy vanilla base all come together into something truly special. It is the kind of dessert that gets everyone excited the moment it hits the table.
The no-churn method makes it completely approachable for any skill level. If you can whip cream and fold ingredients together, you can make this ice cream.
Give it a try the next time you want to impress at a party or just treat yourself to something extraordinary. I would love to hear how yours turns out — drop a comment below to let me know what cookies you used, and share a photo if you make it!
Recommended:
- Monster Cookie Bars
- Monster Cookie Dough Dip
- No Bake Cookie Recipe
- Oatmeal Cookie Recipe
- Peanut Butter Cookie Recipe
- Best Chocolate Chip Cookies
- Snickerdoodle Cookie Recipe
- Oatmeal Raisin Cookie Recipe
- Muddy Buddy Recipe
- Funnel Cake Bites Recipe


