I used to think figgy pudding was just a line in that old Christmas carol—until I tasted the real thing at a holiday dinner party years ago. The rich, warming spices combined with tender figs and a hint of brandy completely changed my mind.
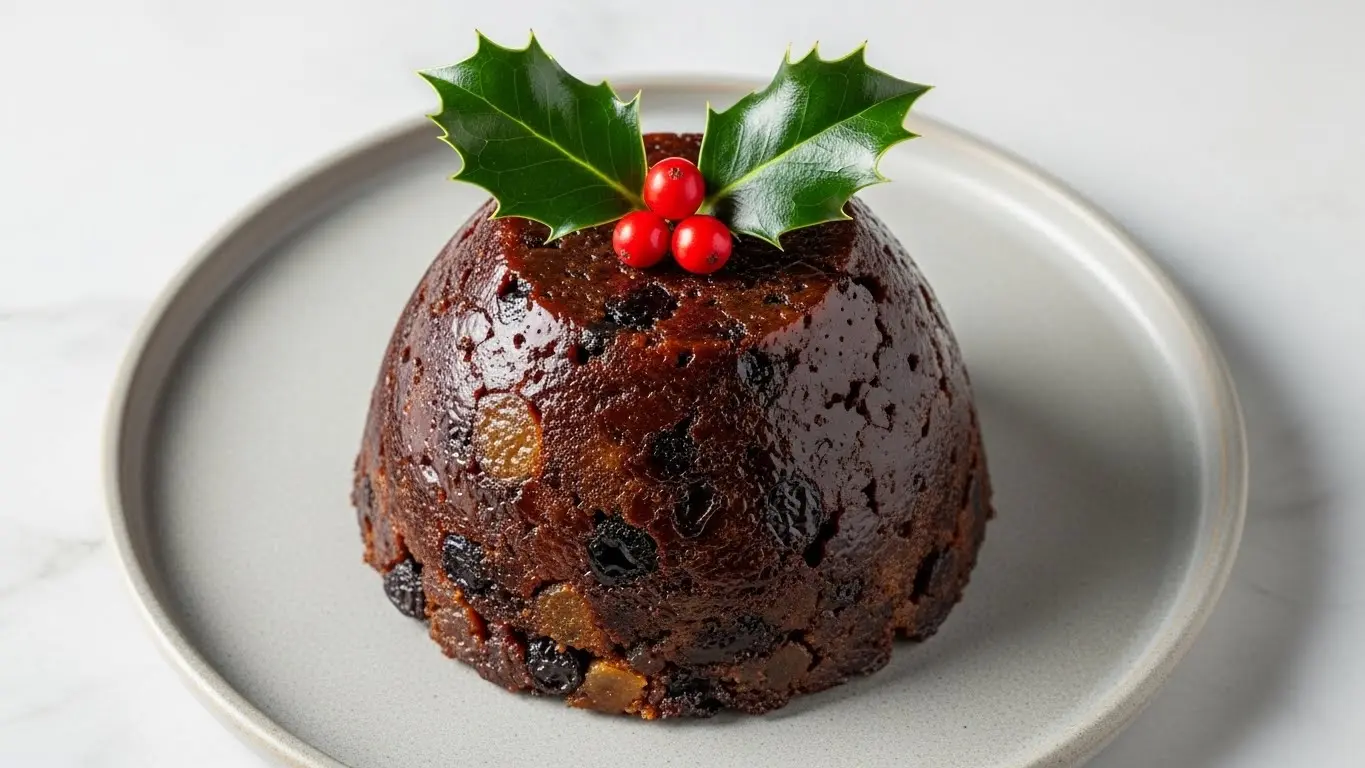
Now, this figgy pudding recipe has become a centerpiece of my holiday baking tradition. It’s a dense, moist steamed cake that tastes like Christmas itself—deeply spiced, fruity, and utterly satisfying.
The beauty of figgy pudding lies in its make-ahead nature and how it actually improves with time. You can prepare it weeks in advance, let it age, and feed it with spirits for an even richer flavor.
It might sound intimidating at first, but I promise the process is straightforward. Once you get the hang of steaming puddings, you’ll feel like a Victorian-era baker bringing history to life in your own kitchen.
This recipe produces a pudding that’s neither too heavy nor overly sweet—just perfectly balanced with fruit, spice, and warmth. Serve it with a generous drizzle of warm brandy butter or custard, and watch your guests’ faces light up.
Why You’ll Love This Figgy Pudding Recipe
This figgy pudding recipe delivers authentic holiday flavors that transport you straight to a Dickensian Christmas feast. The combination of dried figs, warm spices, and a hint of citrus creates layers of flavor that develop beautifully over time.
Unlike many holiday desserts that require last-minute preparation, this one actually benefits from being made ahead. You can steam it weeks before your celebration, then simply reheat it when needed—talk about stress-free entertaining!
Here’s what makes this recipe special:
- Rich, complex flavor profile with figs, dates, spices, and optional brandy
- Make-ahead friendly and improves with age when stored properly
- Traditional steaming method creates the perfect moist, dense texture
- Impressive presentation that wows guests at holiday gatherings
- Customizable sweetness depending on your dried fruit choices
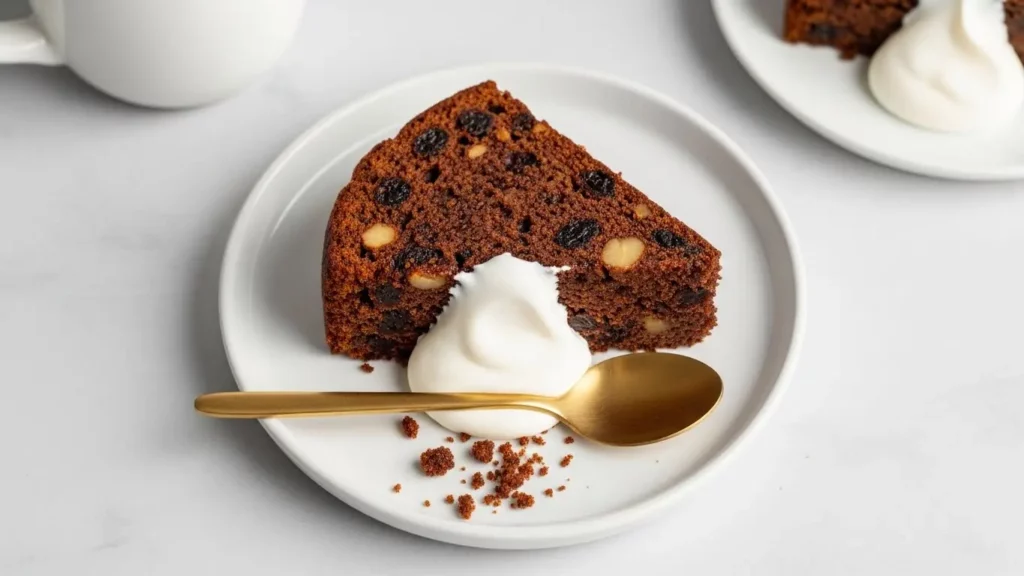
- Pairs beautifully with brandy butter, custard, or whipped cream
- Freezer-friendly for up to three months
You might also enjoy: Sticky Toffee Pudding Recipe
Ingredients
This figgy pudding uses a combination of dried fruits, warming spices, and breadcrumbs to create its signature texture. The alcohol is optional but adds depth and helps preserve the pudding.
Gather these ingredients before you start:
- 1½ cups dried figs, stems removed and chopped
- ½ cup dried dates, pitted and chopped
- ½ cup golden raisins
- ¼ cup brandy or orange juice (plus extra for feeding)
- 1 cup all-purpose flour
- 1½ cups fresh breadcrumbs
- 1 cup dark brown sugar, packed
- 1 cup beef suet or unsalted butter, grated or finely chopped
- 3 large eggs
- ½ cup whole milk
- 1 teaspoon baking powder
- 2 teaspoons ground cinnamon
- 1 teaspoon ground ginger
- ½ teaspoon ground nutmeg
- ½ teaspoon ground allspice
- ¼ teaspoon ground cloves
- Zest of 1 orange
- Zest of 1 lemon
- ½ teaspoon salt
- ¼ cup molasses or treacle
Kitchen Equipment Needed
Having the right equipment makes steaming your pudding much easier and ensures even cooking. Most of these items are standard kitchen tools you likely already own.
Here’s what you’ll need:
- Pudding basin or heatproof bowl (6-cup capacity)
- Large pot with lid for steaming
- Parchment paper and aluminum foil
- Kitchen twine or string
- Mixing bowls (various sizes)
- Wooden spoon or spatula
- Whisk
- Grater (for suet/butter and citrus zest)
- Measuring cups and spoons
- Sharp knife and cutting board
- Trivet or upturned heatproof plate (to keep pudding off pot bottom)
Read Also: Brownie Pudding Recipe
Recommended Products for This Recipe
I’ve tested this recipe with various products over the years, and these are the ones that consistently deliver the best results. Quality ingredients and the right equipment truly make a difference.
1. California Dried Figs
The quality of your figs directly impacts the final pudding texture and flavor. I prefer California dried figs because they’re consistently plump, naturally sweet, and have the perfect chewy texture that softens beautifully during steaming.
2. Traditional Pudding Basin
A proper ceramic pudding basin distributes heat evenly and creates the classic domed shape. The basin I use has a lip around the rim that makes it easy to tie down the cover securely, preventing any water from seeping in during the long steaming process.
3. High-Quality Ground Spices Set
Fresh, aromatic spices transform this pudding from good to spectacular. I recommend investing in a premium spice set specifically for holiday baking—the difference in flavor intensity is remarkable, and you’ll use them for countless other festive treats.
4. Blackstrap Molasses
Blackstrap molasses adds a deep, complex sweetness with mineral notes that enhance the spices. It’s less sweet than regular molasses but contributes incredible depth and that authentic old-world pudding flavor.
Step-by-Step Instructions
Take your time with each step, especially if this is your first steamed pudding. The process is forgiving, and the results are absolutely worth the effort.
1. Prepare the Dried Fruits
Proper fruit preparation ensures even distribution throughout the pudding and prevents any tough pieces.
- Remove stems from the figs and chop them into small, roughly uniform pieces about the size of raisins
- Pit and chop the dates into similar-sized pieces
- Place all dried fruits (figs, dates, and raisins) in a medium bowl
- Pour the brandy or orange juice over the fruits
- Stir well to coat all the fruit pieces evenly
- Cover the bowl with plastic wrap or a clean kitchen towel
- Let the fruits soak at room temperature for at least 2 hours, or preferably overnight
- Stir occasionally if soaking for extended periods to ensure even absorption
2. Prepare Your Pudding Basin
Setting up the basin correctly prevents water from entering during steaming.
- Generously butter the inside of your 6-cup pudding basin, making sure to coat the bottom and sides thoroughly
- Cut a circle of parchment paper to fit the bottom of the basin and press it down
- Cut a large square of parchment paper (about 12 inches) and a slightly larger square of aluminum foil
- Layer the parchment on top of the foil
- Make a 1-inch pleat down the center of both layers by folding them together—this allows for expansion during steaming
- Set aside until needed
3. Mix the Dry Ingredients
Combining dry ingredients first ensures even spice distribution.
- In a large mixing bowl, whisk together the flour, breadcrumbs, and baking powder
- Add the brown sugar and break up any lumps with your fingers or a fork
- Add all the ground spices: cinnamon, ginger, nutmeg, allspice, and cloves
- Stir in the salt
- Add the grated or finely chopped suet (or butter) to the dry mixture
- Use your fingertips to rub the fat into the dry ingredients until the mixture resembles coarse breadcrumbs
- Stir in the orange and lemon zest until evenly distributed
4. Combine Wet Ingredients
The eggs and milk bind everything together and add moisture.
- In a separate medium bowl, whisk the eggs until well beaten and slightly frothy
- Add the milk and molasses to the eggs
- Whisk vigorously until the molasses is fully incorporated and the mixture is smooth
- If the mixture seems separated, continue whisking until emulsified
5. Bring the Batter Together
This is where your pudding takes shape, so mix gently but thoroughly.
- Make a well in the center of your dry ingredient mixture
- Pour the wet ingredients into the well all at once
- Using a wooden spoon or sturdy spatula, stir from the center outward
- Gradually incorporate the dry ingredients into the wet, mixing gently
- Add the soaked fruits along with any remaining liquid from the bowl
- Fold everything together until just combined—the batter will be thick and sticky
- Make sure there are no dry pockets of flour remaining
- Don’t overmix; some small lumps are fine
6. Fill the Pudding Basin
Proper filling and covering technique is crucial for successful steaming.
- Spoon the batter into your prepared pudding basin
- Use the back of your spoon to press the mixture down gently, eliminating any air pockets
- Smooth the top surface as much as possible
- Leave about ½ inch of space at the top to allow for expansion
- Place the pleated parchment and foil circle (pleat side up) over the top of the basin
- Press it down around the rim to create a seal
- Secure the covering by tying kitchen twine tightly around the rim, just under the lip of the basin
- Create a handle by tying a long piece of twine across the top of the basin for easy lifting
7. Steam the Pudding (Initial Cook)
The long, gentle steaming creates the pudding’s signature moist texture.
- Place a trivet or upturned heatproof plate in the bottom of your large pot
- Set the pudding basin on top of the trivet
- Pour boiling water into the pot until it reaches halfway up the sides of the pudding basin
- Place the lid on the pot, ensuring it fits tightly
- Bring the water to a gentle simmer over medium heat
- Reduce heat to low to maintain a steady, gentle simmer—the water should be moving but not rapidly boiling
- Steam the pudding for 6 hours, checking the water level every 45 minutes to 1 hour
- Add more boiling water as needed to maintain the water level
- The pudding is done when a skewer inserted into the center comes out mostly clean
- Carefully remove the basin from the pot using the twine handle or tongs
- Let the pudding cool completely in the basin before storing
Another favorite: Vanilla Pudding Recipe
8. Store and Age the Pudding (Optional but Recommended)
Aging develops deeper flavors and improves the texture.
- Once completely cool, remove the parchment and foil covering
- Prick the top of the pudding all over with a skewer, creating about 20 holes
- Slowly drizzle 2-3 tablespoons of brandy over the top, letting it soak into the holes
- Replace with fresh parchment and foil, securing again with twine
- Store the pudding in a cool, dark place (not the refrigerator)
- “Feed” the pudding with 1-2 tablespoons of brandy weekly by removing the cover, pricking, and adding spirit
- The pudding can be aged for 2-8 weeks—the longer it ages, the richer the flavor becomes
9. Reheat Before Serving
Reheating ensures your pudding is warm and ready to enjoy.
- On serving day, remove the parchment and foil covering
- Replace with fresh parchment and foil, tying securely
- Place the basin back on a trivet in your steaming pot
- Add boiling water to reach halfway up the basin
- Cover and steam for 1½ to 2 hours until heated through completely
- The pudding should be piping hot in the center
- Carefully remove from the pot and let stand for 5 minutes
- Run a thin knife around the edge of the pudding to loosen it
- Place a serving plate over the basin and carefully invert
- Lift off the basin and peel away the parchment paper from the bottom
- Serve immediately while hot
Tips for Success
These tips come from years of making figgy pudding and troubleshooting common issues. They’ll help you achieve perfect results every time.
Follow these guidelines for the best outcome:
- Use fresh breadcrumbs, not dried ones—they create a moister, more tender texture
- Don’t skip the soaking step for dried fruits; it softens them and prevents tough bits in the final pudding
- Maintain consistent water levels during steaming by checking regularly and adding boiling (never cold) water
- Keep the simmer gentle—vigorous boiling can cause water to splash into your pudding
- Make sure your covering is secure with no gaps where steam could enter and waterlog the pudding
- Allow proper cooling time before storing; sealing a warm pudding creates condensation
- Age your pudding for at least 2 weeks if possible—the flavors meld beautifully over time
- Use room temperature ingredients for easier mixing and better incorporation
- Grate frozen butter if using instead of suet for easier distribution
- Test doneness with a metal skewer—it should come out mostly clean with just a few moist crumbs
Serving Suggestions
Figgy pudding shines brightest when paired with rich, complementary accompaniments. The traditional serving style involves setting it aflame with warm brandy for a dramatic presentation.
Serve this impressive dessert with any of these classic pairings. Try it alongside brandy butter, vanilla custard, or freshly whipped cream with a hint of vanilla.
Here are my favorite ways to serve figgy pudding:
- Traditional brandy butter—softened butter whipped with powdered sugar and brandy until fluffy
- Warm vanilla custard—the creamy sauce contrasts beautifully with the dense pudding
- Hard sauce—butter, sugar, and rum beaten until light and served cold
- Whipped cream lightly sweetened with a splash of brandy or rum
- Orange-scented cream—whipped cream flavored with orange zest and Grand Marnier
- Toffee sauce—rich, buttery caramel sauce poured over each slice
- Ice cream—vanilla or butter pecan provides a cold contrast to the warm pudding
Variations to Try
Once you’ve mastered the basic recipe, experimenting with variations keeps things interesting. These adaptations maintain the pudding’s traditional character while adding your personal touch.
Consider these creative twists:
- Chocolate figgy pudding—add ½ cup cocoa powder to the dry ingredients and reduce flour by the same amount
- Cranberry-fig version—replace half the raisins with dried cranberries for tartness
- Ginger-forward—double the ground ginger and add ¼ cup finely chopped crystallized ginger
- Nut-studded pudding—fold in ½ cup chopped toasted almonds or walnuts
- Whiskey variation—substitute whiskey for brandy throughout
- Orange figgy pudding—increase orange zest to 2 oranges and add 2 tablespoons orange juice
- Prune and fig—replace dates with chopped prunes for a deeper flavor
- Spiced rum version—use dark spiced rum instead of brandy for a Caribbean twist
- Mini puddings—divide mixture among 6 individual pudding molds and reduce steaming time to 3 hours
Read Also: Chocolate Pudding Recipe
Storage and Reheating
Proper storage is essential for maintaining quality and developing those complex aged flavors. Figgy pudding is remarkably forgiving and keeps exceptionally well.
Here’s how to store and reheat your pudding:
- Short-term storage (up to 2 weeks)—keep covered in the pudding basin at cool room temperature, feeding with spirits weekly
- Long-term storage (2-8 weeks)—wrap tightly in fresh parchment and foil, store in a cool, dark cupboard, and feed weekly
- Refrigerator storage—wrap well and refrigerate for up to 3 months if you prefer cold storage
- Freezer storage—wrap the cooled pudding in plastic wrap, then foil, and freeze for up to 3 months
- Thawing frozen pudding—transfer to refrigerator 24 hours before reheating
- Reheating whole pudding—steam for 1½ to 2 hours until piping hot throughout
- Reheating individual slices—microwave for 30-45 seconds or warm in a 300°F oven for 15 minutes wrapped in foil
- Testing if heated through—insert a metal skewer into the center and feel if it’s hot when you touch it to your wrist
Nutritional Facts
Per serving (based on 12 servings):
- Calories: 385
- Total Fat: 12g
- Saturated Fat: 6g
- Cholesterol: 65mg
- Sodium: 185mg
- Total Carbohydrates: 65g
- Dietary Fiber: 4g
- Sugars: 45g
- Protein: 5g
- Vitamin A: 4% DV
- Calcium: 8% DV
- Iron: 15% DV
Nutritional values are approximate and will vary based on specific ingredients used and portion sizes.
Health Benefits of Key Ingredients
While figgy pudding is undeniably a rich indulgence, it does contain several nutritious ingredients. The dried fruits and spices contribute vitamins, minerals, and beneficial compounds.
This traditional dessert offers some nutritional advantages. Figs provide dietary fiber and essential minerals, while the warming spices contain anti-inflammatory compounds.
Here’s what makes some ingredients beneficial:
- Figs—excellent source of dietary fiber, calcium, potassium, and iron; support digestive health and bone strength
- Dates—rich in natural sugars for quick energy, plus magnesium and vitamin B6
- Cinnamon—contains antioxidants and may help regulate blood sugar levels
- Ginger—known for anti-inflammatory properties and digestive support
- Eggs—provide high-quality protein and essential amino acids
- Molasses—contains iron, calcium, magnesium, and B vitamins often stripped from refined sugar
- Orange and lemon zest—packed with vitamin C and flavonoids that support immune function
- Nutmeg—contains compounds that may support brain health and reduce inflammation
Frequently Asked Questions
1. Can I make figgy pudding without alcohol?
Absolutely, you can make a delicious alcohol-free version. Replace the brandy with orange juice, apple juice, or strong brewed black tea for soaking the fruits and feeding the pudding.
The flavor will be slightly different but still wonderfully spiced and fruity. You might want to add an extra teaspoon of vanilla extract to deepen the flavor profile.
2. Why is my pudding dense and heavy instead of light?
Figgy pudding is meant to be dense—that’s the traditional texture. However, if it seems excessively heavy or gummy, you may have overmixed the batter or used too much liquid.
Make sure you’re using fresh breadcrumbs, not dried ones, and fold the ingredients together gently without overworking the mixture. Also check that your baking powder is fresh and active.
3. Can I use a slow cooker instead of steaming on the stovetop?
Yes, a slow cooker works beautifully for figgy pudding. Place the covered pudding basin on a trivet or crumpled foil in the slow cooker, add water halfway up the basin, cover, and cook on low for 8-10 hours for the initial cook.
For reheating, 3-4 hours on low should be sufficient. The slow cooker method is more hands-off since you don’t need to monitor water levels as closely.
4. How do I know when the pudding is fully cooked?
The pudding is done when a metal skewer inserted into the center comes out mostly clean with just a few moist crumbs. The top should feel firm to the touch and spring back slightly when pressed.
It should have shrunk away from the sides of the basin just a bit. Remember, it will continue to firm up as it cools, so some moisture on the skewer is normal.
5. Can I substitute butter for suet entirely?
Yes, butter is a perfectly acceptable substitute for suet and many modern recipes use it exclusively. The texture will be slightly different—butter produces a slightly lighter pudding while suet creates the most traditional, rich texture.
If using butter, freeze it first and then grate it into the dry ingredients for easier distribution. The flavor will be excellent either way, so use whichever you prefer or can easily find.
Final Thoughts
Making figgy pudding from scratch is more than just baking—it’s participating in a centuries-old tradition that brings warmth and wonder to the holiday season. The process might seem elaborate at first, but I promise the stunning results and incredible flavors make every minute worthwhile.
This is the kind of dessert that creates lasting memories and becomes a treasured family tradition. Give this figgy pudding recipe a try this holiday season and experience why this classic has endured for generations.
I’d love to hear how your pudding turns out! Share your results in the comments below, and don’t forget to tag me on social media if you post pictures of your creation.
Recommended:
- Dirt Pudding Recipe
- Corn Pudding Recipe
- Rice Pudding Recipe
- Chia Seed Pudding Recipe
- Banana Pudding Recipe
- Yorkshire Pudding Recipe
- Hot Fudge Sauce Recipe
- Cranberry Sauce Recipe
- Caramel Sauce Recipe
- Gingerbread Cookie Recipe


