I grew up with banana pudding at every family gathering, and it’s one of those desserts that brings back all the warm, fuzzy memories of childhood.
My grandmother used to make the most incredible banana pudding recipe, and I’ve spent years perfecting her method. The combination of creamy vanilla pudding, fresh bananas, and crispy vanilla wafers creates layers of texture and flavor that are absolutely irresistible.
This classic Southern dessert is easier to make than you might think. You don’t need fancy equipment or hard-to-find ingredients—just a few simple components that come together to create something truly special.
The best part? You can make it ahead of time, which makes it perfect for potlucks, holidays, or just treating yourself on a Sunday afternoon.
Why You’ll Love This Banana Pudding Recipe
This banana pudding recipe hits all the right notes. It’s creamy, sweet, and has that nostalgic flavor that takes you right back to your childhood.
The texture is absolutely perfect—smooth pudding contrasts beautifully with the soft bananas and slightly softened wafers. Each spoonful gives you a little bit of everything.
I love that this dessert actually tastes better after sitting in the fridge for a few hours. The wafers absorb just enough moisture to become tender without getting mushy, and all the flavors meld together beautifully.
Here’s what makes this recipe stand out:
- Simple ingredients: No exotic or expensive items required
- Make-ahead friendly: Tastes even better the next day
- Crowd-pleaser: I’ve never met anyone who doesn’t love this dessert
- Customizable: Easy to adjust sweetness or add your own twist
- No baking required: Perfect for hot summer days when you don’t want to turn on the oven
You might also enjoy: Brownie Pudding Recipe
Ingredients
This recipe uses straightforward ingredients you probably already have in your pantry. I’ve tested this dozens of times, and these proportions create the perfect balance of flavors.
The key is using fresh bananas that are ripe but still firm—you want them yellow with just a few brown spots. Overripe bananas will turn mushy and brown too quickly.
- 1 (14-ounce) can sweetened condensed milk
- 1½ cups cold water
- 1 (3.4-ounce) package instant vanilla pudding mix
- 3 cups heavy whipping cream
- 4-5 medium bananas, sliced
- 1 (12-ounce) box vanilla wafers
- ¼ cup powdered sugar
- 1 teaspoon pure vanilla extract
Kitchen Equipment Needed
You don’t need any special equipment for this recipe, just basic kitchen tools. I prefer using a glass trifle dish because it shows off those beautiful layers, but any large serving bowl works perfectly.
Make sure your mixing bowls are completely clean and dry, especially when you’re whipping the cream. Even a tiny bit of grease can prevent it from reaching stiff peaks.
- Large mixing bowl
- Medium mixing bowl
- Electric mixer or whisk
- Rubber spatula
- Trifle dish or 9×13-inch baking dish
- Measuring cups and spoons
- Sharp knife for slicing bananas
This pairs beautifully with my Fruit Salad Recipe for a complete dessert spread.
Recommended Products for This Recipe
I’ve made banana pudding hundreds of times, and these are the products that consistently deliver the best results. Investing in quality ingredients and tools makes a noticeable difference in the final dessert.
1. OXO Good Grips Trifle Bowl
This clear trifle bowl showcases all those gorgeous layers and makes serving so much easier with its pedestal base. The 3-quart capacity is perfect for this recipe, and the thick glass keeps everything chilled. Plus, it’s dishwasher safe, which is a huge bonus after a big gathering.
2. Nielsen-Massey Madagascar Bourbon Pure Vanilla Extract
The vanilla flavor in this extract is incredible and really elevates the entire dessert. Since vanilla is such a prominent flavor in banana pudding, using high-quality extract makes a world of difference. This bottle lasts for months and enhances everything from pudding to whipped cream.
3. KitchenAid 5-Speed Ultra Power Hand Mixer
Whipping cream by hand is exhausting, and this hand mixer makes it effortless in just a few minutes. The multiple speed settings give you perfect control, and it’s powerful enough to handle thick pudding mixtures. I use mine at least three times a week.
4. Jell-O Instant Vanilla Pudding Mix
I’ve tried numerous brands, and Jell-O consistently gives the smoothest, most flavorful results. The instant version saves time without sacrificing taste, and it sets up perfectly in the fridge. Keep a few boxes in your pantry—they last for months.
Step-by-Step Instructions
Take your time with each step, and you’ll end up with a perfect banana pudding every single time. I’ve broken everything down into simple, manageable steps that even beginner bakers can follow with confidence.
1. Prepare the Pudding Base
The pudding mixture is the foundation of this entire dessert, so getting it smooth and creamy is essential.
- Pour the sweetened condensed milk into your large mixing bowl
- Add the cold water gradually while whisking to prevent lumps from forming
- Sprinkle in the instant vanilla pudding mix
- Whisk vigorously for about 2 minutes until the mixture is completely smooth and starts to thicken
- Cover the bowl with plastic wrap, pressing it directly onto the surface to prevent a skin from forming
- Refrigerate for at least 5 minutes to allow it to set properly
2. Whip the Cream
Fresh whipped cream adds an incredible lightness to the pudding that store-bought whipped topping just can’t match.
- Pour the cold heavy whipping cream into a medium mixing bowl (make sure both the bowl and beaters are cold for best results)
- Add the powdered sugar and vanilla extract to the cream
- Start mixing on low speed for about 30 seconds to prevent splattering
- Gradually increase to medium-high speed
- Beat for 3-4 minutes until stiff peaks form (when you lift the beaters, the cream should hold its shape)
- Be careful not to overbeat, or the cream will turn grainy and eventually become butter
3. Combine Pudding and Whipped Cream
This step creates that signature light and airy texture that makes banana pudding so special.
- Remove the pudding mixture from the refrigerator
- Add about one-third of the whipped cream to the pudding
- Gently fold it in using a rubber spatula with a swooping motion from the bottom of the bowl
- Add the remaining whipped cream in two more additions
- Continue folding gently until no white streaks remain
- Be patient with this step—aggressive stirring will deflate all those beautiful air bubbles you just created
4. Slice the Bananas
Proper banana preparation prevents browning and ensures even distribution throughout the dessert.
- Peel all your bananas just before assembling (don’t do this ahead of time)
- Slice them into ¼-inch thick rounds using a sharp knife
- Keep the slices as uniform as possible so they layer evenly
- If you’re worried about browning, you can toss them very gently with a tiny splash of lemon juice, but I usually skip this step
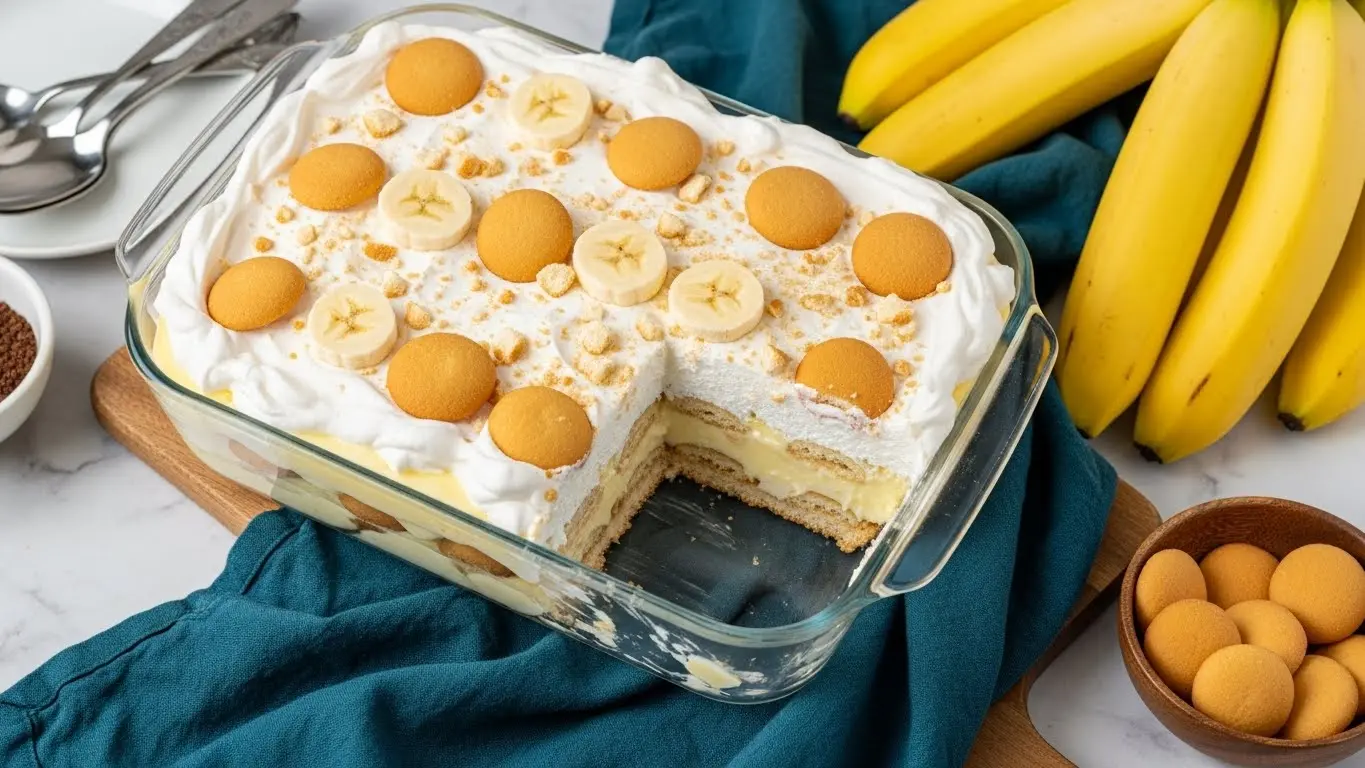
5. Layer the Dessert
The layering technique is what makes banana pudding so visually appealing and ensures every bite has the perfect ratio of ingredients.
- Spread a thin layer of pudding mixture on the bottom of your trifle dish or baking dish (about ½ cup)
- Arrange a single layer of vanilla wafers on top, standing them up around the edges if using a trifle dish
- Add a layer of banana slices, covering the wafers completely
- Spread about one-third of the remaining pudding mixture over the bananas
- Repeat these layers two more times: wafers, bananas, pudding
- For the final layer, arrange wafers decoratively on top and add a few banana slices in the center as garnish
- Crush a few extra wafers and sprinkle them over the top for added texture
6. Chill and Serve
Patience is crucial here—the dessert needs time for all the flavors to come together.
- Cover the dish tightly with plastic wrap
- Refrigerate for at least 4 hours, though overnight is even better
- The wafers will soften perfectly, and the flavors will meld beautifully during this time
- Before serving, you can add additional whipped cream on top if desired
- Garnish with extra vanilla wafers or a sprinkle of crushed wafers right before serving
Read Also: Banana Cream Pie Recipe
Tips for Success
These are the lessons I’ve learned through years of making banana pudding. Following these tips will help you avoid common pitfalls and create the best possible dessert.
- Use cold cream: Cream whips better when it’s very cold—I even chill my mixing bowl and beaters in the freezer for 10 minutes before whipping
- Don’t skip the resting time: The dessert truly needs those hours in the fridge for the wafers to soften and the flavors to develop
- Choose the right bananas: Too green and they’ll be bland and firm; too ripe and they’ll turn brown and mushy
- Fold gently: When combining the whipped cream and pudding, use a light touch to maintain that airy texture
- Make it ahead: This dessert actually improves with time, so don’t hesitate to make it the day before you need it
Another favorite: Pumpkin Roll Recipe
Serving Suggestions
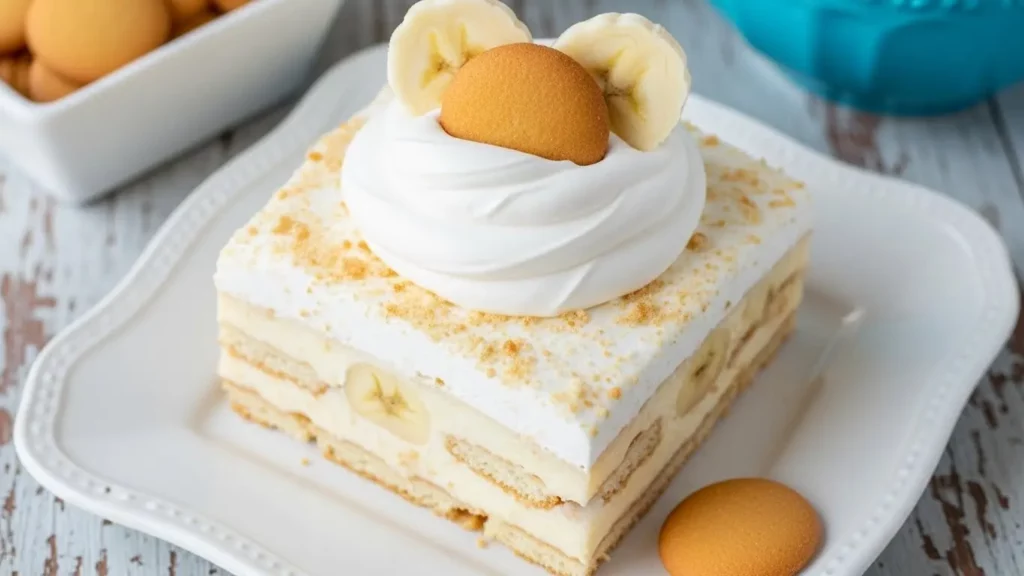
Banana pudding is delicious on its own, but these serving ideas can take it to the next level. I love getting creative with presentation, especially when serving guests.
This dessert is rich, so a little goes a long way. I usually serve it in small portions, which allows everyone to enjoy it without feeling overly full.
Consider these serving ideas:
- Serve in individual mason jars or parfait glasses for a fun twist at parties
- Top each serving with a drizzle of caramel or chocolate sauce
- Add a sprinkle of cinnamon or nutmeg for warmth
- Pair with hot chocolate for a cozy winter dessert
- Serve alongside sugar cookies for a dessert buffet
- Add fresh berries on top for a pop of color and tartness
Variations to Try
Once you’ve mastered the classic version, these variations add exciting new flavors while keeping the essence of traditional banana pudding.
I encourage you to experiment and find your favorite twist on this timeless dessert. Some of these variations have become just as popular in my house as the original.
- Chocolate banana pudding: Replace vanilla pudding mix with chocolate pudding and use chocolate wafers
- Peanut butter banana pudding: Add ½ cup of creamy peanut butter to the pudding mixture and use Nutter Butter cookies instead of vanilla wafers
- Coconut banana pudding: Add 1 cup of toasted coconut flakes between the layers and use coconut cream instead of some of the heavy cream
- Banana foster pudding: Caramelize the bananas in butter and brown sugar before layering for a more sophisticated flavor
- Strawberry banana pudding: Alternate layers of sliced strawberries with the bananas for a fruity twist
- Reduced sugar version: Use sugar-free pudding mix and reduce the powdered sugar in the whipped cream to 2 tablespoons
For a lighter option, try: Fruit Salad Recipe
Storage and Reheating
Proper storage keeps your banana pudding fresh and delicious for days. The good news is that this dessert actually gets better with time as the flavors continue to develop.
I never worry about having leftovers because they taste just as good the next day, sometimes even better.
- Refrigerator storage: Cover tightly with plastic wrap or transfer to an airtight container and refrigerate for up to 3 days
- Freezing: I don’t recommend freezing banana pudding as the bananas become mushy and the texture changes dramatically when thawed
- Preventing browning: To minimize banana browning, press plastic wrap directly onto the surface of the pudding before refrigerating
- Serving leftovers: Stir gently before serving if the layers have settled, or serve as-is for that classic layered look
- Make-ahead tips: Assemble the pudding up to 24 hours in advance for the best texture and flavor development
Nutritional Facts
Here’s the approximate nutritional information per serving (based on 12 servings):
- Calories: 385
- Total Fat: 22g
- Saturated Fat: 13g
- Cholesterol: 65mg
- Sodium: 180mg
- Total Carbohydrates: 44g
- Dietary Fiber: 1g
- Sugars: 32g
- Protein: 5g
Keep in mind that these values are estimates and will vary based on the specific brands you use and how you portion the dessert.
Read Also: Fruit Cocktail Cake Recipe
Health Benefits of Key Ingredients
While banana pudding is definitely a treat, some of its ingredients do offer nutritional benefits. I’m not suggesting this is health food, but it’s nice to know you’re getting some good stuff along with the indulgence.
The bananas in this recipe provide several important nutrients that contribute to overall health.
Here are some benefits of the main ingredients:
- Bananas: Rich in potassium, which supports heart health and helps regulate blood pressure
- Dairy products: Provide calcium for strong bones and teeth, plus protein for muscle maintenance
- Vanilla extract: Contains small amounts of antioxidants and has been linked to reduced stress and anxiety
- Heavy cream: While high in calories, it contains fat-soluble vitamins A, D, E, and K
Frequently Asked Questions
1. Can I use homemade pudding instead of instant pudding mix?
Absolutely! Homemade pudding works beautifully in this recipe. Cook your vanilla pudding according to your favorite recipe, let it cool completely, then proceed with folding in the whipped cream as directed. The main difference is that homemade pudding takes longer to prepare, but many people prefer the richer, more complex flavor it provides.
2. How do I prevent the bananas from turning brown?
The bananas will naturally oxidize over time, but you can slow this process. First, add them just before serving if possible. If you need to make it ahead, toss the banana slices very lightly with lemon juice diluted with water (1 tablespoon lemon juice per ¼ cup water). The acidic environment slows browning significantly without making the dessert taste sour.
3. Can I substitute Cool Whip for homemade whipped cream?
Yes, you can use 8 ounces of thawed Cool Whip instead of making whipped cream from scratch. However, I highly recommend using real whipped cream if possible—the flavor and texture are noticeably better. Cool Whip tends to be sweeter and has a slightly artificial taste, but it’s a convenient option when you’re short on time.
4. Why is my banana pudding runny?
A runny texture usually means the pudding didn’t have enough time to set before you folded in the whipped cream. Make sure you refrigerate the pudding mixture for at least 5 minutes after mixing. Also, ensure you’re using instant pudding mix and not cook-and-serve pudding, as they have different thickening properties.
5. How far in advance can I make banana pudding?
You can make banana pudding up to 24 hours ahead. In fact, it tastes better after the wafers have time to soften and the flavors meld together. Beyond 24 hours, the bananas start to brown noticeably and the wafers can become too soft. If you need to prepare it further in advance, assemble everything except the bananas, then add those within a few hours of serving.
For a different take on pudding desserts, try: Brownie Pudding Recipe
Final Thoughts
Banana pudding is one of those special desserts that never goes out of style. It’s comforting, delicious, and brings people together around the table.
I hope this recipe becomes a favorite in your home, just as it has in mine. The combination of creamy pudding, fresh bananas, and tender vanilla wafers is simply unbeatable.
Give this banana pudding recipe a try for your next gathering, or just make it for yourself on a quiet weekend. Either way, I promise you won’t be disappointed.
I’d love to hear how your banana pudding turns out! Drop a comment below with any questions or share your favorite variations.
Recommended:
- Pumpkin Roll Recipe
- Boston Cream Pie Recipe
- Fruit Cocktail Cake Recipe
- Eggnog Cake Recipe
- Hot Fudge Cake Recipe
- Tres Leches Cake Recipe
- Checkerboard Cake Recipe
- Fruit Tart Recipe
- Cake Pop Recipe
- Hot Fudge Sundae


